
Sony Spresense Arduino compatible board with audio and global navigation satellite systems (GNSS) support and its extension board launched in Japan this summer. The company has now expanded markets, and is offering the boards in the United States and Europe as well.
They also tasked an agency to send samples to various reviewers, and I got selected to receive one as well. I’ll start the review by checking out the hardware, shortly discuss software development options, and report my experience with Spresense SDK.
Sony Spresense Unboxing
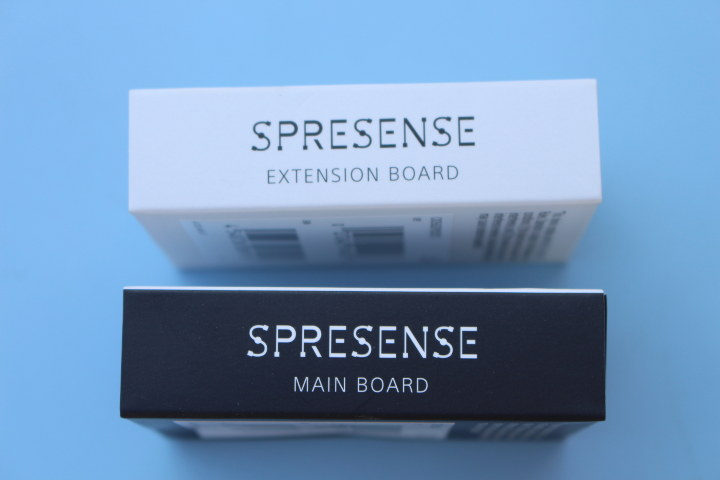
I received two packages…
… one the main board, and the other for the extension board.
The main board package only comes with CXD5602PWBMAIN1 board and an information sheet. The top of the board includes a reset button, four user LEDs, a power LED, a boot recovery button, the camera interface, Sony CXD5247 power management and audio analog interface chip (Black on the photo below, but in reality it’s a reflective surface), Sony CXD5602 hexa core Arm Cortex-M4F microcontroller with GNSS support – seen as D5602GG on the package, two rows of 2.54mm pitch I/O headers, as well as the GNSS antenna on the very right edge of the board.
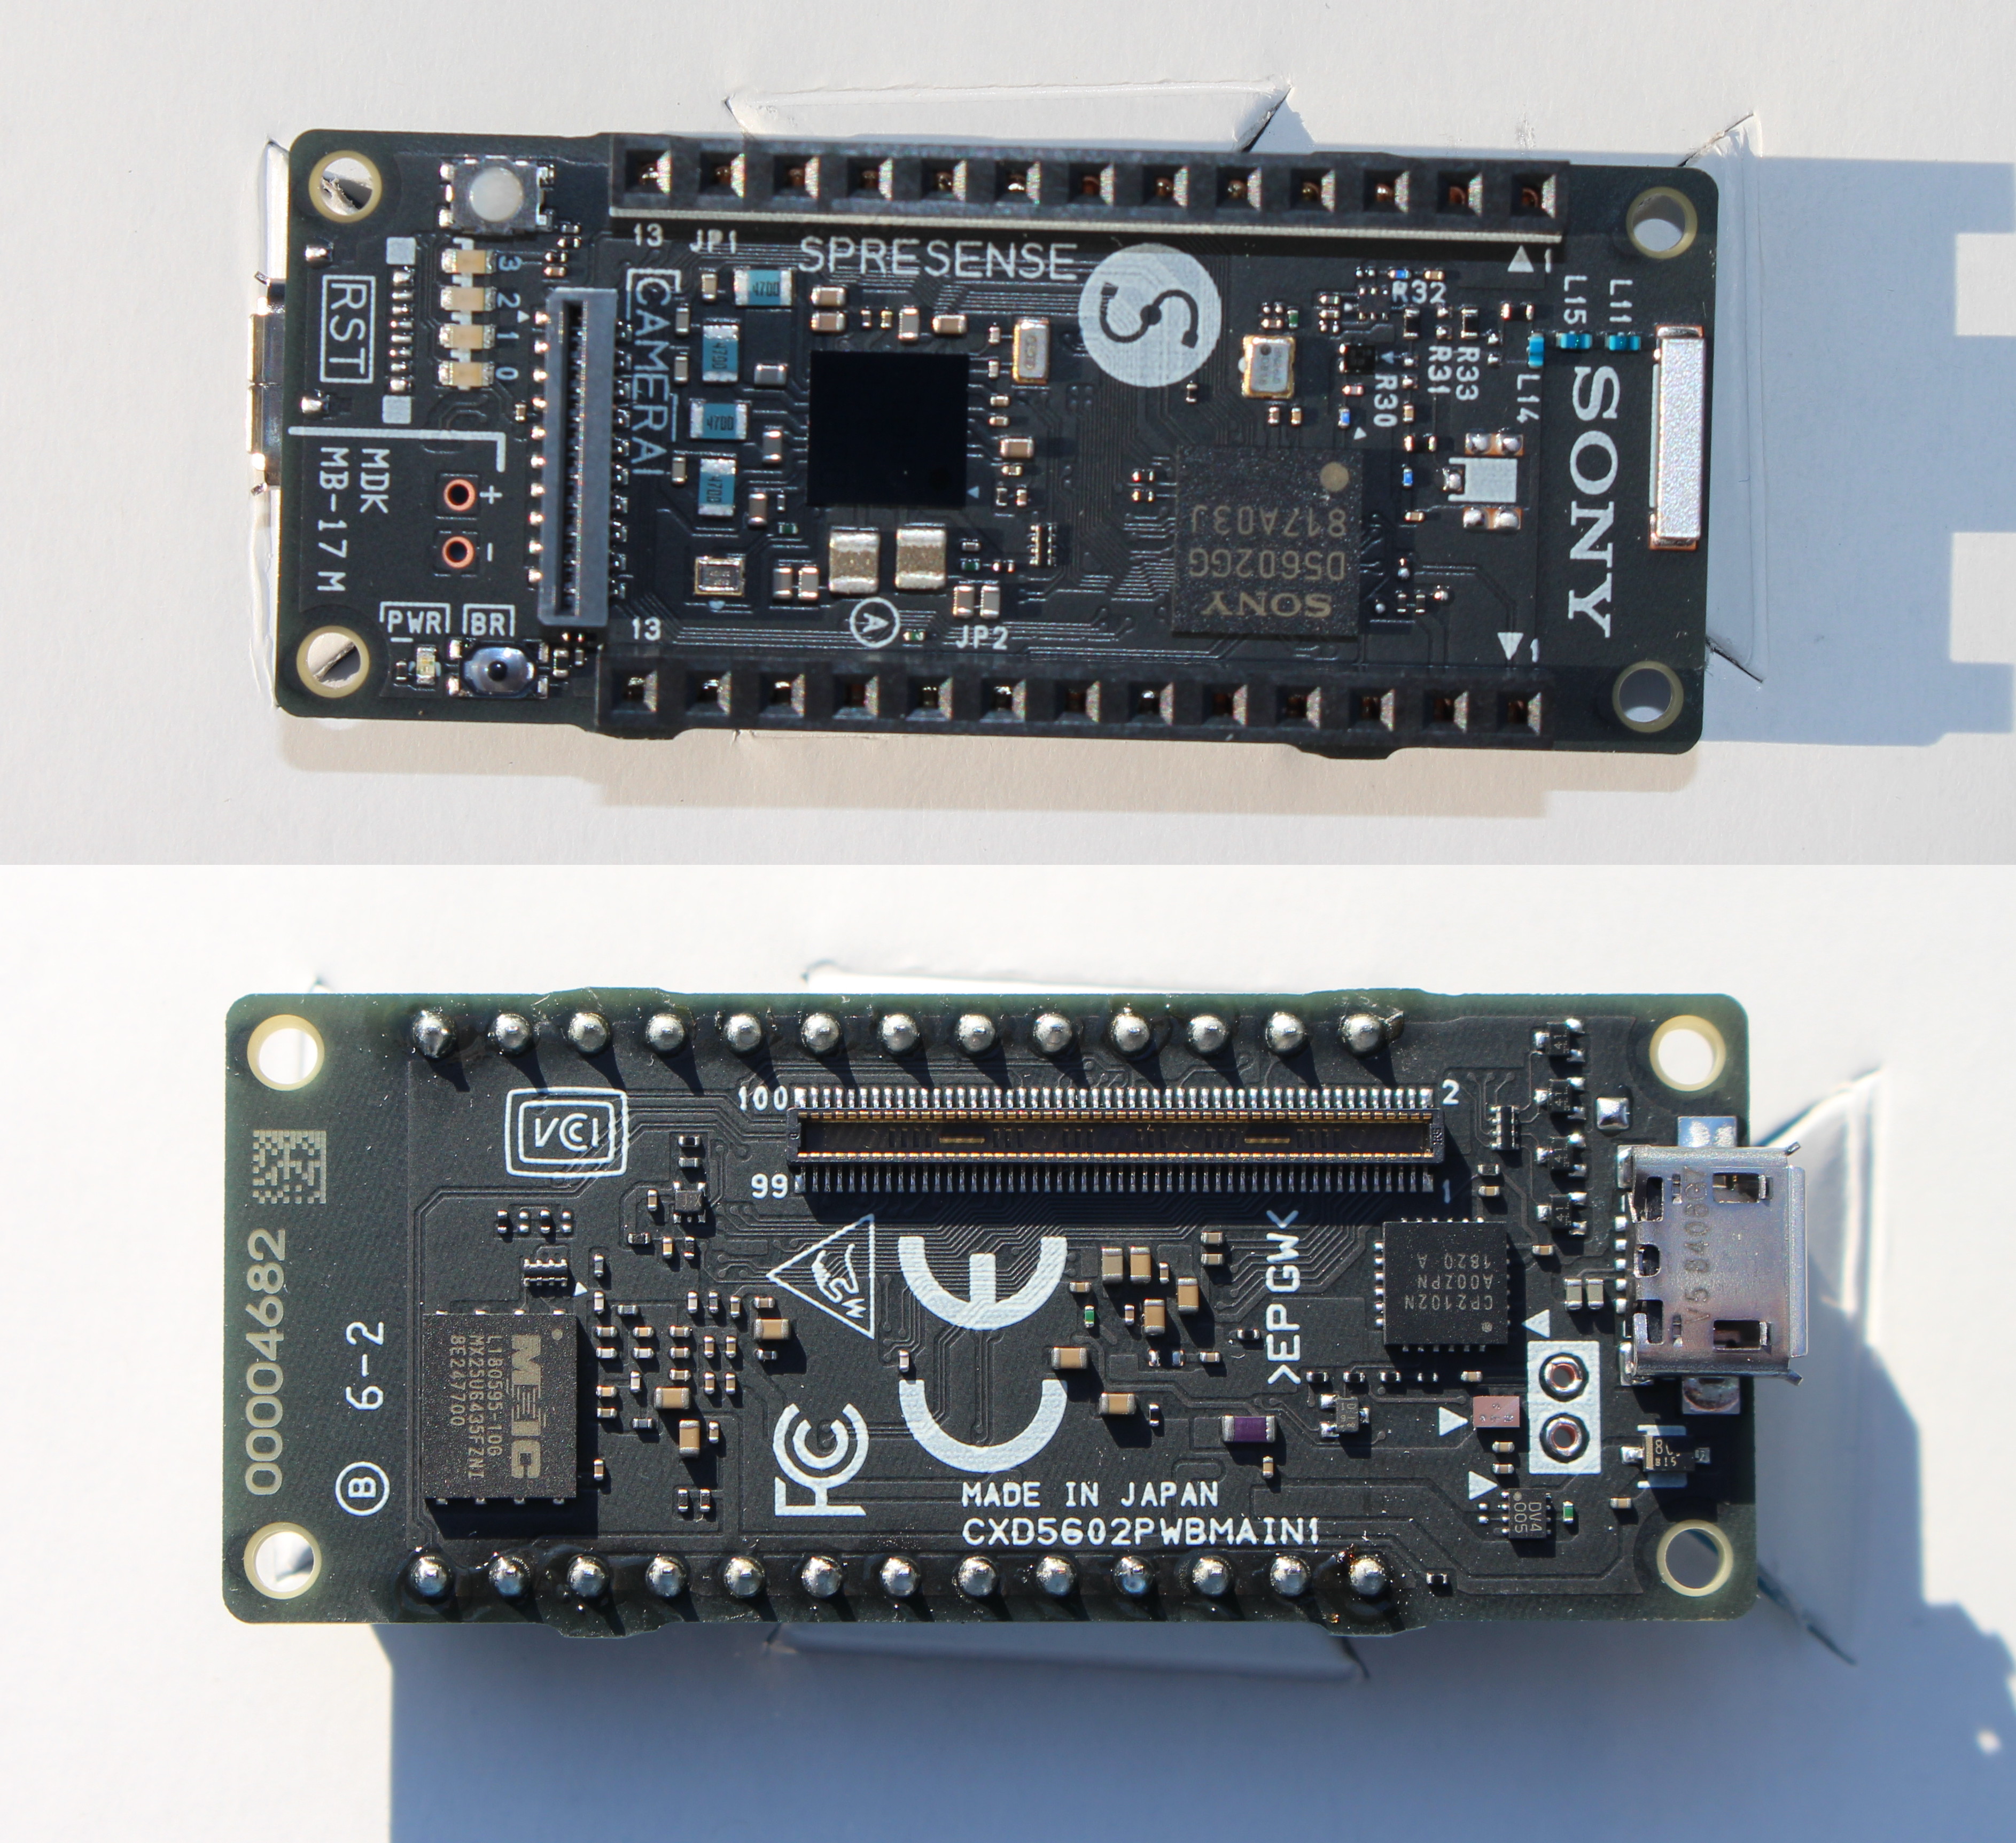
The bottom part of the board features MXIC MX25U6435F SPI NOR flash with 8MB capacity, a 100-pin connector to connect the main board to the extension board, CP2102N USB to TTL chip, and a micro USB port for power and programming.
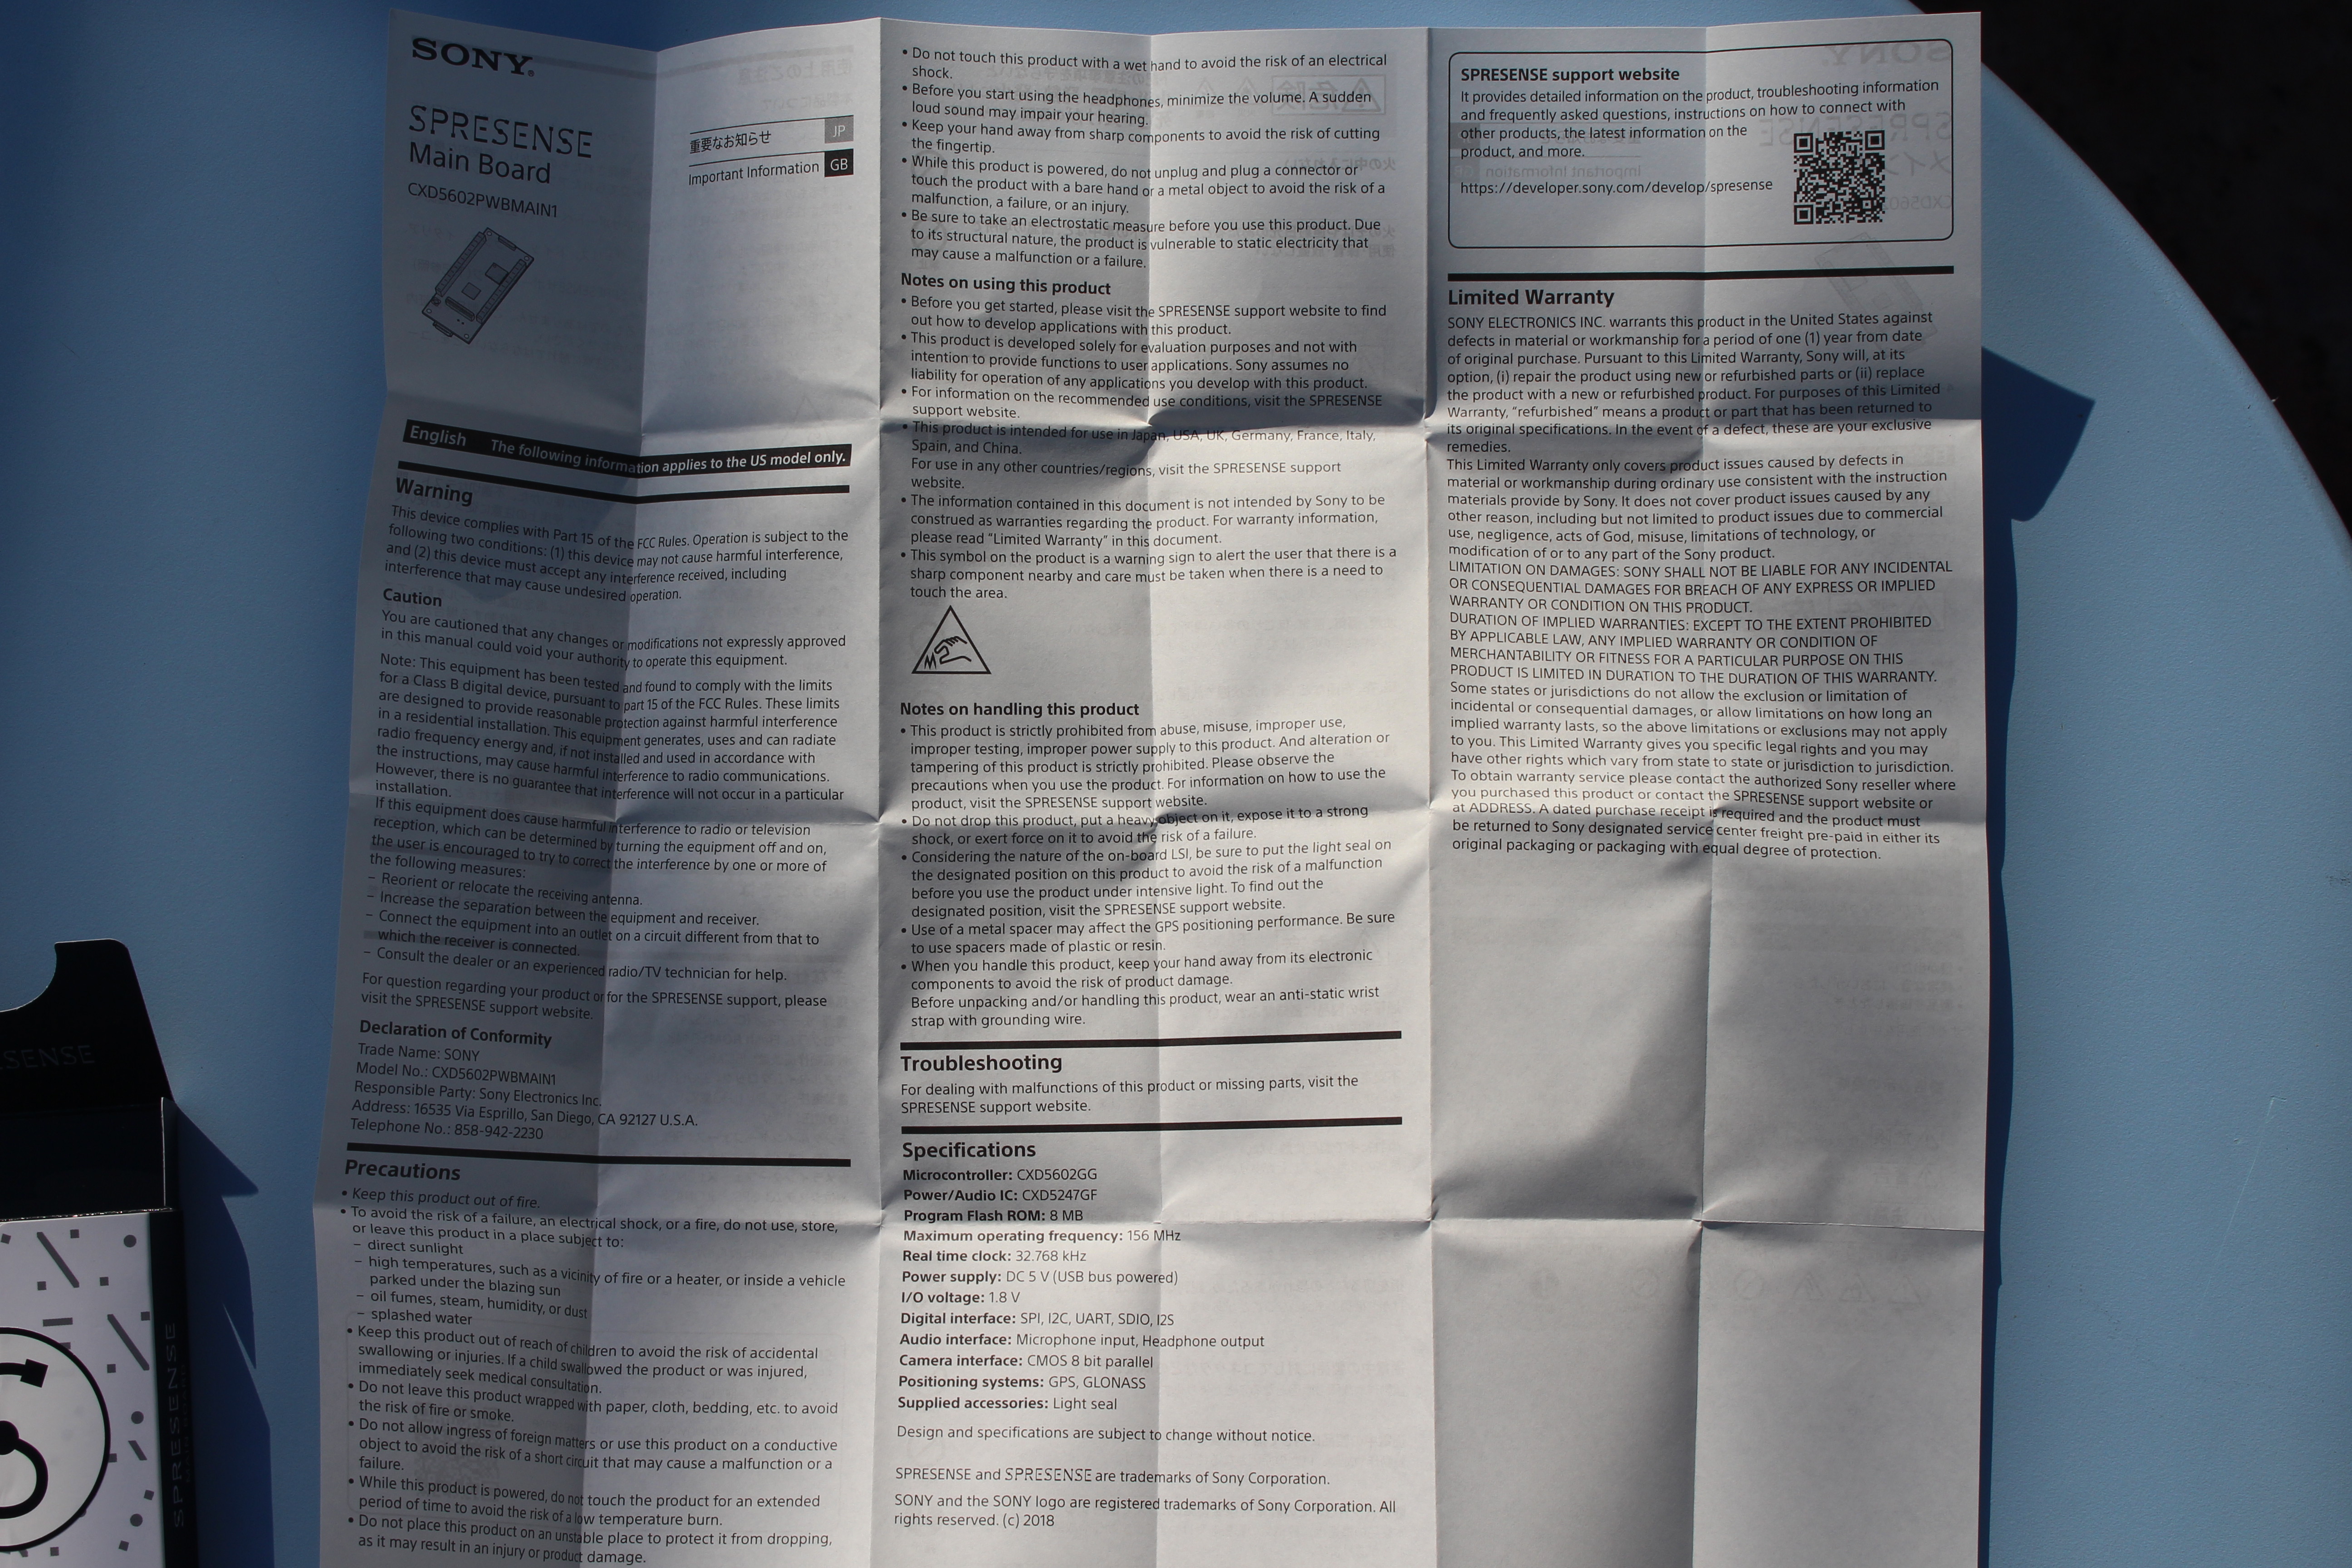
The important information sheet mostly contains legalese, as well as specifications, and a link and QR code to Spresense support website.
The extension board comes with a similar information sheet, as well as four plastic bits that will be used to hold the main board into place.

The extension board comes with Arduino compatible headers, a 100-pin socket to connect to the main board, some jumpers, a 3.5mm audio jack, and a micro SD card slot.
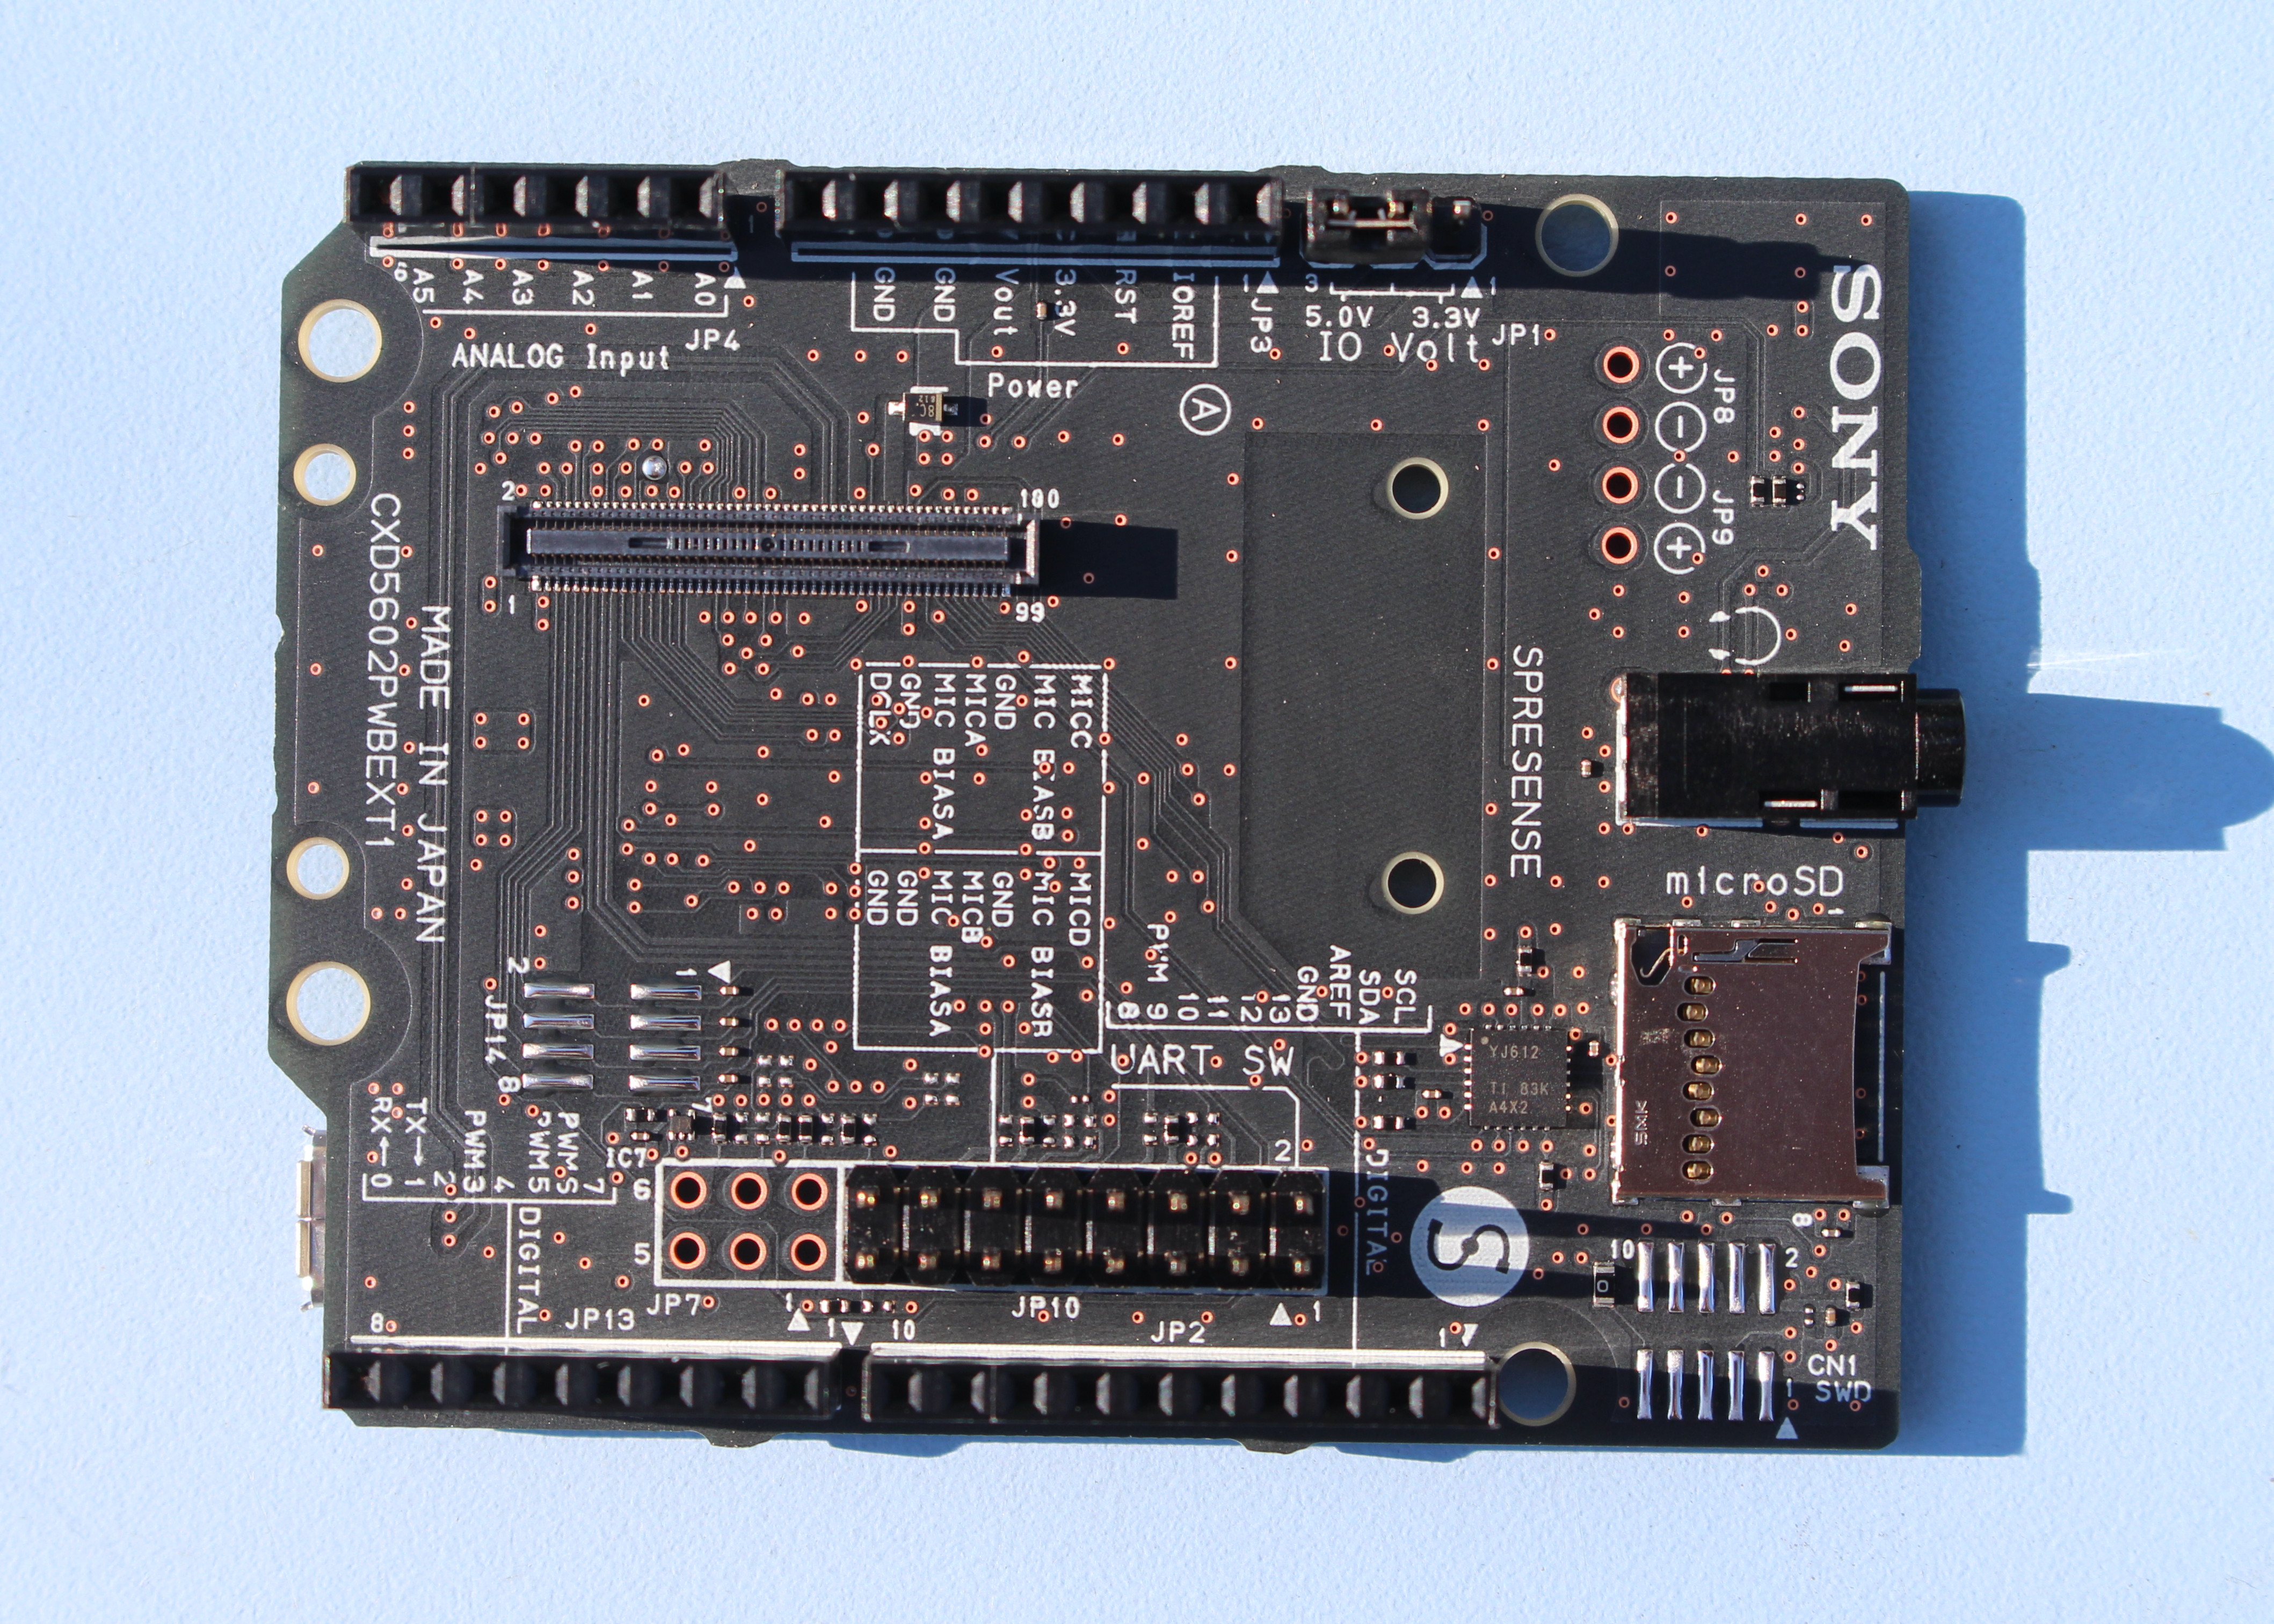
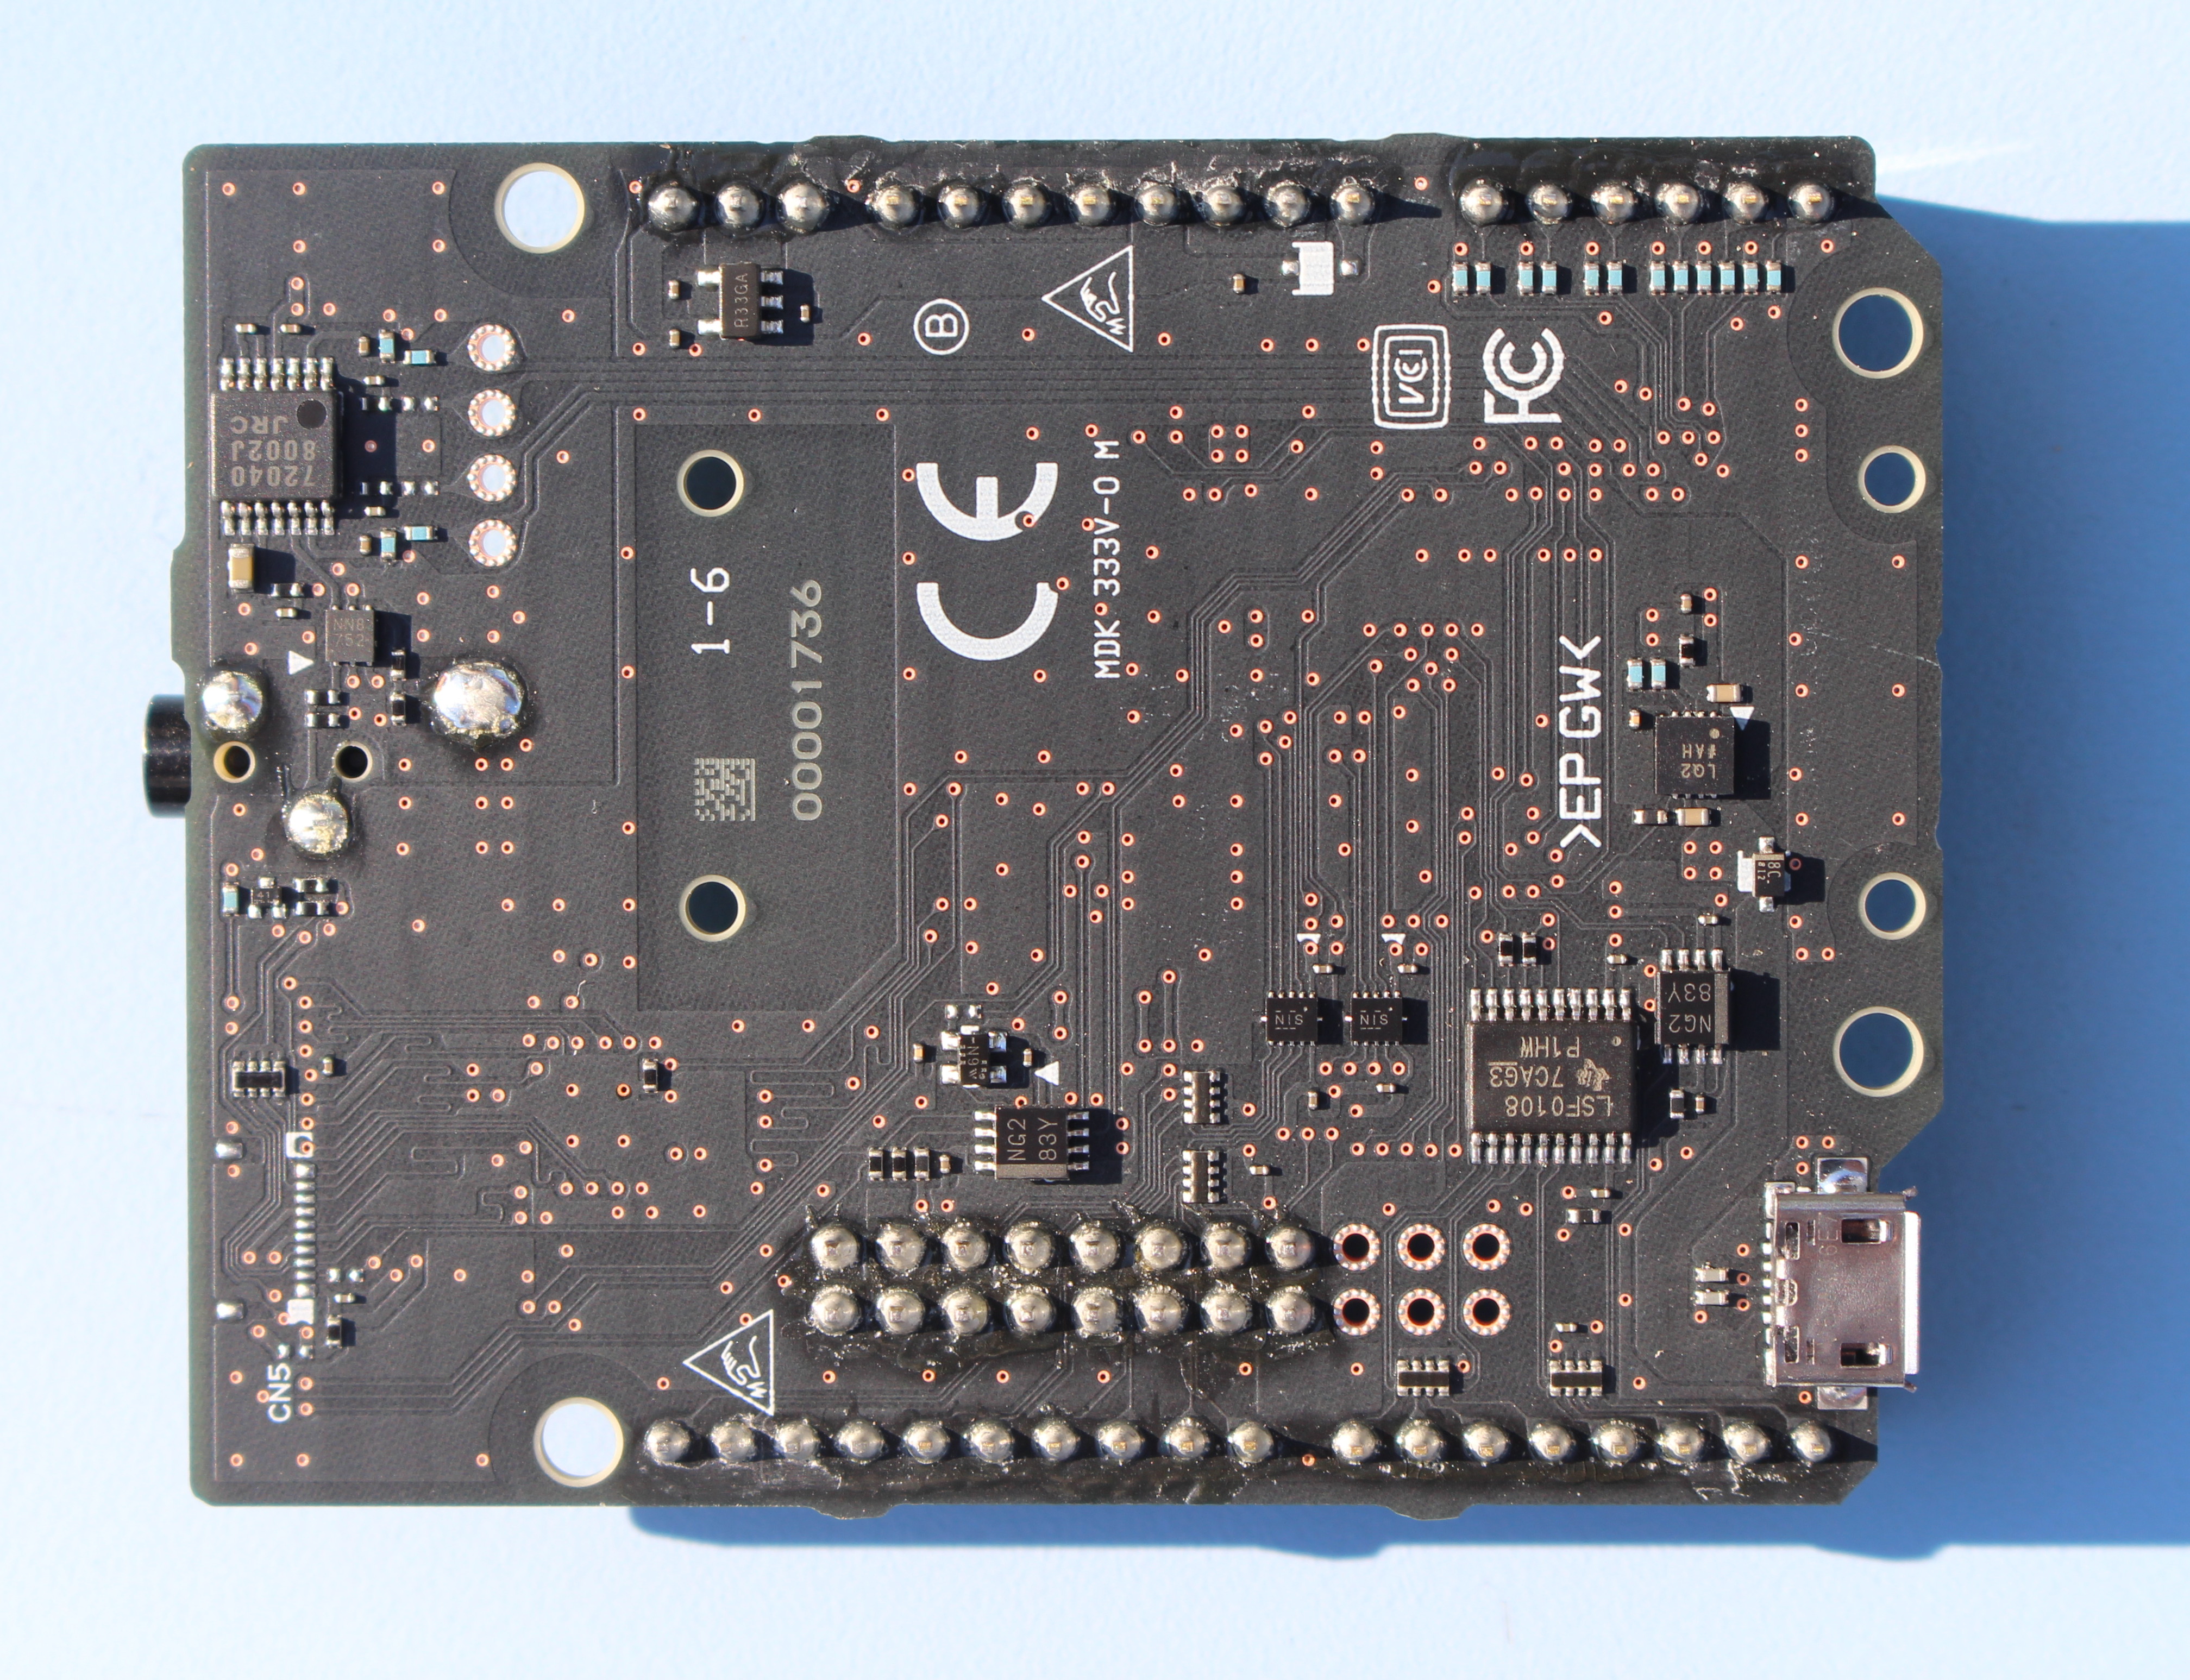
That was for the top side of the board, and the other side mostly features two more chips: 72040 which must be a level shifter, and TI LSF0108 octal bidirectional multi-voltage-level translator, as well as the “extension” micro USB port.
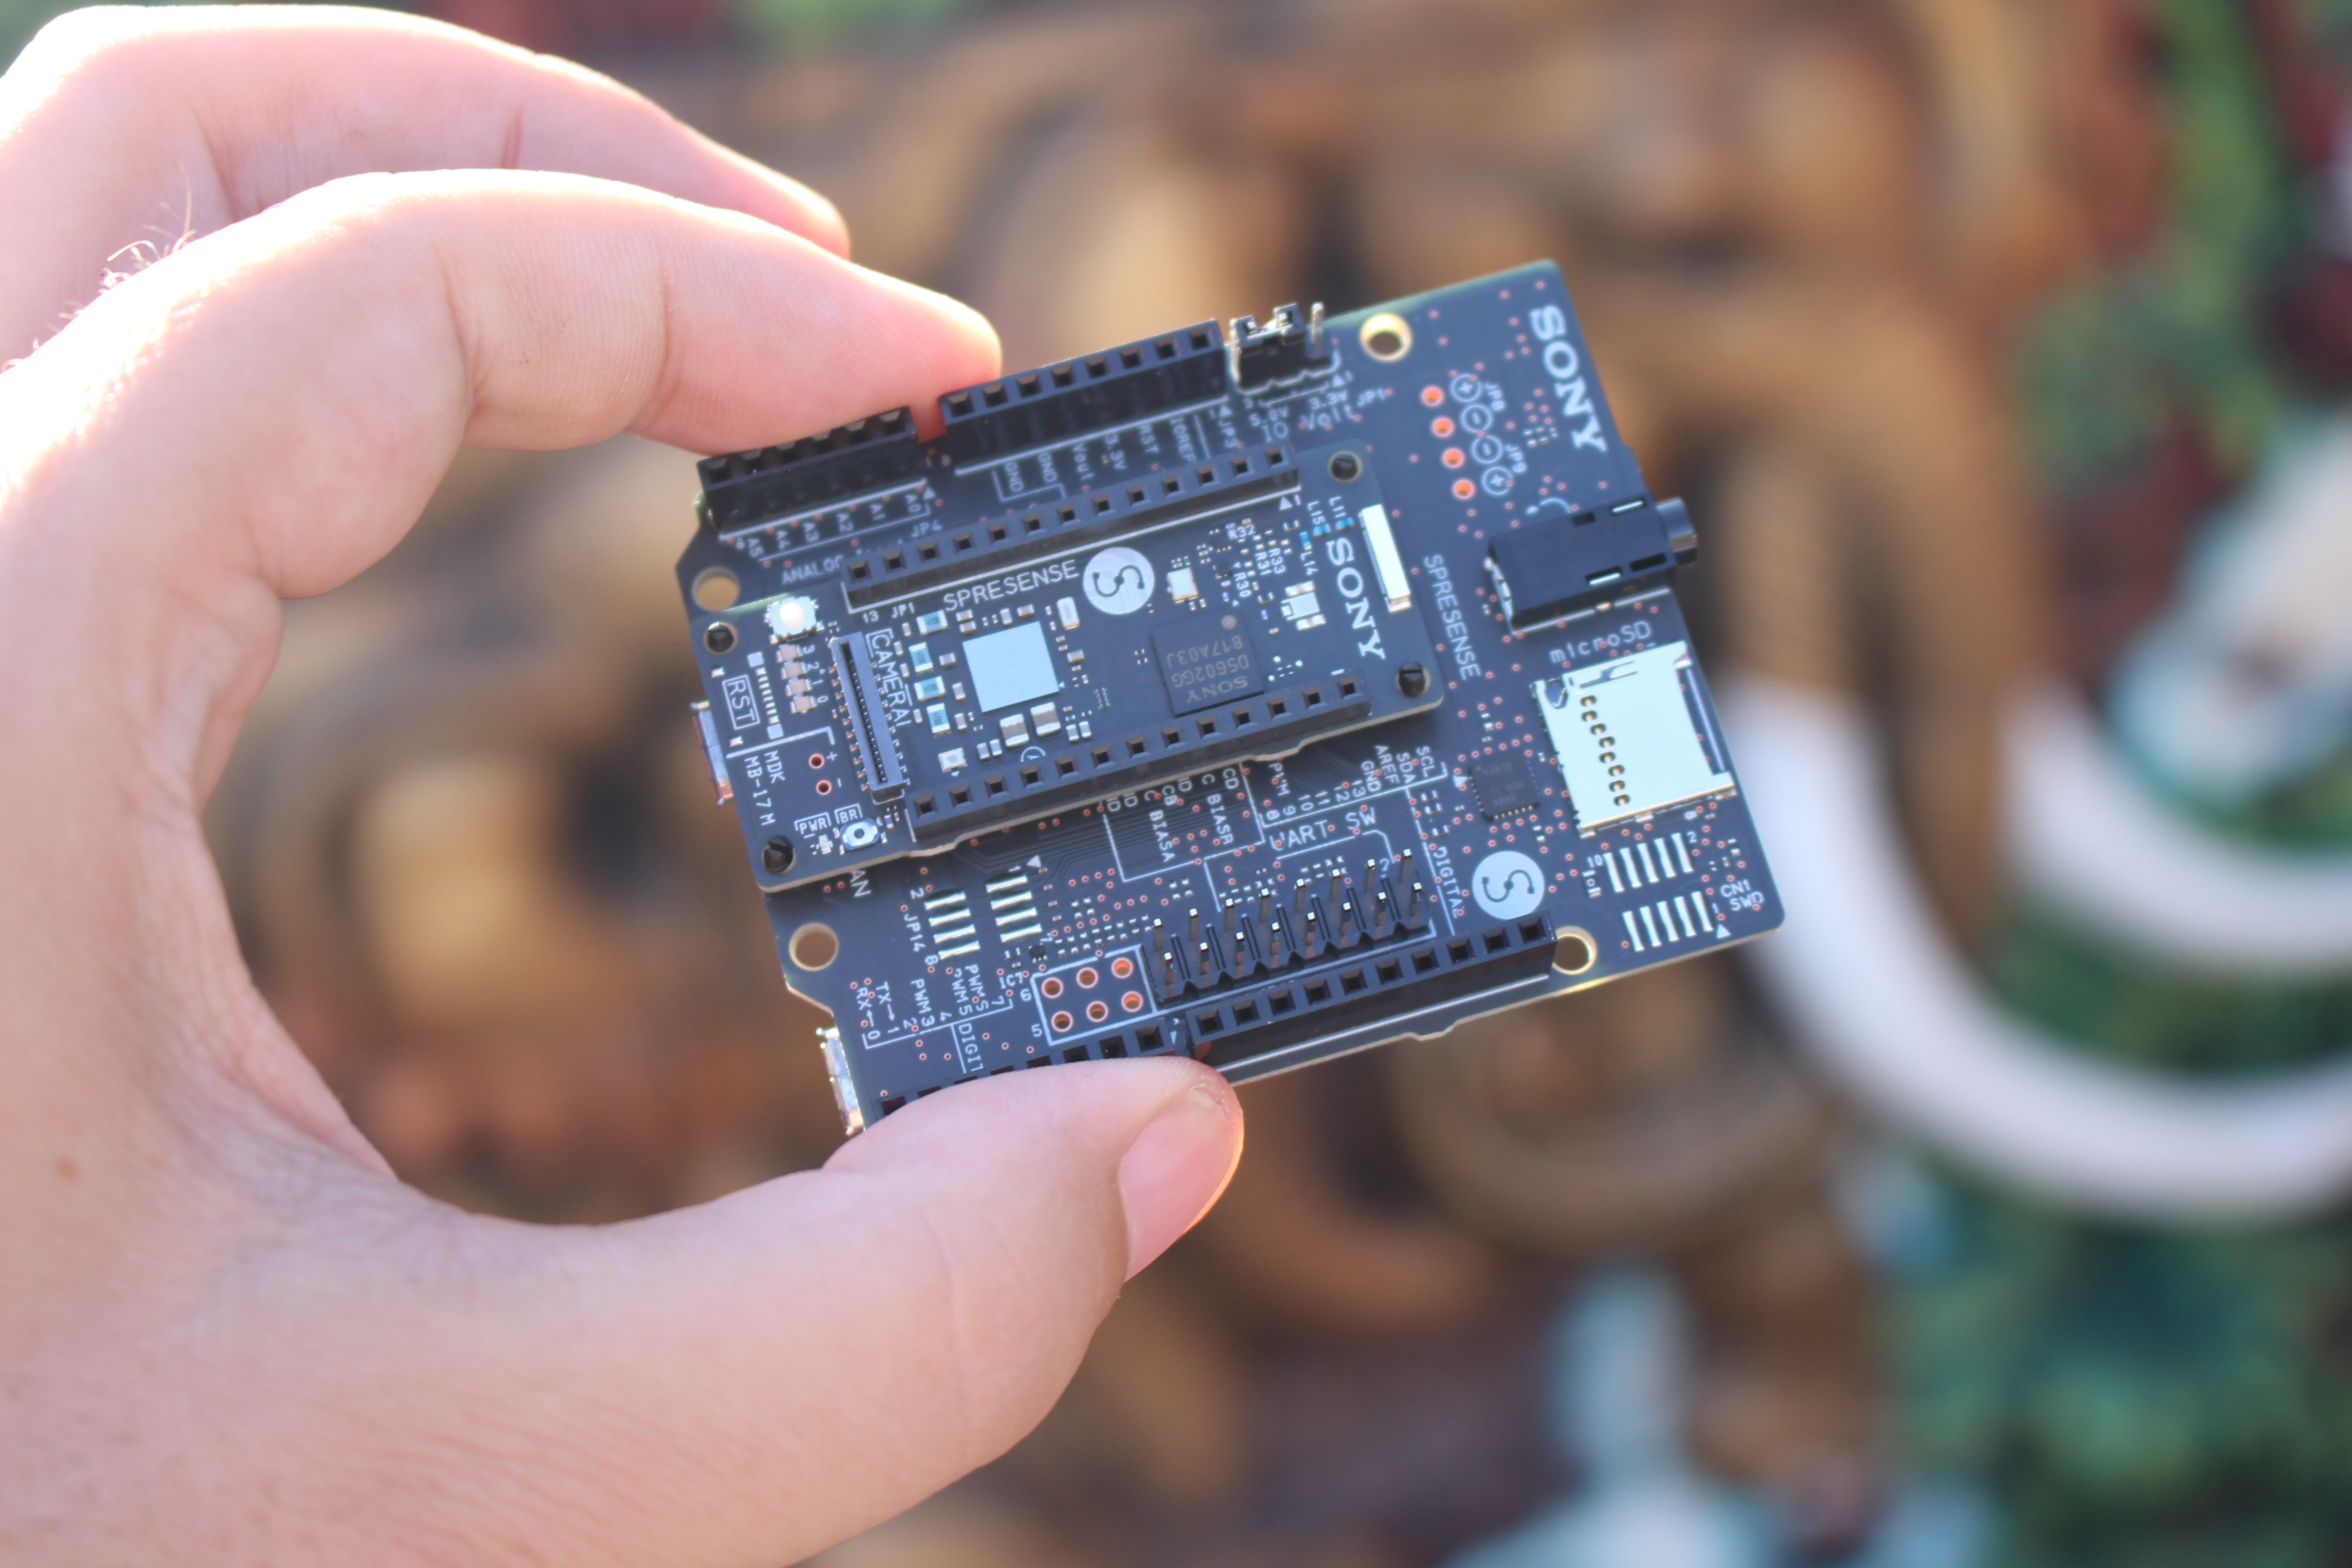
Assembly of both boards is straightforward. Simply insert the four black plastic bits in the mounting holes of the extension board, place the main board on top, and push it down.
Two Software Development Environments
There are two ways to work with Spresense board as explained in Spresense software documentation:
- Spresense Arduino Library – To work with the Arduino IDE familiar to many developers.
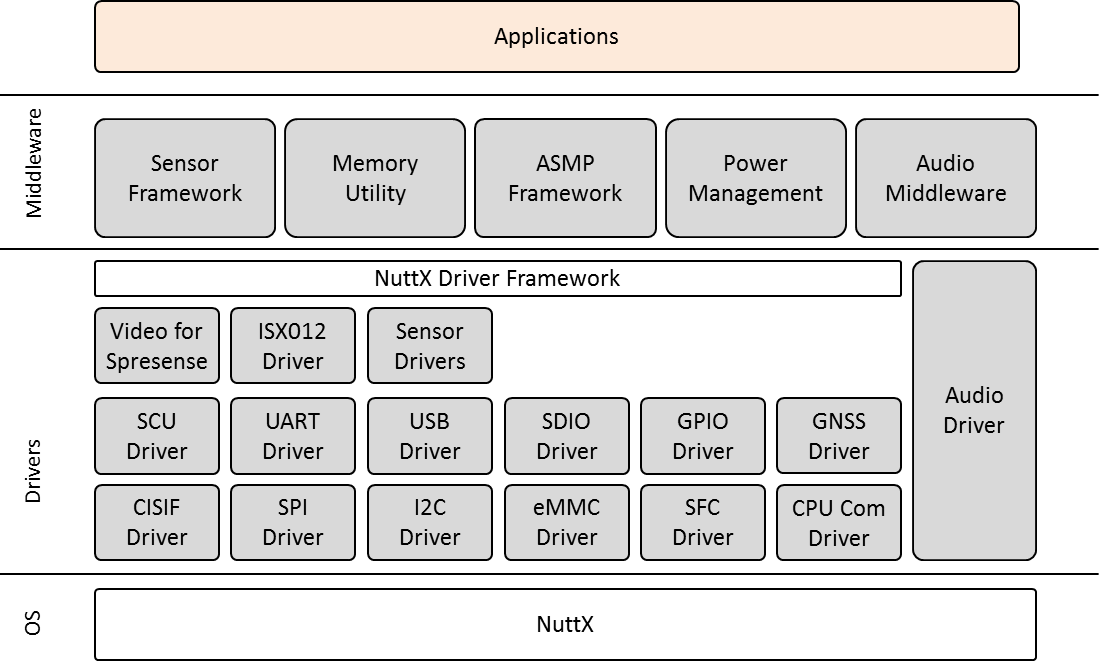
- Spresense SDK – Sony’s original development environment for the CXD5602 chipset, based on NuttX real-time operating system, and leveraging GNU Make toolchain. The low level API enables developers to optimize memory use, power saving, control of multicore processing, and more, which may not be possible with the Arduino library.
I’ve published many reviews with the Arduino IDE for other hardware platforms, and others have already published projects using Spresense with the Arduino IDE, so I thought it would be more interesting for myself and readers to instead look at Spresense SDK.
Getting Started with Spresense SDK
A guide is already available to get started with the SDK. So let’s try to follow it in a laptop running Ubuntu 18.04.
Installing Spresense SDK
- First we need to install some dependencies in a terminal windows:
|
1 |
sudo apt install git gperf libncurses5-dev flex bison gcc-arm-none-eabi genromfs pkg-config autoconf automake cmake |
- The next step os to install the kconfig-frontends package from nuttx-tools:
12345git clone https://bitbucket.org/nuttx/tools.gitcd tools/kconfig-frontends/./configure --disable-sharedmake -j8sudo make install
- And check out the SDK source code:
|
1 2 3 |
cd ../.. git clone --recursive https://github.com/sonydevworld/spresense.git git submodule foreach git checkout master |
USB Connection
You may also want to add your current user to the dialout group, and logout to make sure you can access the serial port:
|
1 |
sudo usermod -a -G dialout $USER |
Time to connect the main board to your computer via USB. Here’s the output from the kernel log:
|
1 2 3 4 5 6 7 8 |
[99898.675476] usb 3-2: new full-speed USB device number 3 using xhci_hcd [99898.849262] usb 3-2: New USB device found, idVendor=10c4, idProduct=ea60 [99898.849267] usb 3-2: New USB device strings: Mfr=1, Product=2, SerialNumber=3 [99898.849270] usb 3-2: Product: CP2102N USB to UART Bridge Controller [99898.849272] usb 3-2: Manufacturer: Silicon Labs [99898.849275] usb 3-2: SerialNumber: 1601ea6abb61e811841264b55bfef139 [99898.851295] cp210x 3-2:1.0: cp210x converter detected [99898.864393] usb 3-2: cp210x converter now attached to ttyUSB0 |
The board is properly detected as a CP210x converter with 10c4 VID and ea60 PID.
Spresense SDK Setup
- First set the initial NuttX kernel configuration:
12cd spresense/sdktools/config.py --kernel release - Then set the initial SDK configuration:
1tools/config.py examples/hello
Output:
|
1 2 3 4 5 6 7 |
WARNING: New loader v1.1.0 is required, please download and install. Download URL : https://developer.sony.com/file/download/download-spresense-firmware-v1-1-000 Install command: 1. Extract loader archive into host PC. ./tools/flash.sh -e <download zip file> 2. Flash loader into Board. ./tools/flash.sh -l /home/jaufranc/edev/spresense/spresense/firmware/spresense -c <port> |
We’ve being ask to…
- Install a new loader
The download URL requires you to accept an EULA, so it can’t downloaded from the command from the command line. But after download, I could easily flash it to the board with the following commands:
|
1 2 3 4 |
cd tools mv ~/Downloads/spresense-binaries-v1.1.0.zip . ./flash.sh -e spresense-binaries-v1.1.0.zip sudo ./flash.sh -l ../../firmware/spresense/ -c /dev/ttyUSB0 |
Last command output:
|
1 2 3 4 5 6 7 8 9 10 11 12 13 14 15 16 |
>>> Install files ... install -b 115200 Install ../../firmware/spresense/loader.espk Waiting for XMODEM (CRC or 1K) transfer. Ctrl-X to cancel. ....................................................................................................................115856 bytes loaded. Package validation is OK. Saving package to "loader" updater# install -b 115200 Install ../../firmware/spresense/gnssfw.espk Waiting for XMODEM (CRC or 1K) transfer. Ctrl-X to cancel. ..........................................................................................................................................................................................................................................................................................................................................................................................................................................................450336 bytes loaded. Package validation is OK. Saving package to "gnssfw" updater# sync updater# Restarting the board ... reboot |
- Build the example image:
|
1 2 3 |
cd .. make buildkernel -j8 make -j8 |
You should end up with nuttx.spk firmware in the current directory:
|
1 2 |
ls nuttx.spk -l -rw-r--r-- 1 jaufranc jaufranc 153776 ม.ค. 5 16:11 nuttx.spk |
Flash and run the firmware
At this point, we’re asked to flash the bootloader, but we’ve already done it above, so we can just flash nuttx.spk:
|
1 |
sudo tools/flash.sh -c /dev/ttyUSB0 nuttx.spk |
Output from the command:
|
1 2 3 4 5 6 7 8 9 10 |
>>> Install files ... install -b 115200 Install nuttx.spk Waiting for XMODEM (CRC or 1K) transfer. Ctrl-X to cancel. .........................................................................................................................................................153776 bytes loaded. Package validation is OK. Saving package to "nuttx" updater# sync updater# Restarting the board ... reboot |
To run the hello world program we need to connect with serial with 115200 8N1 parameters using minicom or other tools:
|
1 |
minicom -D /dev/ttyUSB0 -b 115200 -s |
Disable hardware flow control in Serial port setup, and exit by pressing Esc and selecting Exit. We should now have access to NuttShell (NSH) shell for NuttX.
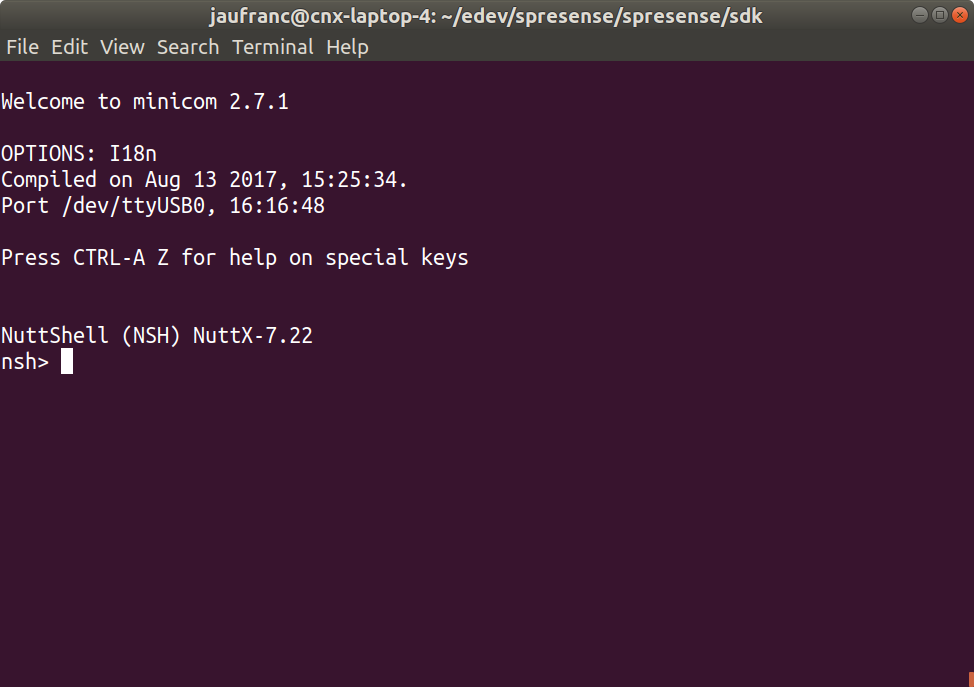
Type hello to run the demo program:
|
1 2 3 4 |
NuttShell (NSH) NuttX-7.22 nsh> hello Hello, World!! nsh> |
Success. The source code of the hello world program can be found in examples/hello/hello_main.c, and is mostly your typical C hello world program:
|
1 2 3 4 5 6 7 8 9 10 11 12 13 14 15 16 17 18 19 20 21 22 23 24 |
**************************************************************************** * Included Files ****************************************************************************/ #include <sdk/config.h> #include <stdio.h> /**************************************************************************** * Public Functions ****************************************************************************/ /**************************************************************************** * hello_main ****************************************************************************/ #ifdef CONFIG_BUILD_KERNEL int main(int argc, FAR char *argv[]) #else int hello_main(int argc, char *argv[]) #endif { printf("Hello, World!!\n"); return 0; } |
For reference NuttX shell has some similar commands as you’d find in busybox:
|
1 2 3 4 5 6 7 8 9 10 11 12 |
nsh> help help usage: help [-v] [<cmd>] [ date help mksmartfs rm uname ? dd hexdump mh rmdir umount basename df kill mount set unset break echo ls mv sh usleep cat printf mb mw shutdown xd cd exec mkdir poweroff sleep cp exit mkfatfs ps test cmp false mkfifo pwd time dirname free mkrd reboot true |
Spresense Sample Programs
Hello word is fine to get started but there are other, more interesting samples in Spresense SDK:
|
1 2 3 4 5 6 7 8 9 10 11 12 |
ls examples/ accel camera gyro press adc colorsensor hello prime alarm decimator helloxx proximity Application.mk dnnrt_lenet Kconfig pwm asmp fft libexamples.a README.md audio_player fwupdate LibTarget.mk sixaxis audio_player_objif geofence light tilt audio_recorder gnss lte_http_get voice_call audio_through gnss_atcmd mag voice_command bluetooth_le_peripheral gnss_factory Make.defs watchdog bluetooth_spp gnss_pvtlog Makefile |
Each sample is described in Spresense NuttX developer guide. Somehow there is no blinky sample, what kind of develeloper guide is that! 😉
Some samples requires additional hardware such as camera add-on, Bluetooth LE add-on, sensors add-ons and so on. You’ll find a list by scrolling down on the main page of the developer website.
Since audio and GNSS are some of the main features of the board, I’ll try the audio_player and gnss samples respectively written in C++ and C programming languages.
Spresense Audio Player
The build and flash procedure is the same as for the hello world program with the following commands executed in sdk directory:
|
1 2 3 |
./tools/config.py examples/audio_player make -j8 sudo tools/flash.sh -c /dev/ttyUSB0 nuttx.spk |
The program is loaded to the board, but we’ll need some extra files stored in a micro SD card with music, playlist and “worker” binaries as described in the README.txt file in the audio_player sample directory:
After that, you can see worker binary ‘MP3DEC’, ‘WAVDEC’ in directory sdk/modules/audio/dsp.
Store worker binary, playlist and play contents in the path specified by option.
– Default path
worker binary : /mnt/sd0/BIN
play list : /mnt/sd0/PLAYLIST
contents : /mnt/sd0/AUDIOAs a sample of Playlist, there is TRACK_DB.CSV in the PLAYLIST folder. Also, as a sample of contents, there is Sound.mp 3 in the AUDIO folder. Sound.mp3 is a sampling frequency of 48000, bit length 16, codec MP3 file.
I was initially confused about the wording of the instructions at first, but eventually figured it, and copied the files to a 4GB micro SD card formatted with FAT32:
|
1 2 3 4 5 6 |
cp ../examples/audio_player/AUDIO <sd_card_mount_point> -R cp ../examples/audio_player/PLAYLIST/ <sd_card_mount_point> -R mkdir <sd_card_mount_point>/BIN pushd modules/audio/dsp cp MP3DEC WAVDEC <sd_card_mount_point>/BIN/ popd |
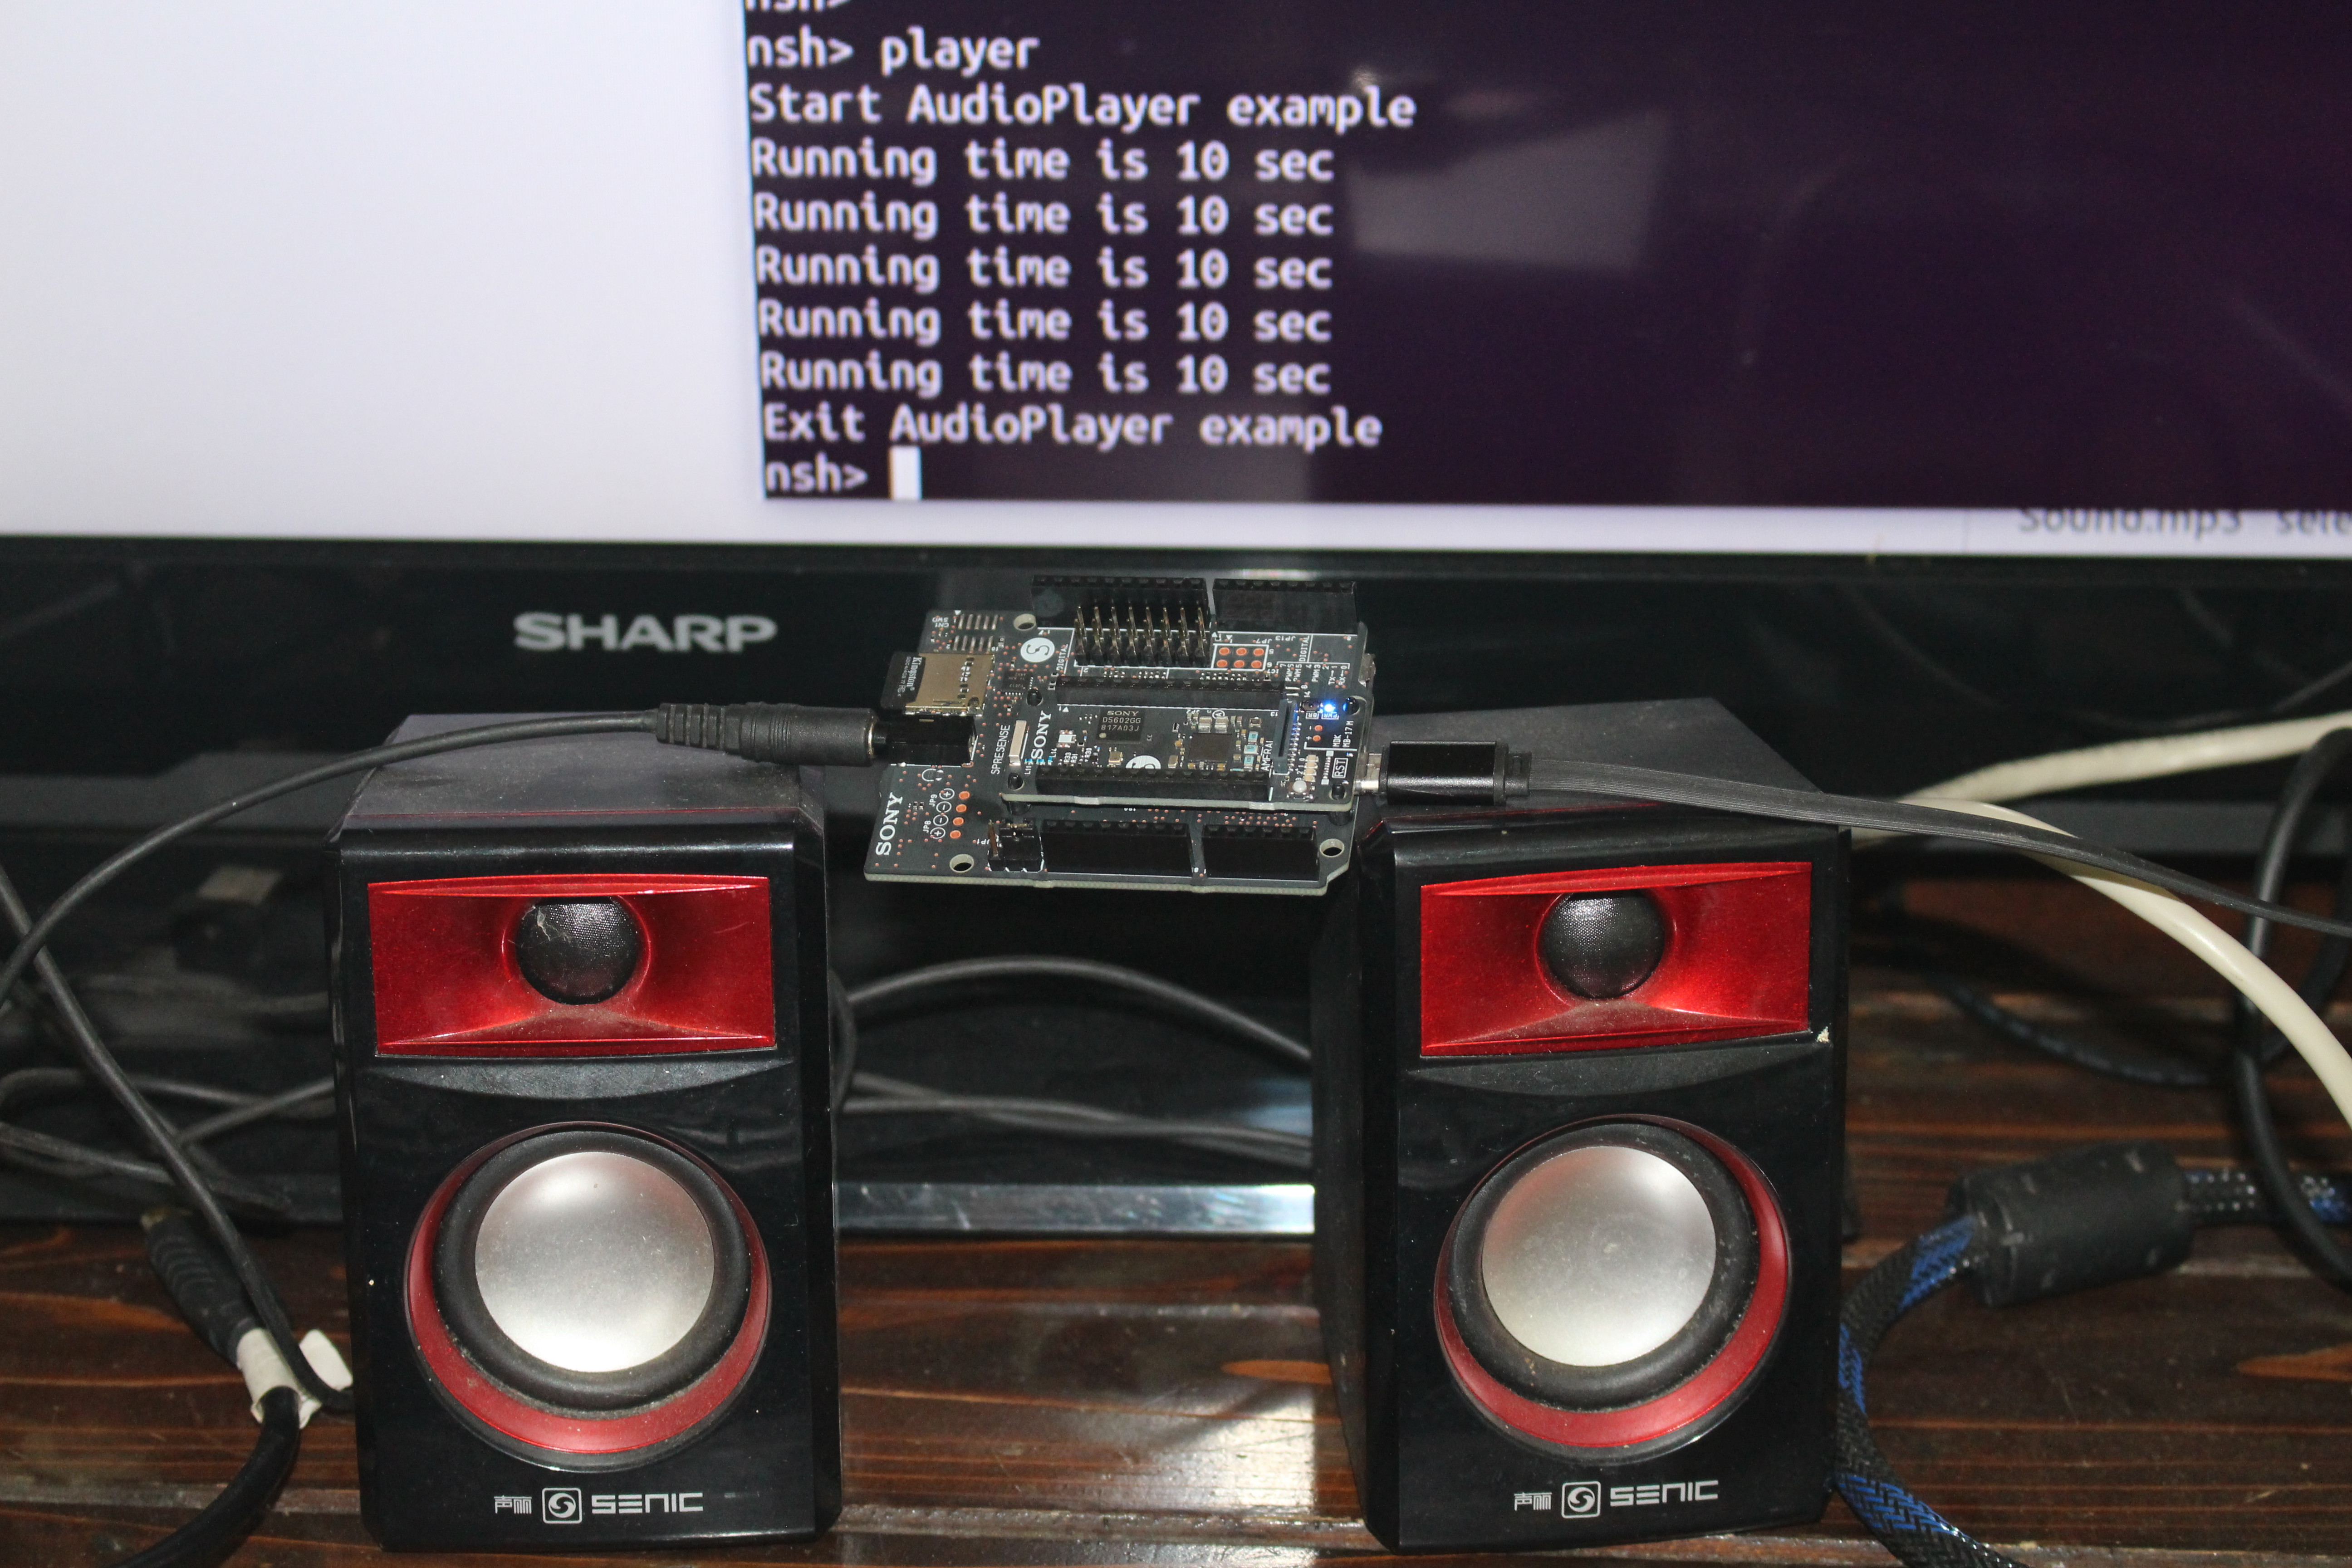
Now insert the microSD card into Spresense board, and connect some speakers, before launching the app in NuttShell.
|
1 2 3 4 5 |
NuttShell (NSH) NuttX-7.22 nsh> player Start AudioPlayer example Running time is 10 sec Running time is 10 sec |
Everything appears to work as expected, except I could not hear any audio…I check the audio jack connection in case of bad contact, my speakers’ power and volume level, but still nothing. Then I thought maybe there’s a bad contact between Spresense main board and the extension board, so I pressed on the top of the board and… success !!! I could finally hear the beep sound from Sound.mp3 file. Interesting that the micro SD card did work, but not the audio.
GNSS Sample
Let’s move on to the GNSS sample:
|
1 2 3 |
./tools/config.py examples/gnss make -j8 sudo tools/flash.sh -c /dev/ttyUSB0 nuttx.spk |
By the way, remember to always exit minicom before running flash.sh, or you’ll end up with the following error:
|
1 2 3 4 5 6 7 8 9 10 11 12 13 14 |
Traceback (most recent call last): File "serial/serialposix.py", line 495, in read serial.serialutil.SerialException: device reports readiness to read but returned no data (device disconnected or multiple access on port?) During handling of the above exception, another exception occurred: Traceback (most recent call last): File "flash_writer.py", line 504, in <module> File "flash_writer.py", line 446, in main File "flash_writer.py", line 316, in cancel_autoboot File "flash_writer.py", line 263, in readline File "serial/serialposix.py", line 505, in read serial.serialutil.SerialException: read failed: device reports readiness to read but returned no data (device disconnected or multiple access on port?) [8067] Failed to execute script flash_writer |
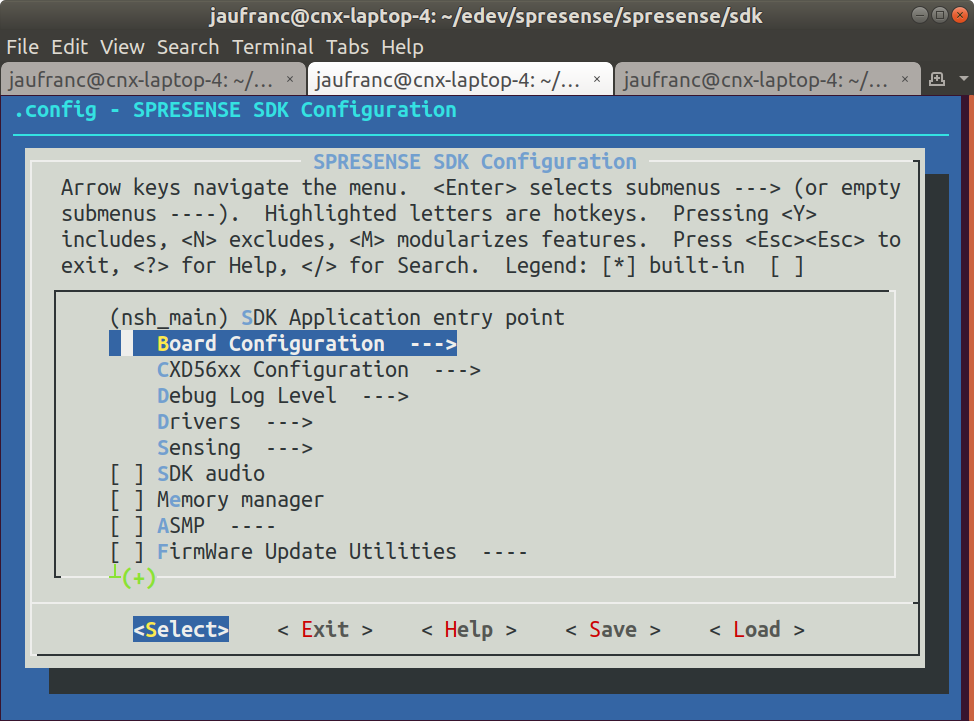
Another site note is that you can run the config.py with an option that brings menuconfig to setup options:
|
1 |
./tools/config.py -m examples/gnss |
Back to GPS testing. I tried to place the board close to the window, but the building design is not really suitable to get a proper GPS signal, and after 1h30, I only got the UTC time. So I moved outdoors, restarted the board, and everything worked pretty well. I got the UTC time after just 24 seconds:
|
1 2 3 4 5 6 7 8 9 10 11 12 13 14 15 16 17 18 19 20 21 |
NuttShell (NSH) NuttX-7.22 nsh> nsh> nsh> gnss Hello, GNSS(USE_SIGNAL) SAMPLE!! start GNSS OK >Hour:0, minute:0, sec:3, usec:497 >No Positioning Data >Hour:0, minute:0, sec:4, usec:512 >No Positioning Data >Hour:0, minute:0, sec:5, usec:15289 ... >No Positioning Data >Hour:0, minute:0, sec:23, usec:507 >No Positioning Data >Hour:0, minute:0, sec:24, usec:522 >No Positioning Data >Hour:6, minute:59, sec:32, usec:554 >No Positioning Data >Hour:6, minute:59, sec:33, usec:561 >No Positioning Data |
and positioning data after one minute 40 seconds:
|
1 2 3 4 5 6 7 8 9 10 11 12 13 |
>Hour:7, minute:0, sec:47, usec:559 >No Positioning Data >Hour:7, minute:0, sec:48, usec:533 >No Positioning Data >Hour:7, minute:0, sec:49, usec:533 >No Positioning Data >Hour:7, minute:0, sec:49, usec:769162 >LAT 37.02.1428 >LNG 95.36.5893 >Hour:7, minute:0, sec:50, usec:578 >LAT 37.02.1428 >LNG 95.36.5893 >Hour:7, minute:0, sec:51, usec:574 |
and no, I don’t live in Coffeyville 😉
The code for the samples is too long to go into details in this review, but you’ll find the source in the examples directory, and Spresense SDK documentation looks to be clearly structured, quite detailed and thorough.
Final words
Recently, I’ve been having troubles with hardware reviews, and there was always sometimes that went wrong, but I have to admit everything went rather smoothly with Spresense board, samples just work, and developer documentation looks great.
For most project you’ll likely need add-ons board, as there must not be many applications that require GNSS and audio without any type of wireless or wired connectivity.
Sony Spresense main board goes for $65 on Framos US, where you’ll also find the extension board for $45, and soon the 5MP camera board that will become available later his month. If you are based in Europe, you can also buy from RS Components or Vido instead. The Spresense camera is 29 Euros ex. VAT on the latter. The sensors and Bluetooth add-ons board are made by ROHM and can be purchased separately, but only in Japan for now. Hopefully, they’ll work out an easier ordering method, maybe with a full development kit in the near future.

Jean-Luc started CNX Software in 2010 as a part-time endeavor, before quitting his job as a software engineering manager, and starting to write daily news, and reviews full time later in 2011.
Support CNX Software! Donate via cryptocurrencies, become a Patron on Patreon, or purchase goods on Amazon or Aliexpress


I’m interested in what use case needs audio and GPS together.
You may have covered it in your previous article and I’ve forgotten it. I may get one of these, as it sounds like it might be interesting with the GPS development code in the state it is in.
blind’s guide? location aware advertising bot? spying audio player?
It seems like a cheaper alternative with also some features missing of the ublox C030 Dev kit.
These are mainly for various kind fleet control where ublox almost dominates the market. It’s nice to have competition.
I like the SDK, though. The time-to-market makes most companies to release rubbish SDKs with very few re-usable examples, but they seem to have it done right.
Six Cortex M4s (7 if you include the “GNSS DSP” one) and an M0 seems like a weird way of going about it. I guess there’s a reason but you would have thought a Cortex A5 or A7 and an M0/M4 for low power/wake up and realtime stuff. I guess using a low power core to run each part of the middleware and gating off/down clocking the cores is easier than trying to make that work on Linux on a A5/7. Nice to see NuttX getting some love either way. If there’s ever been a decent project that needs some… Read more »
The licensing costs on the m0 and m4 cores are likely far far cheaper then cortex aX cores.
… from the company who secretly installed a r00tkit via their CD’s ..
no thanks SONY. Stay away from IOT we know your track record.
Any information on how much RAM on this chip and how much is used by NuttX?
1.5MB SRAM, but I’m not sure how much is used by NuttX.