
Elecrow CrowPi L is an 11.6-inch laptop shell based on Raspberry Pi 4 designed for STEM education with optional electronics modules and tutorials. That’s an evolution of the CrowPi 2 laptop I reviewed in 2020 with a thinner design and more flexible since the electronics modules are optional, so it can serve the market of people just wanting a Raspberry Pi 4 laptop.
The company has sent me a full “CrowPi L Advanced Kit” for review with the CrowPi L laptop fitted with a Raspberry Pi 4, as well as the Crowtail Starter Kit for Raspberry Pi.
CrowPi L Advanced Kit Unboxing

Let’s check out the laptop package first.

Since in this design, the laptop comes with a battery, and mine already had a Raspberry Pi 4 installed, I could just turn it on immediately. Accessories include a wireless mouse, a 12V/2A power supply (with USB Type-C plug… this should be illegal IMHO as it could fry 5V-only hardware), a Grove shield with a ribbon cable to connect to the Raspberry Pi 40-pin GPIO header, and a simple user manual that’s mostly useful to install your own Raspberry Pi.
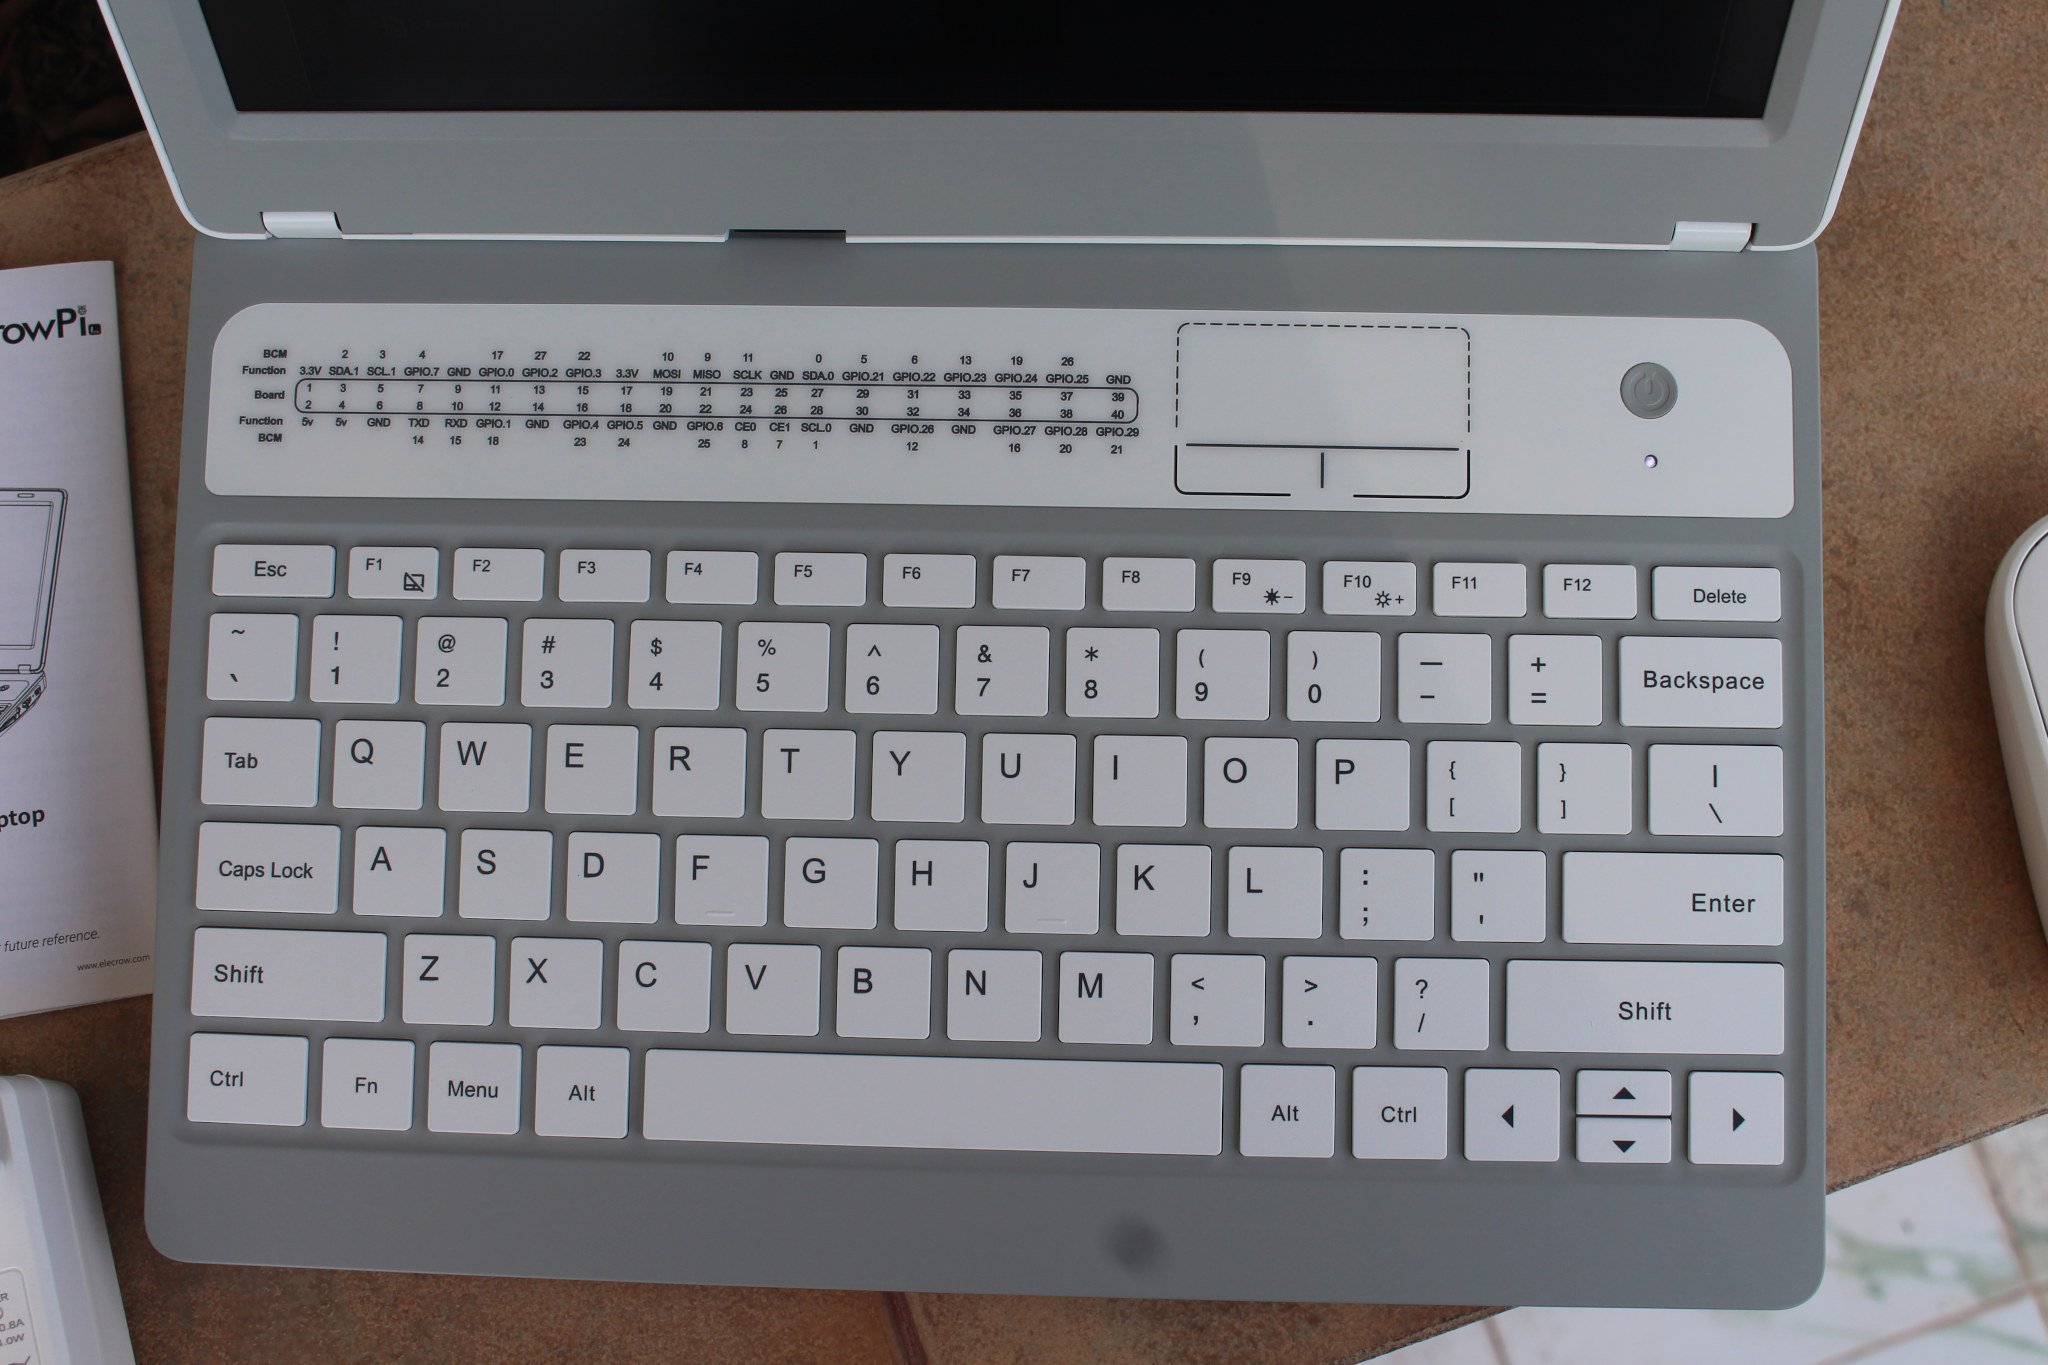
The QWERTY keyboard layout is accompanied by a touchpad with two mouse buttons and a description of the GPIO pins that should be convenient while playing with Grove modules. There’s also a power button and LED.
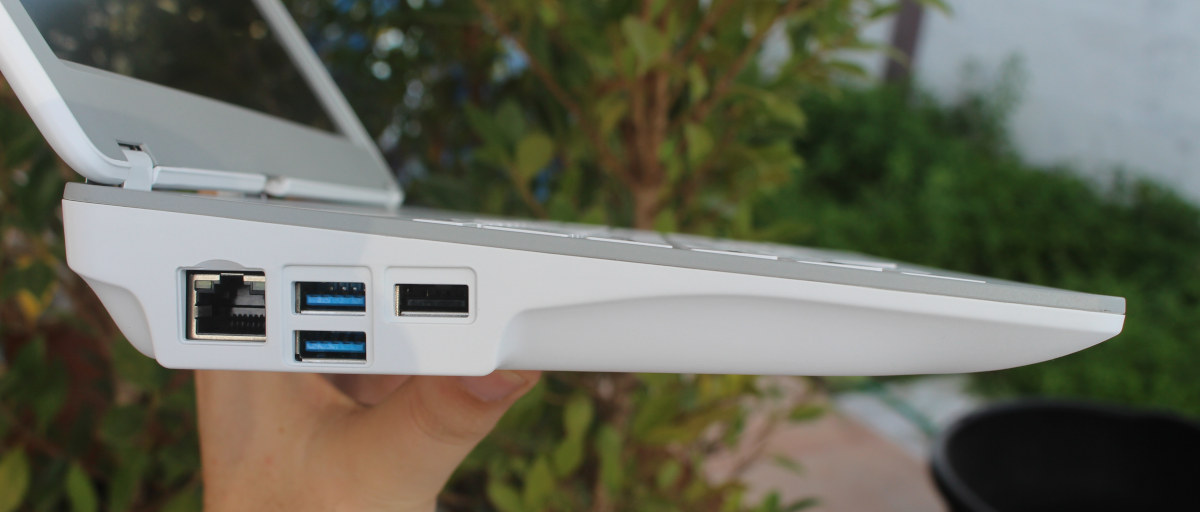
One side comes with the Gigabit Ethernet port, the two USB 3.0 ports, and one USB 2.0 port from the Raspberry Pi 4 SBC, with the other USB port hidden as it is used internally as we’ll see in the teardown part.
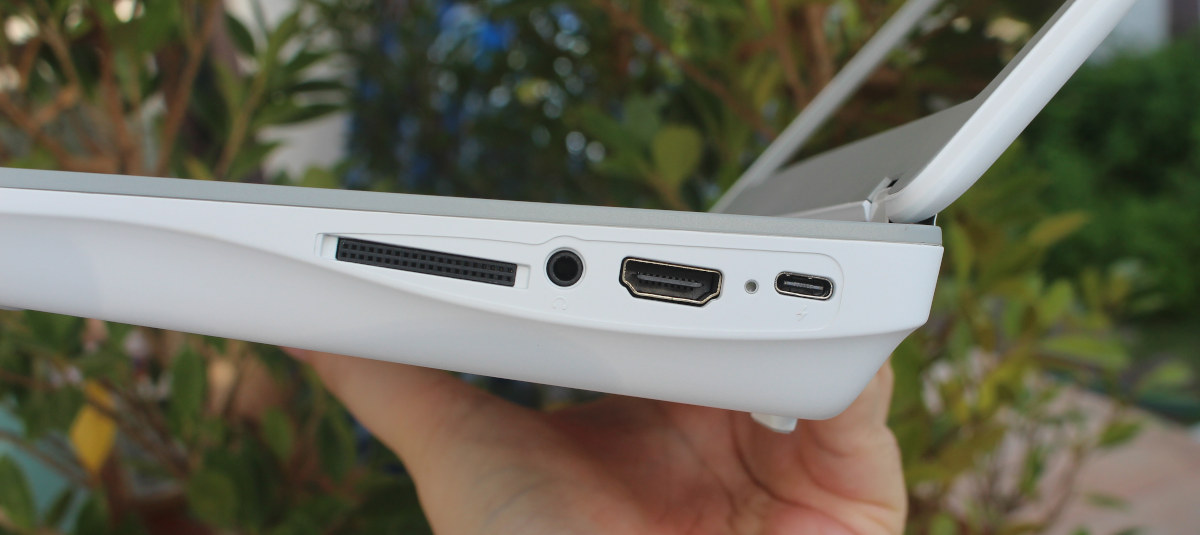
The other side features the GPIO connector, a 3.5mm AV jack, HDMI output, and a USB Type-C port for power.
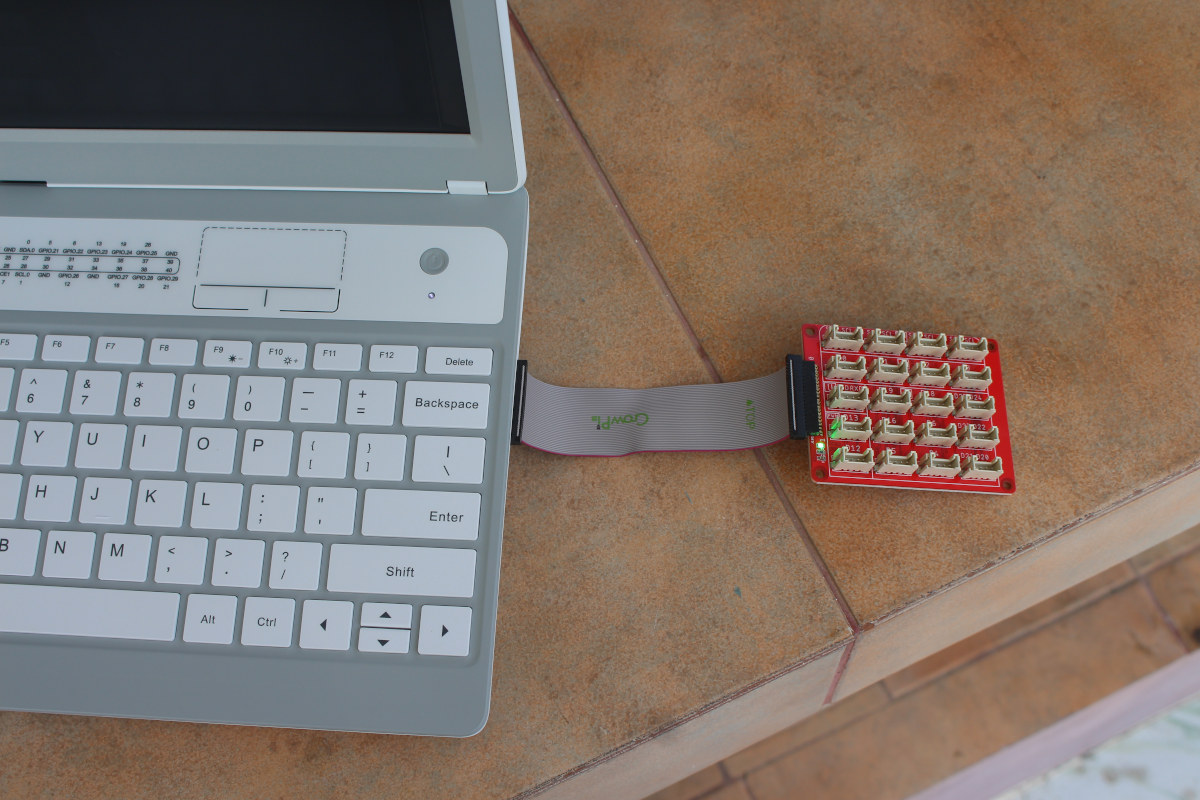
That’s the laptop connected to the Grove shield with the provided ribbon cable, and we’ll check that in more detail in the second part.
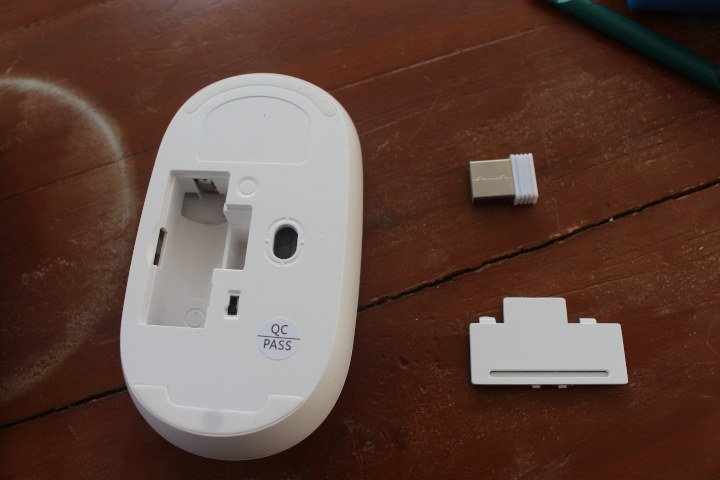
The wireless mouse does not use Bluetooth, and instead comes with its own 2.4GHz RF dongle, and you’ll need to add an AA battery for power.
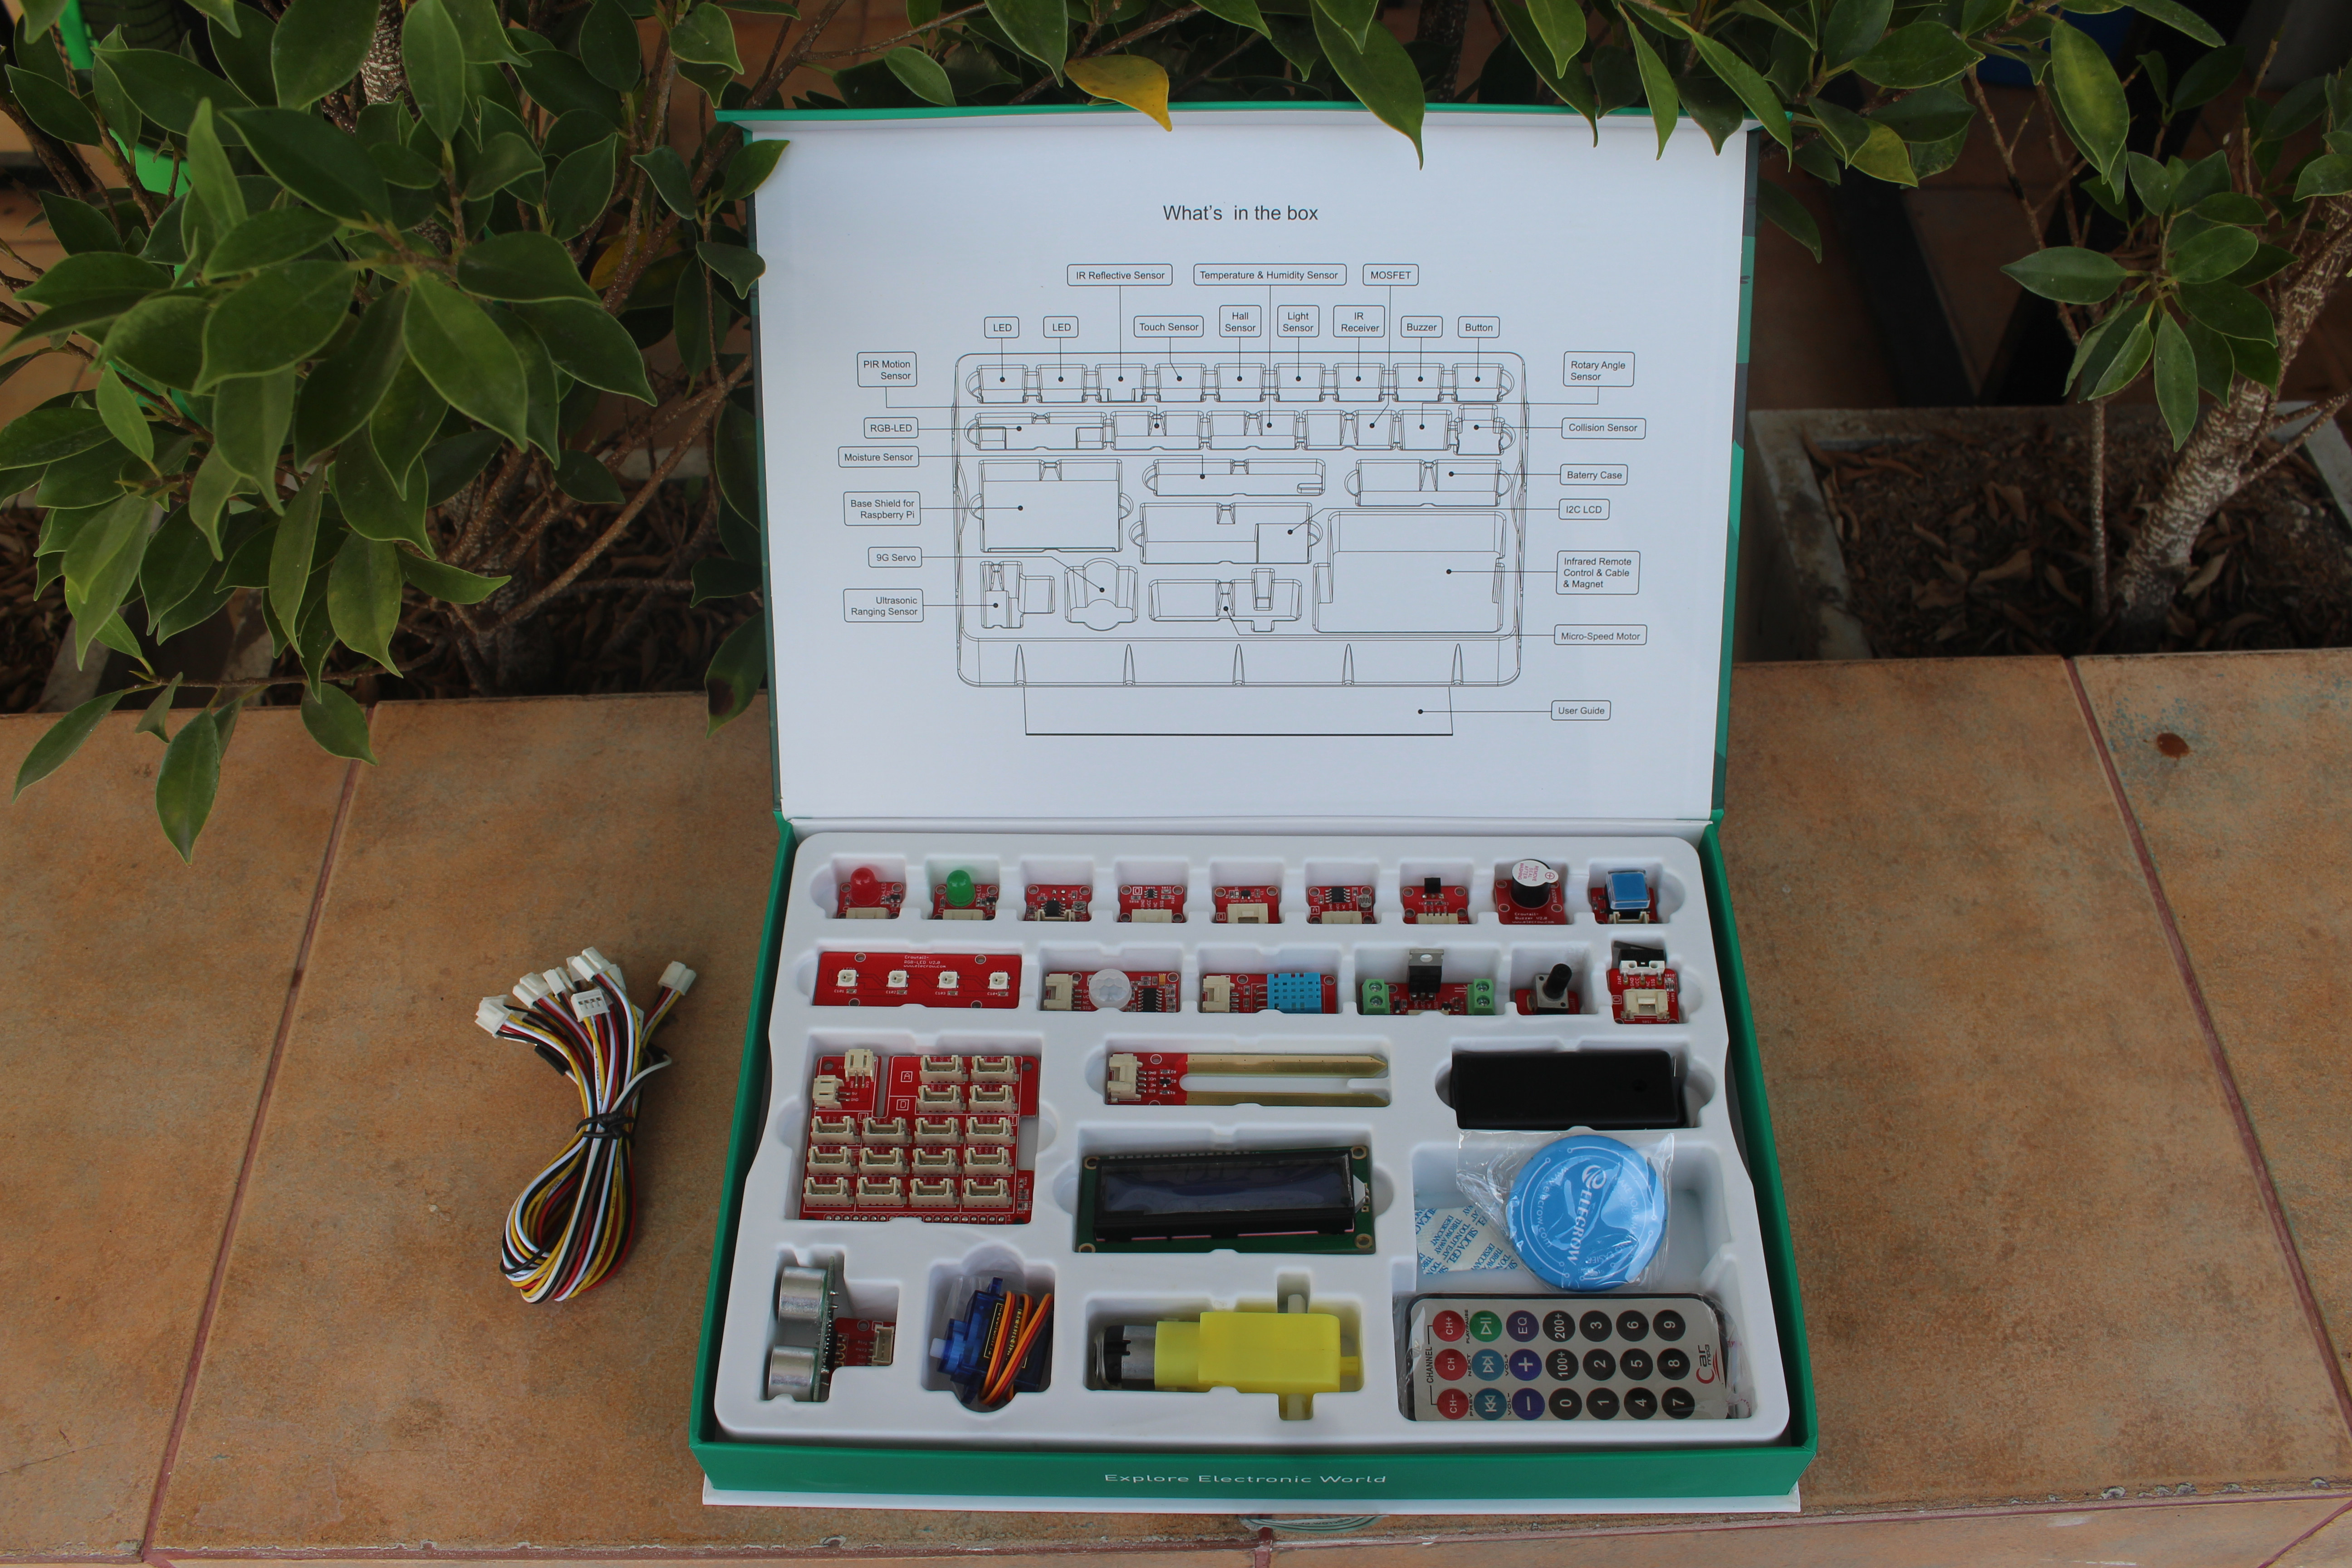
Time to have a look at the Crowtail Starter Kit for Raspberry Pi which comes with plenty of modules, some cables, and a description of each module on the package.
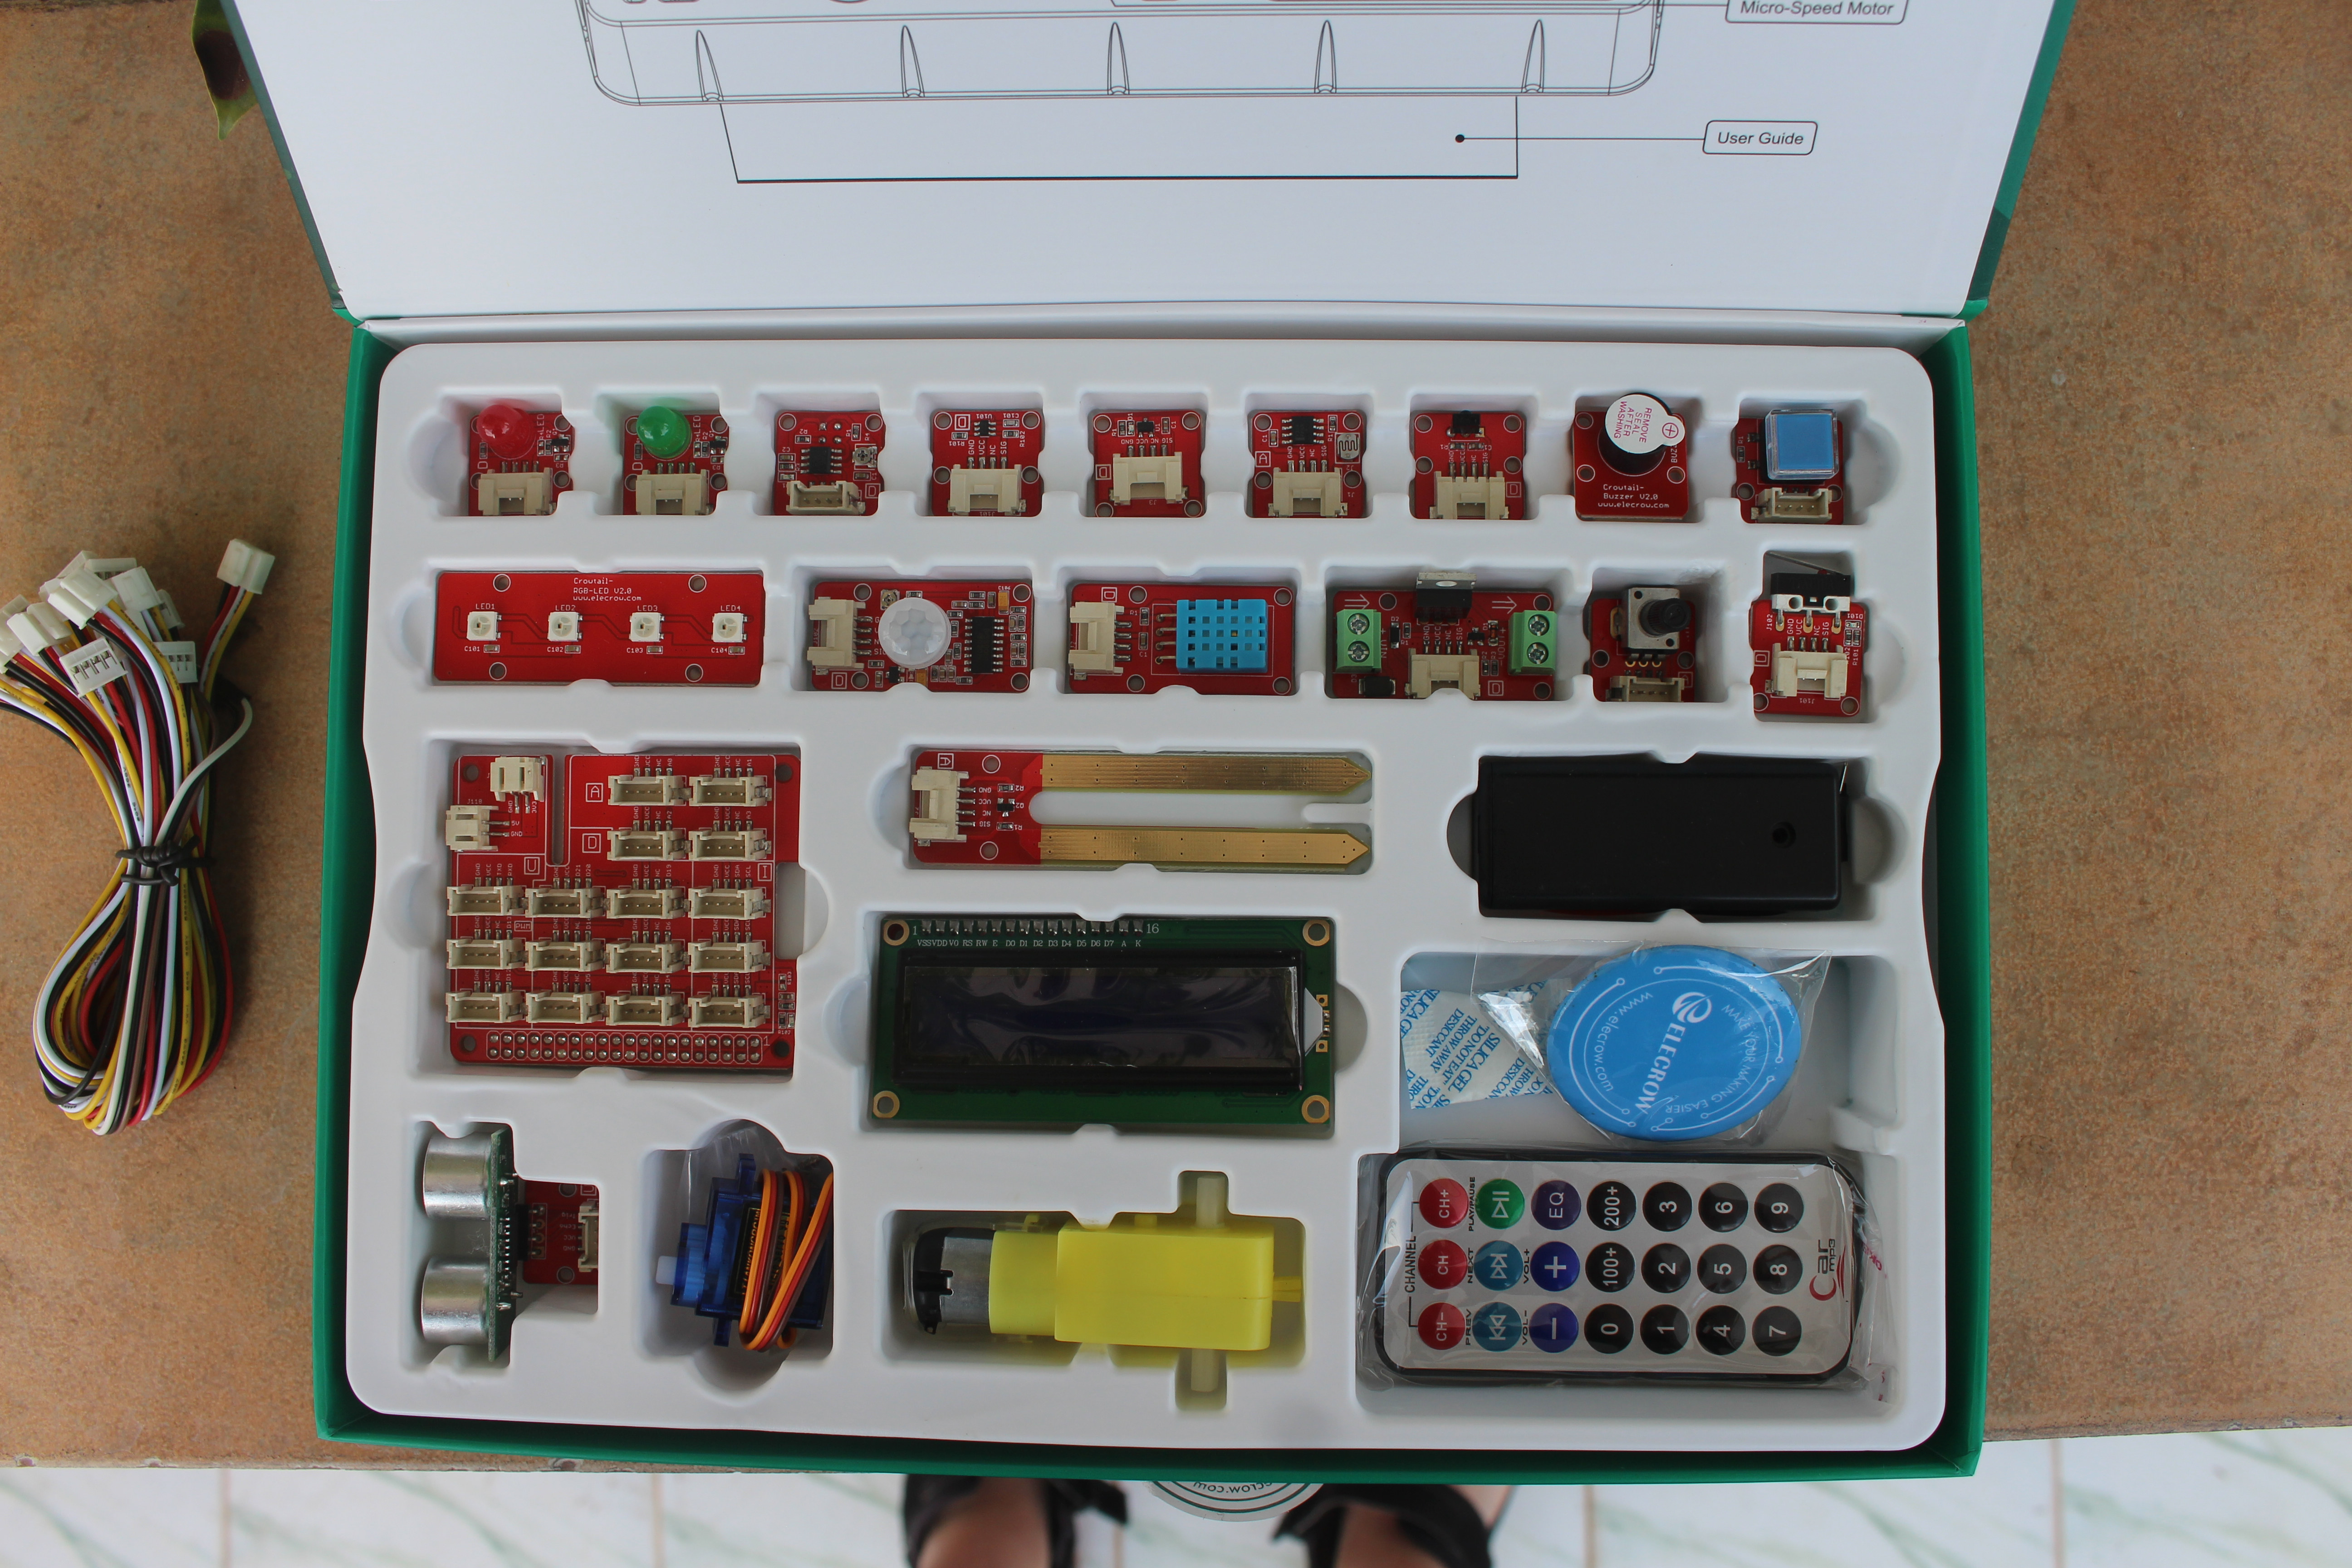
The kit includes LEDs, various sensors, a servo, a micro-speed motor, a remote control, a battery case, an LCD display, and more.
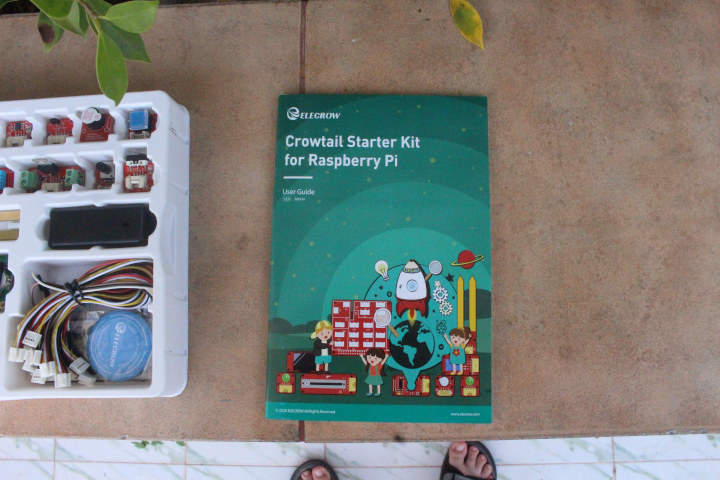
If we lift the plastic tray, we’ll see the user guide with the 20 lessons part of the kit.
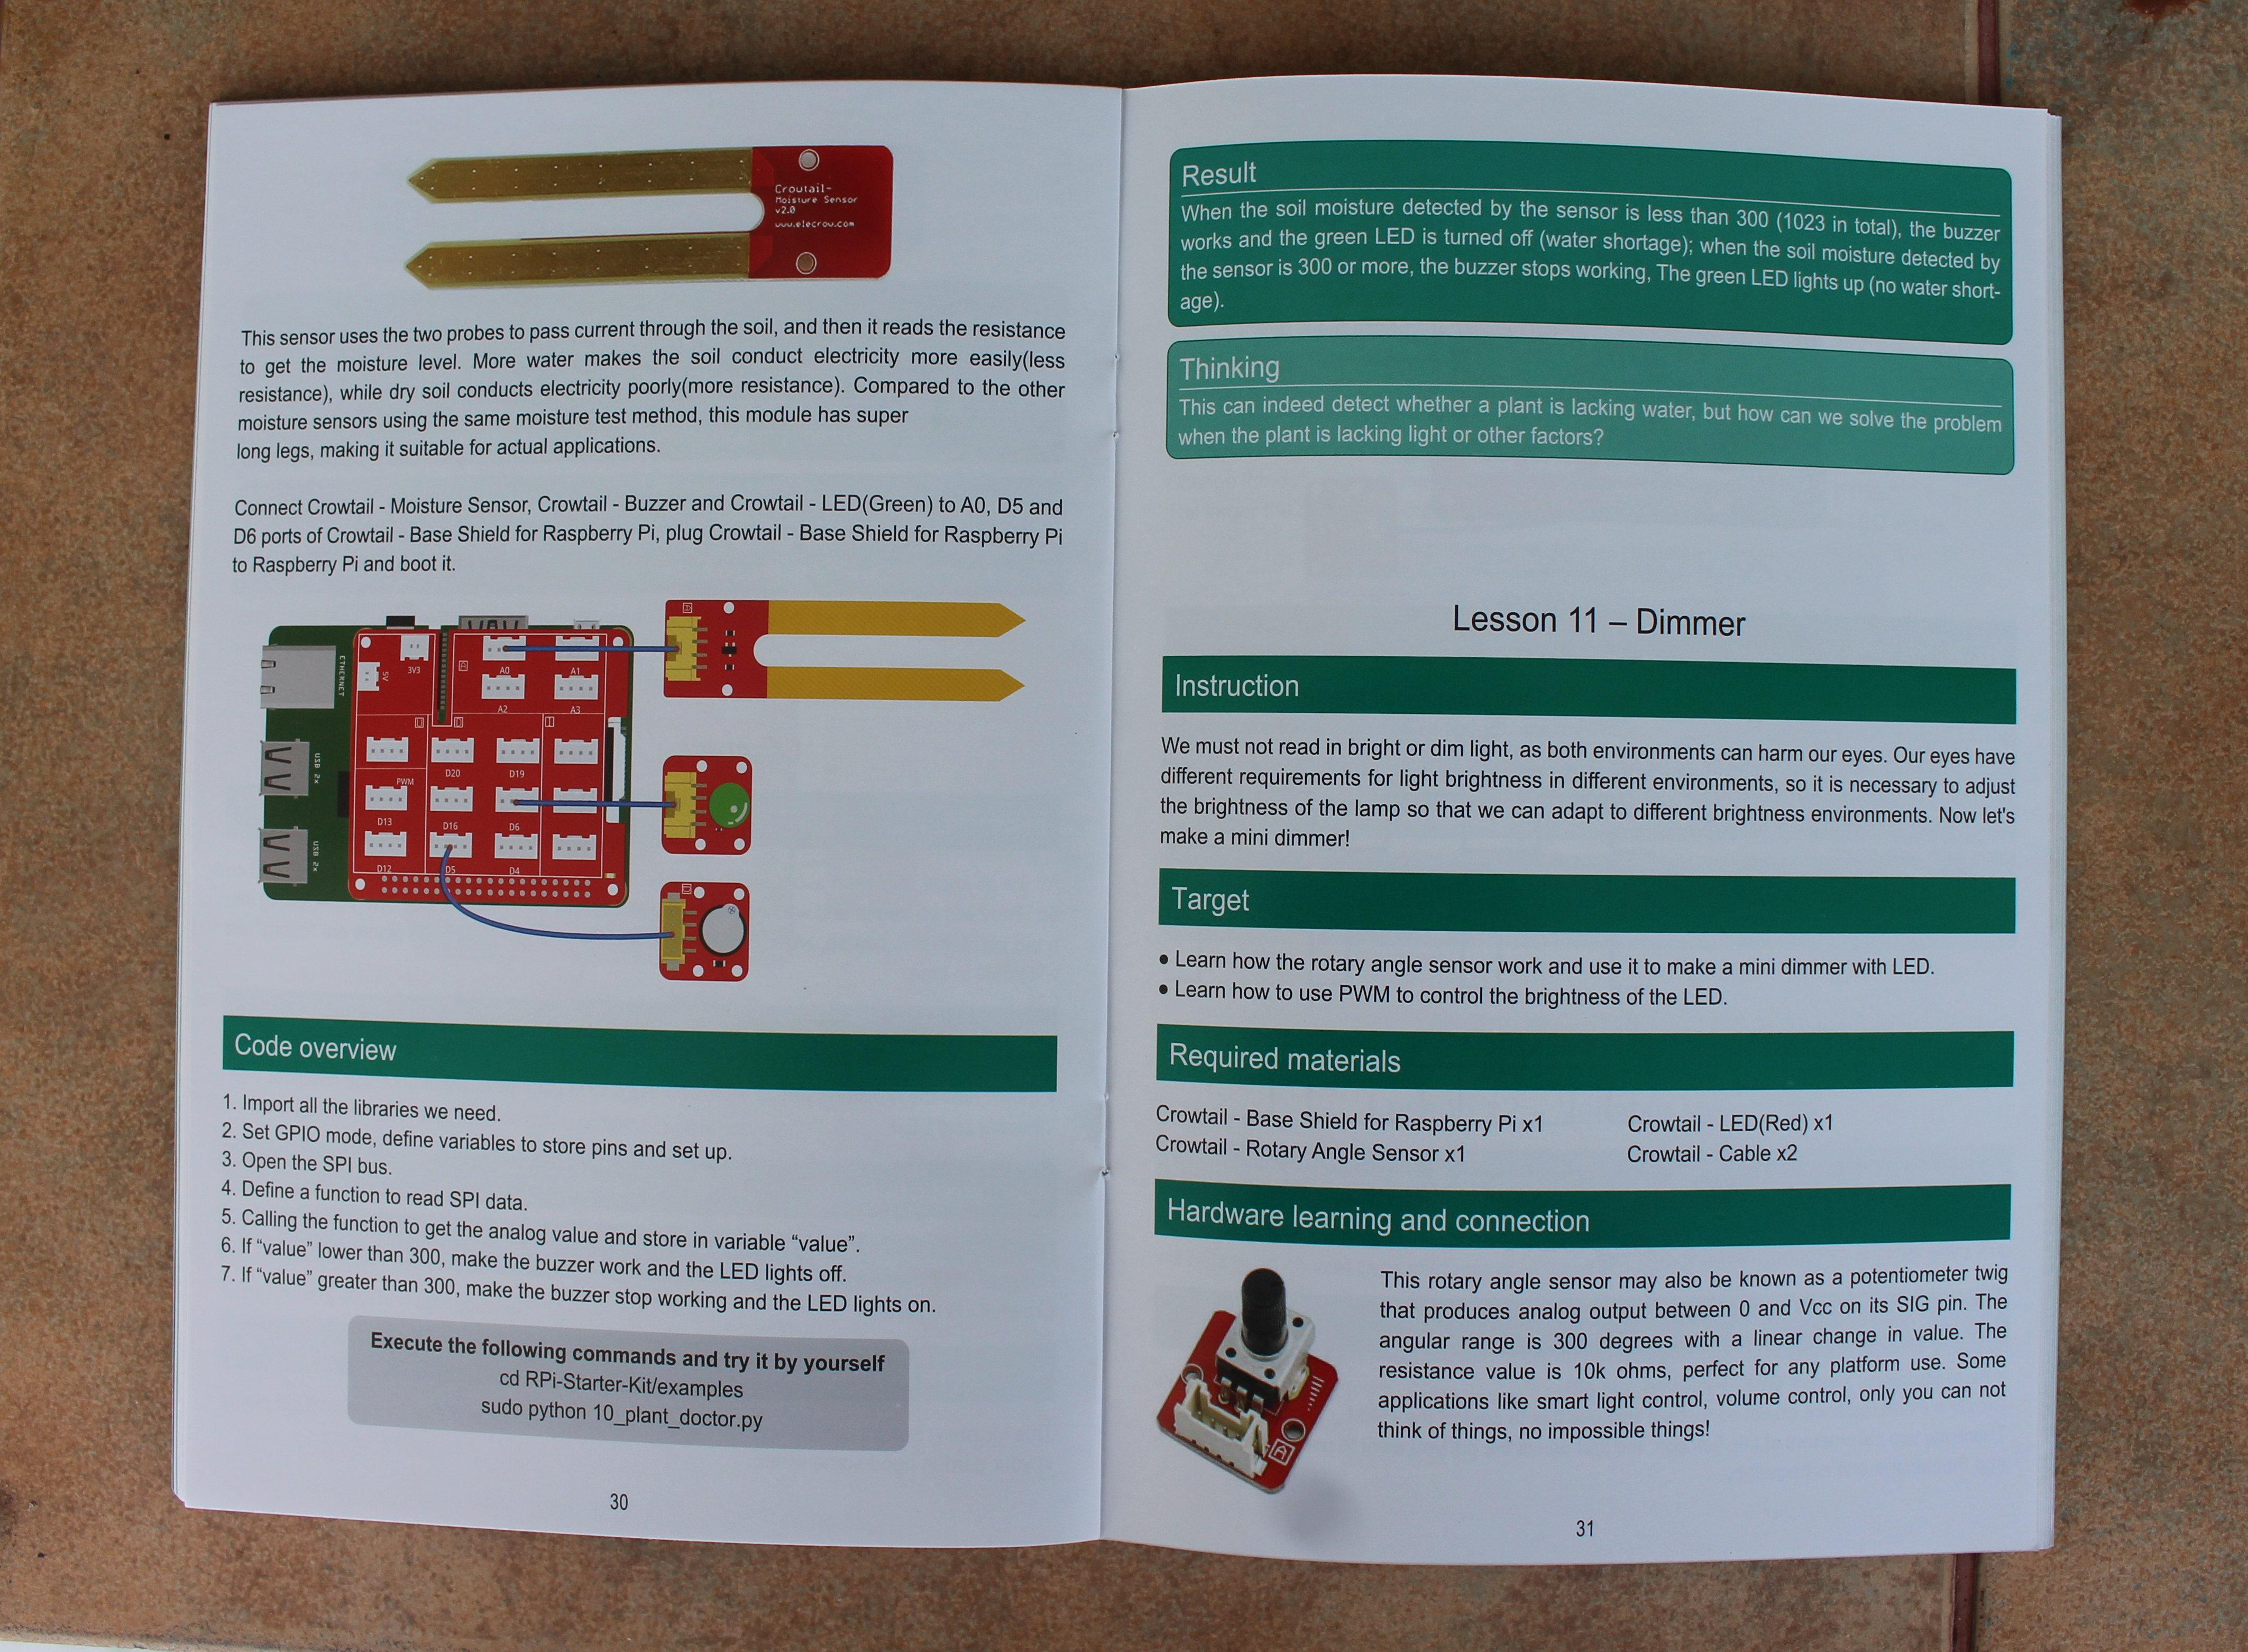
I’ve taken a photo of two pages from the book as shown above to give a sneak peek of what’s inside, but I’ll try at least one lesson in the second part of the review.
CrowPi L laptop teardown
Let’s now do a teardown, that will also serve as a “reverse” assembly guide for people who will only purchase the laptop shell and install their own Raspberry Pi 4. Such users will not need any screwdrivers.
The first step is to take out the cover at the top right cover.
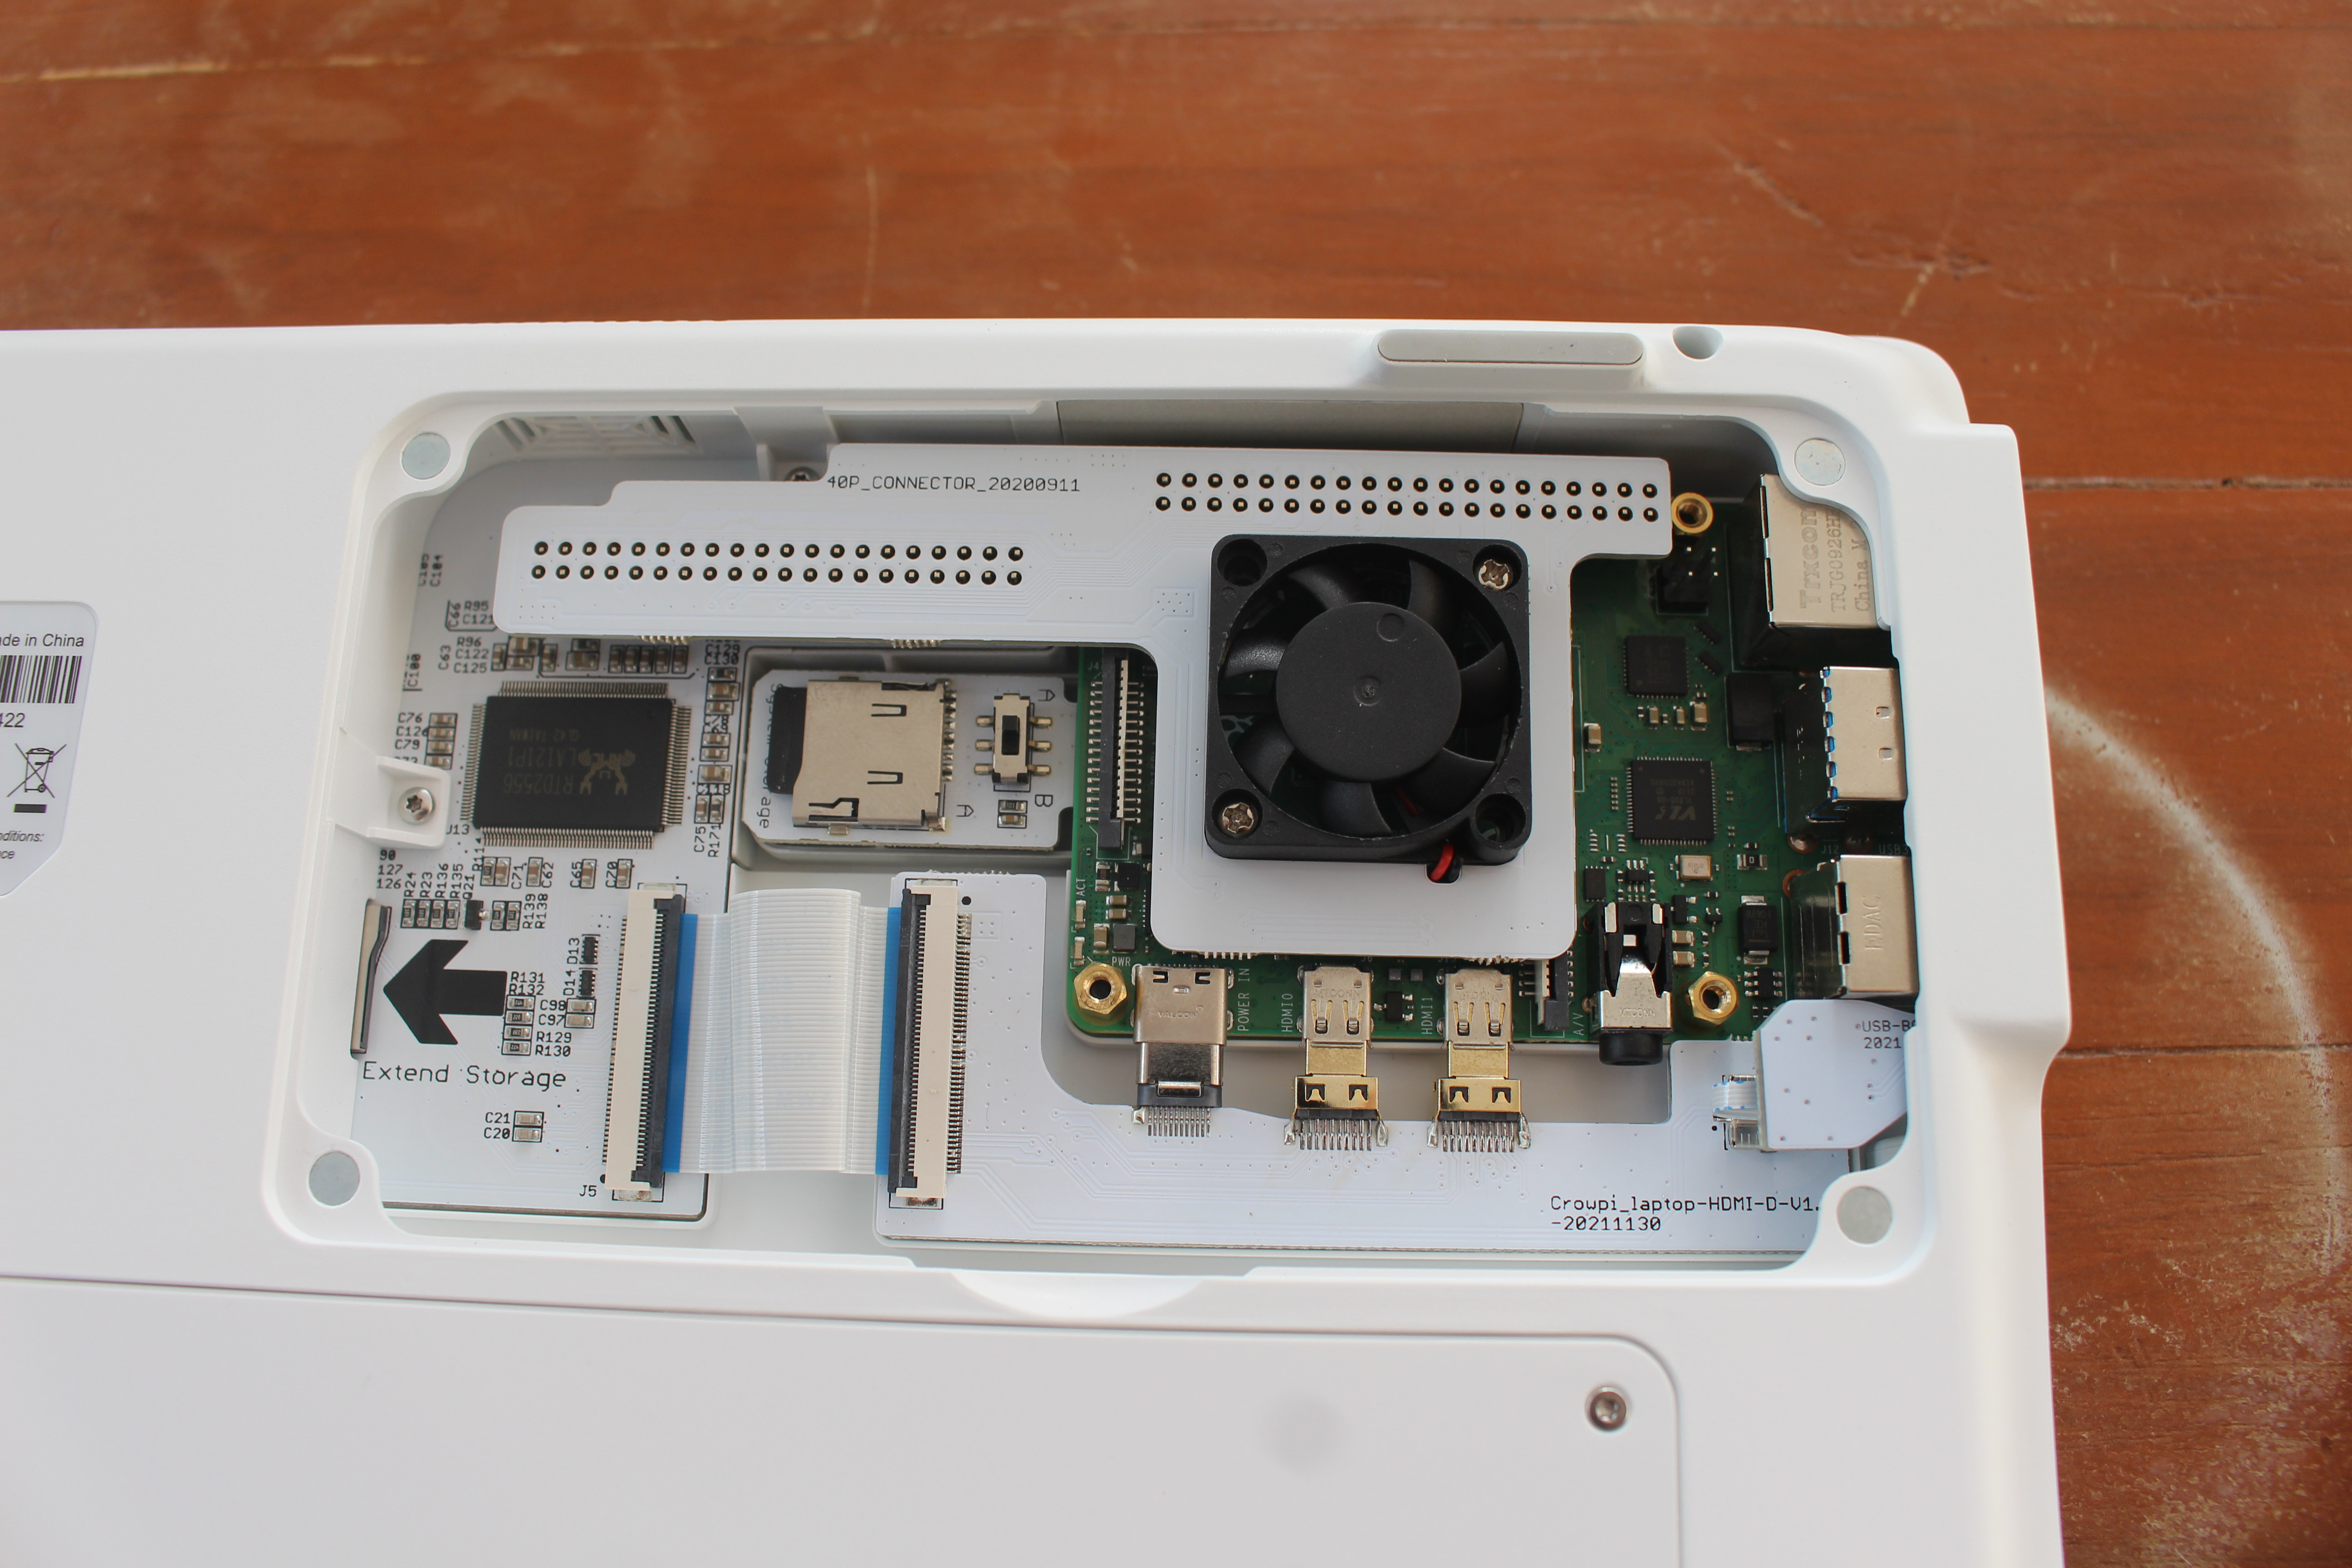
It will show the GPIO expansion board with its heatsink placed on top of Raspberry Pi 4, and inserted in both the 40-pin GPIO header from the SBC, and an additional 40-pin header on the laptop’s motherboard. Let’s take that board out, and disconnect the Raspberry Pi 4 from the board with two HDMI ports and USB-C. You’ll also notice a 4-pin USB Type-A connector on the right that was inserted into the top USB 2.0 port from the Raspberry Pi 4 board.
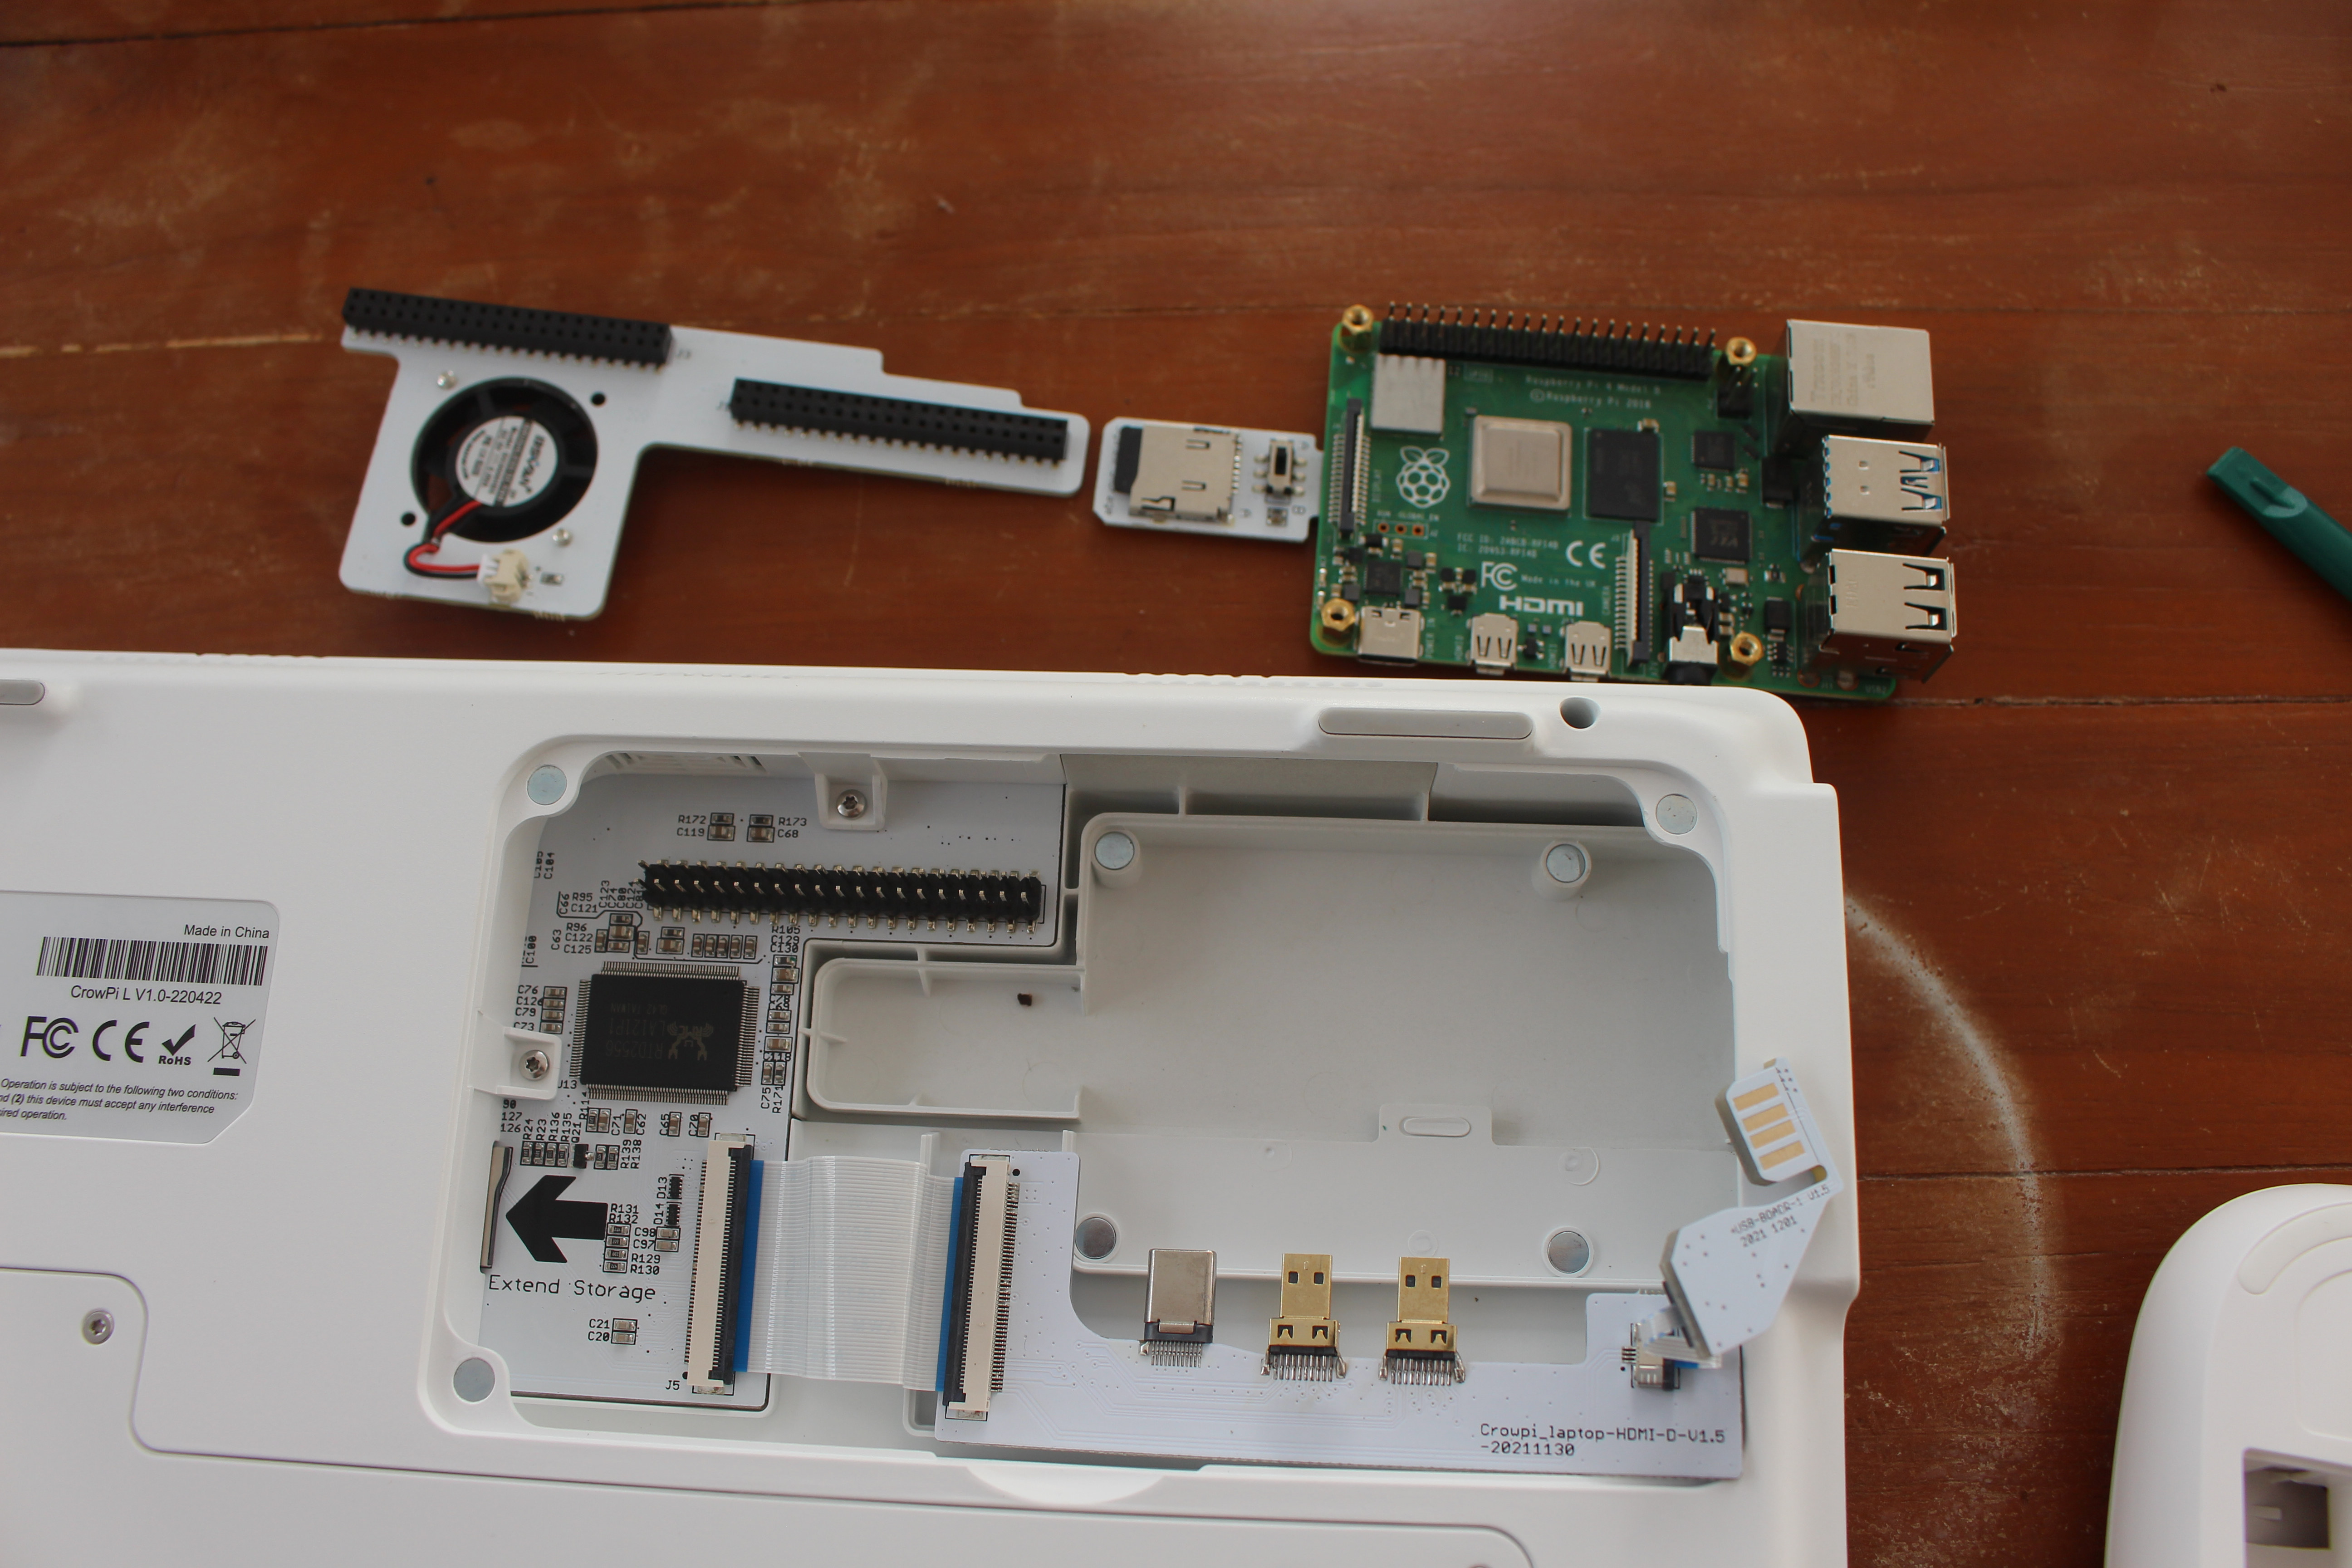
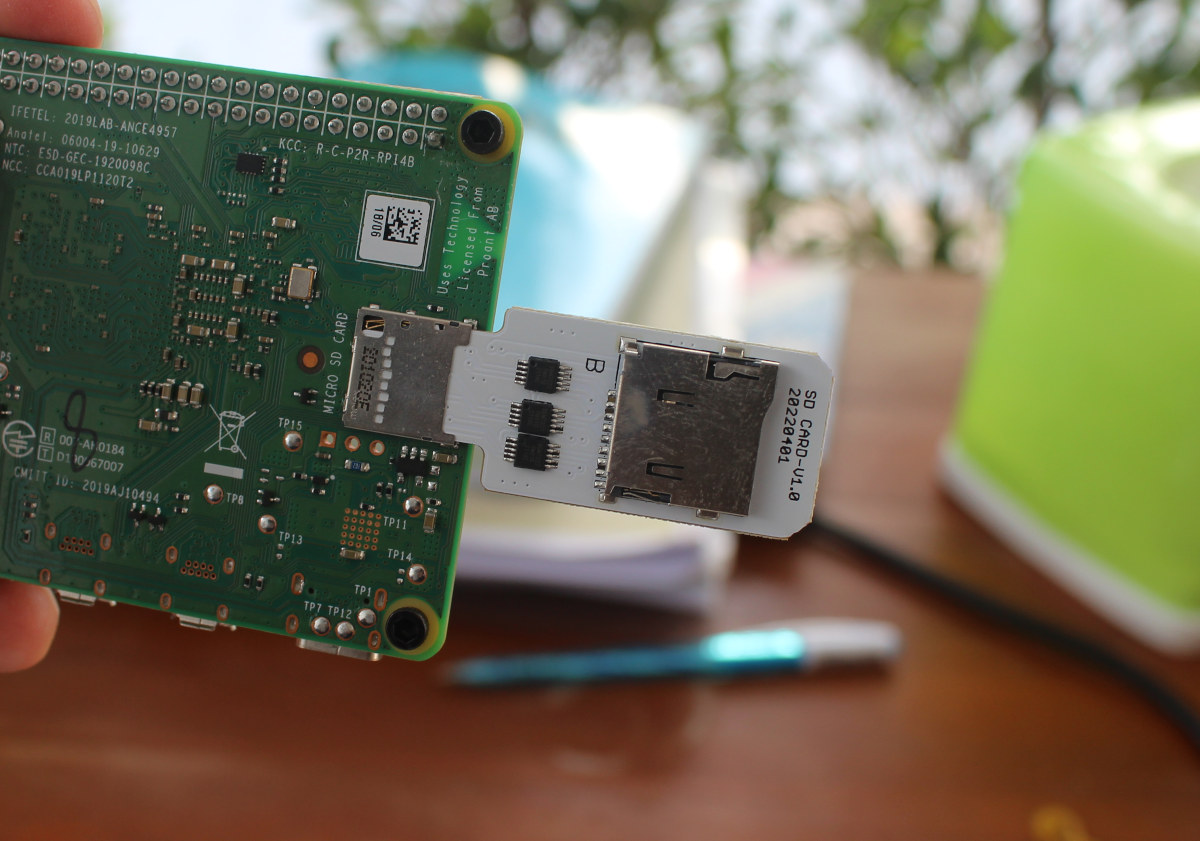
Another interesting point is that there are three microSD sockets in the laptop. One is called “Extend storage” on the motherboard, and there are two more on the microSD card expansion with an A/B switch that allows people to boot the laptop to another operating system, for instance, RetroPie.
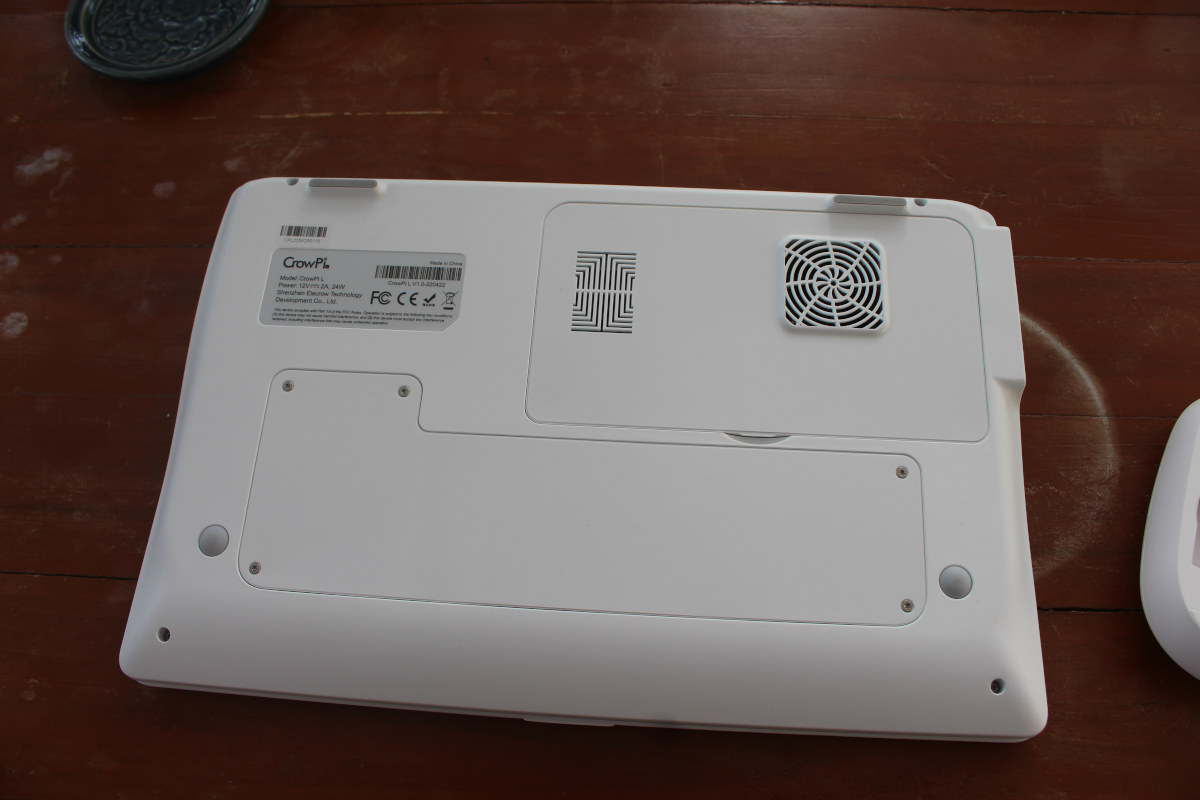
The reverse installation guide ends here, and we’ll now go into the actual teardown. We’ll need a 6-lobed, star-shaped (Torx) screwdriver to remove the screws from the battery cover.
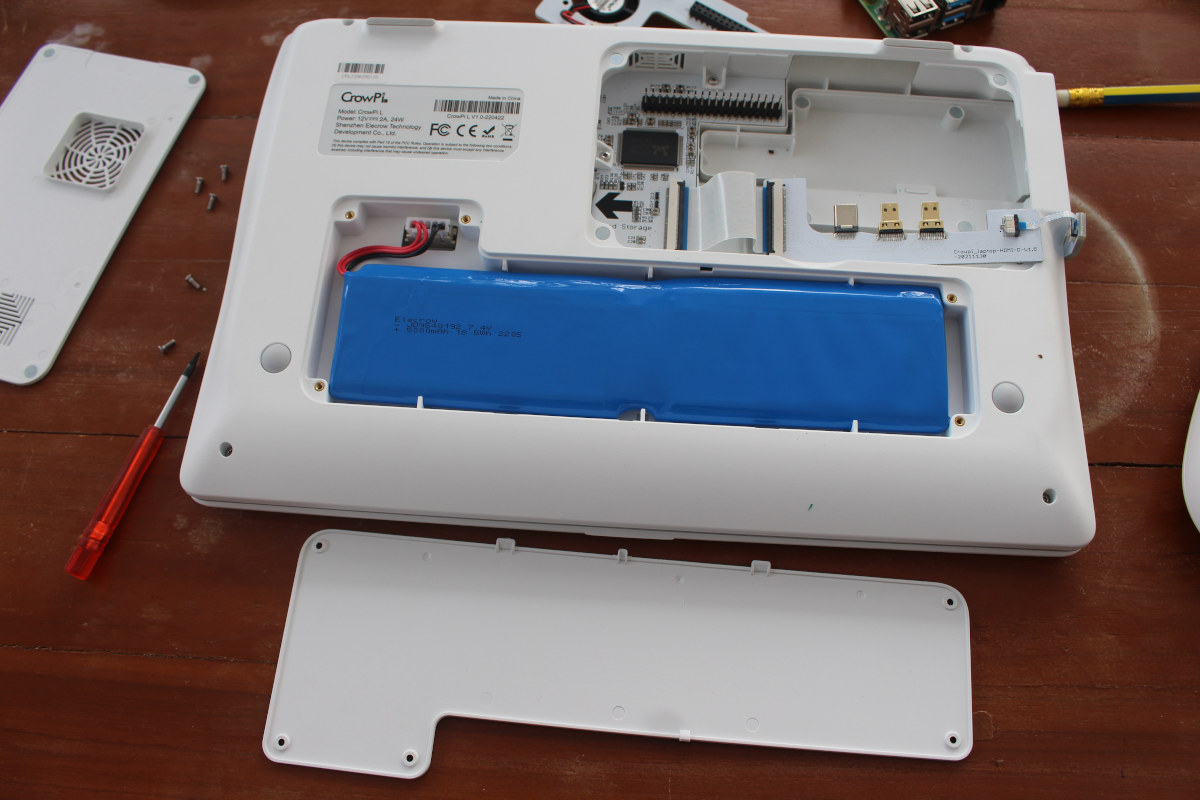
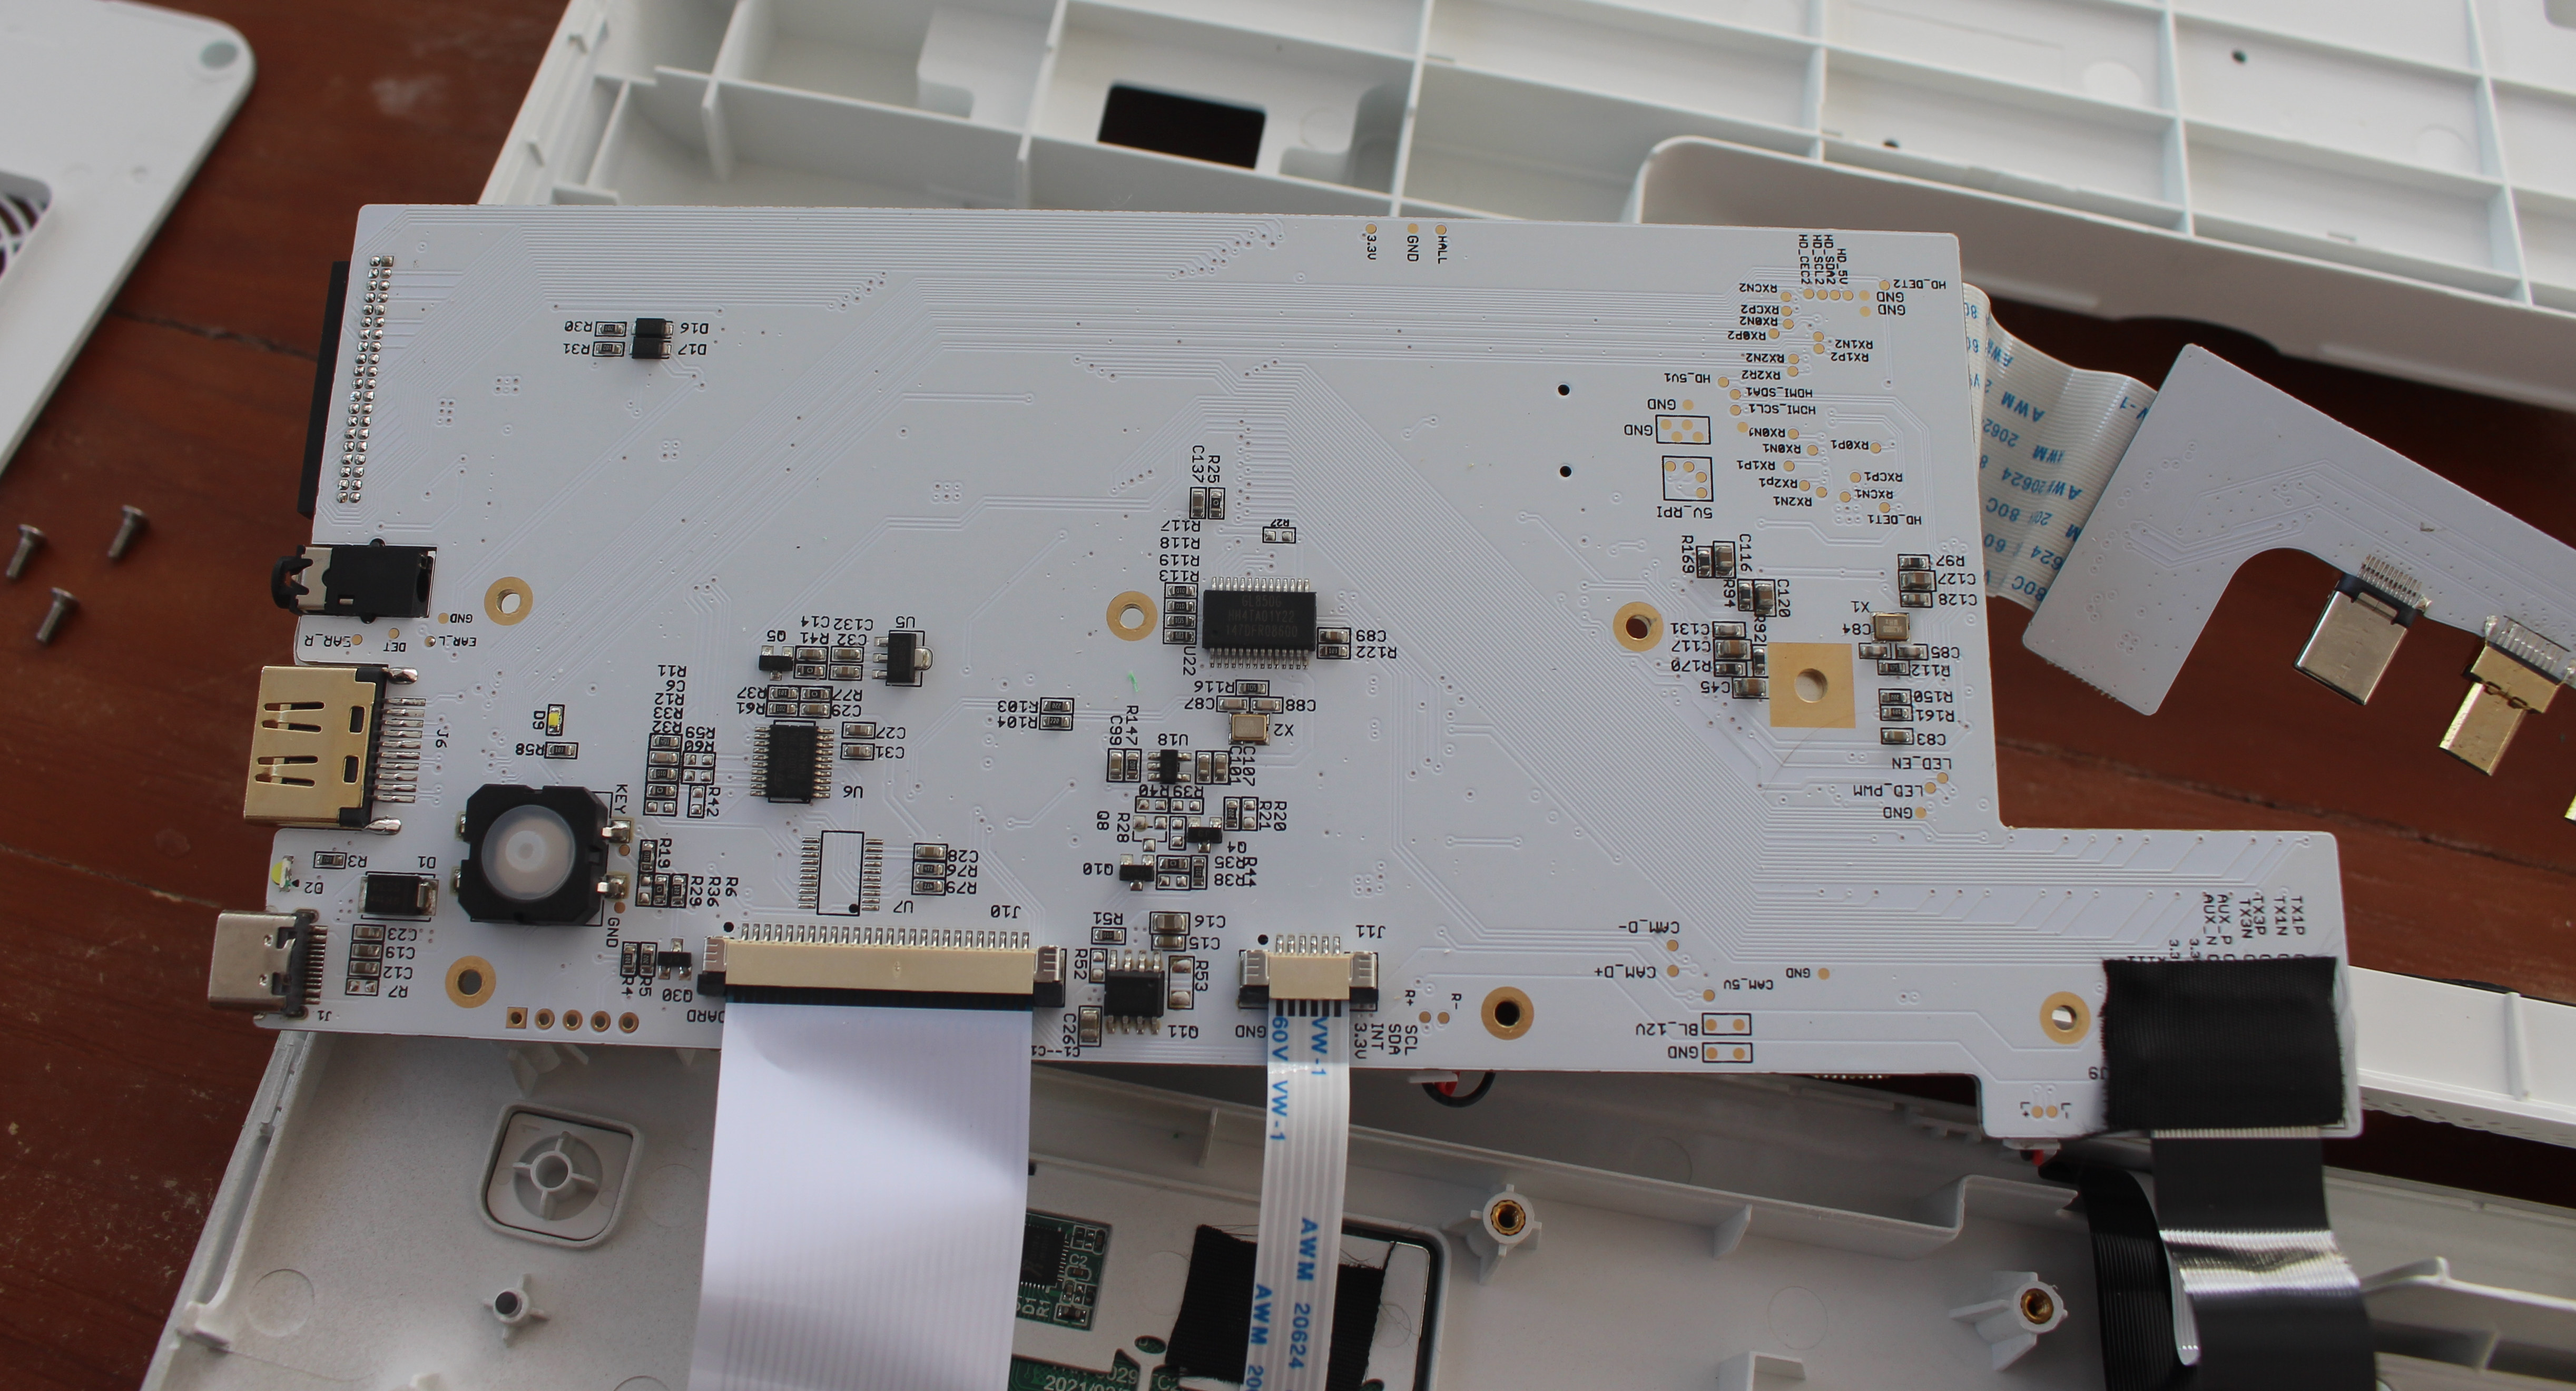
That reveals a replaceable 5,000 mAh, 18.5 Wh battery, which I can’t find for sale right now, but hopefully will be in the future for people who may need to replace it. The next step is to remove the battery, loosen a few more screws, and clip out the plastic cover. That step left some marks/light damage on the cover, but I could have a full look at the motherboard and two speakers.
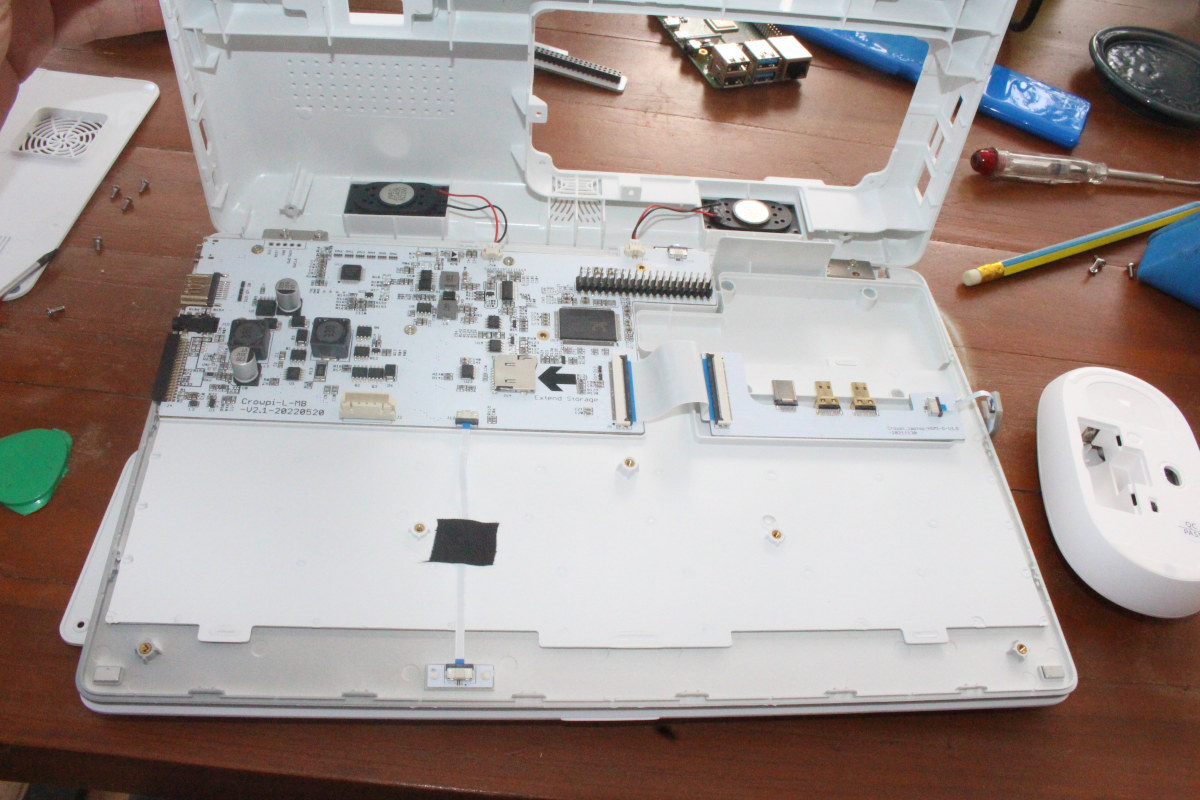
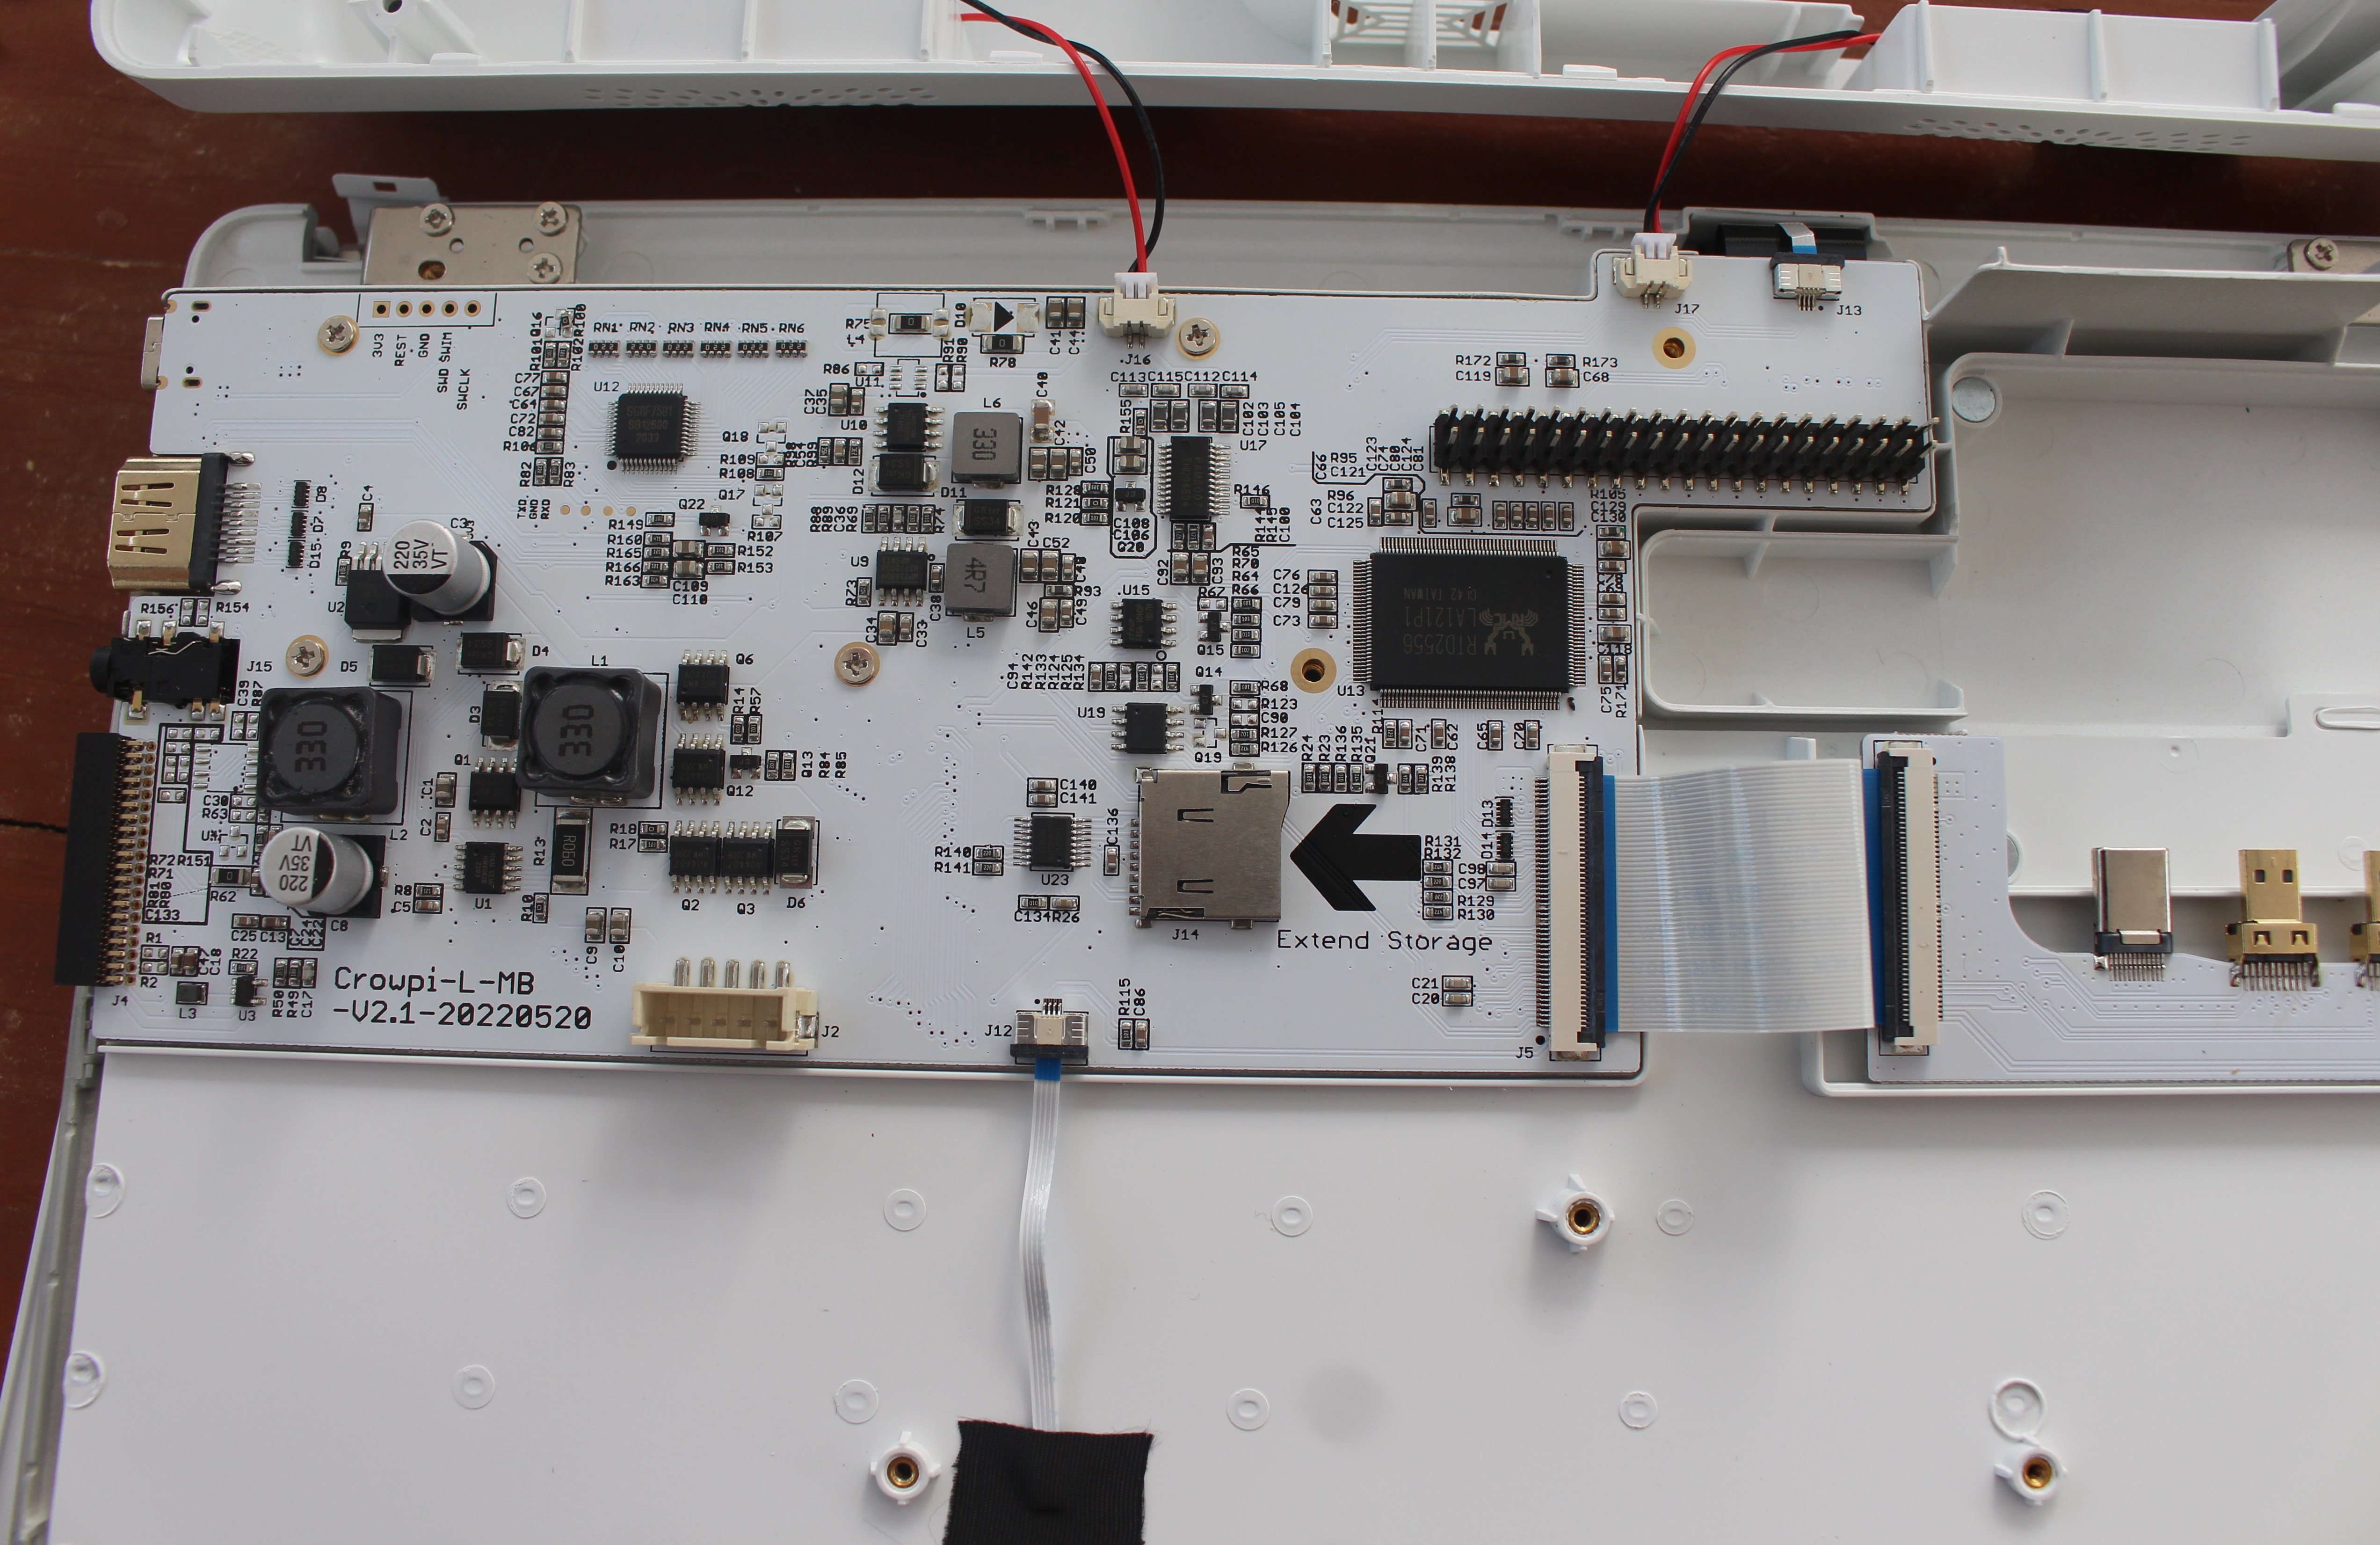
The larger chip on the motherboard is the Realtek RTD2556 display controller that converts HDMI signals into “LCD” signals for the 11.6-inch display., while the Sigma Micro SG8F7581 8-bit 8051 microcontroller clocked at 48 MHz handles the keyboard.
If we look at the other side there’s a GL850G USB 2.0 hub controller that should help control the “Extend Storage” microSD card via another chip, and probably other features such as the touchpad.
That will be all for today. I’d like to thank Elecrow for sending the CrowPi L laptop, Raspberry Pi 4 (8GB RAM), and Crowtail Starter kit for review. The CrowPi L Advanced Kit reviewed here sells for $442 plus shipping, but if you only need the laptop shell, available in white or black, that would be $203.15 plus shipping. The kits are also available on Crowpi.cc with pricing there including shipping.
Continue reading: “CrowPi L Review – Part 2: Learn programming and electronics with a Raspberry Pi 4 laptop“.

Jean-Luc started CNX Software in 2010 as a part-time endeavor, before quitting his job as a software engineering manager, and starting to write daily news, and reviews full time later in 2011.
Support CNX Software! Donate via cryptocurrencies, become a Patron on Patreon, or purchase goods on Amazon or Aliexpress. We also use affiliate links in articles to earn commissions if you make a purchase after clicking on those links.


> designed for STEM education
So this thing is meant for ‘education’ while shipping with a dumb 12V PSU featuring an USB-C connector to destroy 5V devices?
“That will teach them!” if they blow up a 5V device, and they are more likely to check the voltage before plugging a power supply into random devices in the future 😉
What’s the power limits request by EU.
” By autumn 2024, USB Type-C will become the common charging port for all mobile phones, tablets and cameras in the EU, Parliament and Council negotiators agreed today “
https://www.europarl.europa.eu/news/en/press-room/20220603IPR32196/deal-on-common-charger-reducing-hassle-for-consumers-and-curbing-e-waste
As mentioned in ST’s TCPP01-M12 datasheets, USB-C devices are required (per-spec) to have over-voltage IC on the vbus pin since chargers can fault and get stuck on 12V.
Mind you, this “getting stuck” business is very common to the point of being normal. e.g. it’s very common for devices negotiating 12V via a hub to, if only for a moment, spike up the voltage for all the other ports to 12V as well. Though I even seen cases where they simply get stuck on 12V and refuse to come down until renegotiated. Worse case was when I had two devices battling it out on negotiations leaving the voltage to alternate between 12v and 5.5v every few ms…
Anyhow, assuming this is just a dumb charger (where did you put that multitmeter…), consider this PSU as an educational fault tolerance testing device 😀
No different than sticking a 3v into a 5v ,
we can dumb everything down to be idiot proof, but.. this is an educational tool.. you need to be able to make mistakes to learn …
If all electronics were fullproof .. wouldn’t be much to learn?
Building a circuit and putting a diode in the wrong direction, or transistor etc .. can blow up your cicuits ..IMO .
Fried a lot of stuff learning over the years.
But ..i learned !!!
People learn from mistakes. 😉
I really hope Tom Cubie partnered with someone will create something like these with the RK3588 akin to Framework laptop. Slim SBC design (like khadas VIM), large, wide slim heatsink (fanless), removable battery. So, in the future, we could just replace the SBC if we want to upgrade our laptop.
The old one can be easily removed and put in other case for desktop, or HTPC use.
A Pine64 Pinebook with a different bottom and internals ?
Yes, something like pinebook pro. With better design and parts.
Correct me if I am wrong, but the nice part of this design is that if the next version of the RPi has different port layout, unless the 40 pin connector changes, one could upgrade the laptop.
Great Idea, but where do you get good supply of RP4 now to put into it, they are getting hard to come by.