CrowBot BOLT is a smart robot car based on an ESP32 wireless microcontroller and designed for the education market with the ability to program the robot with visual programming, Arduino, or MicroPython.
Elecrow sent me a sample of the CrowBot BOLT kit for evaluation so I’ll have a look at the hardware, show how to assemble it, showcase the features of the built-in firmware, and demonstrate how to program the robot with visual programming, Arduino, and MicroPython using some of the provided code samples.
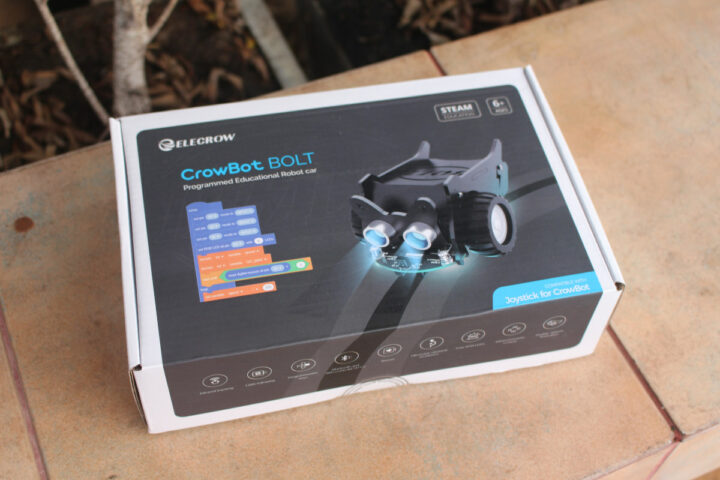
CrowBot BOLT unboxing
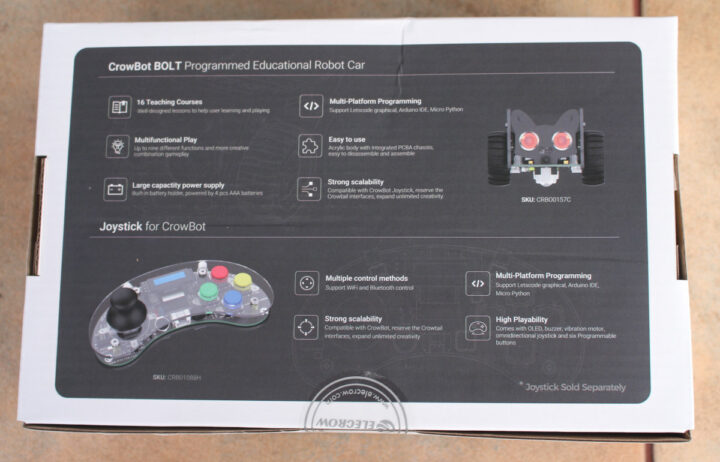
The package lists some of the highlights with 16 teaching courses, support for multiple programming platforms, scalability with Grove connectors, and the inclusion of the Joystick that’s also programmable.
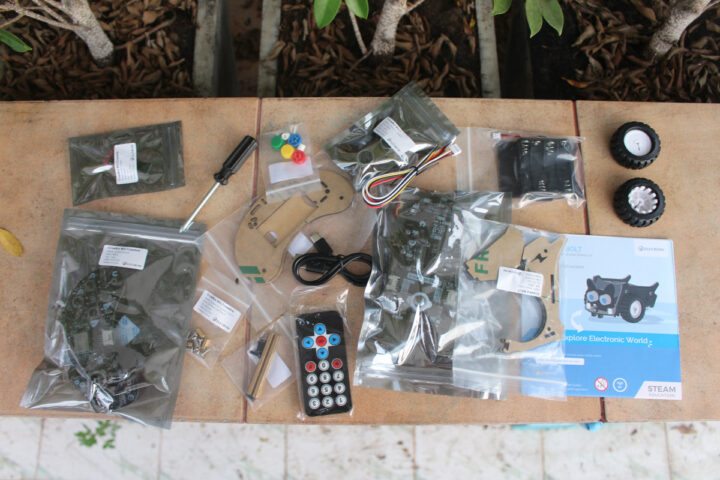
The CrowBot BOLT comes as a kit so there will need to be some work to do to assemble the robot, but no soldering is required (in normal cases, more on that later).
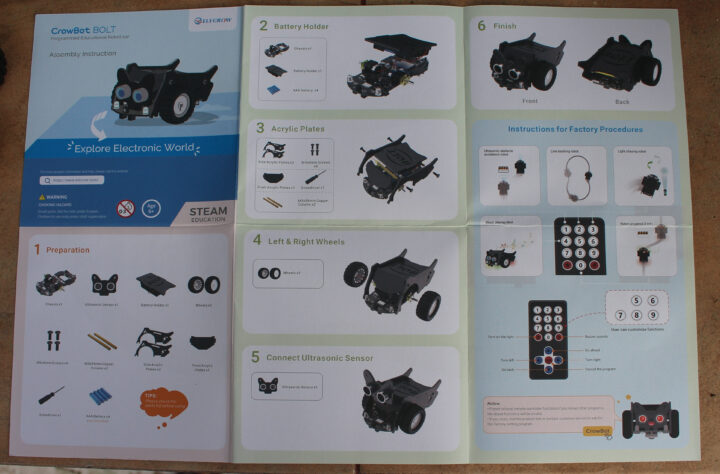
The user manual explains how to assemble the robot, and use the remote control to control it with the default/factory firmware.
The other side of the user is a tracking map that can be used by the robot for line tracking.
Assembly of the CrowBot BOLT smart robot car
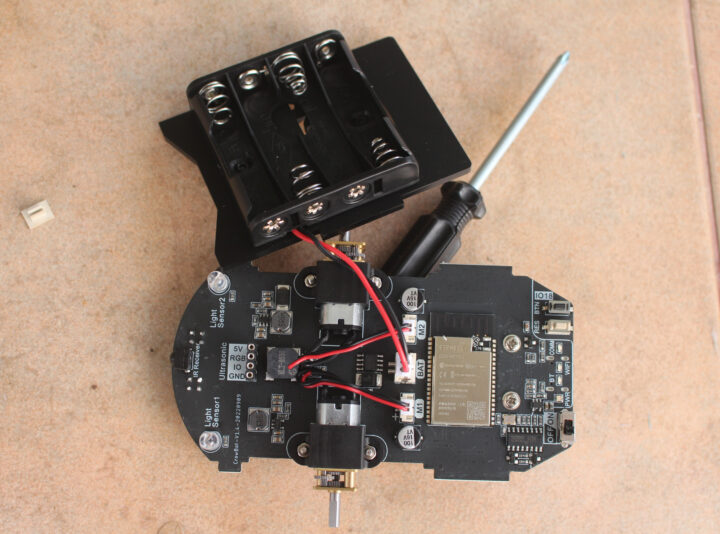
First, we’ll need to connect the battery holder (4x AAA) to the main board based on the ESP32-WROVER-B wireless module by connecting it to the BAT connector. Note while not shown in the photo below, you’ll need to install the battery at that time as well.
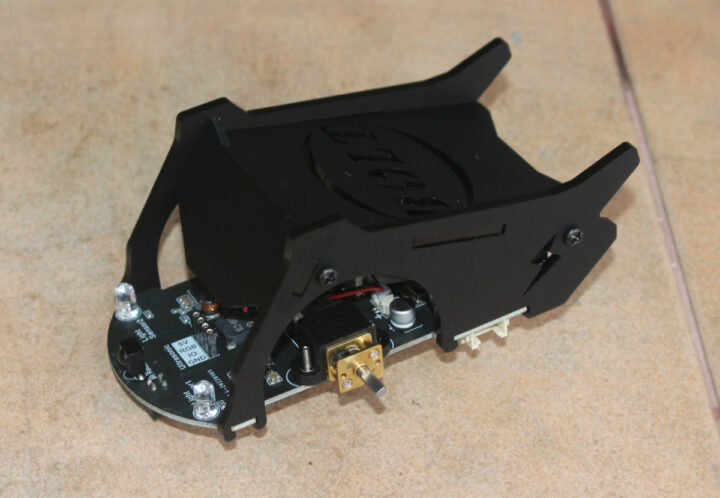
Once done, we’ll need to assemble the acrylic plates and fasten them with the provided spacers and screws.
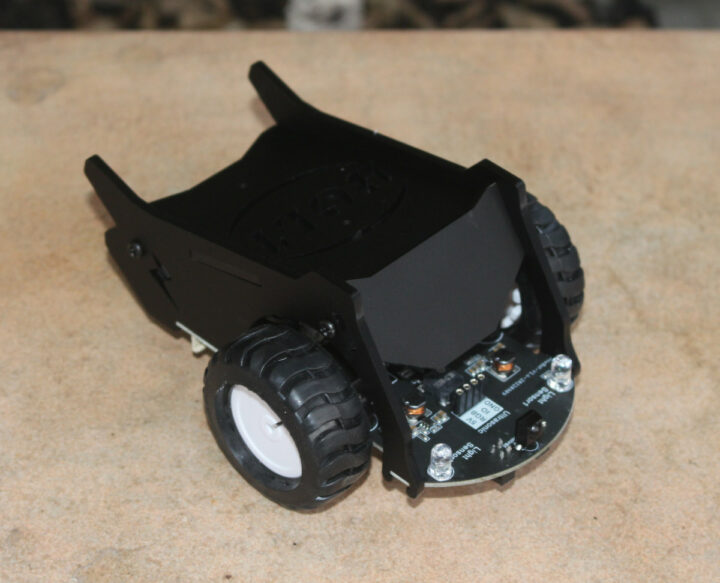
We can then slide the two wheels into the motors’ axles…
… before inserting the ultrasonic sensor into its 4-pin header.
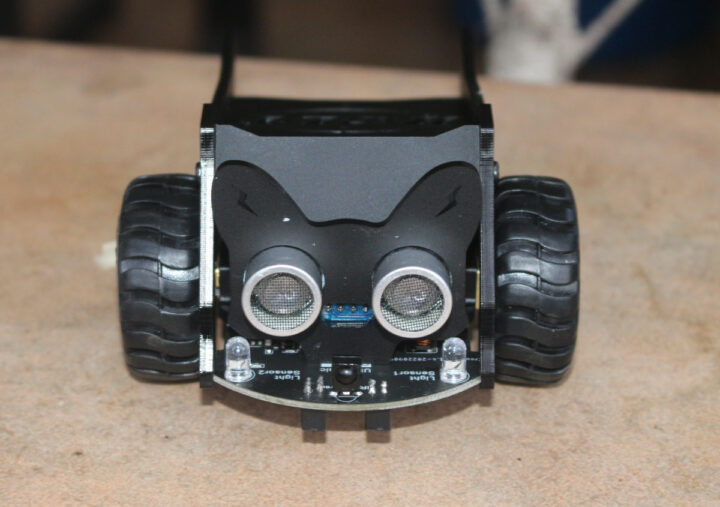
And that’s it. So the front of the robot comes with an ultrasonic sensor, two LEDs, an IR receiver, and two line follower sensors (underneath the board).
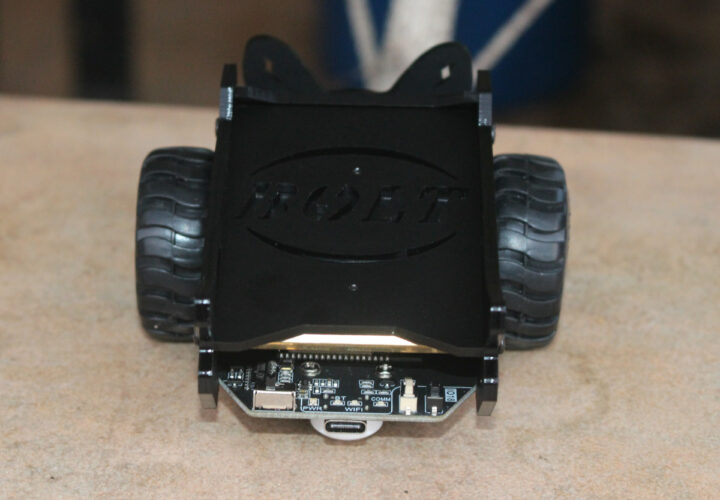
The rear of the car features a power button, some LEDs, and a USB Type-C port for programming.
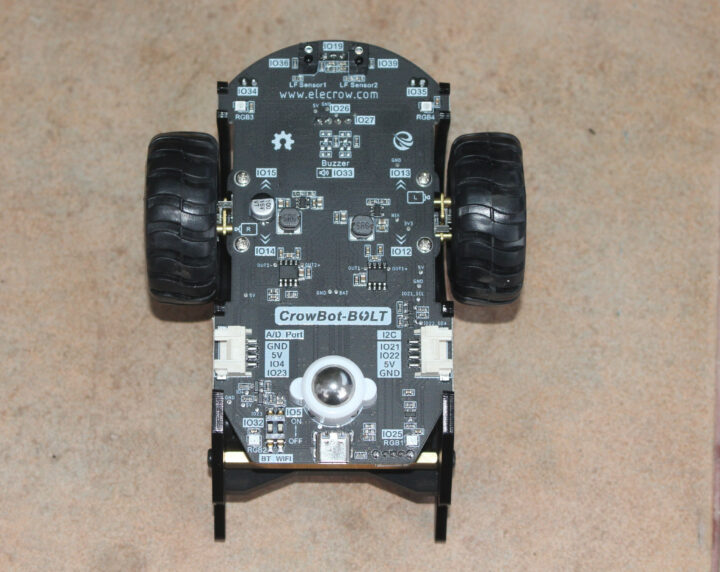
We’ll find the third wheel underneath, together with a DIP switch to enable/disable WiFi and/or Bluetooth, as well as two Grove connectors to add I2C or analog modules.
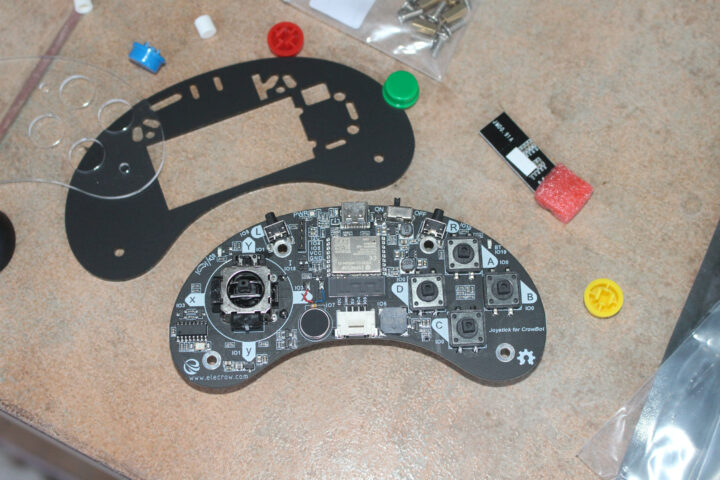
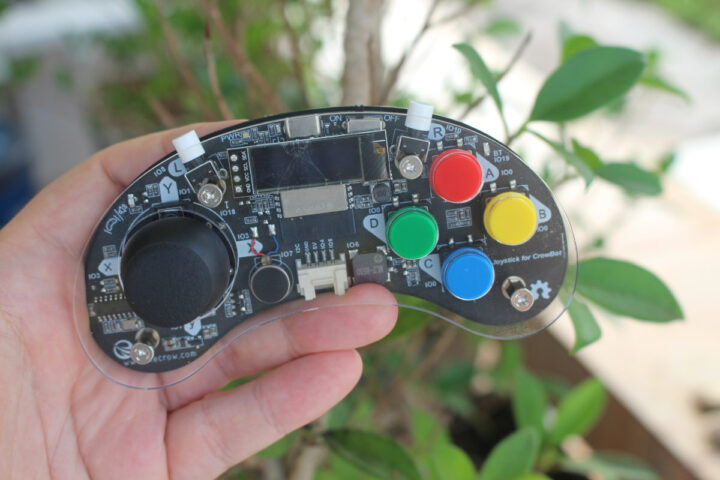
The Joystick also comes as a kit with the mainboard based on an ESP32-C3-WROOM-02 wireless module, some buttons, an OLED display, as well as front and back plates. An “open-source hardware” icon can be seen on both the robot and joystick PCB because the Eagle PCB and PDF schematics as well as the PCB Layout are available for download from the store page we’ll link at the end of this review.
The assembly is pretty straightforward, but sadly my display did not survive shipping and arrived at its destination in a broken state.
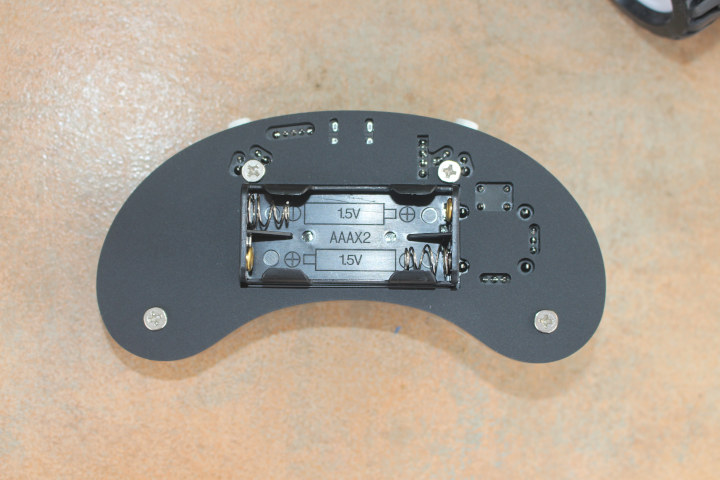
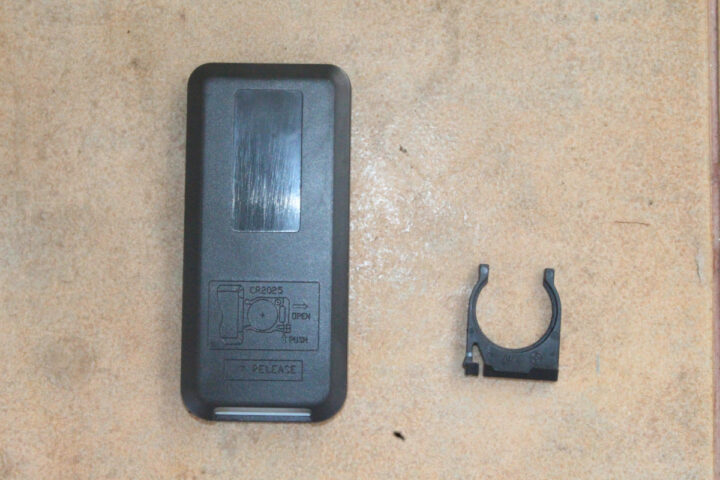
The Joystick is powered by two AAA batteries. So in total, you would need to prepare six AAA batteries, four for the robot, two for the joystick, as well as one CR2025 coin-cell battery for the infrared remote control.
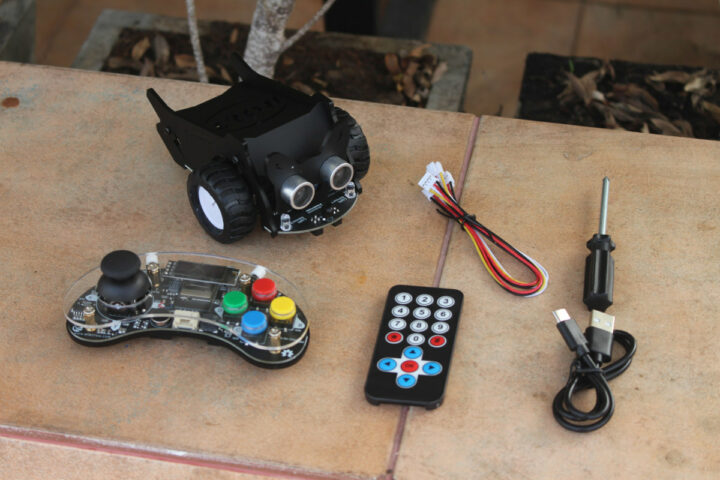
Once the assembly is complete, we are left with the CrowBot BOLT car robot, the CrowBot joystick, the remote control, two Grove cables, a screwdriver, and a USB-A to USB-C cable for programming.
Smart car demos with factory firmware
The robot is ready to use once the assembly is complete, you don’t need to program it at all to try it out with various demos included in the firmware namely obstacle avoidance, line tracking, music playback, light following, as well as a 3-in-1 demo that combines music, line following, and obstacle avoidance. You just need to press some keys on the IR remote control as explained in the provided user manual. You can check out all five demos in the video below.
It’s also possible to control the CrowBot BOLT manually with the arrow keys, as well as trigger the buzzer or turn the light on and off. Note the line tracking demo only worked indoors. If I tried on my porch (like for the obstacle avoidance demo) it would just go backward, and the same thing under the sun. The photodiodes must only be working under specific light conditions.
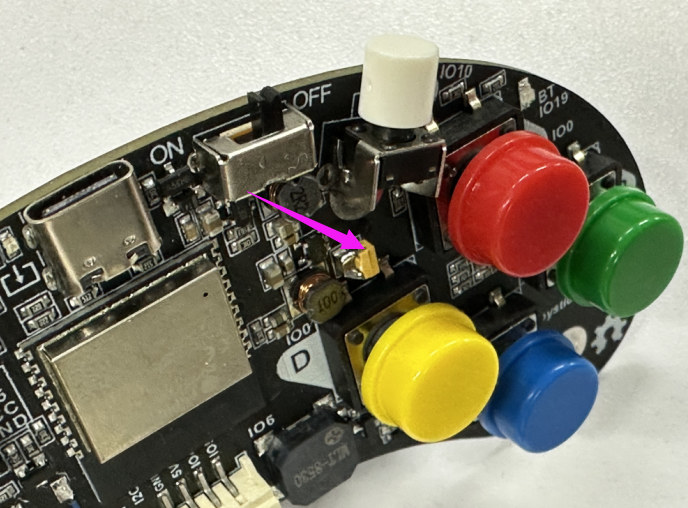
I then tried to use the Joystick, as the default firmware can connect via Bluetooth, but it did not work even after I enabled Bluetooth with the DIP switch, but that’s because of a capacitor, and the company tells its customers to solder a different capacitor to make it work… That seems crazy that they didn’t bother to rework their board and decided to push that to the customer, but it is what it is… Maybe it’s part of the educational experience 🙂
Programming the CrowBot BOLT
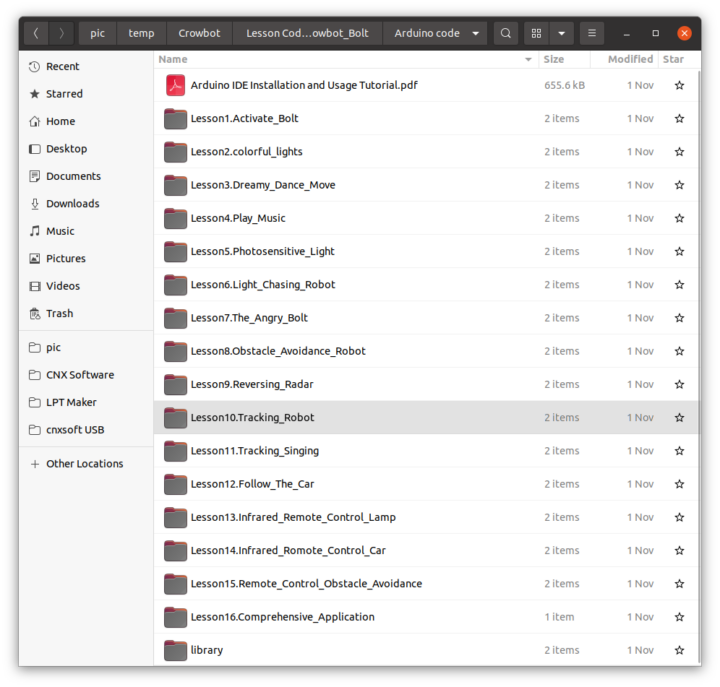
The company provides further details on a wiki to help people get started with programming. Alternatively, you can find all code including the factory firmware, and Letscode visual programming, Arduino, or MicroPython lessons in a zip file.
Letscode visual programming
I’ve already used the Letscode program when reviewing the CrowPi L and CrowPi 2 laptops based on the Raspberry Pi 4 SBC, but I don’t have those anymore. So I had to download it to install it on my computer. The program is sadly only available for Windows and macOS, or Raspberry Pi, and I have a laptop running Ubuntu 20.04. I was surprised it worked on Linux for Arm (Raspberry Pi), and not Linux x86-64, but the company confirmed that was the case by email.
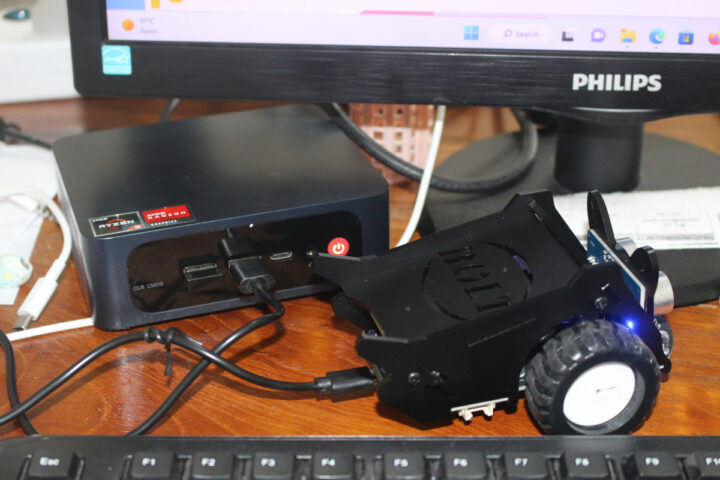
So I used a Windows 11 mini PC instead to install Letscode.
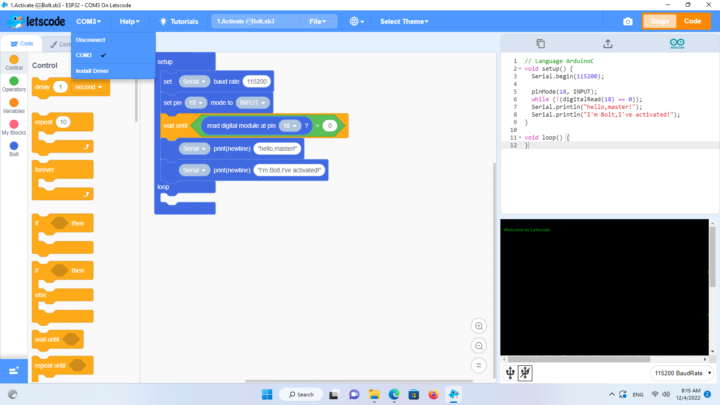
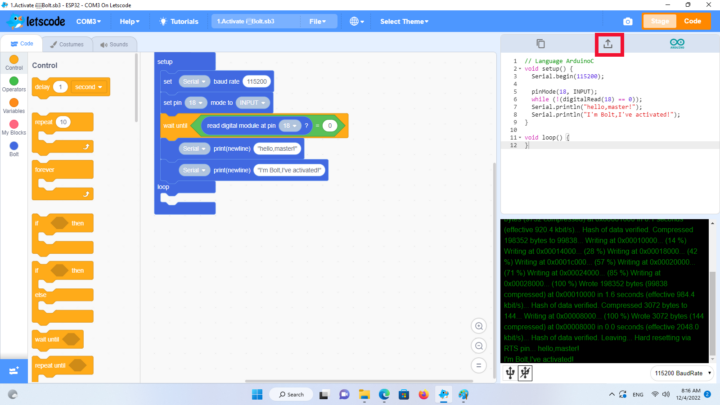
I then loaded the Activate Bolt.sb3 sample project from the lesson code, and clicked on Install Driver in the top menu to install the “Arduino USB driver”. I also connected the Crowbot BOLT robot car to the mini PC with the USB cable and turned it on, and a COM3 port showed up.
Finally, I clicked on the Upload code icon to flash the firmware to the robot, and press the Reset button once complete to see the “Hello World” text in the serial terminal.
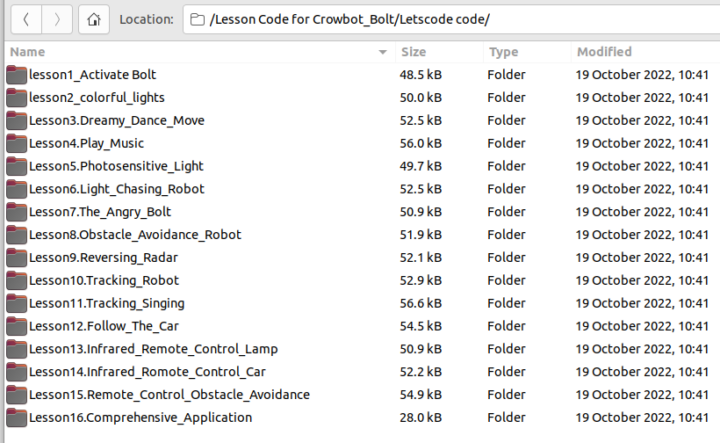
The example shows that we can program the robot, but it’s not fun since we are not using its electric motors. There are 16 lessons in total:
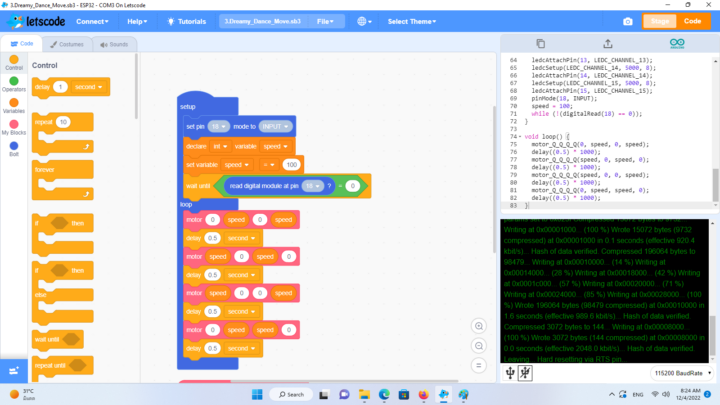
Let’s go with lesson 3: Dreamy Dance Move since it has some blocks to drive the motors.
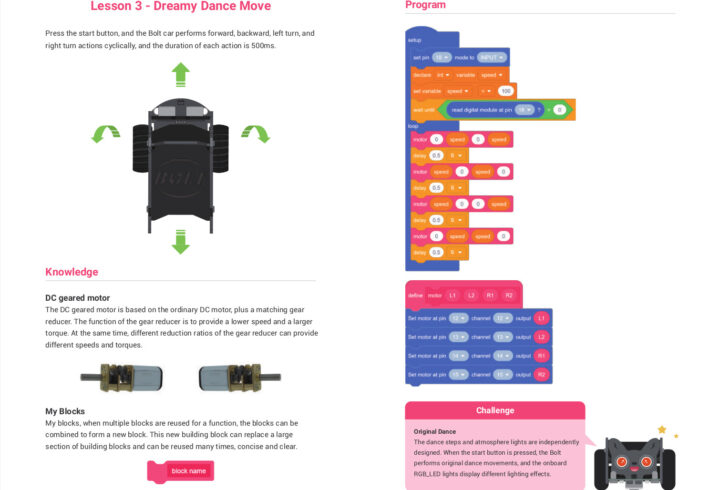
I could load the program to the robot as previously, but the loop will only be trigged if pin 18 is set to zero. There’s no comment in the code, nor documentation in the ZIP file with the code, and I had to open the schematics to find out pin 18 is connected to the user button, and once I press it the robot had a gentle “dance” on the desk with my low volume sound from the buzzer. I was initially unimpressed I had to open the schematics to find out, but then I noticed Elecrow wrote a “beginner’s guide” for Letscode on Crowbot BOLT.
It also happens to explain the user button is connected to GPIO 18 in lesson 2. So all good after all. It would probably have been nice to include the PDF together with the Code as they have done for the Arduino IDE.
Arduino programming
There are the same 16 lessons for Arduino plus the user’s manual and the libraries.
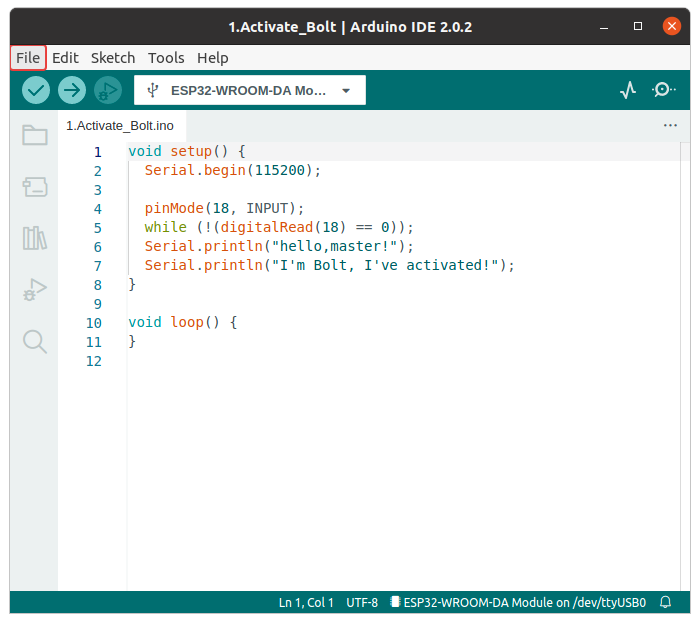
I’ll go back to my Ubuntu 20.04 laptop to install the latest Arduino 2.0.2 IDE. The documentation tells us to go to File ->Preferences to add the following JSON files to the Additional boards manager URLs field:
|
1 2 |
https://raw.githubusercontent.com/espressif/arduino-esp32/gh-pages/package_esp32_dev_index.json https://raw.githubusercontent.com/espressif/arduino-esp32/gh-pages/package_esp32_index.json |
in order to install ESP32 boards support, but it was already installed on my system even though I don’t have the JSON files above. It was stuck to version 2.0.0 without the possibility to update it, so I uninstalled it, added the two lines above, and installed the latest 2.0.5 version which has support for the ESP32-WROOM-DA module somehow needed for the robot.
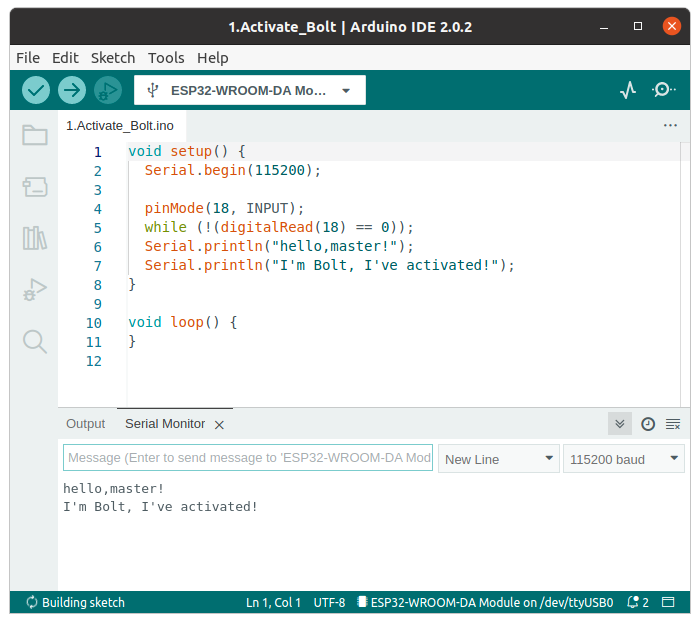
Lets’ try the “Activate Bolt” sketch first after selecting ESP32-WROOM-DA Module and /dev/ttyUSB0 in the IDE:
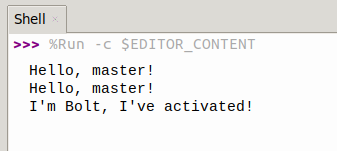
After we press reset to restart the board, open the serial monitor in the Arduino IDE, and press the user button, we get the Hello World, or rather “Hello, master” output as expected.
Let’s now open a sample that controls the motors of the smart car robot, namely 8.Obstacle_Avoidance_Robot.ino:
|
1 2 3 4 5 6 7 8 9 10 11 12 13 14 15 16 17 18 19 20 21 22 23 24 25 26 27 28 29 30 31 32 33 34 35 |
int distance = 0, Ultrasonic_Pin = 27, Button_pin = 18; void setup() { for (int i = 12; i <= 15; i++) { ledcSetup(i, 255, 8); ledcAttachPin(i, i); } while (digitalRead(Button_pin) == 1); } void Get_Distance() { pinMode(Ultrasonic_Pin, OUTPUT); digitalWrite(Ultrasonic_Pin, HIGH); delayMicroseconds(20); digitalWrite(Ultrasonic_Pin, LOW); pinMode(Ultrasonic_Pin, INPUT); int Time_Echo_us = pulseIn(Ultrasonic_Pin, HIGH); distance = Time_Echo_us / 58; } void Motor(int L1, int L2 , int R1, int R2) { ledcWrite(12, L1); ledcWrite(13, L2); ledcWrite(14, R1); ledcWrite(15, R2); } void loop() { Get_Distance(); if (distance < 20) { Motor(255, 0,0, 255); } else { Motor(0,255, 0, 255); } } |
I would have expected the need to import some libraries and more complex code, but the sample for obstacle avoidance is incredibly simple… I still wish there were some comments in the code.
So that one I had to turn off the robot, disconnect the USB cable, place the Crowbot BOLT on the floor, turn it on, and press the user button to get started. It was exactly the same behavior as in the factory firmware showcased in the earlier video.
Programming the Crowbot BOLT with MicroPython
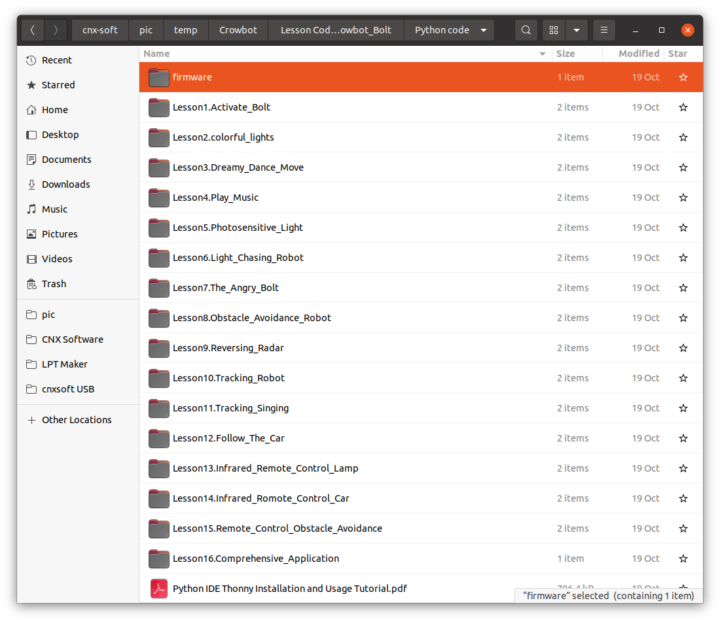
We have the same 16 lessons in the Python directory, as well as the MicroPython firmware, and a programming guide.
There are using Thonny IDE for programming, and me too. I had troubles with the Thonny 3.3.3 installed on my computer, as it would find the serial port, so I upgraded it to version 4.0.1 with:
|
1 |
pip install --upgrade thonny |
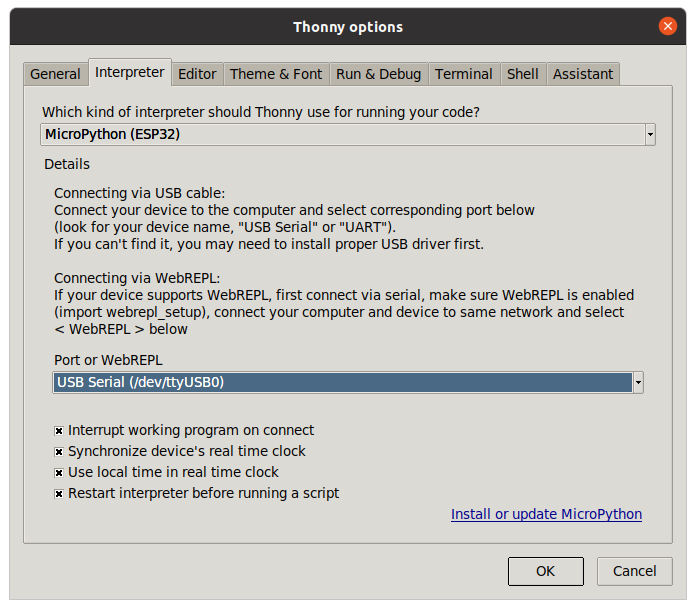
I could select “MicroPython (ESP32)” and the serial device (/dev/ttyUSB0) after going to Tools->Options:
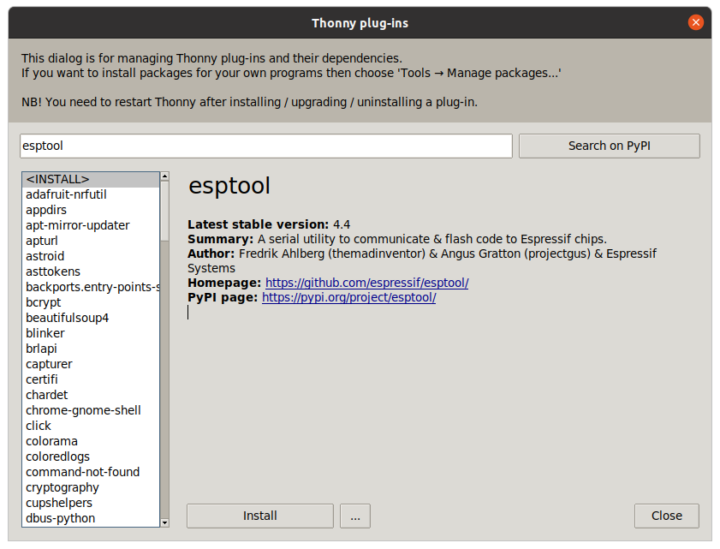
But I could not install MicroPython firmware to the robot just yet, because esptool was not installed. It can be added by going to Tools->Manage plug-ins, and searching for esptool.
Once this is done, we can go back to the previous window and select “Install or update MicroPython”.
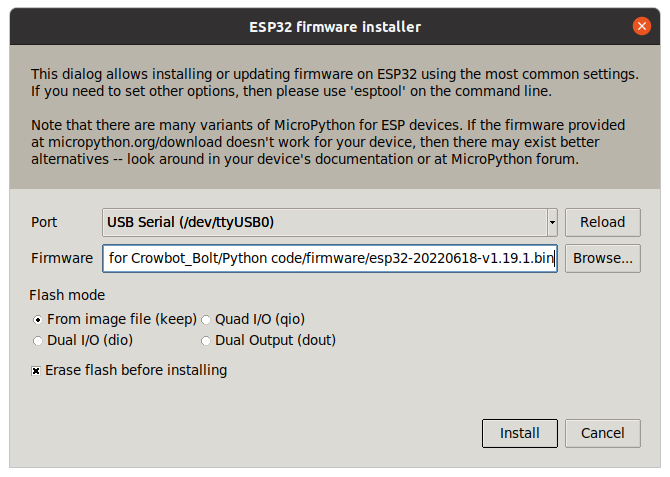
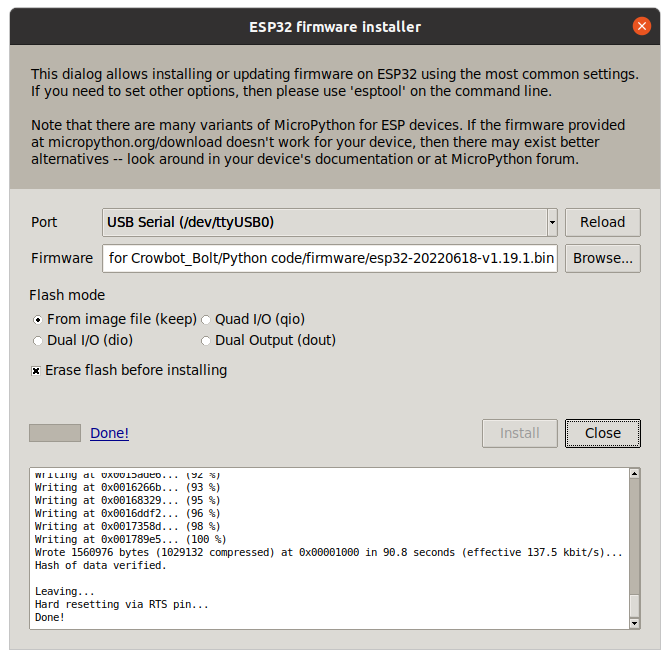
A new popup will show up where we can select the Port, and the “esp32-20220618-v1.19.1.bin” firmware file provided by Elecrow, before clicking on the Install button to complete the process. I still had some issues with the “esptool not found” error, so I installed esptool from the command line again:
|
1 |
pip3 install esptool |
and this time, I could install the MicroPython firmware successfully.
So I loaded the Activate Bolt sample:
|
1 2 3 4 5 6 7 8 9 10 11 |
from machine import Pin import time button=Pin(18,Pin.IN,Pin.PULL_UP) print("Hello, master!") while True: if button.value() == 1: pass else: if button.value() == 1: print("Hello, master!") print("I'm Bolt, I've activated!") |
The serial console output is as expected after pressing the user button:
Next, I loaded the line tracking program:
|
1 2 3 4 5 6 7 8 9 10 11 12 13 14 15 16 17 18 19 20 21 22 23 24 25 26 27 28 |
from machine import Pin,PWM,ADC import utime button = Pin(18, Pin.IN) QTI_L=Pin(39,Pin.IN,Pin.PULL_UP) QTI_R=Pin(36,Pin.IN,Pin.PULL_UP) def motor(L12,L13,R14,R15): PWM(Pin(12)).duty(L12) PWM(Pin(13)).duty(L13) PWM(Pin(14)).duty(R14) PWM(Pin(15)).duty(R15) if __name__ == '__main__': while button.value() == 1: pass else: while True: QTI_MAX = QTI_L.value() * 2 + QTI_R.value() if QTI_MAX == 0: motor(800,0,800,0) elif QTI_MAX == 1: motor(0,800,0,400) elif QTI_MAX == 2: motor(0,400,0,800) elif QTI_MAX == 3: motor(0,1000,0,1000) |
Again, I was expecting something a bit more complicated. Still, some comments in the code would have been welcomed, as the code may not be 100% obvious… Since the program is not convenient to test on my desktop, I save the Micrpython script to the robot, by clicking on Save As, and then the MicroPython device button.
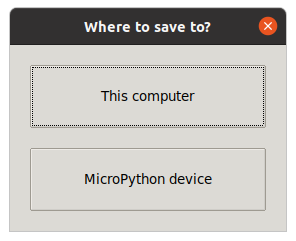 and save it as boot.py on the device.
I then turned off the robot, disconnected the USB cable, placed the Crowbot BOLT on the tracking map, turn it on, and pressed the user button to get started. It was exactly the same behavior as in the factory firmware showcased in the earlier video.
Final Words
Elecrow’s Crowbot BOLT is an inexpensive smart robot car for the education market that can help kids understand the various components required on this type of robot, and learn programming through a visual programming IDE, as well as the Arduino IDE, or a Python IDE such as Thonny. There’s some documentation for the 16 Letscode visual programming lessons, but more details on how it works would be welcome, as the tutorial won’t explain basics such as PWM and how the motors work. The MicroPython and Arduino Python lessons are designed to be used after learning about visual programming, and the documentation is limited to installing and configuring the IDEs to work for the robot, and the code lacks comments to clearly understand what’s taking place.
Despite the few shortcomings, I still think the Crowbot BOLT may be an interesting piece of kit for STEM education, especially since it sells for just $34.90 plus shipping, or $57.80 with the JoyStick as in this kit, but be prepared to have to modify the hardware to make Bluetooth work as noted in this guide.

Jean-Luc started CNX Software in 2010 as a part-time endeavor, before quitting his job as a software engineering manager, and starting to write daily news, and reviews full time later in 2011.
Support CNX Software! Donate via cryptocurrencies, become a Patron on Patreon, or purchase goods on Amazon or Aliexpress


