
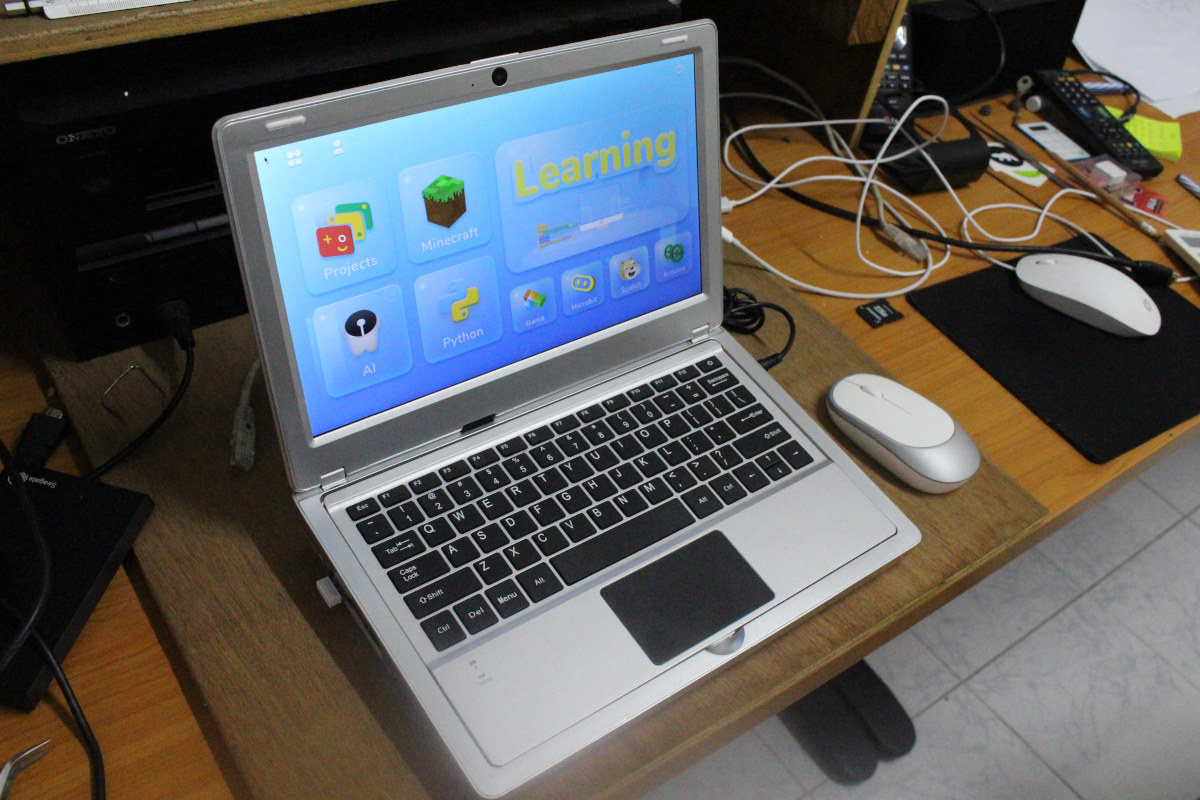
I started my review of CrowPi2 Raspberry Pi 4 Learning Kit a while ago and at the time I showed content from the kit and its first boot. I’ve now spent more time with this very special Raspberry Pi 4 laptop and will focus this review on the education part, namely CrowPi2 software, but will also look at thermal cooling under stress with and without a fan, and try to install another Raspberry Pi compatible board inside the laptop shell.
CrowPi2 Education Software
It’s quite important to read the user manual before getting started as there are a few non-intuitive steps you may have to take. First I assume the wireless keyboard would just connect after pressing the power button, but it did not.
The user manual explains the RF dongle is inside the mouse, and once you connect it you’ll be able to use the keyboard that has some battery charge out of the box, and can be charged via a micro USB cable. The camera and microphone also require you to connect a separate USB cable, but more on that later.
At first boot, you’ll be asked to go through Raspberry Pi OS setup to have the most-to-date version of the OS, and from now on the laptop will start with CrowPi2 education software by default.
The user interface has icons for Learning, Projects, Minecraft, AI, Python, Game, Microbit, Scratch, and Arduino. We’ll go through each, but not in detail because there are hundreds of tutorials and lessons. So instead I’ll try one example in each to give an idea of what the laptop has to offer.
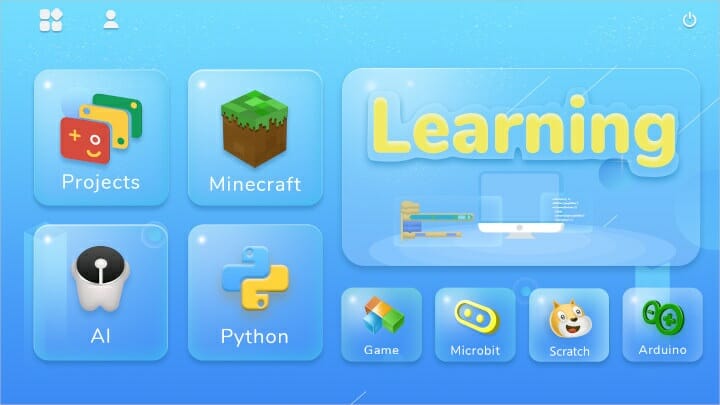
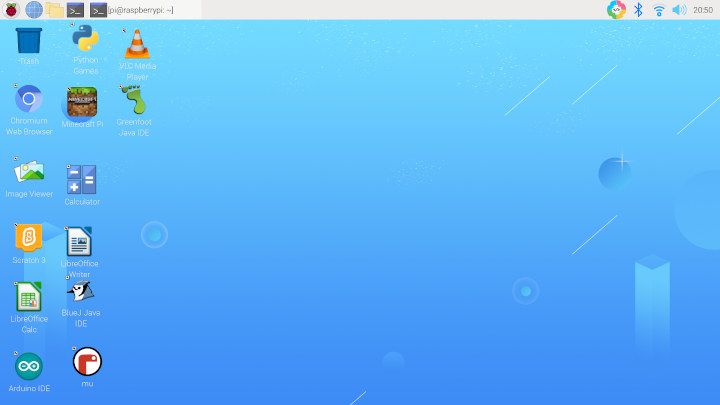
If you click on the top left icon, you’ll be redirected to Raspberry Pi OS desktop environment, and clicking on the blue, red, yellow, and green ring icon on the navigation bar will take you back to CrowPi2 interface.
But the first thing we should go, as per the user manual is to create an account by clicking on the second icon on the top.
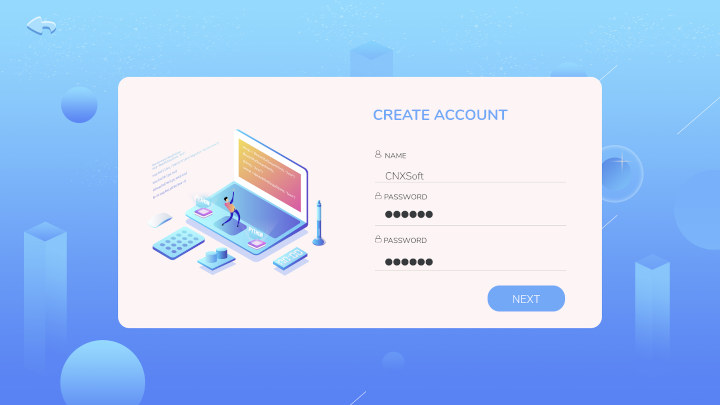
The account is offline, i.e. not synchronized to the cloud, and allow several kids to use the laptop, and get back to where they left last time.
With hindsight, I’d recommend starting with Projects (no code, just shows how to use each component), then Learning (basic Python/Scratch), and finally AI (more advanced Python) and other sections as the level of difficulty increases.
Learning
I’ve started with Learning and we’re asked to choose between Python with 32 lessons or scratch with 16 lessons.

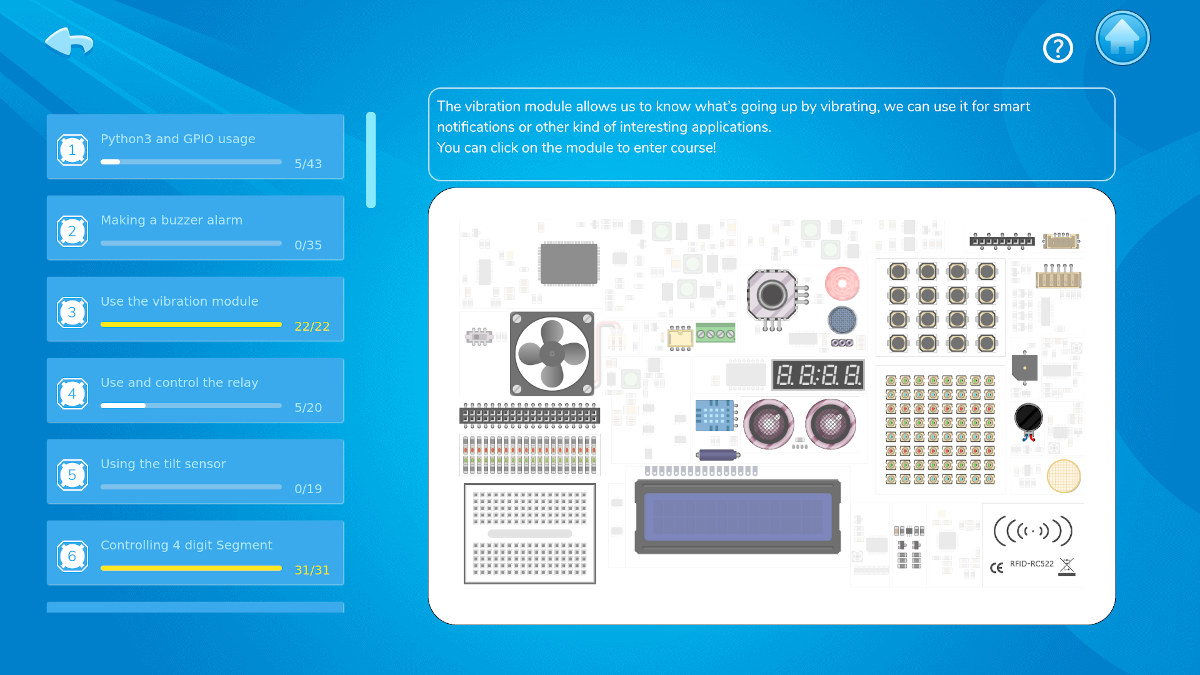
I’ve gone with Python first, and after a few lessons (complete and partial), you can see the process is shown for each, and students can hover the mouse pointer over the components illustration to learn more about each component.
I’ve gone a bit random in the way I approach learning, but I’d recommend just learning in sequence: lesson 1, lesson 2 , 3, etc…
Let’s look into a particular lesson to see what exactly the platform has to offer: 4-digit segment display.
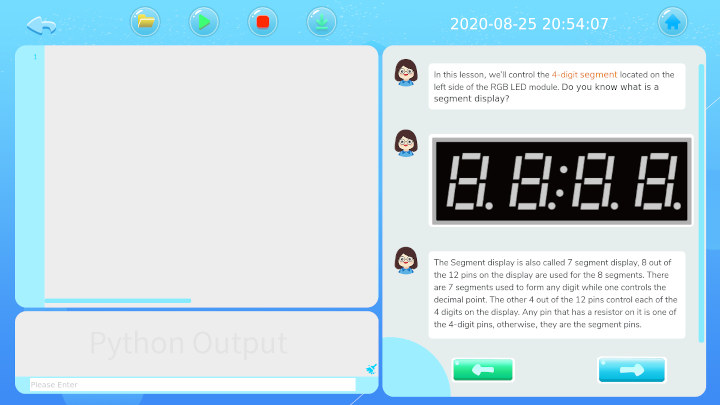
We have icons to open a file, run code, stop code, and save a file. The top left section is to write Python, the bottom left shows Python output, and the right side provides step-by-step instructions and explanation.
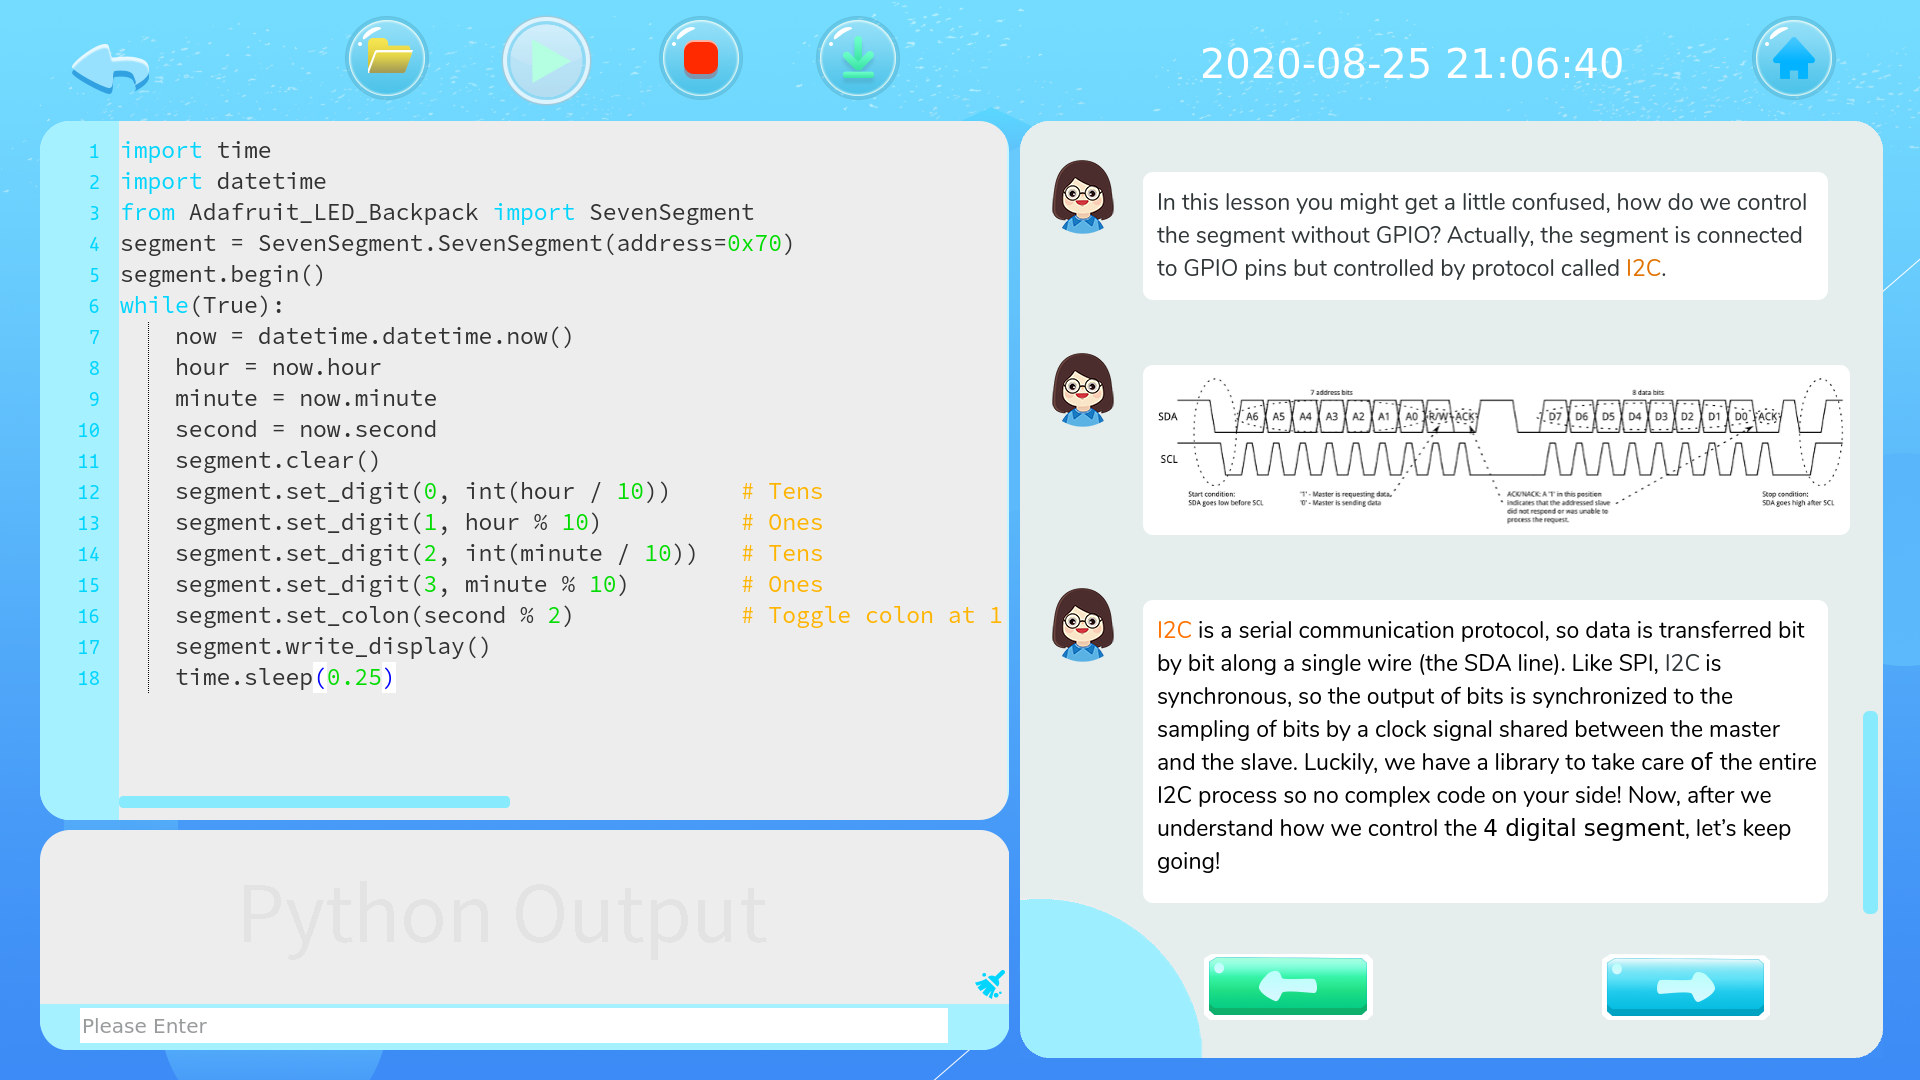
The teacher will also explain what each line of code does, and introduce the students to interfaces likes I2C in detail. It’s possible to copy the code with the mouse plus Ctrl+C or middle click.
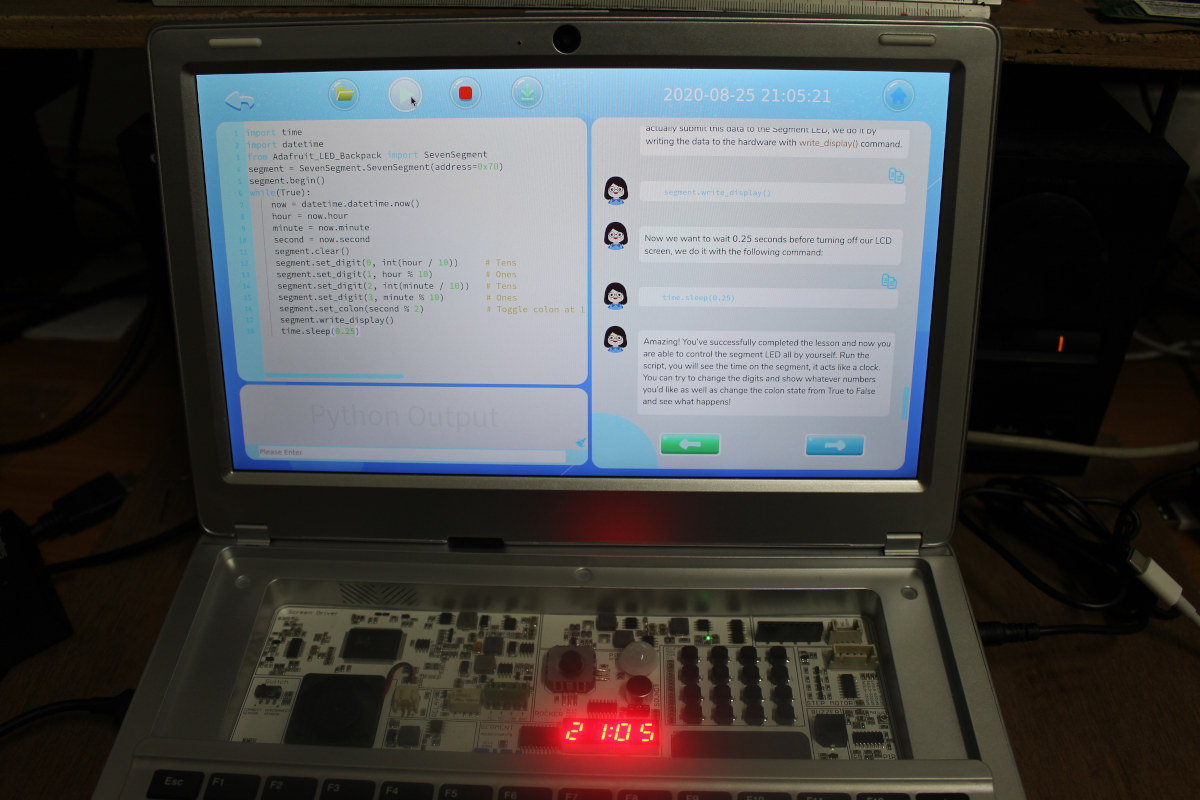
Once the lesson is complete, we can run the code, and show the current time displayed on the 4-digit segment display. So far, I’m really impressed and feel this can be a great platform to learn electronics and Python.
Let’s switch to Scratch.
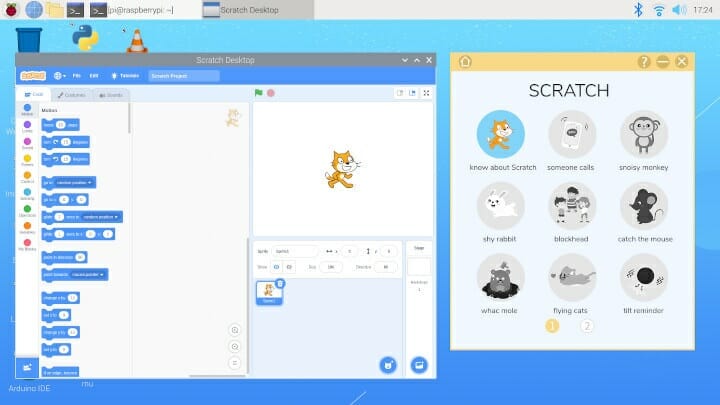
It will open Scratch visual programming application on the left and the lesson on the right. The first lesson explains what Scratch does.
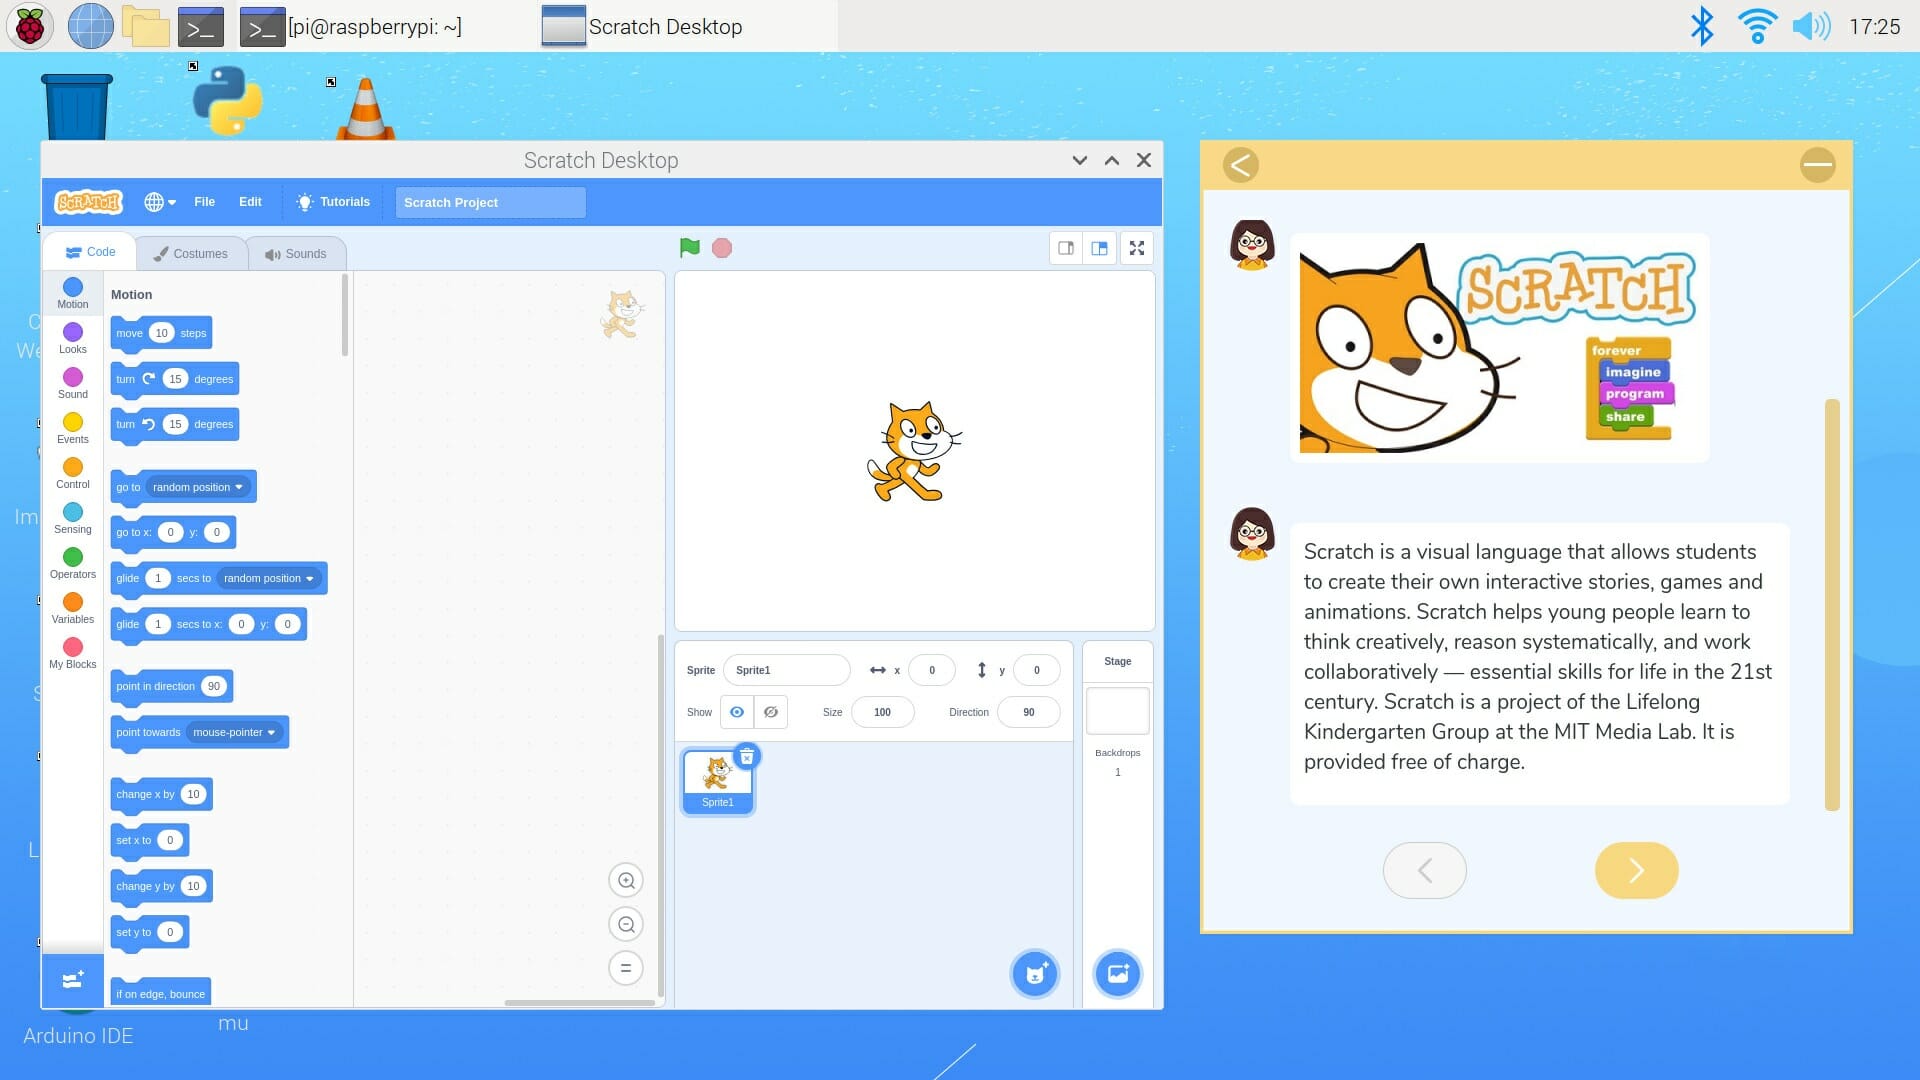
As a side note having Scratch windowed on an 11.6-inch Full HD display makes the text really small. I had to wear my reading glasses to carry on…
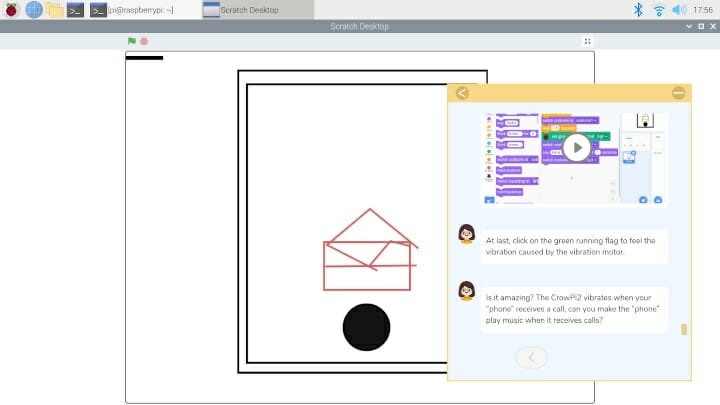
I went with the “someone calls” to get started with visual programming. The lesson mixes text with videos to explain the steps that involve drawing…

and connecting blocks to perform tasks, add timers, text, etc…
Projects
I should have started with the Projects section as there’s no coding just some examples of using various components.
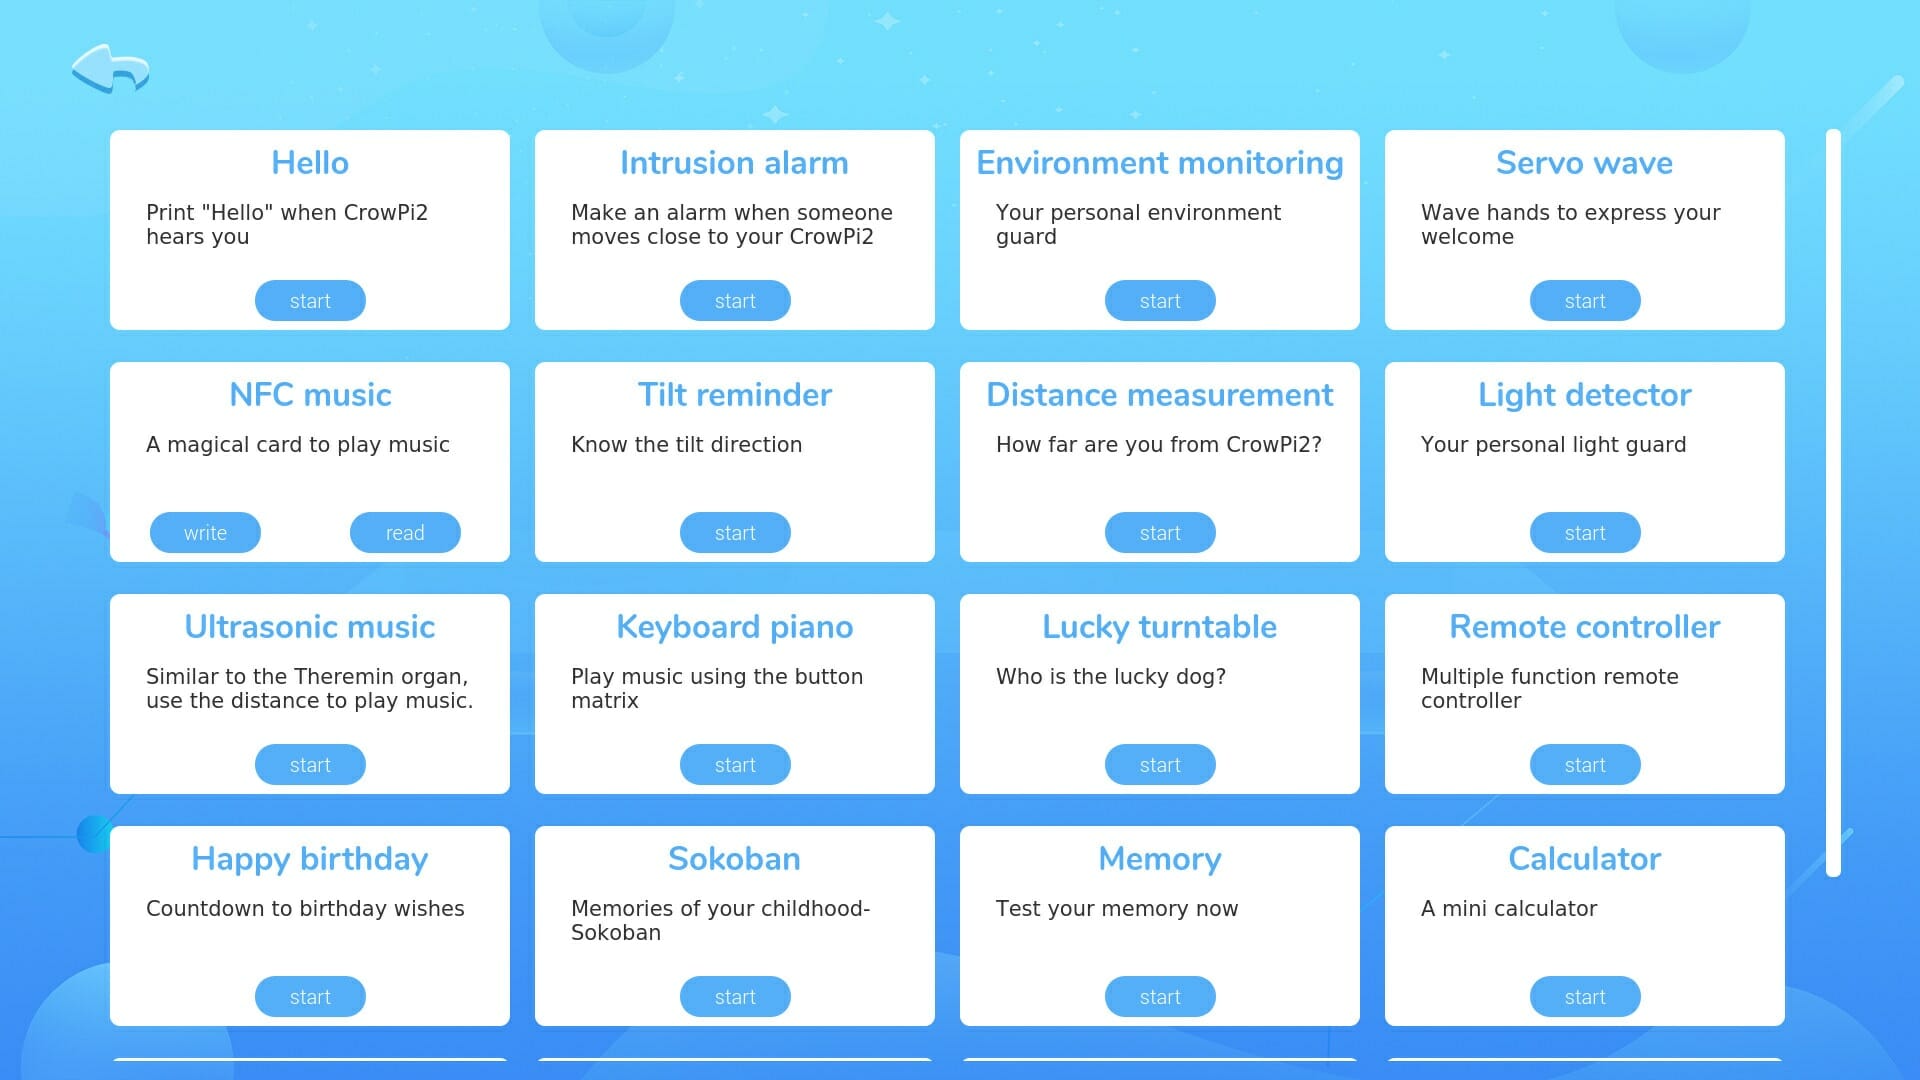
I went to the NFC music section for testing. We need to start by writing to the card.
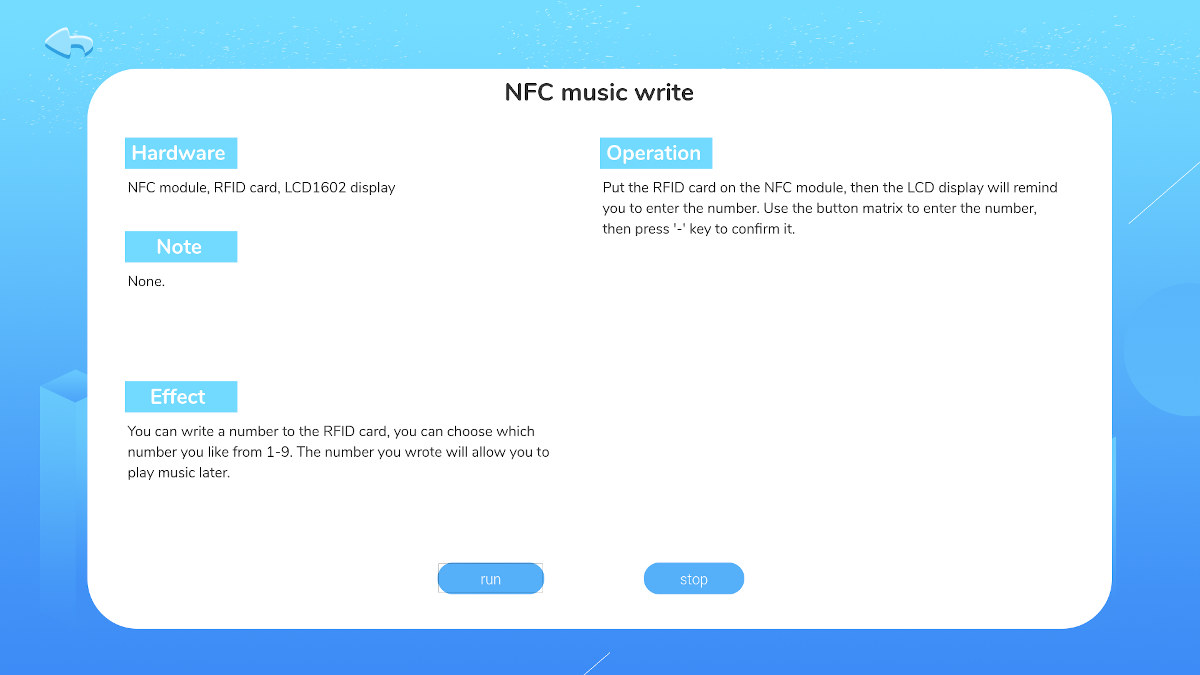
The demo uses the NFC module, RFID card, LCD1602 display, and button matrix. Click run, read the instructions on the display, press the buttons as asked, and it should end with “Success ” written on the display.
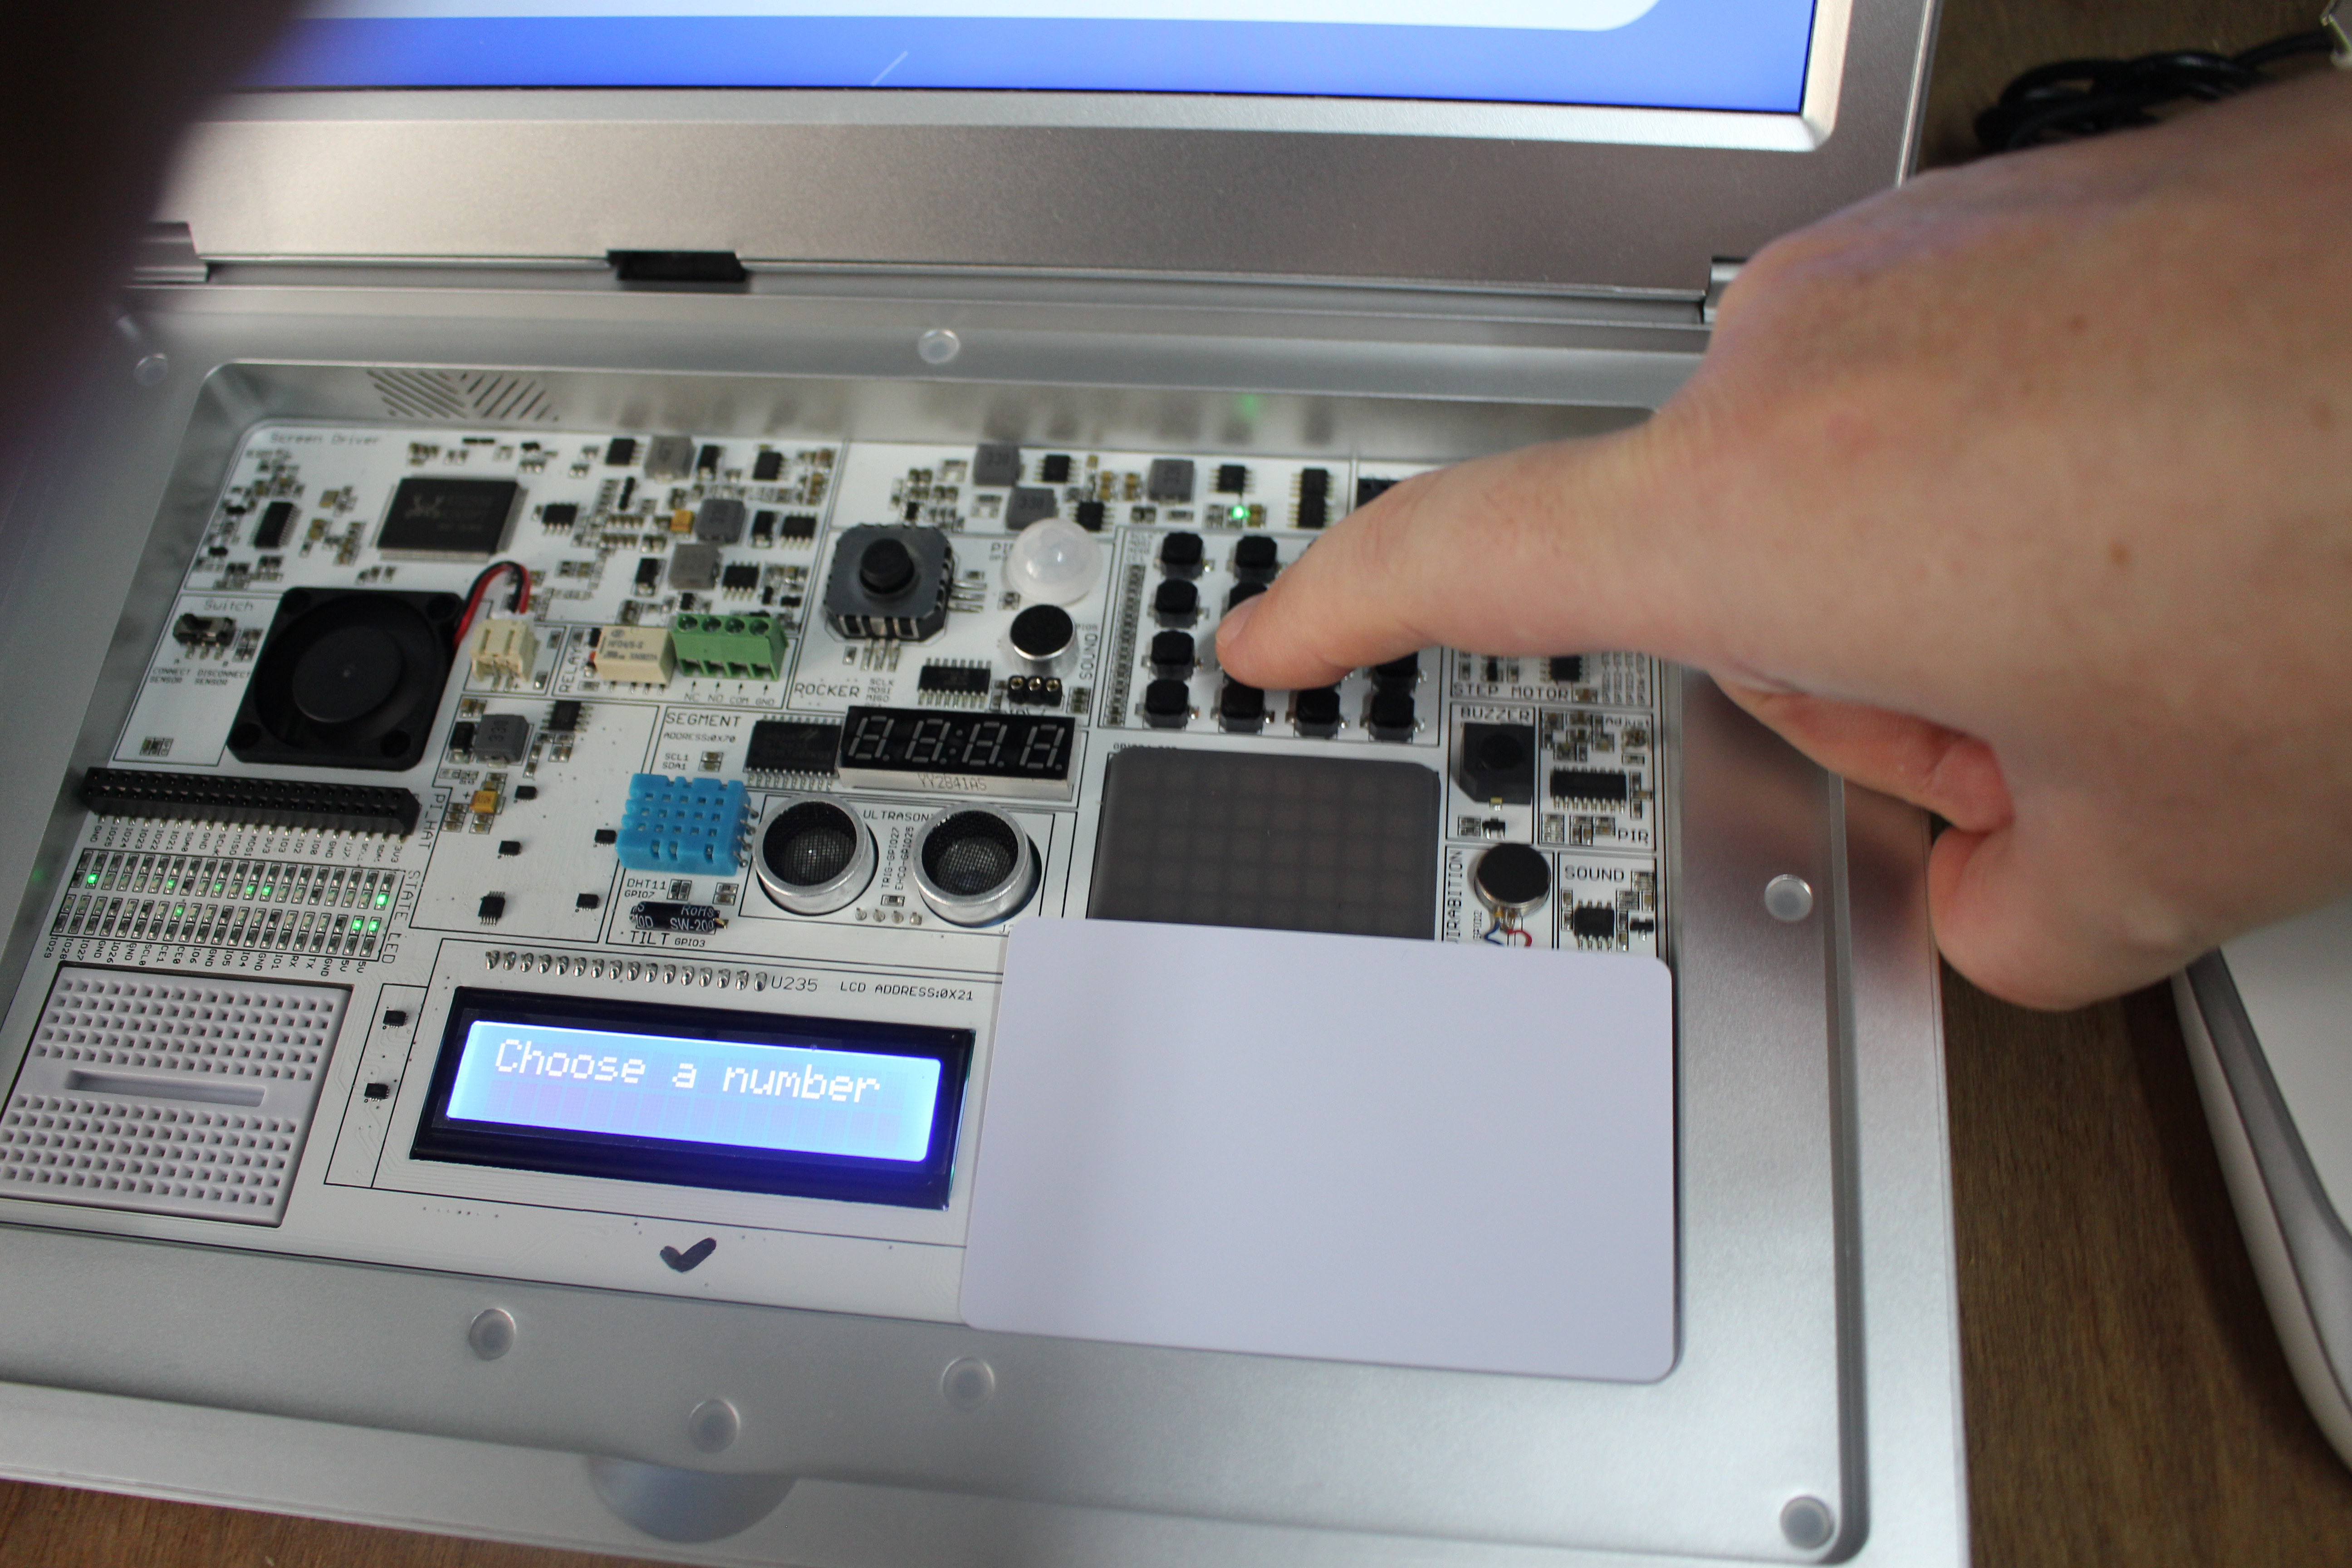
All good. Now we need to read the number in order to play music preinstalled in the device.
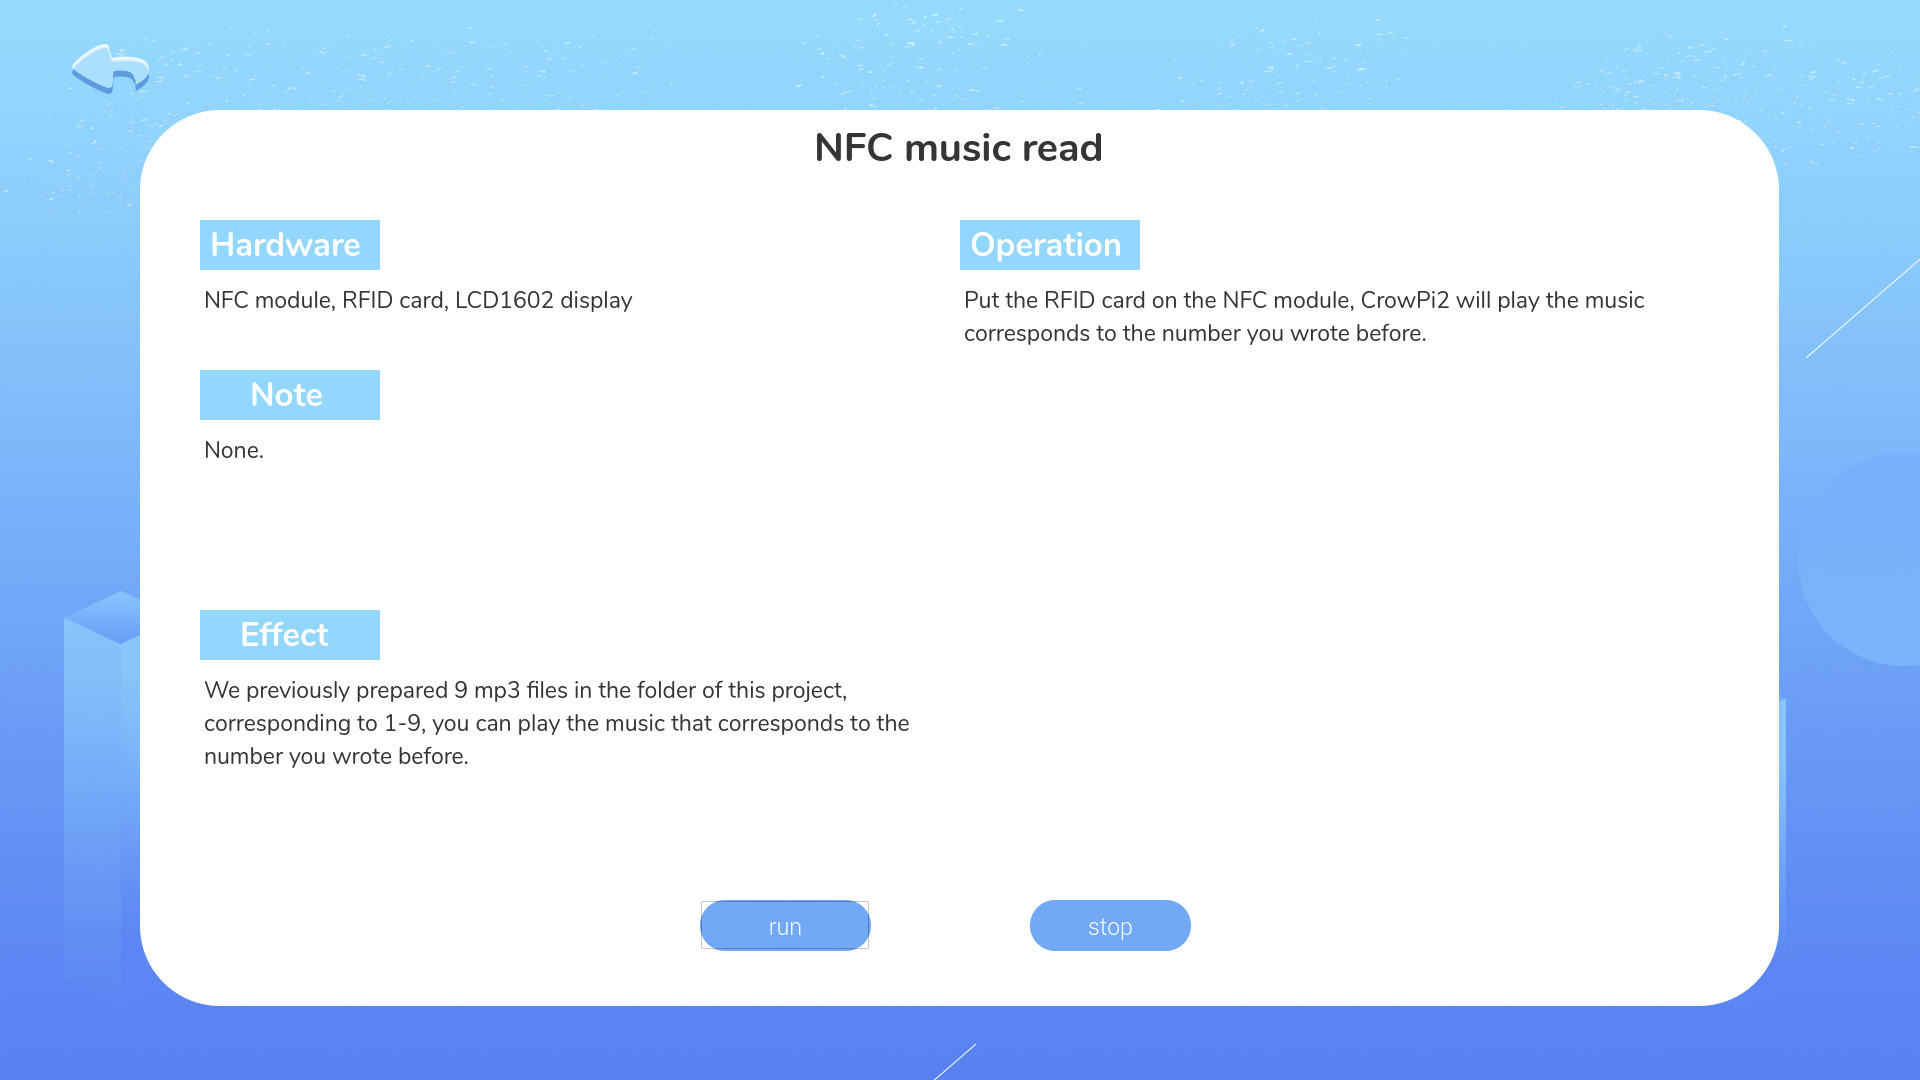
So I clicked on Run and placed the card on the NFC reader, but nothing happened with the display simply showing “Checking” forever. I contacted the company about this issue, and they make it install some Python script (pi-rc522.zip), but it made things worse, with CrowPi2 software becoming install (crashing often), and the writing demo would not work anymore.
Minecraft
Minecraft is a game, but the section is not only about gaming since there are 16 Python lessons to customize the game.
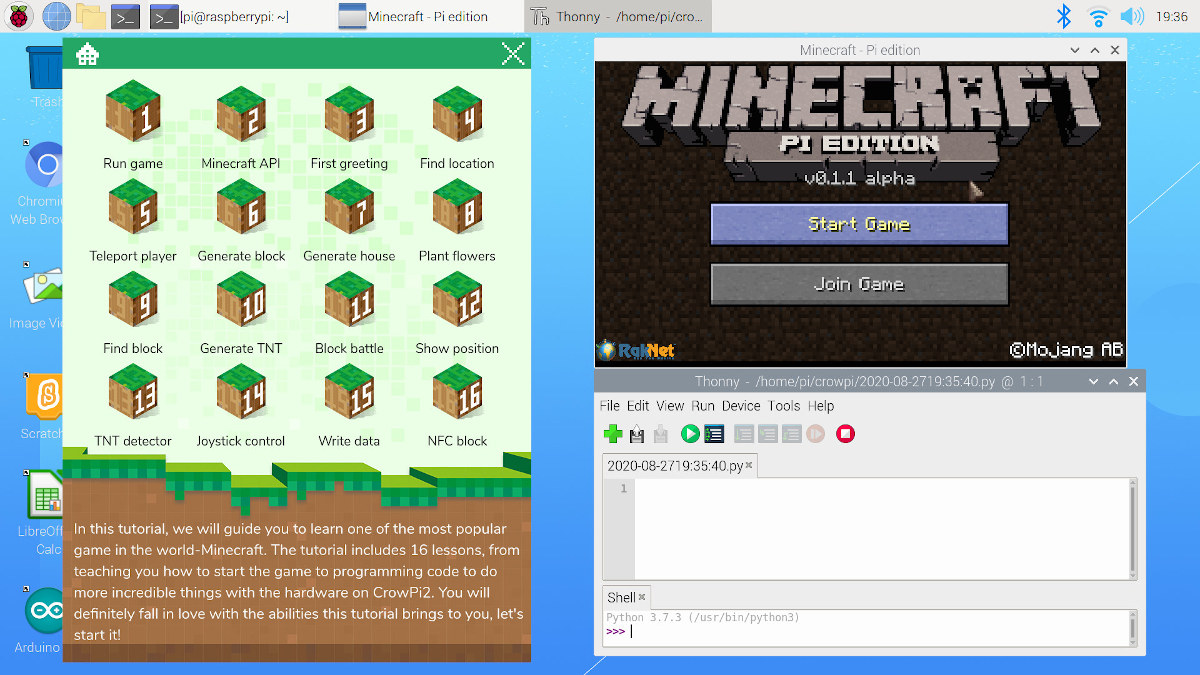
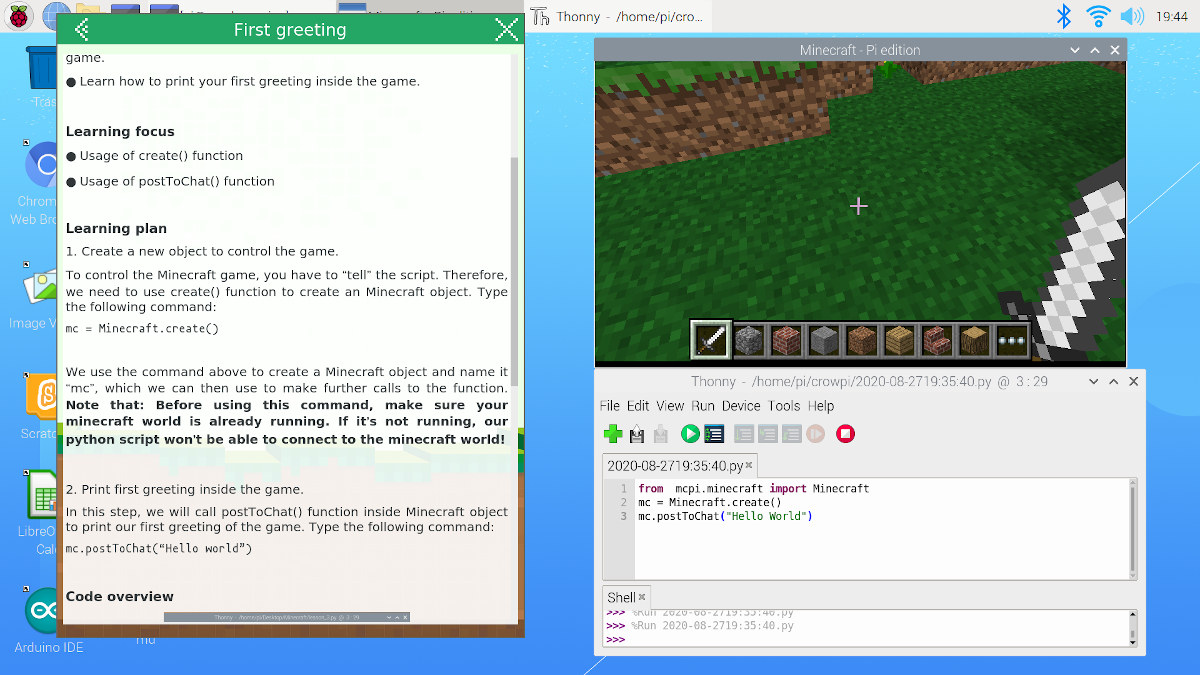
But Minecraft Pi Edition is part of Raspberry Pi OS by default, so it’s not specific to CrowPi2.
CrowPi2 AI Programs
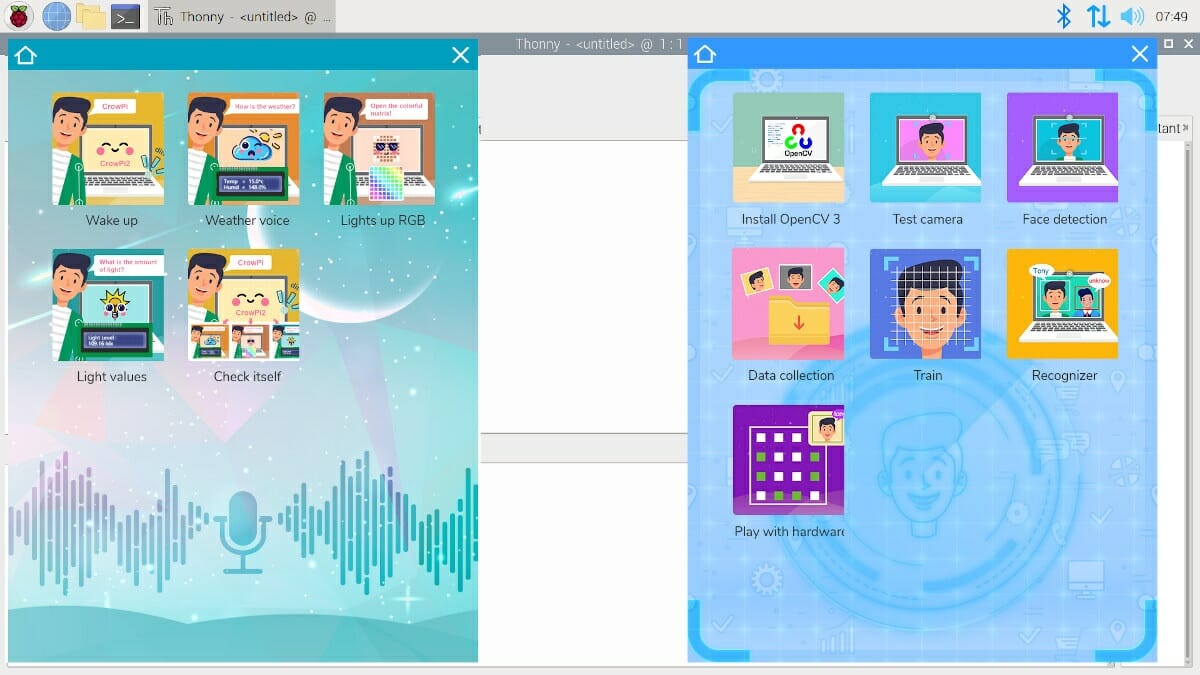
The AI section also relies on Python programming, but it’s much more complex, so students should probably complete other lessons first before moving to either Speech Recognition of Face Recognition lessons.

There are five speech recognition lessons with Snowboy or Google Assistant, and seven face recognition tutorials using OpenCV with one of the lessons including how to train a model.
I tried the Speech Recognition demo that draws on the RGB LED matrix after recognizing the phrase “turn on the light”.
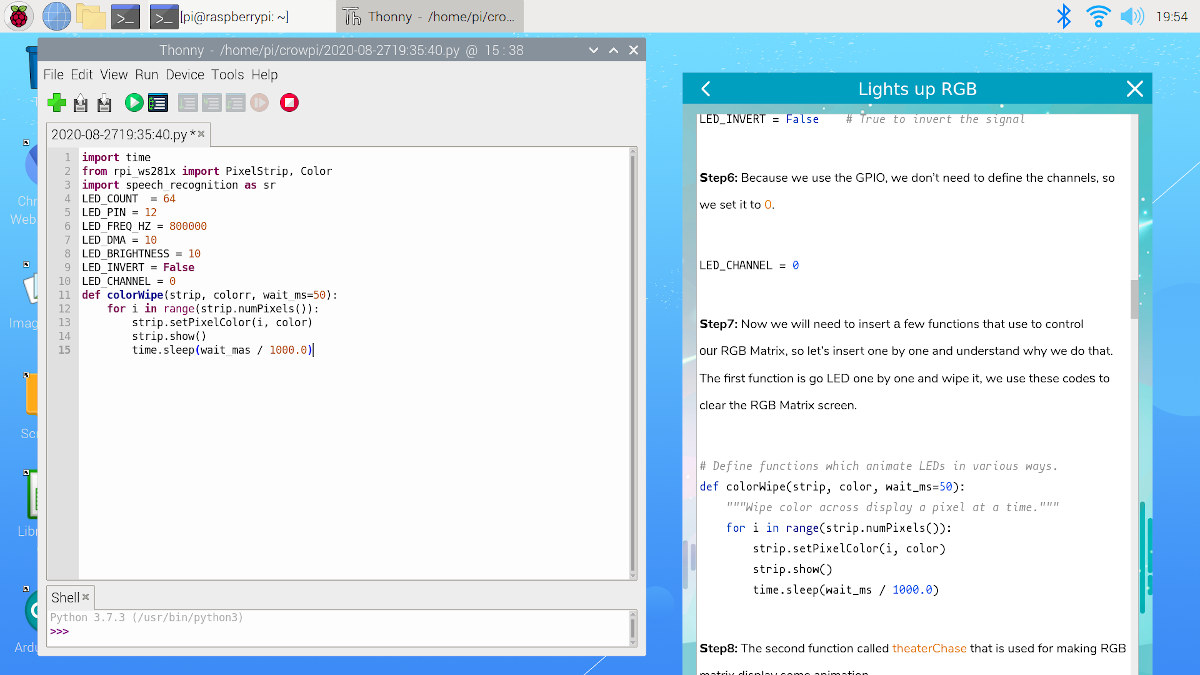
The tutorial explains the code by step, but sometimes it may be hard to know what the code really does if one if not experienced.
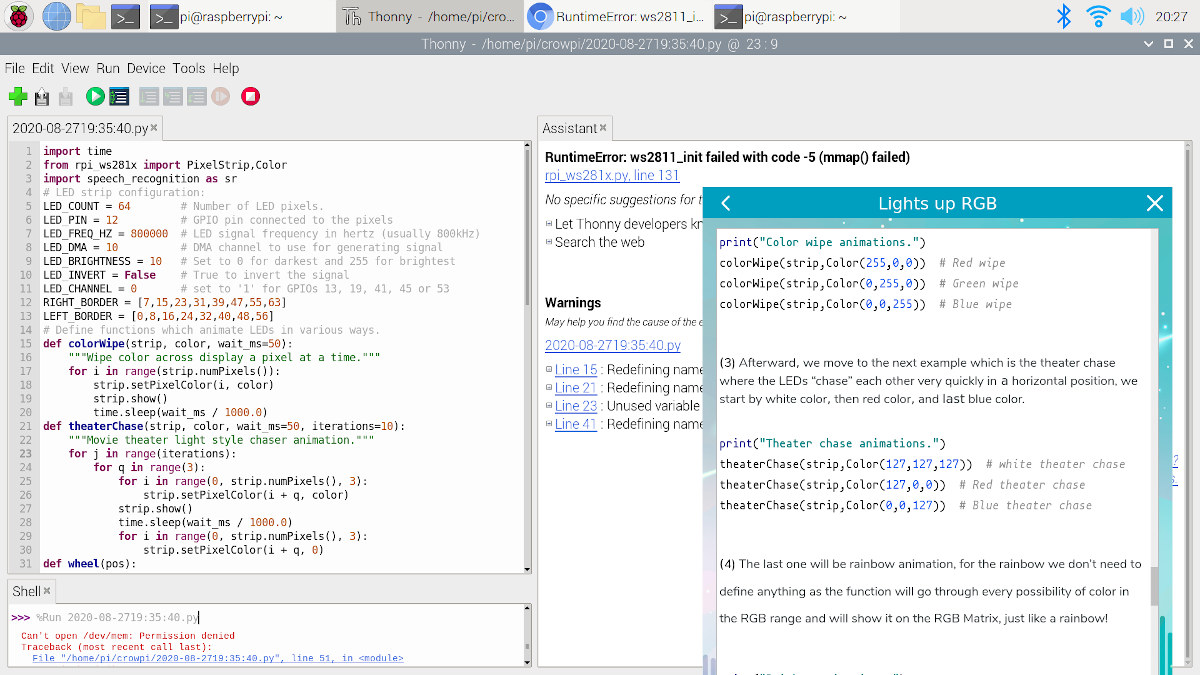
After completing the tutorial, I encountered a permission error to /dev/mem. So I went to the terminal to try to run it a root:
|
1 2 3 4 5 6 7 8 9 10 11 12 13 14 15 16 17 18 19 20 21 22 23 24 25 26 27 28 29 30 31 32 33 34 35 36 37 38 39 40 41 42 43 44 45 46 47 |
sudo python3 2020-08-2719\:35\:40.py Expression 'alsa_snd_pcm_hw_params_set_period_size_near( pcm, hwParams, &alsaPeriodFrames, &dir )' failed in 'src/hostapi/alsa/pa_linux_alsa.c', line: 924 Expression 'alsa_snd_pcm_hw_params_set_period_size_near( pcm, hwParams, &alsaPeriodFrames, &dir )' failed in 'src/hostapi/alsa/pa_linux_alsa.c', line: 924 ALSA lib pcm.c:2565:(snd_pcm_open_noupdate) Unknown PCM cards.pcm.front ALSA lib pcm.c:2565:(snd_pcm_open_noupdate) Unknown PCM cards.pcm.rear ... ALSA lib conf.c:5036:(snd_config_expand) Args evaluate error: No such file or directory ALSA lib pcm.c:2565:(snd_pcm_open_noupdate) Unknown PCM bluealsa ALSA lib confmisc.c:1281:(snd_func_refer) Unable to find definition 'defaults.bluealsa.device' ALSA lib conf.c:4568:(_snd_config_evaluate) function snd_func_refer returned error: No such file or directory ALSA lib conf.c:5036:(snd_config_expand) Args evaluate error: No such file or directory ALSA lib pcm.c:2565:(snd_pcm_open_noupdate) Unknown PCM bluealsa Cannot connect to server socket err = No such file or directory Cannot connect to server request channel jack server is not running or cannot be started JackShmReadWritePtr::~JackShmReadWritePtr - Init not done for -1, skipping unlock JackShmReadWritePtr::~JackShmReadWritePtr - Init not done for -1, skipping unlock Cannot connect to server socket err = No such file or directory Cannot connect to server request channel jack server is not running or cannot be started JackShmReadWritePtr::~JackShmReadWritePtr - Init not done for -1, skipping unlock JackShmReadWritePtr::~JackShmReadWritePtr - Init not done for -1, skipping unlock ALSA lib pcm_oss.c:377:(_snd_pcm_oss_open) Unknown field port ALSA lib pcm_oss.c:377:(_snd_pcm_oss_open) Unknown field port ALSA lib pulse.c:243:(pulse_connect) PulseAudio: Unable to connect: Connection refused ALSA lib pulse.c:243:(pulse_connect) PulseAudio: Unable to connect: Connection refused ALSA lib pcm_a52.c:823:(_snd_pcm_a52_open) a52 is only for playback ALSA lib conf.c:5014:(snd_config_expand) Unknown parameters {AES0 0x6 AES1 0x82 AES2 0x0 AES3 0x2 CARD 0} ALSA lib pcm.c:2565:(snd_pcm_open_noupdate) Unknown PCM iec958:{AES0 0x6 AES1 0x82 AES2 0x0 AES3 0x2 CARD 0} ALSA lib pcm_usb_stream.c:486:(_snd_pcm_usb_stream_open) Invalid type for card ALSA lib pcm_usb_stream.c:486:(_snd_pcm_usb_stream_open) Invalid type for card Expression 'alsa_snd_pcm_hw_params_set_period_size_near( pcm, hwParams, &alsaPeriodFrames, &dir )' failed in 'src/hostapi/alsa/pa_linux_alsa.c', line: 924 Cannot connect to server socket err = No such file or directory Cannot connect to server request channel jack server is not running or cannot be started JackShmReadWritePtr::~JackShmReadWritePtr - Init not done for -1, skipping unlock JackShmReadWritePtr::~JackShmReadWritePtr - Init not done for -1, skipping unlock Traceback (most recent call last): File "2020-08-2719:35:40.py", line 55, in <module> with sr.Microphone() as source: File "/usr/local/lib/python3.7/dist-packages/speech_recognition/__init__.py", line 86, in __init__ device_info = audio.get_device_info_by_index(device_index) if device_index is not None else audio.get_default_input_device_info() File "/usr/local/lib/python3.7/dist-packages/pyaudio.py", line 949, in get_default_input_device_info device_index = pa.get_default_input_device() OSError: No Default Input Device Available |
It failed as the script could not detect any microphone. So I asked EleCrow, and they told me to connect the USB camera and microphone cable. I misunderstood the provided instructions and photo, and end up frying the Raspberry Pi4 4GB included, so I carried on with my own Raspberry Pi 4 1GB board. More on that later…
The trick is the USB webcam cable is under the bottom cover where the Raspberry Pi 4 is installed. It’s clearly indicated in the user manual, but AFAIK not in any of the lessons and I missed it.

Once I connected the USB camera, I had to go to the terminal because the program would still not run due to the aforementioned /dev/mem permission issue, and Elecrow engineer just told me to use sudo as a workaround.
It failed again because flac was not installed, so I added it to the system:
|
1 |
sudo apt install flac |
And finally, I could run the program:
|
1 2 3 4 5 6 7 8 9 10 11 12 13 14 15 16 17 18 19 20 21 22 23 24 25 26 27 28 |
sudo python3 light-up-rgbpy.py Expression 'alsa_snd_pcm_hw_params_set_period_size_near( pcm, hwParams, &alsaPeriodFrames, &dir )' failed in 'src/hostapi/alsa/pa_linux_alsa.c', line: 924 Expression 'alsa_snd_pcm_hw_params_set_period_size_near( pcm, hwParams, &alsaPeriodFrames, &dir )' failed in 'src/hostapi/alsa/pa_linux_alsa.c', line: 924 ALSA lib confmisc.c:1281:(snd_func_refer) Unable to find definition 'cards.bcm2835_alsa.pcm.front.0:CARD=0' ALSA lib conf.c:4568:(_snd_config_evaluate) function snd_func_refer returned error: No such file or directory ALSA lib conf.c:5047:(snd_config_expand) Evaluate error: No such file or directory ALSA lib pcm.c:2565:(snd_pcm_open_noupdate) Unknown PCM front ... ALSA lib pcm_a52.c:823:(_snd_pcm_a52_open) a52 is only for playback ALSA lib confmisc.c:1281:(snd_func_refer) Unable to find definition 'cards.bcm2835_alsa.pcm.iec958.0:CARD=0,AES0=6,AES1=130,AES2=0,AES3=2' ALSA lib conf.c:4568:(_snd_config_evaluate) function snd_func_refer returned error: No such file or directory ALSA lib conf.c:5047:(snd_config_expand) Evaluate error: No such file or directory ALSA lib pcm.c:2565:(snd_pcm_open_noupdate) Unknown PCM iec958:{AES0 0x6 AES1 0x82 AES2 0x0 AES3 0x2 CARD 0} ALSA lib pcm_usb_stream.c:486:(_snd_pcm_usb_stream_open) Invalid type for card ALSA lib pcm_usb_stream.c:486:(_snd_pcm_usb_stream_open) Invalid type for card Expression 'alsa_snd_pcm_hw_params_set_period_size_near( pcm, hwParams, &alsaPeriodFrames, &dir )' failed in 'src/hostapi/alsa/pa_linux_alsa.c', line: 924 Cannot connect to server socket err = No such file or directory Cannot connect to server request channel jack server is not running or cannot be started JackShmReadWritePtr::~JackShmReadWritePtr - Init not done for -1, skipping unlock JackShmReadWritePtr::~JackShmReadWritePtr - Init not done for -1, skipping unlock Please speak: You said: turn on the light Color wipe animations. Theater chase animations. Rainbow animations. Wipe LEDs pi@raspberrypi:~/Desktop $ |
There are still plenty of warnings/errors in Python output, but the program runs just fine as shown in the video below.
That means that part may need some adult supervision and preferably a person familiar with the Linux command line.
Other Sections of CrowPi2 Education Software
The other sections of the interface are more like direct links to app and games, and independently developed tutorials. Python will launch Thonny Python IDE, Games will show a list of free games

Microbit will launch Chromium and go to makecode.microbit.org for owners of BBC Micro:bit board, while Scratch and Arduino will launch the corresponding programs.
RetroPie on CrowPi2
The kit also comes with another 32GB MicroSD card preloaded with RetroPie for playing after all that time spent studying programming. I just connected the two provided USB gamepads…

… went through some configuration, and loading optional packages in RetroPie… 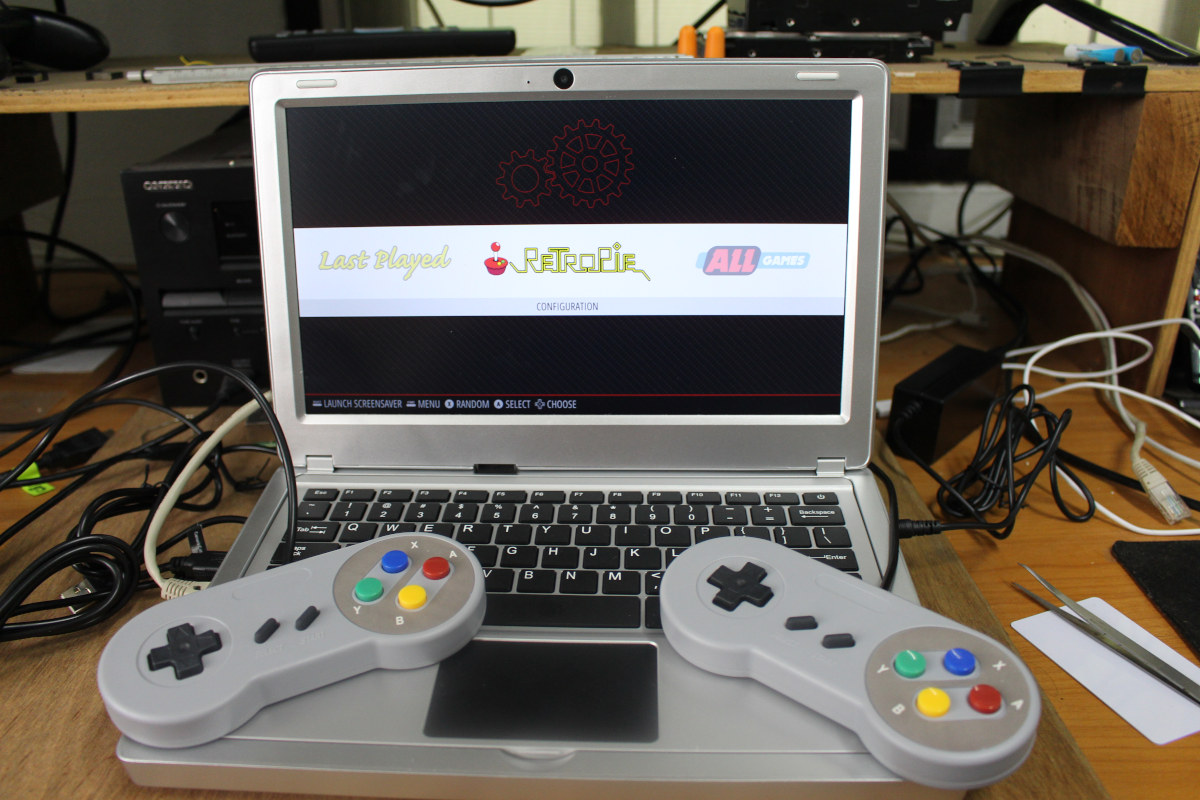
and after a while, I was able to play free games like Doom and others.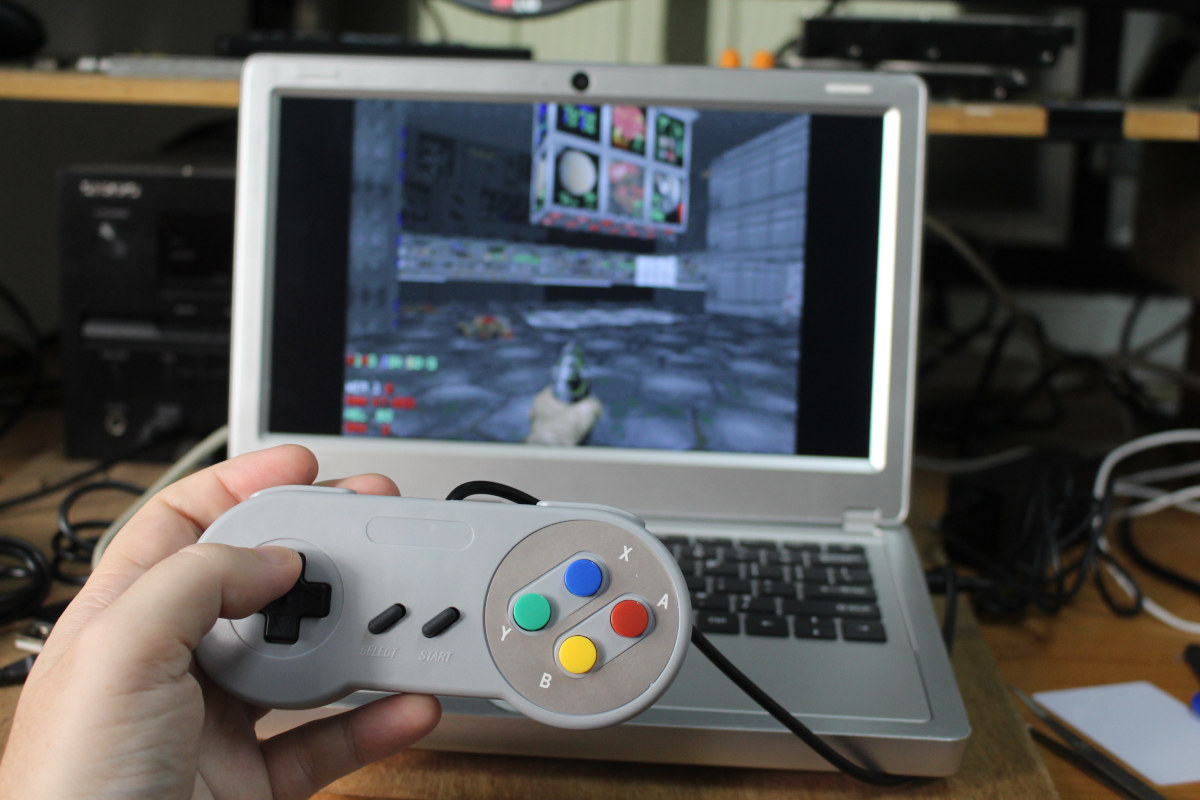
CrowPi2 display is quite small, and there’s no external HDMI output, so it’s not the ideal platform to play games, especially if you are two. You can also remove the HDMI adapter, and connect the Raspberry Pi directly to a TV, but that’s not very convenient.
CrowPi2 Thermal Design and Stress Test
Some people may want to use CrowPi2 has a standard laptop. Raspberry Pi 4 performance is well known, so the important part is usually the thermal design that may greatly influence the performance in case of overheating.
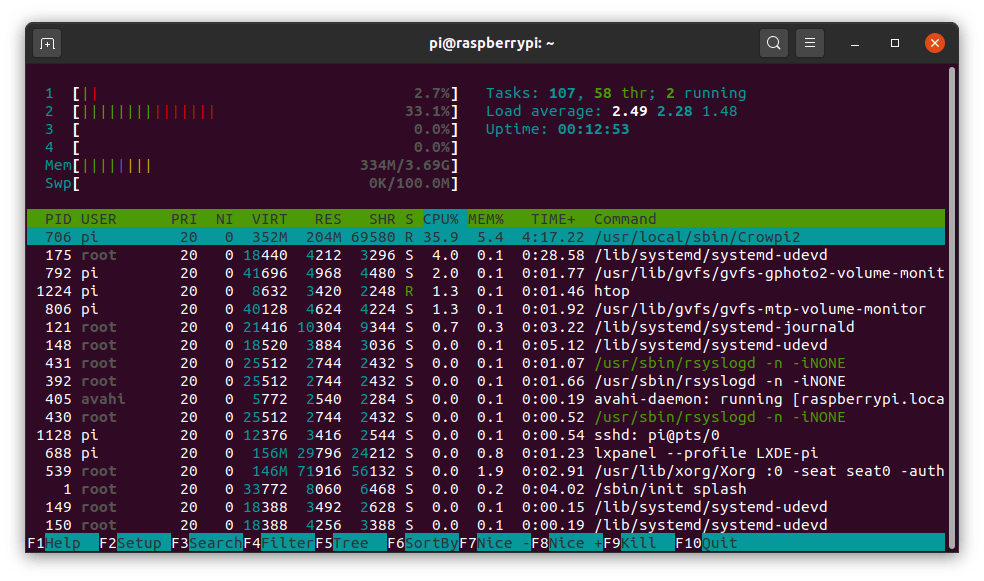
CrowPi2 is cooled with a rather noisy fan that competes for attention against my air conditioner but can be made somewhat by placing the keyboard on top. So I’ve tested the laptop in this configuration first. However, when trying to run sbc-bench.sh benchmark to stress test the laptop, I noticed CrowPi2 would take some resources in the background preventing the script to run..
|
1 2 3 4 5 6 7 8 9 10 11 12 13 14 15 16 17 18 19 20 21 22 23 24 25 26 27 28 29 30 31 |
sudo ./sbc-bench.sh -c sbc-bench v0.7.2 Installing needed tools. This may take some time... Done. Checking cpufreq OPP... Done. Executing tinymembench. This will take a long time... Done. Executing OpenSSL benchmark. This will take 3 minutes... Done. Executing 7-zip benchmark. This will take a long time... Done. Checking cpufreq OPP... Done. It seems neither throttling nor frequency capping has occured. sed: -e expression #1, char 0: no previous regular expression Memory performance: memcpy: 2478.9 MB/s memset: 3267.4 MB/s (0.1%) 7-zip total scores (3 consecutive runs): 5481,5509,5526 OpenSSL results: type 16 bytes 64 bytes 256 bytes 1024 bytes 8192 bytes 16384 bytes aes-128-cbc 62492.67k 76708.54k 83064.41k 84463.96k 85185.88k 85164.03k aes-128-cbc 62522.70k 76788.61k 82952.96k 84610.73k 85035.69k 85207.72k aes-192-cbc 56271.78k 67297.19k 72080.21k 73237.85k 73569.62k 73695.23k aes-192-cbc 56269.33k 67470.46k 71924.39k 73325.91k 73670.66k 73558.70k aes-256-cbc 50805.78k 59808.11k 63276.03k 64381.95k 64664.92k 64678.57k aes-256-cbc 50821.00k 60039.83k 63657.73k 64414.38k 64905.22k 64929.79k Full results uploaded to http://ix.io/2vxZ. Please check the log for anomalies (e.g. swapping or throttling happenend) and otherwise share this URL. |
Performance is good, and there’s no CPU throttling at all.
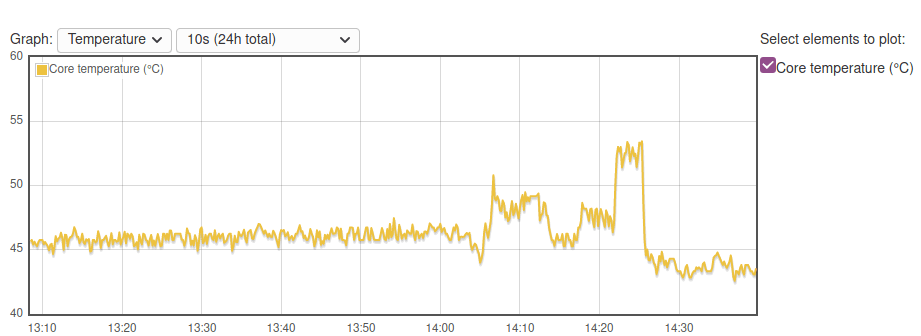
The Idle temperature is around 45°C (with 30°C ambient temp), and never above 55°C during sbc-bench script. All good.
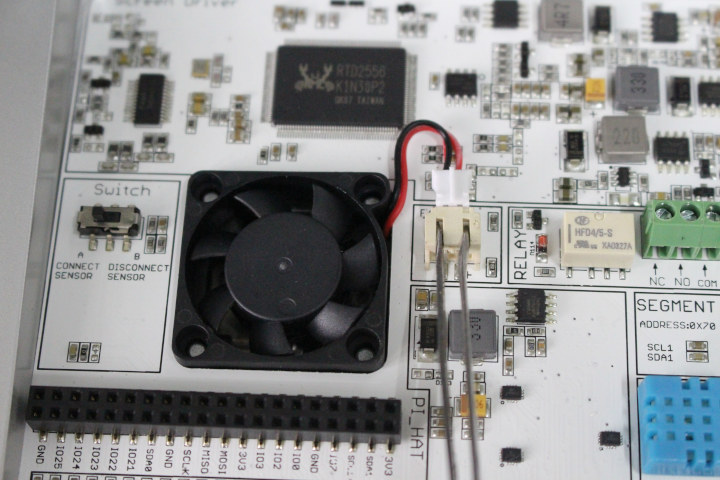
Let’s disconnect the fan. The 2-pin connector will not get out very easily, so I used a pair of tweezers to push it out.
I killed Crowpi2 program after boot, and waited several minutes to let the temperature stabilize, then started sbc-bench again:
|
1 2 3 4 5 6 7 8 9 10 11 12 13 14 15 16 17 18 19 20 21 22 23 24 25 26 27 28 29 30 31 |
sudo ./sbc-bench.sh -c sbc-bench v0.7.2 Installing needed tools. This may take some time... Done. Checking cpufreq OPP... Done. Executing tinymembench. This will take a long time... Done. Executing OpenSSL benchmark. This will take 3 minutes... Done. Executing 7-zip benchmark. This will take a long time... Done. Checking cpufreq OPP... Done. ATTENTION: Throttling and frequency capping has occured. Check the log for details. sed: -e expression #1, char 0: no previous regular expression Memory performance: memcpy: 1968.4 MB/s (5.1%) memset: 2673.6 MB/s (2.4%) 7-zip total scores (3 consecutive runs): 2374,2089,1850 OpenSSL results: type 16 bytes 64 bytes 256 bytes 1024 bytes 8192 bytes 16384 bytes aes-128-cbc 30485.50k 32811.50k 40347.39k 35450.54k 38513.32k 37999.96k aes-128-cbc 30550.36k 37557.48k 39898.54k 39183.02k 40856.23k 40916.31k aes-192-cbc 24592.13k 27808.24k 33650.18k 32600.41k 32003.41k 30758.23k aes-192-cbc 29541.37k 32518.59k 33584.73k 34761.05k 33428.82k 33319.59k aes-256-cbc 24503.37k 25579.63k 28867.84k 26816.85k 27074.56k 27650.73k aes-256-cbc 21155.20k 25582.61k 25425.92k 28026.54k 27615.23k 26378.24k Full results uploaded to http://ix.io/2vyj. Please check the log for anomalies (e.g. swapping or throttling happenend) and otherwise share this URL. |
Benchmark results are way lower, and the script reports that throttling and frequency capping has occurred.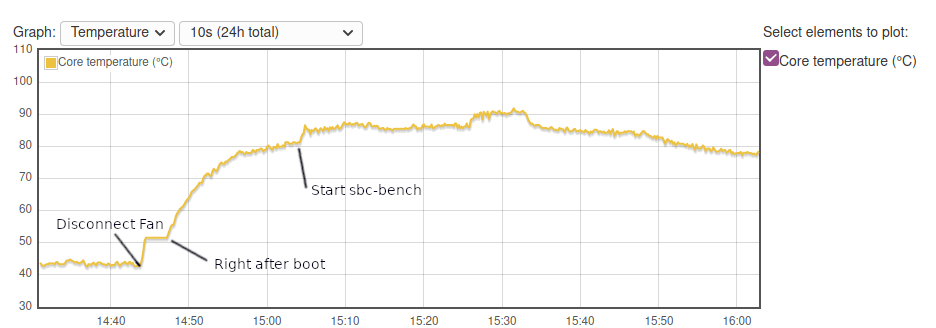
We can see idle temperature was above 80°C, and the board was above 85°C during the benchmark…
Let’s have a peek inside to see how cooling is done. The Raspberry Pi is bare without any heatsink, and the fan is doing all the cooling.
If we reinsert the board and take out the fan, we can see the processor.
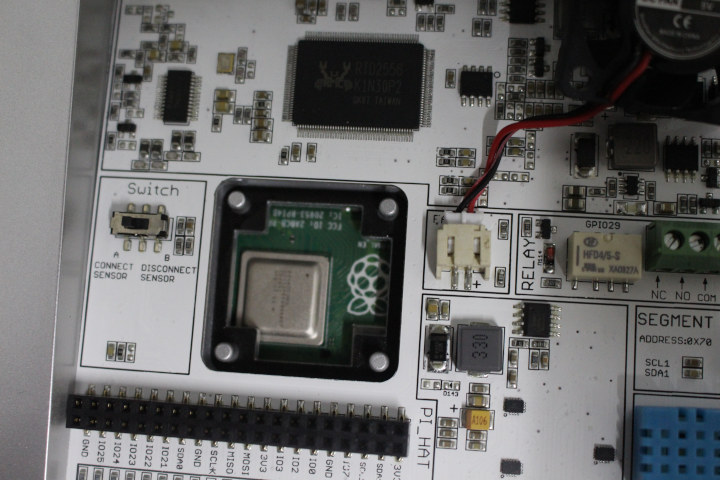
That means it might be possible to make a fanless CrowPi2 laptop by adding a thick thermal pad and a heatsink that fits in a volume of around 28 x 28 x 10 mm.
Can we make a laptop with CrowPi2 and Rock Pi 4C SBC?
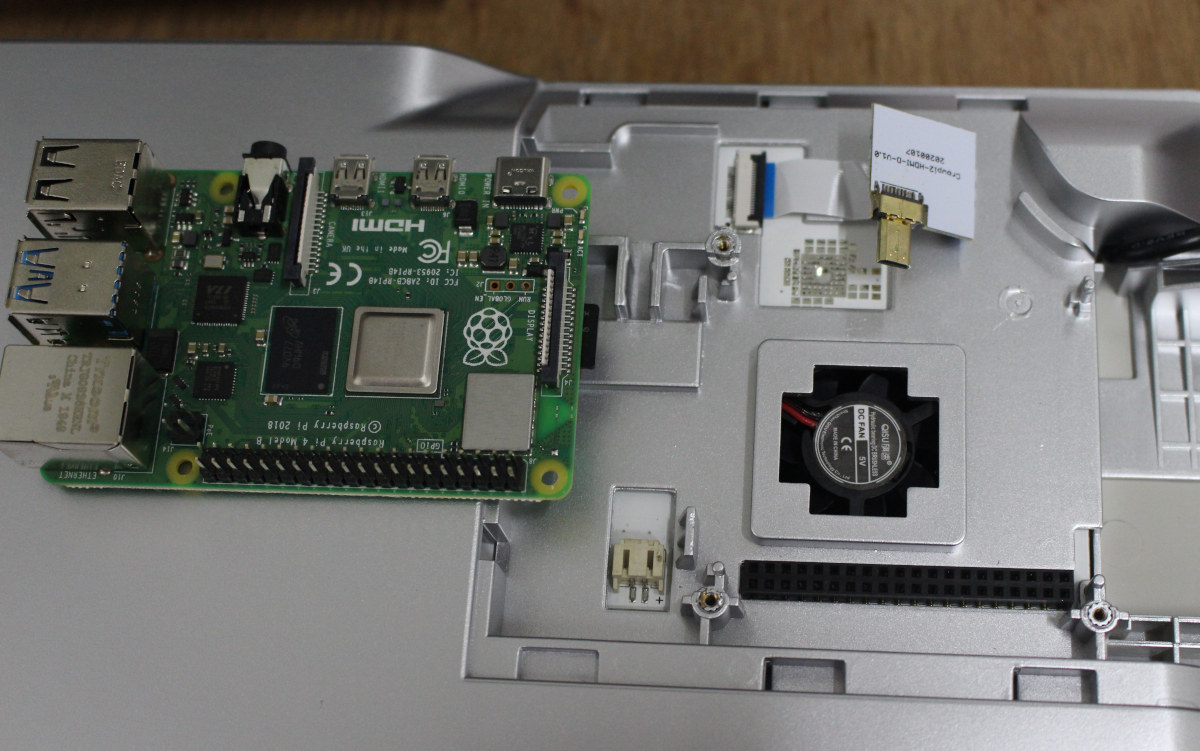
I recently received a Raspberry Pi 4 compatible board: Rockchip RK3399 powered Rock Pi 4C single board computer and I thought it might be fun to install it in CrowPi2.
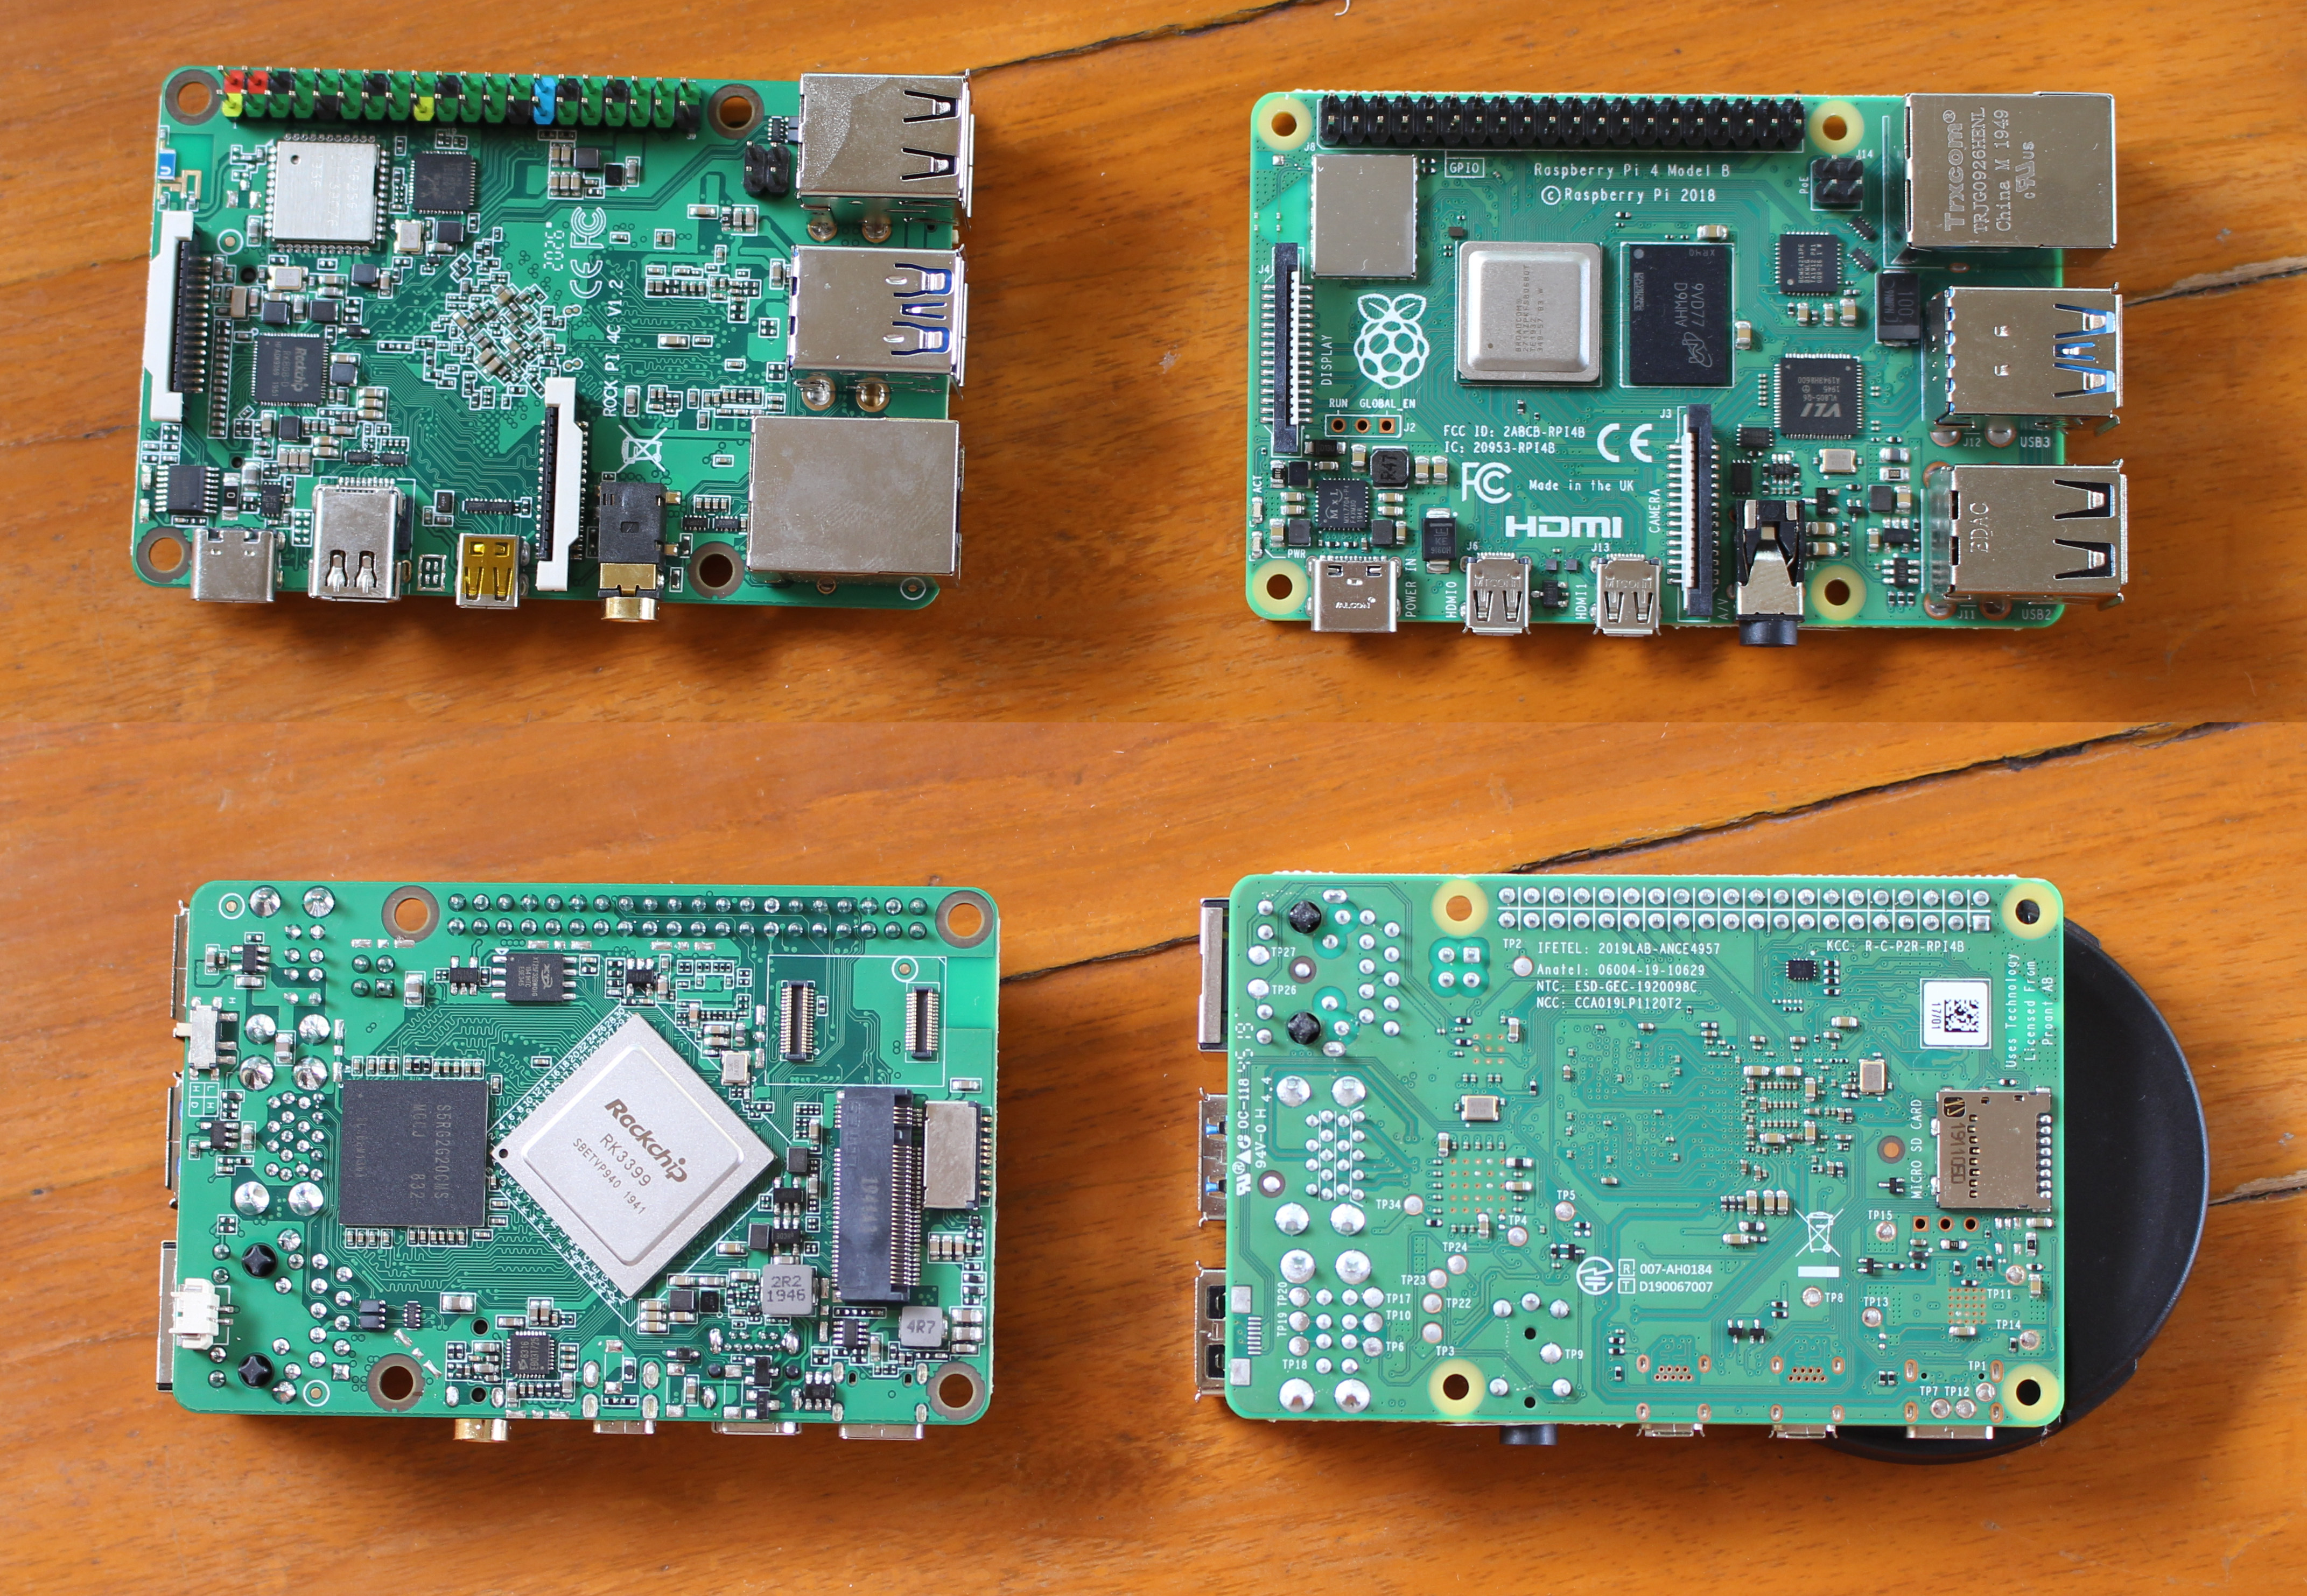
Both boards are pretty identical, but the Ethernet and USB ports are swapped, one of the micro HDMI ports is replaced by a mini DisplayPort connector, and the RK3399 processor is placed underneath the board while the Broadcom BCM2711 SoC stands on top of the RPi4 SBC.

The Ethernet and USB swap is not an issue, but I could not insert the micro HDMI adapter board because the flat cable is too short, and the board would be blocked by the plastic bit holding the camera cable… It could be reworked but that’s not ideal. More important, since the processor is underneath the board, it would not be cooled by the fan very efficiently at all. The optional heatsink for Rock Pi 4, which I did not have, also requires access to the mounting holes of the board, but there are using for mounting the board in the laptop shell and may make the whole setup too thick to fit.
When Things Go Wrong…
As mentioned earlier, I fried the Raspberry Pi 4 board when I misunderstood the USB camera connection instructions. I was in a rush to test before leaving for other duties, and I connected a cable between the Micro USB port on the left to one of the USB ports on the right. The laptop immediately turned off.
I could restart the laptop, but then I discovered the USB ports were really fried (although they may be a way to recover which I may investigate later on), and so was the RF dongle used for the wireless keyboard and mouse. So I could boot the laptop to the user interface but could not do anything from there.
So I thought I’d simply use my Raspberry Pi 4 1GB I received last year. I inserted CrowPi2 microSD card and installed the board in the laptop shell, but while the board seemed to boot, I had no display output. So I tried to insert the microSD card into my laptop, but I could not access it, then tried again with a card reader, but no luck. I would not even show with fdisk or Disks programs in Ubuntu at all.
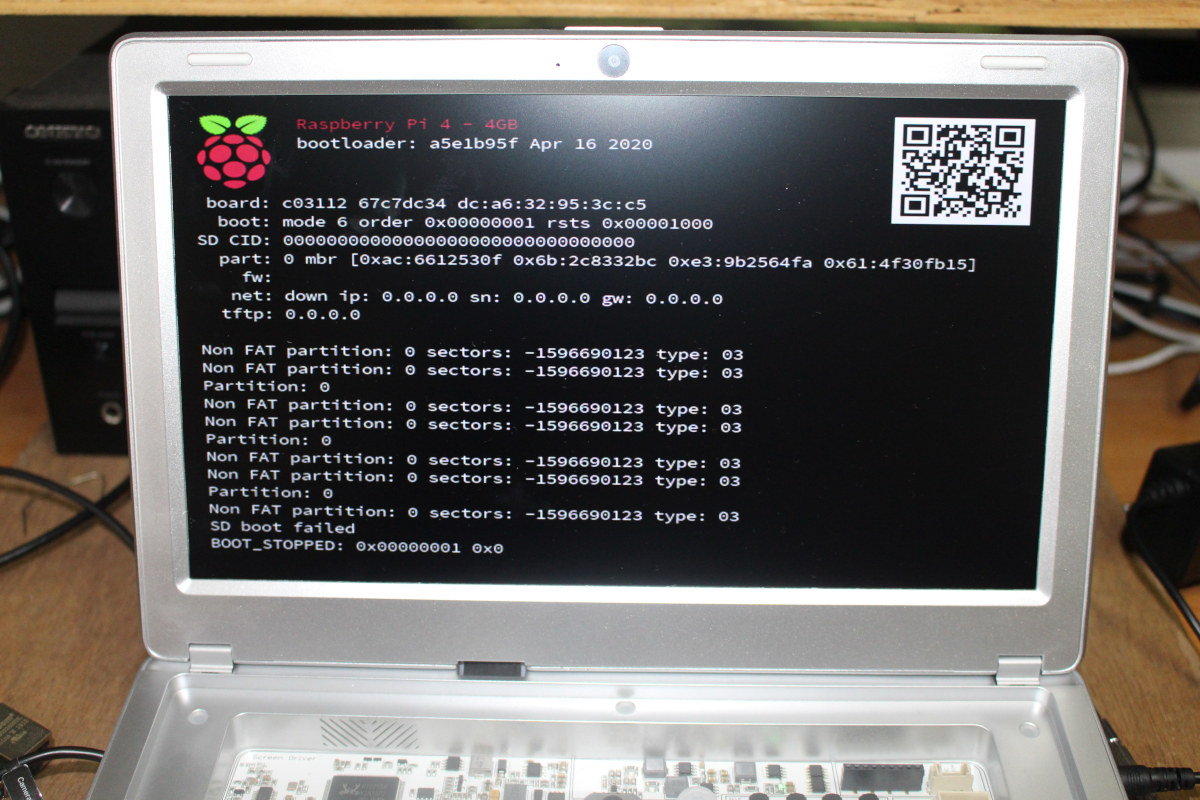
I went back to Raspberry Pi 4 included with the kit, so that I can check the card, but while it could properly detect the card, it completely failed to boot.
I naively assumed that I would be able to recover by downloading CrowPi2 image from Elecrow website, but it’s nowhere to be found. Instead, I was given a Google drive link (that I’m not allowed to share) which once uncompress has a 11.4GB “crowpi2_release.img” image. So I went ahead and started to flash the image with balenaEtcher…
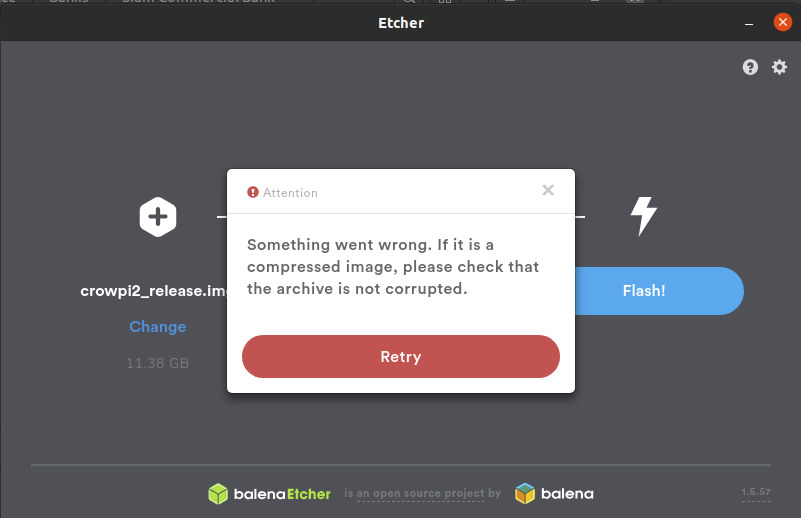
After switching to another microSD card, I still got the same error:
Something went wrong. If it is a compress image, please check that the archive is not corrupted.
I sent the MD5sum of the uncompressed file to the company but never got an answer. Nevertheless, a good night sleep solve my issue, as I had installed the program (v1.5.57) a several months ago, and I thought maybe I should upgrade balenaEtcher to the latest version (v1.5.106), and that did the trick, I was finally able to flash the image.
So I have two takeaway from this experience
- Make sure to backup CrowPi2 SD card content with dd or other software to have a backup
- Upgrade balenaEtcher in case of issues while flashing.
Conclusion
CrowPi2 looks to be a great little platform to learn about electronics, programming, and the basics of artificial intelligence thanks to over one hundred lessons and tutorials. Multiple kids can make use of the laptop since there can be an offline account of each that keeps track of the progress of each student.
But the platform is not perfect. Sometimes samples won’t work without messing with the command line, as some instructions may not be complete. Some Project samples simply do not work as intended, but hopefully, this will be fixed before shipping to backers. I could not really find any (active) online resources for CrowPi2 and the earlier CrowPi, but Elecrow does have a Wiki for their other products.
Another potential issue is that the fan is really loud, especially when you take out the keyboard to play with the electronics module underneath. As we’ve seen in the review it might be possible to convert it into a fanless laptop with some minimal efforts.
The crowdfunding campaign on Kickstarter is now over and the company has raised a cool $652,640 USD, but you can now pre-order it directly from Elecrow for $260 without Raspberry Pi and a few accessories, or $399 with a Raspberry Pi 4 4GB and more accessories as tested in this review.

Jean-Luc started CNX Software in 2010 as a part-time endeavor, before quitting his job as a software engineering manager, and starting to write daily news, and reviews full time later in 2011.
Support CNX Software! Donate via cryptocurrencies, become a Patron on Patreon, or purchase goods on Amazon or Aliexpress


Or don’t use etcher at all!
This piece of software is not only horrable bloated (around 150mb of electron madness including probably a good amount of security flaws and dozens of outdated components) it also comes with trackers and advertisement on top.
Heavy on cpu, ram, storage, phones home (and
elsewhere) plus showing ads – I really got no use for something like that.
Alternatives are present which can do same (actually better) in less than 1mb – so why bother at all?
Why not list some alternatives?
Starting with version 1.0.1 USB Imager is now an alternative due to doing ‘verify after write’ by default since then: https://gitlab.com/bztsrc/usbimager/-/issues/5#note_309809677
USBImager is indeed what I use:
https://gitlab.com/bztsrc/usbimager#usbimager
Available for all kinds of platform it is also able to create a image/backup of your drive/card beside writing and verifying.