
SunFounder Zeus Car Kit is an Arduino UNO and ESP32 Cam-based educational kit for children (and adults) that can be used to learn more about electronics, robotics, and programming. It’s a car comprised of four 6cm Mecanum wheels for omnidirectional motion and various sensors that can be controlled with an Android app enabling first-person view (FPV) thanks to the built-in camera.
The company sent us a Zeus Car Kit for review and evaluation, and after assembly, we’ll use it in “Play Mode”, or in other words a toy that basically works out of the box, before checking out the “Programing Mode” and related Arduino tutorials to evaluate it’s educational potential.
Zeus Car Kit Unboxing

The kit comes in a nice retail package which highlights some of the capacities of the kit: FPV, Omnidrive, AI vision, compass, IR control, APP control, and RGB lights.

The package itself contains four more boxes with all the components shown below.

Here’s the full list:
- Structural plates (four metal parts)
- 4x Mecanum wheels
- 4x motors
- SunFounder (Arduino UNO) R3 board
- SunFounder Zeus Car Shield that’s used to interface all sensors and motors to the Arduino UNO
- ESP32 CAM board and a camera adapter board
- 2x IR obstacle avoidance modules
- An ultrasonic module
- SunFounder Omni Grayscale module used for line following and edge detection
- 2x RGB LED strips
- 2,220 mAh battery comprised of two 18650 batteries packed together
- IR remote control
- Washers, nuts, screws, standoffs, and rivets of different sizes clearly marked in each of their respective zip bags
- Tools such as hex keys, screwdrivers,
- Various cables


The included assembly guide helps users easily build the kit and links to the more detailed online user guide as well.
Zeus Car Kit Assembly
As somebody who tries not to turn on my computer before 9 am, I really appreciate the printed-out guide, and that’s what I used for the assembly. The first step is to mount the four motos to the metal chassis.

It’s straightforward, and the main thing is to make sure the wires face inwards.

The next step is the assembly of the ultrasonic sensor using a metal plate and rivets.


Next, we can install the ESP32-Cam board through the adapter using one more metal plate as well as the two IR IR obstacle avoidance modules with the respective cables, and a few standoffs.

Once this is done we can secure the Arduino UNO R3 board (Clone) with the standoffs and screws making sure the camera and sensor cables go underneath.

At this point, we can insert the Zeus Car Kit shield into the Arduino board and connect the cable as shown below.

Some cable management follows by using a cable tie to bring all motor wires together, and we also stick one of the side of the velcro to the bottom of the car.

The other side is going to the battery which we can attach to the bottom of the car using velcro.

We then connect the battery to the PWR connector on the Zeus Car Shield, as well as the two RGB LED strips.

We can peel the blue film from the RGB LED strips to attach them to the front and rear of the Zeus car, install the Omni Grayscale module to the bottom of the car, and fit the four Mecanum wheels to the kit securing them with the provided screws. That step is not as straightforward as I wish it would have been, and I had to exert some force to insert the wheels into the axes of the motors.

The final step is to connect the Omni Grayscale module cable to the GS connector on the Zeus Car Shield.

We’re now done with a pretty nice-looking robotic car.

The Zeus Car Kit has more functions such as the Mecanum wheels and ESP32 camera board, and feels much sturdier than the lower-cost CrowBot BOLT car kit from Elecrow that I reviewed a few months ago. So if you need something durable and more advanced the Zeus car should be a better choice, while the CrowBot BOLT is better suited if you think it will only be used a couple of days as it will save you a few dollars.

Play Mode with SunFounder Controller Android app
Before we can use the robot kit we should charge it. Simply use a USB-C power adapter and the charging LED will turn on until the charge is complete. You’ll also want to make sure the power switch is off and the upload switch set to Run mode (as opposed to Upload mode) as shown in the photo below.

There are two “Play Modes” for the kit with the infrared remote control or the SunFounder Controller app for iOS or Android. The IR remote control method is a slightly faster way to get started with built-in functions, but the mobile app is more fun to use with access to the ESP32 camera as well. So I’ve installed the Android app on Huawei Y9 Prime 2019 smartphone to give it a try.

The first step is to click on the Plus icon and select Zeus Car.

The app will load a default remote control where you could add extra functions, but let’s just tap on the tick on the top right to confirm the design.

Let’s turn on the Zeus Car and the RGB LED Strip under the car lights up in cyan. If it’s yellow, double-check the upload switch. Now we can tap on the chain icon to connect to WiFi…

… select Zeus_Car SSID on your phone…

… and Zeus_Car will show in the app in place of the chain/connection icon.

If we tap on the play button next to the “Zeus_Car” string we’ll see the output from the camera behind the controls…

… and can manually control the car with the joysticks.
- The K joystick (left) controls the car to move in all directions.
- The Q joystick (right) controls the front wheels’ direction.
The other functions are as follows:
- Calibration (E) – Turn on compass calibration. The robot will rotate for a while until calibration is complete (less than one minute, in our case around 10 seconds)
- Stop (F) – Stop all movements of the car.
- Speech (I) – Control the car voice commands. Not working on Android before the robot is connected through access point mode. It works on iOS with offline voice recognition.
- Drift Enable (J) – Activate the drift function.
- Line (N) – Switch to line tracking mode.
- Follow (O) – Switch to follow mode.
- Avoid (P) – Switch to obstacle avoidance mode.
The Follow mode requires some calibration by adjusting the potentiometers for each obstacle avoidance module to about a 15 cm distance (Sled LED turning on), while the ultrasonic sensor detects objects about 20cm away.

You’ll have to build a little track for the Line following mode using the provided electrical tape. It took me several tries as the track really needs to be at least 3 cm wide everywhere for this to work reliably. The tape tends to unglue and curl as well, so it’s not ideal. I wish they had provided a track printed on a large piece of paper or cardboard instead which would have been folded to fit into the package.

Calibration is also recommended, but I skipped that part as a quick try confirmed “white” and black detection working fine, even though my floor is not exactly white…
The best is to watch the video below to see all the different preset modes in action.

Programming the Zeus Car with the Arduino IDE
While just using the Zeus Car kit in Play Mode is fun, it would be a shame not to also use its programming capabilities to teach or learn more about electronics and Arduino programming. There are 18 “funny projects” on the documentation website with the code also available on GitHub including the default “Play Mode” firmware that will be overwritten once we start loading our own program to the Arduino UNO R3 board.
We’ll try the first Arduino tutorial called “Basic Movements” to learn how to make the Zeus Car move in any direction. The first step is to download and install the Arduino IDE (preferably Arduino 2.x) on your computer and install the required libraries for the tutorials, namely: SoftPWM and IRLremote.

We can download/clone the code from GitHub:
|
1 |
$ git clone https://github.com/sunfounder/zeus-car/ |
Connect the Zeus Car to your host computer with the provided USB device cable (Blue) while making sure the Upload switch is set to the correct position.

A new USB device should appear in your operating system. This is the kernel output in Linux (Ubuntu 22.04):
|
1 2 3 4 5 6 7 8 |
[24617.705382] usb 1-1: new full-speed USB device number 4 using xhci_hcd [24617.892262] usb 1-1: New USB device found, idVendor=2341, idProduct=0043, bcdDevice= 0.01 [24617.892270] usb 1-1: New USB device strings: Mfr=1, Product=2, SerialNumber=220 [24617.892273] usb 1-1: Manufacturer: Arduino (www.arduino.cc) [24617.892276] usb 1-1: SerialNumber: 24238313435351C08281 [24618.041524] cdc_acm 1-1:1.0: ttyACM0: USB ACM device [24618.041586] usbcore: registered new interface driver cdc_acm [24618.041589] cdc_acm: USB Abstract Control Model driver for USB modems and ISDN adapters |
Let’s now load the “Basic Movements” sample into the Arduino IDE, and select the “Arduino UNO” board (connected to /dev/ttyACM0 or COMXX depending on the OS).

Here’s the full Arduino sketch for reference:
|
1 2 3 4 5 6 7 8 9 10 11 12 13 14 15 16 17 18 19 20 21 22 23 24 25 26 27 28 29 30 31 32 33 34 35 36 37 38 39 40 41 42 43 44 45 46 47 48 49 50 51 52 53 54 55 56 57 58 59 60 61 62 63 64 65 66 67 68 69 70 71 72 73 74 75 76 77 78 79 80 81 82 83 84 85 86 87 88 89 90 91 92 93 94 95 96 97 98 99 100 101 102 103 104 105 106 107 108 109 110 111 112 113 114 115 116 117 118 119 120 121 122 123 124 125 126 127 128 129 130 131 132 133 134 135 136 |
/******************************************************************* * basic_move Control the direction and speed of motors rotation by pwm, to make the car go forward, backward, left turn, right turn and stop. ******************************************************************/ #include <Arduino.h> #include <SoftPWM.h> /* * [0]--|||--[1] * | | * | | * | | * | | * [3]-------[2] */ /** Set the pins for the motors */ #define MOTOR_PINS \ (uint8_t[8]) { \ 3, 4, 5, 6, A3, A2, A1, A0 \ } /** Set the positive and negative directions for the motors */ #define MOTOR_DIRECTIONS \ (uint8_t[4]) { \ 1, 0, 0, 1 \ } #define MOTOR_POWER_MIN 28 // 28/255 int8_t power = 80; void setup() { Serial.begin(115200); Serial.println("Zeus Car basic move"); SoftPWMBegin(); //init softpwm, before the motors initialization carBegin(); // init motors } void loop() { carForward(power); delay(1000); carBackward(power); delay(1000); carLeft(power); delay(1000); carRight(power); delay(1000); carLeftForward(power); delay(1000); carLeftBackward(power); delay(1000); carRightForward(power); delay(1000); carRightBackward(power); delay(1000); carTurnLeft(power); delay(1000); carTurnRight(power); delay(1000); carStop(); delay(2000); } void carBegin() { for (uint8_t i = 0; i < 8; i++) { SoftPWMSet(MOTOR_PINS[i], 0); SoftPWMSetFadeTime(MOTOR_PINS[i], 100, 100); } } void carSetMotors(int8_t power0, int8_t power1, int8_t power2, int8_t power3) { bool dir[4]; int8_t power[4] = { power0, power1, power2, power3 }; int8_t newPower[4]; for (uint8_t i = 0; i < 4; i++) { dir[i] = power[i] > 0; if (MOTOR_DIRECTIONS[i]) dir[i] = !dir[i]; if (power[i] == 0) { newPower[i] = 0; } else { newPower[i] = map(abs(power[i]), 0, 100, MOTOR_POWER_MIN, 255); } SoftPWMSet(MOTOR_PINS[i * 2], dir[i] * newPower[i]); SoftPWMSet(MOTOR_PINS[i * 2 + 1], !dir[i] * newPower[i]); } } void carForward(int8_t power) { carSetMotors(power, power, power, power); } void carBackward(int8_t power) { carSetMotors(-power, -power, -power, -power); } void carLeft(int8_t power) { carSetMotors(-power, power, -power, power); } void carRight(int8_t power) { carSetMotors(power, -power, power, -power); } void carLeftForward(int8_t power) { carSetMotors(0, power, 0, power); } void carLeftBackward(int8_t power) { carSetMotors(-power, 0, -power, 0); } void carRightForward(int8_t power) { carSetMotors(power, 0, power, 0); } void carRightBackward(int8_t power) { carSetMotors(0, -power, 0, -power); } void carTurnLeft(int8_t power) { carSetMotors(-power, power, power, -power); } void carTurnRight(int8_t power) { carSetMotors(power, -power, -power, power); } void carStop() { carSetMotors(0, 0, 0, 0); } |
There aren’t many comments, but the code is easy enough to understand, and the Zeus Car kit will move in various directions for one second in each step, before stopping for 2 seconds, and repeating the loop indefinitely. The tutorial also explains in more detail how the Mecanum wheels are working.

Let’s upload the code to the board. Ah, it failed:
|
1 2 3 4 5 6 7 8 9 10 11 12 13 14 15 16 17 18 19 20 21 22 23 |
Sketch uses 3438 bytes (10%) of program storage space. Maximum is 32256 bytes. Global variables use 401 bytes (19%) of dynamic memory, leaving 1647 bytes for local variables. Maximum is 2048 bytes. avrdude: stk500_recv(): programmer is not responding avrdude: stk500_getsync() attempt 1 of 10: not in sync: resp=0x00 avrdude: stk500_recv(): programmer is not responding avrdude: stk500_getsync() attempt 2 of 10: not in sync: resp=0x00 avrdude: stk500_recv(): programmer is not responding avrdude: stk500_getsync() attempt 3 of 10: not in sync: resp=0x00 avrdude: stk500_recv(): programmer is not responding avrdude: stk500_getsync() attempt 4 of 10: not in sync: resp=0x00 avrdude: stk500_recv(): programmer is not responding avrdude: stk500_getsync() attempt 5 of 10: not in sync: resp=0x00 avrdude: stk500_recv(): programmer is not responding avrdude: stk500_getsync() attempt 6 of 10: not in sync: resp=0x00 avrdude: stk500_recv(): programmer is not responding avrdude: stk500_getsync() attempt 7 of 10: not in sync: resp=0x00 avrdude: stk500_recv(): programmer is not responding avrdude: stk500_getsync() attempt 8 of 10: not in sync: resp=0x00 avrdude: stk500_recv(): programmer is not responding avrdude: stk500_getsync() attempt 9 of 10: not in sync: resp=0x00 avrdude: stk500_recv(): programmer is not responding avrdude: stk500_getsync() attempt 10 of 10: not in sync: resp=0x00 Failed uploading: uploading error: exit status 1 |
And it’s my mistake, as I missed that the ESP32-CAM board had to be removed before uploading the code since it shares the same serial port. I just assumed the “Upload” switch took care of that, but it’s not the case, and the ESP32-CAM needs to be physically removed from the SunFounder camera adapter board. Once done, I could upload the sample code without issue:

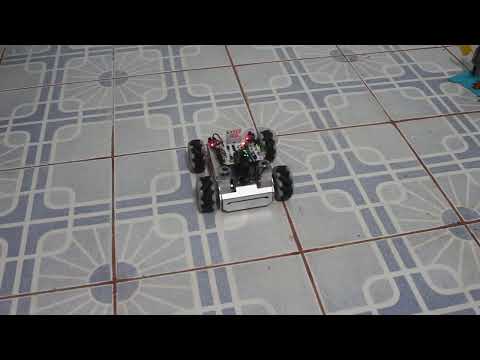
Unless you have a large desk with plenty of space, you should probably move the car kit on the floor to power the robot on and test the “Basic Movements” program.
The full list of “Funny Projects” tutorials:
- Basic Movements
- Omni Move
- Move and Rotate
- Drift
- Remote Control
- Car Light
- Compass
- Move Field Centric
- IR Obstacle
- Ultrasonic
- Obstacle Avoidance
- Follow
- Grayscale
- Line Track
- Line Track Field Centric
- AI Detection from APP (Face detection or Pose Estimation)
- APP Control
- APP Control Plus (almost the same as the “Play Mode” firmware”
So there’s plenty to play and learn from the kit.
Conclusion
SunFounder Zeus Car Kit is really a nice robot both as a toy that can be played with right after assembly and as an education platform to learn programming and basic robotics concepts since the company provides Arduino code samples and tutorials. The design of the robot feels sturdy and should last longer than cheaper models so it looks especially well-suited to the classroom since it should last several years.
While I had a lot of fun reviewing the Zeus Car Kit, I did not really enjoy having to make my own track on the floor with electrical tape, especially since the track has now basically self-destructed after a few hours as the tape won’t stick to the floor for long. Maybe it’s just because of Thailand’s hot and humid climate, but still, a folded printed-out track would have been nice. As far I can tell, the mobile app is also closed-source, and it could be seen as a long opportunity to also learn about mobile programming.
I would still have no issue recommending the Zeus Car Kit, especially since it’s pretty good value with SunFounder selling it on its store for $99 plus shipping and new buyers also get a 10% discount. Alternatively, it can also be purchased on Amazon.

Jean-Luc started CNX Software in 2010 as a part-time endeavor, before quitting his job as a software engineering manager, and starting to write daily news, and reviews full time later in 2011.
Support CNX Software! Donate via cryptocurrencies, become a Patron on Patreon, or purchase goods on Amazon or Aliexpress. We also use affiliate links in articles to earn commissions if you make a purchase after clicking on those links.


Photo of my race track 24 hours after “construction”.
https://www.cnx-software.com/wp-content/uploads/2023/08/electrical-tape-race-track.jpg
There’s got to be a better way 🙂 The room was cleaned and mopped before I laid out the black tape yesterday. The floor was obviously dry as well.
Hi Jean-Luc Aufranc,
the shrinkage effect of electrical tape is predictable on a flat surface.
Have you tried reinforced/armed tape? It is not pre-stressed during packaging and resists three-dimensional stress well.
Regards
Thanks for the tip. I’ll try next time I have a robot to test. The Zeus Car kit is on its way to a university in Thailand.
Thanks for your input as I needed the extra info. Just received my Zeus Car Kit August 2023. I’m retired and dabble into Robotics. My latest robotics kit is the Zeus Car-Kit.
The kit came with tools, and everything needed. The instructions were good.
The only downside I found assembling the kit is that I have adult hands and the small screws and nuts aren’t easy for an adult to work with.
After assembly completed the remote worked fine.
As far as working with the Smartphone App (Android in my case), I’m not completely satisfied with the user friendliness of the Android App. I struggled with the App on my Samsung Smartphone and decided to use my Samsung Tablet instead for better response with the boxes that really needed my S-Pen.
The Android App for adding features, setting up the Wi-Fi, Bluetooth, etc., and getting it to communicate was a bit of understanding, especially with all the instructions on the SunFounder web page to find answers. Don’t get me wrong, the SunFounder web page is loaded with great information but too busy for my simple question of how do I get the App to work over my router network.
A simpler step by step instruction to setup the network access with the App would have helped me save a lot of time researching all the docs on the SunFounder web page.
The Arduino IDE Code for Windows is a new learning curve for me so I will be taking the learning seminars at SunFounder.
I’m looking forward to learning Robotics Language so that I can do my own programming.
So, in conclusion, as a dabbler into Robotics as a 1st project for newbies, I’d say that it might be best for a first time programmer to read up on SunFounder’s docs and take some of SunFounder’s Seminars before building the kit.
Do some reading first and have a good understanding of your home network, router, etc.
It’s a great little project and it won’t break your bank account as a kit to your first step towards learning Robotics Programming.
I haven’t tried to connect the robot to my WiFi network, I only used the access point from the robot connection. I did not see instructions to connect the robot in client mode. It should be possible, but you might need to modify the firmware, and type the IP address in the mobile app (if possible).