
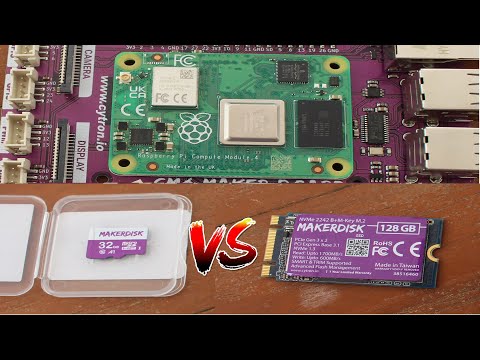
We’ve already checked out Cytron’s CM4 Maker Board kit with a Raspberry Pi CM4 system-on-module and booted the system with the included 32GB “MAKERDISK” Class 10 microSD card preloaded Raspberry Pi OS in the first part of the review. For the second part of the CM4 Maker review, I’ve mostly used the 128GB NVMe SSD provided by the company and played with other features of the board including the RTC, the buzzer, some Seeed Studio grove modules, and even got help from ChatGPT for one of the Python programs I used.
Booting Cytron CM4 Maker Board with the “MAKERDISK” NVMe SSD
I connected several Grove modules with GPIO and I2C interfaces, a Raspberry Pi Camera Module 3, an Ethernet cable, two RF dongles for a wireless keyboard and mouse, an HDMI cable to a monitor, and finally inserted the provided 5V/3.5A USB-C power adapter.

The MAKERDISK SSD comes with Raspberry Pi OS, so I did not have to flash the image, and booting the CM4 Maker Board with it was easy. I just had to remove the microSD card (that has priority over the SSD), and make sure the switch on the bottom left of the image above was set to RUN since the BOOT mode is for CM4 modules with an eMMC flash.

It’s truly a plug-and-play system since the OS is preinstalled.
System info and SBC Bench
Let’s check out the system information:
|
1 2 3 4 5 6 7 8 9 10 11 12 13 14 15 16 17 18 19 20 21 22 23 24 25 26 27 28 29 30 31 32 33 34 35 36 37 38 39 40 41 42 43 |
pi@raspberrypi:~ $ sudo inxi -Fc0 System: Host: raspberrypi Kernel: 6.1.21-v8+ aarch64 bits: 32 Console: tty 0 Distro: Raspbian GNU/Linux 11 (bullseye) Machine: Type: ARM Device System: Raspberry Pi Compute Module 4 Rev 1.1 details: BCM2835 rev: c03141 serial: 100000003927104e CPU: Info: Quad Core model: N/A variant: cortex-a72 bits: 64 type: MCP Speed: 1500 MHz min/max: 600/1500 MHz Core speeds (MHz): 1: 1500 2: 1500 3: 1500 4: 1500 Graphics: Device-1: bcm2711-hdmi0 driver: vc4_hdmi v: N/A Device-2: bcm2711-hdmi1 driver: vc4_hdmi v: N/A Device-3: bcm2711-vc5 driver: vc4_drm v: N/A Display: server: X.org 1.20.11 driver: loaded: modesetting unloaded: fbdev tty: 80x24 Message: Advanced graphics data unavailable in console for root. Audio: Device-1: bcm2711-hdmi0 driver: vc4_hdmi Device-2: bcm2711-hdmi1 driver: vc4_hdmi Sound Server: ALSA v: k6.1.21-v8+ Network: Message: No ARM data found for this feature. IF-ID-1: eth0 state: up speed: 1000 Mbps duplex: full mac: e4:5f:01:e4:b8:e5 IF-ID-2: wlan0 state: up mac: e4:5f:01:e4:b8:e6 Drives: Local Storage: total: 119.24 GiB used: 10.31 GiB (8.6%) ID-1: /dev/nvme0n1 model: PCIe SSD size: 119.24 GiB Partition: ID-1: / size: 117.03 GiB used: 10.26 GiB (8.8%) fs: ext4 dev: /dev/nvme0n1p2 ID-2: /boot size: 252 MiB used: 50.2 MiB (19.9%) fs: vfat dev: /dev/nvme0n1p1 Swap: ID-1: swap-1 type: file size: 100 MiB used: 0 KiB (0.0%) file: /var/swap Sensors: System Temperatures: cpu: 56.0 C mobo: N/A Fan Speeds (RPM): N/A Info: Processes: 186 Uptime: 2m Memory: 3.78 GiB used: 583.7 MiB (15.1%) gpu: 76 MiB Init: systemd runlevel: 5 Shell: Bash inxi: 3.3.01 |
The output mentions “Raspberry Pi Compute Module 4”, but it looks like the output from a Raspberry Pi 4 SBC, except for the NVMe drive. Having a PCIe interface for the SSD means there is no VL805 chip and as a result, no USB 3.0 ports, only four USB 2.0 ports on the CM4 Maker Board.
Let’s run sbc-bench benchmark scripts to check for potential issues:
|
1 2 3 4 5 6 7 8 9 10 11 12 13 14 15 16 17 18 19 20 21 22 23 24 25 26 27 28 29 30 31 32 33 34 35 36 37 38 39 40 41 42 43 44 45 46 47 48 49 50 51 52 53 54 55 56 57 58 59 60 61 62 63 64 65 66 67 68 69 70 71 72 73 74 75 76 77 78 79 80 81 82 83 84 85 86 87 88 89 90 91 92 93 94 95 96 97 98 99 100 101 102 103 104 105 106 107 108 109 110 111 112 113 114 115 116 117 118 119 |
pi@raspberrypi:~/ $ sudo ./sbc-bench.sh -c sbc-bench v0.9.40 Installing needed tools: apt -f -qq -y install sysstat lshw, tinymembench, ramlat, mhz, cpuminer...^Cpi@raspberrypi:~/iozone3_494/src/current $ sudo ./sbc-bench.sh -r Starting to examine hardware/software for review purposes... Average load and/or CPU utilization too high (too much background activity). Waiting... Too busy for benchmarking: 10:49:26 up 17 min, 3 users, load average: 0.96, 0.77, 0.44, cpu: 8% Too busy for benchmarking: 10:49:31 up 17 min, 3 users, load average: 0.96, 0.77, 0.44, cpu: 0% Too busy for benchmarking: 10:49:36 up 17 min, 3 users, load average: 0.88, 0.76, 0.44, cpu: 0% Too busy for benchmarking: 10:49:41 up 17 min, 3 users, load average: 0.81, 0.75, 0.43, cpu: 0% Too busy for benchmarking: 10:49:46 up 17 min, 3 users, load average: 0.83, 0.75, 0.44, cpu: 0% Too busy for benchmarking: 10:49:51 up 17 min, 3 users, load average: 0.76, 0.74, 0.44, cpu: 0% sbc-bench v0.9.40 Installing needed tools: apt -f -qq -y install stress-ng smartmontools mmc-utils, cpuminer. Done. Checking cpufreq OPP. Done. Executing tinymembench. Done. Executing RAM latency tester. Done. Executing OpenSSL benchmark. Done. Executing 7-zip benchmark. Done. Throttling test: heating up the device, 5 more minutes to wait. Done. Checking cpufreq OPP again. Done (15 minutes elapsed). ./sbc-bench.sh: line 4434: /sys/block/nvme0n1/device/type: No such file or directory Results validation: * Measured clockspeed not lower than advertised max CPU clockspeed * No swapping * Background activity (%system) OK * Throttling / frequency capping occured Full results uploaded to http://ix.io/4sWJ # Raspberry Pi Compute Module 4 Rev 1.1 Tested with sbc-bench v0.9.40 on Sat, 08 Apr 2023 11:08:43 +0700. Full info: [http://ix.io/4sWJ](http://ix.io/4sWJ) ### General information: BCM2711, Kernel: aarch64, Userland: armhf CPU sysfs topology (clusters, cpufreq members, clockspeeds) cpufreq min max CPU cluster policy speed speed core type 0 0 0 600 1500 Cortex-A72 / r0p3 1 0 0 600 1500 Cortex-A72 / r0p3 2 0 0 600 1500 Cortex-A72 / r0p3 3 0 0 600 1500 Cortex-A72 / r0p3 3794 KB available RAM ### Governors/policies (performance vs. idle consumption): Original governor settings: cpufreq-policy0: performance / 1500 MHz (conservative ondemand userspace powersave performance schedutil / 600 700 800 900 1000 1100 1200 1300 1400 1500) Tuned governor settings: cpufreq-policy0: performance / 1500 MHz ### Clockspeeds (idle vs. heated up): Before at 56.5°C: cpu0 (Cortex-A72): OPP: 1500, ThreadX: 1500, Measured: 1498 After at 84.2°C (throttled): cpu0 (Cortex-A72): OPP: 1500, ThreadX: 1500, Measured: 1498 ### Performance baseline * memcpy: 2447.2 MB/s, memchr: 1247.0 MB/s, memset: 2992.8 MB/s * 16M latency: 162.8 162.9 166.1 162.5 164.7 165.3 181.4 194.4 * 128M latency: 184.6 181.5 207.6 183.8 185.0 180.2 204.8 224.4 * 7-zip MIPS (3 consecutive runs): 5672, 5727, 5715 (5700 avg), single-threaded: 1630 * `aes-256-cbc 50486.18k 59697.96k 63357.01k 64378.20k 64714.07k 64618.50k` * `aes-256-cbc 50662.80k 59868.22k 63469.40k 64380.25k 64667.65k 64607.57k` ### Storage devices: * 119.2GB "PCIe SSD" SSD as /dev/nvme0: Speed 5GT/s (downgraded), Width x1 (downgraded), 0% worn out, drive temp: 36°C ### Swap configuration: * /var/swap on /dev/nvme0n1p2: 100.0M (0K used) ### Software versions: * Raspbian GNU/Linux 11 (bullseye) * Build scripts: http://archive.raspberrypi.org/debian/ bullseye main * Compiler: /usr/bin/gcc (Raspbian 10.2.1-6+rpi1) 10.2.1 20210110 / arm-linux-gnueabihf * OpenSSL 1.1.1n, built on 15 Mar 2022 * ThreadX: 82f3750a65fadae9a38077e3c2e217ad158c8d54 / Mar 17 2023 10:50:39 ### Kernel info: * `/proc/cmdline: coherent_pool=1M 8250.nr_uarts=0 snd_bcm2835.enable_headphones=0 snd_bcm2835.enable_hdmi=1 snd_bcm2835.enable_hdmi=0 video=HDMI-A-1:1920x1080M@60 smsc95xx.macaddr=E4:5F:01:E4:B8:E5 vc_mem.mem_base=0x3ec00000 vc_mem.mem_size=0x40000000 console=ttyS0,115200 console=tty1 root=PARTUUID=32d5aead-02 rootfstype=ext4 fsck.repair=yes rootwait quiet splash plymouth.ignore-serial-consoles` * Vulnerability Spec store bypass: Vulnerable * Vulnerability Spectre v1: Mitigation; __user pointer sanitization * Vulnerability Spectre v2: Vulnerable * Kernel 6.1.21-v8+ / CONFIG_HZ=250 All known settings adjusted for performance. Device now ready for benchmarking. Once finished stop with [ctrl]-[c] to get info about throttling, frequency cap and too high background activity all potentially invalidating benchmark scores. All changes with storage and PCIe devices as well as suspicious dmesg contents will be reported too. Time fake/real load %cpu %sys %usr %nice %io %irq Temp VCore 11:08:48: 1500/1500MHz 2.50 34% 1% 33% 0% 0% 0% 69.6°C 0.8700V |
It looks pretty much as expected, and CPU throttling occurred because the system does not ship with any cooling solution. That’s in a room with a 29°C ambient temperature. There are also some Spectre v1/v2 vulnerabilities…
|
1 2 3 4 5 6 7 8 9 10 11 12 13 14 15 16 17 18 19 20 21 22 23 24 25 26 |
System health while running 7-zip multi core benchmark: Time fake/real load %cpu %sys %usr %nice %io %irq Temp VCore 10:59:21: 1500/1500MHz 1.05 15% 1% 13% 0% 0% 0% 61.8°C 0.8700V 10:59:41: 1500/1500MHz 1.63 82% 1% 81% 0% 0% 0% 68.2°C 0.8700V 11:00:02: 1500/1500MHz 2.47 94% 2% 92% 0% 0% 0% 71.1°C 0.8700V 11:00:23: 1500/1500MHz 3.32 90% 2% 88% 0% 0% 0% 72.1°C 0.8700V 11:00:42: 1500/1500MHz 3.40 87% 1% 86% 0% 0% 0% 70.1°C 0.8700V 11:01:03: 1500/1500MHz 3.57 92% 1% 90% 0% 0% 0% 74.0°C 0.8700V 11:01:27: 1500/1500MHz 3.70 94% 2% 92% 0% 0% 0% 74.5°C 0.8700V 11:01:48: 1500/1500MHz 3.67 92% 2% 89% 0% 0% 0% 73.5°C 0.8700V 11:02:07: 1500/1500MHz 3.83 84% 2% 82% 0% 0% 0% 74.5°C 0.8700V 11:02:30: 1500/1500MHz 3.66 96% 1% 95% 0% 0% 0% 76.9°C 0.8700V 11:02:49: 1500/1500MHz 4.03 91% 2% 89% 0% 0% 0% 76.4°C 0.8700V 11:03:08: 1500/1500MHz 4.17 93% 3% 89% 0% 0% 0% 76.0°C 0.8700V System health while running cpuminer: Time fake/real load %cpu %sys %usr %nice %io %irq Temp VCore 11:03:21: 1500/1500MHz 4.23 24% 1% 22% 0% 0% 0% 80.8°C 0.8700V 11:04:07: 1500/1426MHz 4.19 99% 0% 99% 0% 0% 0% 82.8°C 0.8700V 11:04:53: 1500/1377MHz 4.37 100% 0% 99% 0% 0% 0% 83.8°C 0.8700V 11:05:40: 1500/1377MHz 4.22 100% 0% 99% 0% 0% 0% 84.2°C 0.8700V 11:06:27: 1500/1377MHz 4.21 100% 0% 99% 0% 0% 0% 83.8°C 0.8700V 11:07:13: 1500/1377MHz 4.32 99% 0% 99% 0% 0% 0% 83.8°C 0.8700V 11:08:00: 1500/1329MHz 4.23 100% 0% 99% 0% 0% 0% 84.2°C 0.8700V |
The overheating issue is not that based as it did not happen with 7-zip, and only cpuminer. Since the CM4 Maker Board looks to be easily useful for the education market, it won’t matter to most people, but if your target use case is demanding, or want to overclock the BCM2711 processor, you may consider purchasing a $4.5 heatsink for the CM4 module. That should help quite a bit.
CM4 Maker Board’s NVMe SSD
One of the highlights of the CM4 Maker Board is support for a short M.2 2242 NVMe SSD. So I’ve built iozone for Raspberry Pi to test the drive performance:
|
1 2 3 4 5 6 7 8 9 10 |
pi@raspberrypi:~ $ iozone -e -I -a -s 100M -r 4k -r 16k -r 512k -r 1024k -r 16384k -i 0 -i 1 -i 2 random random bkwd record stride kB reclen write rewrite read reread read write read rewrite read fwrite frewrite fread freread 102400 4 63527 101848 93009 93003 41134 96589 102400 16 161396 212032 171558 171222 107160 204687 102400 512 372712 374917 354187 354190 353150 377961 102400 1024 379233 387792 372938 372891 372089 383440 102400 16384 399166 395914 398335 398314 397881 399957 iozone test complete. |
Almost 400MB/s sequential read and write speeds, and random I/Os are not too bad,
Let’s now insert the 32GB “MAKERDISK” Class A1 microSD card to test it with iozone:
|
1 2 3 4 5 6 7 8 9 10 11 12 13 14 15 16 17 18 19 |
pi@raspberrypi:/media/pi/rootfs $ lsblk NAME MAJ:MIN RM SIZE RO TYPE MOUNTPOINT mmcblk0 179:0 0 28.9G 0 disk ├─mmcblk0p1 179:1 0 256M 0 part /media/pi/bootfs └─mmcblk0p2 179:2 0 28.7G 0 part /media/pi/rootfs nvme0n1 259:0 0 119.2G 0 disk ├─nvme0n1p1 259:1 0 256M 0 part /boot └─nvme0n1p2 259:2 0 119G 0 part / pi@raspberrypi:/media/pi/rootfs $ sudo iozone -e -I -a -s 100M -r 4k -r 16k -r 512k -r 1024k -r 16384k -i 0 -i 1 -i 2 random random bkwd record stride kB reclen write rewrite read reread read write read rewrite read fwrite frewrite fread freread 102400 4 3374 3461 12744 12736 10046 3176 102400 16 11155 11435 24923 24926 22029 11289 102400 512 29045 28593 44127 44161 43848 28540 102400 1024 29408 29014 44220 44322 44155 29083 102400 16384 28205 27217 44405 44529 44516 27626 iozone test complete. |
That’s a good microSD card, but at around 44MB/s sequential read/write speeds, and much slower random I/Os, especially for smaller writes.
To showcase the difference in performance I performed a reboot and started Chromium and LibreOffice Write with the microSD card and the SSD.
The SSD is faster, but I was expecting a larger difference. LibreOffice was not installed on the microSD card, so I installed it with apt, and started it immediately after that. I assumed caching during the installation would not impact the app startup too much, but I was wrong, and with caching, LibreOffice Writer starts faster on the microSD card than on the SSD without caching. I also loaded CNX Software website in Chromium but did not end up showing it in the video, because the website ended up being faster with the microSD card because it took longer to load the data from the Internet with the SSD image independently of the storage speed… (I had to refresh the page as it would not load)
So overall, the system is snappier with the SSD than with the microSD card, but the difference might not be as great as one would necessarily expect. The performance delta should be more noticeable for applications that frequently write a small amount of data to the drive.
CM4 Maker board built-in features
PCF85063A RTC
The board has a range of interesting features, and I started with the RTC (without battery). Instructions can be found on the Wiki. But we are just told to use hwclock utility and that “Please note that DSI and CSI are prohibited when using RTC. I2C-10 is used by default”.
So first thing, I had to enable I2C with raspi-config in a terminal. It can also be done in the Settings menu on the desktop.
 After a reboot, I was still unable to use the RTC:
|
1 2 3 |
pi@raspberrypi:~ $ sudo hwclock -r hwclock: Cannot access the Hardware Clock via any known method. hwclock: Use the --verbose option to see the details of our search for an access method. |
I eventually figured out I had to add the following line in /boot/config.txt:
|
1 |
dtoverlay=i2c-rtc,pcf85063a,i2c_csi_dsi |
One more reboot and the PCF85063A RTC is detected in the kernel log:
|
1 2 3 |
pi@raspberrypi:~ $ dmesg | grep pcf [ 7.155444] rtc-pcf85063 10-0051: registered as rtc0 [ 7.160928] rtc-pcf85063 10-0051: hctosys: unable to read the hardware clock |
I can read the time from the RTC:
|
1 2 |
pi@raspberrypi:~ $ sudo hwclock -r 2023-04-08 14:26:42.962612+07:00 |
Synchronize the system time clock to the hardware clock:
|
1 |
pi@raspberrypi:~ $ sudo hwclock -w |
Synchronize the hardware clock to the system clock:
|
1 |
pi@raspberrypi:~ $ sudo hwclock -s |
The wiki has further instructions to show the time on an I2C OLED display.
Buzzer & user buttons
My plan was to test the buzzer next, but Cytron provide a Python program for the buzzer and the three buttons on the board, so that gave me the opportunity to test both.
We’ll find all Python code sample codes on Github:
|
1 |
git clone https://github.com/CytronTechnologies/Getting-Started-with-CM4-Maker-Board/ |
We can test the buzzer and the buttons with Lesson 2/buzzer_button.py:
|
1 2 3 4 5 6 7 8 9 10 11 12 13 14 15 16 17 18 19 20 21 22 23 24 25 26 27 28 29 30 31 32 33 34 35 36 37 38 39 40 41 42 43 44 45 46 47 48 49 50 51 52 53 54 55 56 57 58 59 60 61 62 63 |
import RPi.GPIO as GPIO import time import math buttonPin1 = 17 #Define the button pins buttonPin2 = 22 buttonPin3 = 27 buzzerPin = 19 #Define the buzzer pin GPIO.setwarnings(False) #Disable warnings (optional) GPIO.setmode(GPIO.BCM) #Number GPIOs by Broadcom Chip GPIO.setup(buzzerPin, GPIO.OUT) #Set buzzerPin's mode as output GPIO.setup(buttonPin1, GPIO.IN, pull_up_down=GPIO.PUD_UP) # Set pin to be an input pin and set initial value to be pulled high GPIO.setup(buttonPin2, GPIO.IN, pull_up_down=GPIO.PUD_UP) GPIO.setup(buttonPin3, GPIO.IN, pull_up_down=GPIO.PUD_UP) p = GPIO.PWM(buzzerPin, 1) p.start(0); def tone1(): p.start(50) for x in range(0,361): #Frequency of the tone along the sine wave sinVal = math.sin(x * (math.pi / 180.0)) #Calculate the sine value toneVal = 2000 + sinVal * 500 #Add to the resonant frequency with a Weighted p.ChangeFrequency(toneVal) #Output PWM time.sleep(0.001) def tone2(): p.start(50) for x in range(0,361): sinVal = math.sin(x * (math.pi / 180.0)) toneVal = 1000 + sinVal * 500 p.ChangeFrequency(toneVal) time.sleep(0.001) def tone3(): p.start(50) for x in range(0,361): sinVal = math.sin(x * (math.pi / 180.0)) toneVal = 3000 + sinVal * 800 p.ChangeFrequency(toneVal) time.sleep(0.001) def stopTone(): p.stop() while True: # Run forever if GPIO.input(buttonPin1) == GPIO.LOW: print("Button #17 was pushed!") tone1() elif GPIO.input(buttonPin2) == GPIO.LOW: print("Button #22 was pushed!") tone2() elif GPIO.input(buttonPin3) == GPIO.LOW: print("Button #27 was pushed!") tone3() else: stopTone() |
Just keep pressing the button to output a specific sound.
|
1 2 3 4 |
pi@raspberrypi:~/Getting-Started-with-CM4-Maker-Board/Lesson 2 $ python buzzer_button.py Button #17 was pushed! Button #27 was pushed! Button #27 was pushed! |

GPIO LEDs
Cytron likes to add LEDs to at least some GPIOs on their boards. It’s great for education, but also for debugging a program. The CM4 Maker Board comes with 10 GPIO LEDs.

So I wrote a small Python program to light up each LED one by one, and then turn them off one by one in reverse order:
|
1 2 3 4 5 6 7 8 9 10 11 12 13 14 15 16 17 18 19 20 |
import RPi.GPIO as GPIO import time gpios = [2, 3, 5, 6, 12, 13, 14, 15, 23, 24] GPIO.setmode(GPIO.BCM) # Broadcom pin-numbering scheme for x in gpios: GPIO.setup(x, GPIO.OUT) # LED pin set as output while 1: for i in gpios: GPIO.output(i, GPIO.HIGH) time.sleep(0.5) time.sleep(1) gpios.reverse() for i in gpios: GPIO.output(i, GPIO.LOW) time.sleep(0.5) gpios.reverse() time.sleep (1) |

All good.
CM4 Maker Board expansion ports & ChatGPT
The CM4 Maker includes several Grove connectors and one small Maker port. I don’t have any module for the latter so instead, I used some of the Grove modules from the Wio Link Starter Kit I reviewed many years ago.
I’ll start with the DHT11 temperature and humidity sensor connected to a Grove GPIO connector.

We’ll need to install some dependencies first:
|
1 2 |
pip3 install adafruit-circuitpython-dht sudo apt-get install libgpiod2 |
I then used the DHT11 sample from Cytron’s GitHub repo (Lesson 1) and just changed the GPIO from 2 (for the Maker port) to 24 from the second Grove digital connector on the board:
|
1 2 3 4 5 6 7 8 9 10 11 12 13 14 15 16 17 18 19 20 21 22 23 |
import time import board import adafruit_dht import psutil # We first check if a libgpiod process is running. If yes, we kill it! for proc in psutil.process_iter(): if proc.name() == 'libgpiod_pulsein' or proc.name() == 'libgpiod_pulsei': proc.kill() sensor = adafruit_dht.DHT11(board.D24) while True: try: temp = sensor.temperature humidity = sensor.humidity print("Temperature: {}*C Humidity: {}% ".format(temp, humidity)) except RuntimeError as error: print(error.args[0]) # comment this line to disable the error messages time.sleep(2.0) continue except Exception as error: sensor.exit() raise error time.sleep(2.0) |
And it works fine, but with some errors from time to time.
|
1 2 3 4 5 6 7 8 9 |
pi@raspberrypi:~/Getting-Started-with-CM4-Maker-Board/Lesson 1 $ python dht11_sensor.py A full buffer was not returned. Try again. Temperature: 31*C Humidity: 28% Temperature: 31*C Humidity: 27% Temperature: 31*C Humidity: 27% Temperature: 31*C Humidity: 27% Temperature: 31*C Humidity: 27% Checksum did not validate. Try again. Temperature: 31*C Humidity: 27% |
I then tested Seeed Studio’s Grove I2C accelerator module connected to the only Grove I2C port on the board.

“I” wrote some code to test the Grove I2C connector with a 3-axis MMA7660 accelerometer:
|
1 2 3 4 5 6 7 8 9 10 11 12 13 14 15 16 17 18 19 20 21 22 23 24 25 26 27 28 29 30 31 32 33 34 35 36 37 38 |
import smbus import time # Define the I2C address of the accelerometer ACCEL_ADDR = 0x4c # Initialize the I2C bus bus = smbus.SMBus(1) # Start measurement bus.write_byte_data(ACCEL_ADDR, 0x07, 0x01) while True: # Read the acceleration values for each axis try: accel_x = bus.read_byte_data(ACCEL_ADDR, 0x00) accel_y = bus.read_byte_data(ACCEL_ADDR, 0x01) accel_z = bus.read_byte_data(ACCEL_ADDR, 0x02) except OSError as e: print("Error reading accelerometer data: {}".format(e)) accel_x, accel_y, accel_z = 0, 0, 0 # Convert the raw values to G-forces accel_x_g = (accel_x & 0x3F) * 0.047 # 47 mg/LSB if (accel_x & 0x40): accel_x_g -= 2.048 # 2 g offset accel_y_g = (accel_y & 0x3F) * 0.047 if (accel_y & 0x40): accel_y_g -= 2.048 accel_z_g = (accel_z & 0x3F) * 0.047 if (accel_z & 0x40): accel_z_g -= 2.048 # Print the acceleration values print("Acceleration (g): X={:.2f}, Y={:.2f}, Z={:.2f}".format(accel_x_g, accel_y_g, accel_z_g)) # Wait for 1 second time.sleep(1) |
And it worked fine as I moved the module around to test it successfully.
|
1 2 3 4 5 6 7 8 9 10 11 12 13 14 15 16 17 18 19 |
pi@raspberrypi:~ $ python accel-loop.py Acceleration (g): X=0.00, Y=0.00, Z=0.00 Acceleration (g): X=0.52, Y=2.63, Z=2.02 Acceleration (g): X=1.08, Y=0.23, Z=2.21 Acceleration (g): X=0.99, Y=2.21, Z=2.40 Acceleration (g): X=2.68, Y=1.18, Z=2.87 Acceleration (g): X=0.70, Y=0.00, Z=2.12 Acceleration (g): X=0.56, Y=2.58, Z=2.07 Acceleration (g): X=0.52, Y=0.05, Z=2.40 Acceleration (g): X=2.96, Y=2.02, Z=2.77 Acceleration (g): X=2.91, Y=1.97, Z=0.00 Acceleration (g): X=2.87, Y=1.93, Z=2.91 Acceleration (g): X=0.05, Y=1.97, Z=2.96 Acceleration (g): X=2.91, Y=2.07, Z=0.28 Acceleration (g): X=0.23, Y=2.21, Z=2.26 ^CTraceback (most recent call last): File "/home/pi/accel-loop.py", line 38, in <module> time.sleep(1) KeyboardInterrupt |
Actually, I lied… I did not write this code myself, instead, I asked ChatGPT. It took 4 interactions with the AI chatbot, but the code eventually worked without any modifications from my side.

Here’s what I wrote in ChatGPT:
- Write Python code for a 3-axis Grove I2C accelerometer connected to a custom Raspberry Pi CM4 board
- Will this work with MMA7660 accelerometer?
- Can you add some debugging code since the code will only return 0
- Not sure why, but it works now. I’d like to measure acceleration data in a loop every second
The first time it outputted code for an accelerometer using 0x53 I2C address. But i2cdetect showed nothing with 0x53, only one device using 0x4c. I eventually found out the Grove accelerometer used an MMA7660 chip, hence my second question. The code would then run once only and show 0,0,0. So I asked ChatGPT to add some debug code, and it worked, and finally, I asked it to write code to read data every second. I just had to copy/paste the code for it to work. That’s a pretty powerful tool.
Raspberry Pi 4 interfaces testing
Cytron CM4 Maker Board comes with interfaces that are found in the Raspberry Pi 4 board, so I quickly tested those worked as expected. We’ve already seen USB 2.0 ports and HDMI ports work, so I’ll test the camera connector, Gigabit Ethernet, and the audio jack.
Raspberry Pi Camera Module 3
Following the instructions from the Raspberry Pi Camera Module 3 review, I tried to list the camera:
|
1 2 |
pi@raspberrypi:~ $ libcamera-hello --list-camera No cameras available! |
But it fails. I tried to disable the RTC, and double-checked the flat cables were properly inserted, but it did not help. I did not update the firmware since it was dated from March 2023. The Camera Module 3 should work out of the box, but Cytron tells us to install a blob in the Wiki…
|
1 |
sudo wget https://datasheets.raspberrypi.com/cmio/dt-blob-cam1.bin -O /boot/dt-blob.bin |
And after a reboot, the system could indeed detect the camera
|
1 2 3 4 5 6 7 |
pi@raspberrypi:~ $ libcamera-hello --list-camera Available cameras ----------------- 0 : imx708 [4608x2592] (/base/soc/i2c0mux/i2c@1/imx708@1a) Modes: 'SRGGB10_CSI2P' : 1536x864 [120.13 fps - (768, 432)/3072x1728 crop] 2304x1296 [56.03 fps - (0, 0)/4608x2592 crop] 4608x2592 [14.35 fps - (0, 0)/4608x2592 crop] |
And I could indeed use the camera normally.

I also tested the RTC while running libcamera-hello preview window, I had no issues when reading the date from the RTC nor artifacts or errors with the camera:
 Cytron is using legacy camera tools such as raspistill and raspivid, and that may be why they have issues…
Gigabit Ethernet
A quick check showed Gigabit Ethernet works fine even in full-duplex:
|
1 2 3 4 5 6 7 8 9 10 11 12 13 14 15 16 17 18 19 20 21 22 23 24 25 |
jaufranc@cnx-laptop-4:~$ iperf3 -t 60 -c 192.168.31.93 -i 10 --bidir Connecting to host 192.168.31.93, port 5201 [ 5] local 192.168.31.86 port 54936 connected to 192.168.31.93 port 5201 [ 7] local 192.168.31.86 port 54938 connected to 192.168.31.93 port 5201 [ ID][Role] Interval Transfer Bitrate Retr Cwnd [ 5][TX-C] 0.00-10.00 sec 1.09 GBytes 933 Mbits/sec 0 1.31 MBytes [ 7][RX-C] 0.00-10.00 sec 939 MBytes 788 Mbits/sec [ 5][TX-C] 10.00-20.00 sec 1.09 GBytes 934 Mbits/sec 0 1.31 MBytes [ 7][RX-C] 10.00-20.00 sec 964 MBytes 809 Mbits/sec [ 5][TX-C] 20.00-30.00 sec 1.09 GBytes 934 Mbits/sec 0 1.31 MBytes [ 7][RX-C] 20.00-30.00 sec 968 MBytes 812 Mbits/sec [ 5][TX-C] 30.00-40.00 sec 1.09 GBytes 933 Mbits/sec 0 1.31 MBytes [ 7][RX-C] 30.00-40.00 sec 958 MBytes 804 Mbits/sec [ 5][TX-C] 40.00-50.00 sec 1.09 GBytes 934 Mbits/sec 0 1.31 MBytes [ 7][RX-C] 40.00-50.00 sec 961 MBytes 807 Mbits/sec [ 5][TX-C] 50.00-60.00 sec 1.09 GBytes 933 Mbits/sec 0 1.31 MBytes [ 7][RX-C] 50.00-60.00 sec 968 MBytes 812 Mbits/sec - - - - - - - - - - - - - - - - - - - - - - - - - [ ID][Role] Interval Transfer Bitrate Retr [ 5][TX-C] 0.00-60.00 sec 6.52 GBytes 934 Mbits/sec 0 sender [ 5][TX-C] 0.00-60.04 sec 6.52 GBytes 933 Mbits/sec receiver [ 7][RX-C] 0.00-60.00 sec 5.63 GBytes 806 Mbits/sec 0 sender [ 7][RX-C] 0.00-60.04 sec 5.62 GBytes 805 Mbits/sec receiver iperf Done. |
Audio jack
The final test I wanted to go through was connecting the 3.5mm audio jack to speakers powered by one of the USB ports from the board.

But to my surprise, it did not work for me. Only HDMI shows up on the desktop (right-click on the volume icon), and raspi-config does not have any “headphones” option in the audio config:

I could not find any obvious solution, but I’ve asked, and hopefully, Cytron will explain how to make that work, and I’ll update the post accordingly.
Update: the /boot/config.txt file must be edited with the following line for the audio jack to work:
|
1 |
dtoverlay=audremap,pins_18_19 |
After a reboot, we can find the “AV Jack” by right-clicking on the volume icon, or in raspi-config:

As you can see, this completely disables HDMI audio, but I could play a YouTube video with audio going out through the speakers attached to the 3.5mm audio jack.
Cytron told me it was in the datasheet, a Google Docs document that did not show in a web search…, and also includes a script that will automatically make the /boot/config.txt modifications I did manually in the review above.
|
1 |
curl -L tinyurl.com/setup-maker-cm4 | sudo bash |
Final words
Cytron’s CM4 Maker Board has been fun to review. It looks like a nice platform for education, prototyping with its expansion options, or even debugging. It offers a snappier system than a Raspberry Pi 4 thanks to support for NVMe SSD. I also like that the company is selling MAKERDISK drives preloading with Raspberry Pi OS as it can save time, for example for a teacher that may have to prepare a dozen systems for a class.
Somebody asked me if this could be used as a Raspberry Pi 4 replacement, and I don’t see any reason why not, since everything mostly works the same. If your workload is demanding, just make sure to purchase a heatsink for the Raspberry Pi CM4 module to prevent any throttling, and you’d be good to go. But note that there aren’t any USB 3.0 ports, and if USB 2.0 does not cut it for your use case, then it would not be suitable.
I’d like to thank Cytron for sending a sample for review. The kit used in this review is similar to the “CM4 Maker Board + CM4W4L + MD NVMe 2242 128 GB + Accessories” minus the microSD card which does not seem to be included, and there should be an HDMI cable that was not in my kit. It is listed for $177, but is currently out of stock. If you only need the CM4 Maker Board carrier board, the price is much lower at $56, and a full kit with CM4W88 and accessories, but no SSD, sells for $179 with 30 pieces in stock. I’d recommend also purchasing the CM4 heatsink for $4.50.

Jean-Luc started CNX Software in 2010 as a part-time endeavor, before quitting his job as a software engineering manager, and starting to write daily news, and reviews full time later in 2011.
Support CNX Software! Donate via cryptocurrencies, become a Patron on Patreon, or purchase goods on Amazon or Aliexpress. We also use affiliate links in articles to earn commissions if you make a purchase after clicking on those links.

