I’ve just received a kit comprised of an ODROID-H4+ SBC along with a Type 3 enclosure taking up to four 2.5-inch SATA drives and related accessories for review. I’ll start with an unboxing, followed by an assembly guide, and a quick first boot in the first part of the review, before testing performance, features such as IBECC memory, power consumption, and more in the second part of the review.
ODROID-H4+ kit unboxing
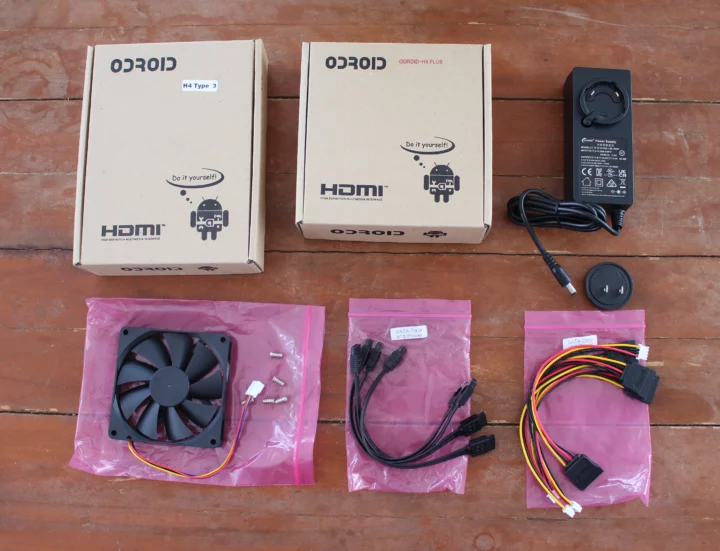
The package I received included small packages for the “H4 Type 3” enclosure and the ODROID-H4 PLUS SBC, a 15V/4A (60W) power supply with US plug adapter, a large fan with screws, as well as four sets of SATA data and power cables.
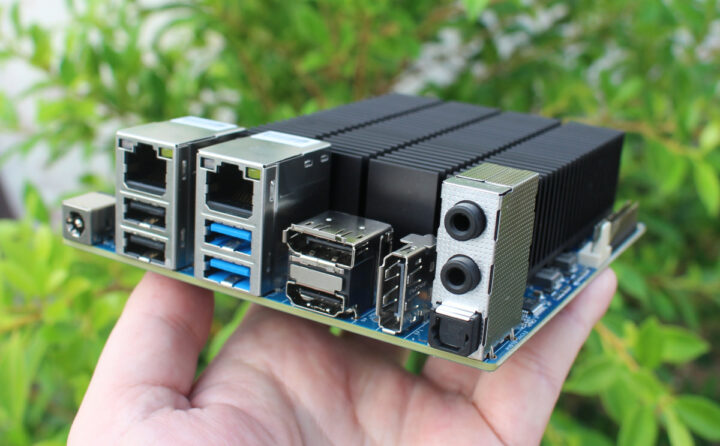
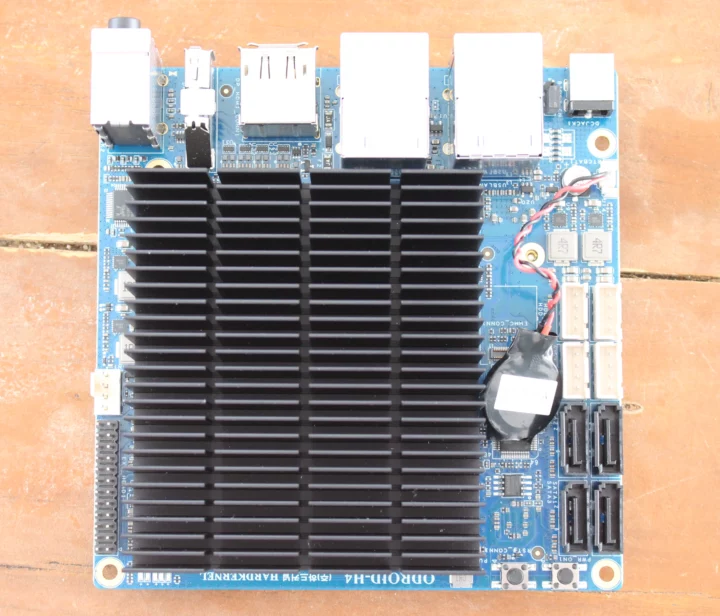
We’ve already provided the ODROID-H4, H4+, and H4 Ultra specifications in the announcement post, but let’s have another quick look at the Intel Processor N97 fanless SBC. The rear panel comes with a DC jack, two 2.5GbE RJ45 ports, two USB 2.0 ports, two USB 3.0 ports, three video outputs (1x HDMI and 2x DisplayPort), and an audio combo hack with audio input, audio output, and optical S/PDIF.
The other side of the board comes with four SATA data ports, four SATA power connectors, the power and reset buttons, and an RTC backup battery (not included by default).
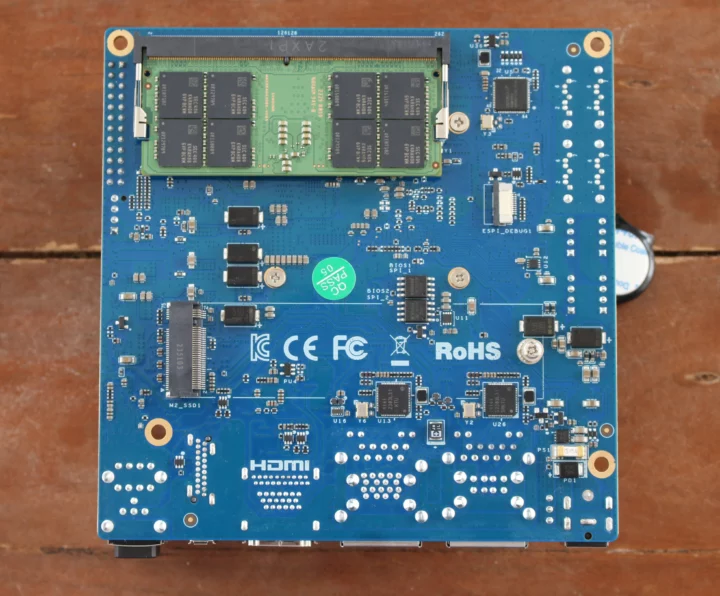
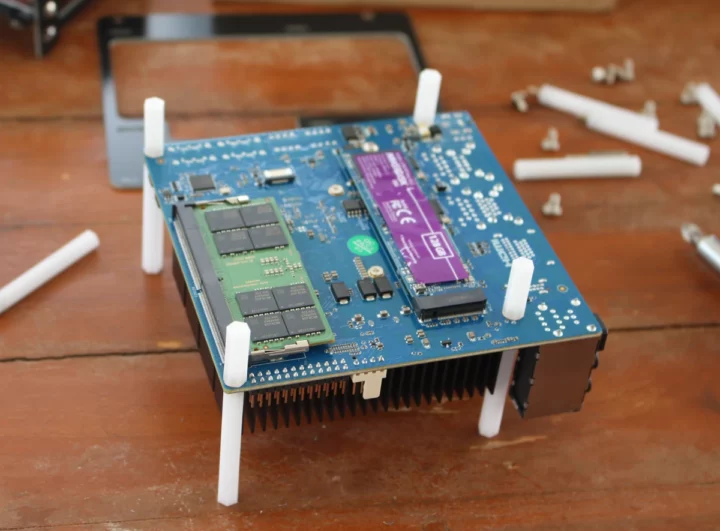
The ODROID-H4+ SBC will not come with RAM by default, but since I don’t have any spare one, I asked Hardkernel to send the review sample with memory, and they told me they added a “32GB Samsung DDR5” memory… The bottom side also features an M.2 NVMe socket and I’ll add my own SSD during the assembly.
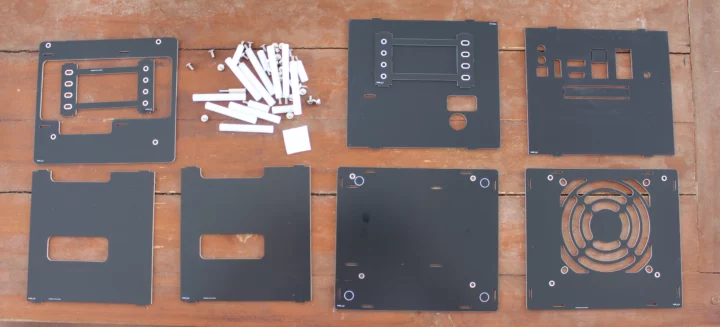
The H4 Type 3 enclosure comes as a kit with PCB-like parts, plastic standoffs, a few screws, and four rubber feet.
ODROID-H4 Type 3 case assembly instructions
The only assembly instructions I could find were a YouTube video… If like me, you’re not a big fan of video instructions with having to pause and rewind the video frequently, I’ll go through the main assembly steps below.
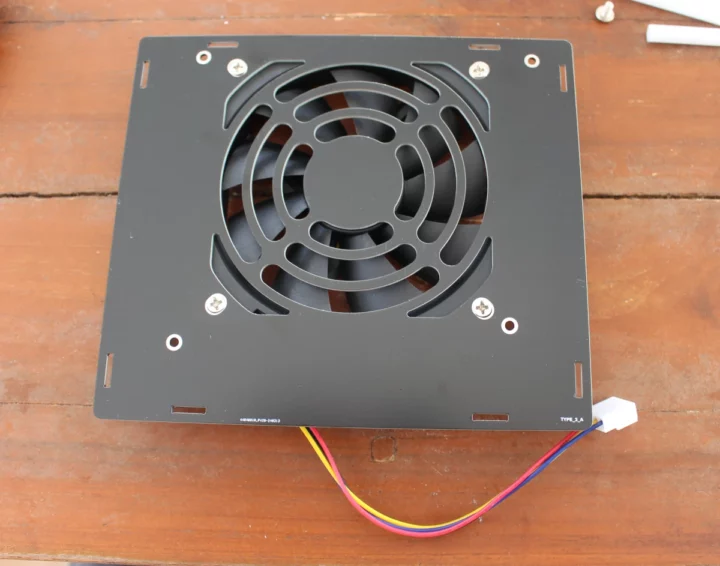
We’ll start by attaching the fan to the top cover with four of the five screws that ship with the fan. Make sure the fan is orientated as shown in the photo above. Hardkernel recommends the use of an electric screwdriver. I didn’t have any on hand, so I did that manually
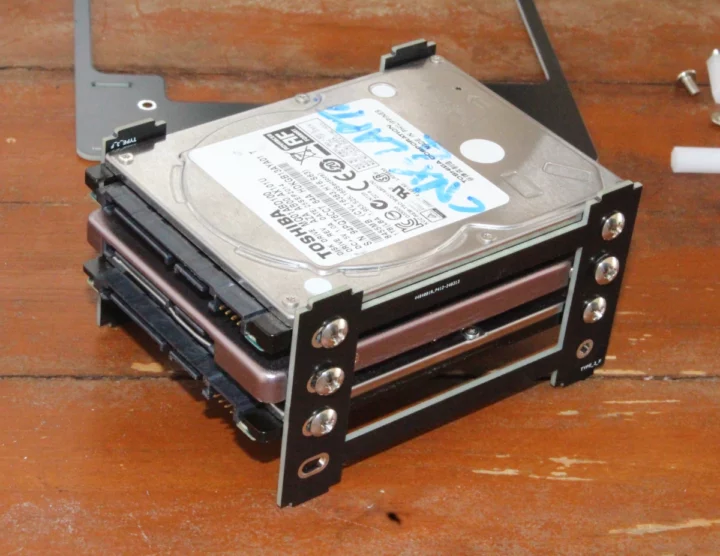
The next step is to mount the SATA drives to the two brackets. I only have three 2.5-inch drives (2x HDD and 1x SSD), but there’s room for four. The main point is to pay attention to the orientation of the drives. Somehow I struggled to fully tighten the two screws at the front part of the SSD, maybe the threads are damaged on my drive after being used in so many reviews…
We can now work on the ODROID-H4+ SBC. I started by installing a 128GB MAKERDISK NVMe SSD, as once the kit is assembled, it will be a pain to install or replace the memory or storage (See photo below). I also mounted four long standoffs with female threads to four short standoffs with female and male threads through the four mounting holes of the board.
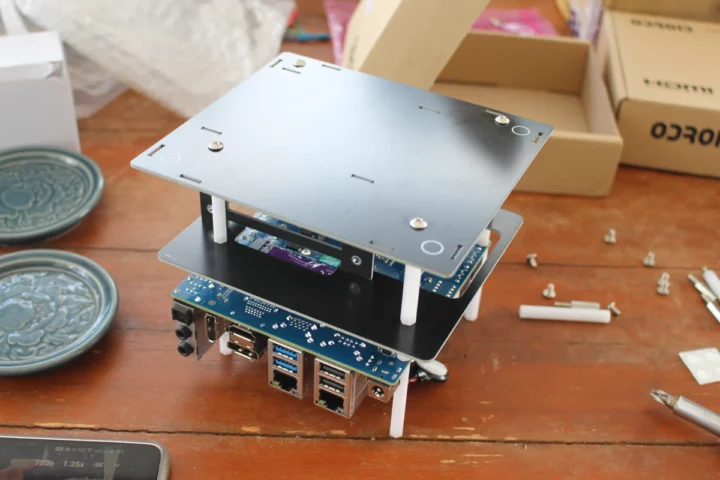
Time to install the middle plate and secure it with long female/make standoffs before clipping the SATA drive brackets on top.
At this stage, we can install the bottom plate and secure it with four screws. It might also be a good time to stick the four rubber feet on the white circles, although I did not do it at this step of the assembly myself.
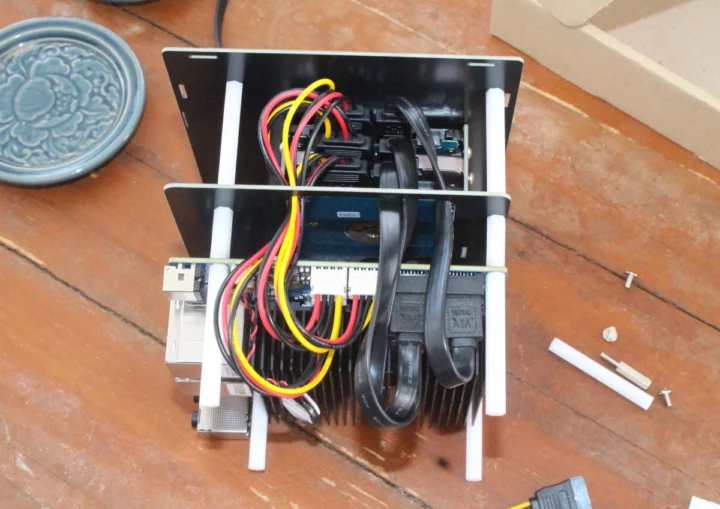
Now place the kit on its side, and connect the power and data cables between the drives and the ODROID-H4+ board making sure to pass the cables through the large opening of the middle plate, and not around it (one mistake I made the first time).
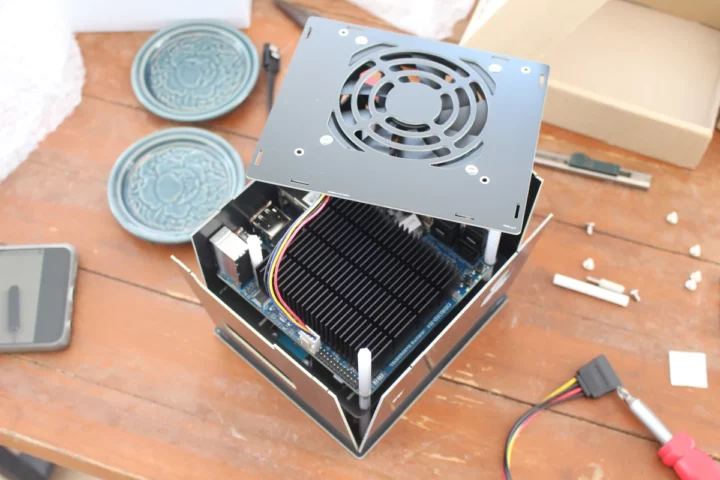
The H4 Type 3 enclosure is designed to work with all ODROID-H4 boards including the variant with only one RJ45 port, so we’ll need to cut off the bit covering one of the RJ45 ports on the rear plate to access the two Ethernet ports on the ODROID-H4+. We can now insert all sides in the small opening of the bottom plate, and connect the fan to the connector on the SBC as shown in the photo above.
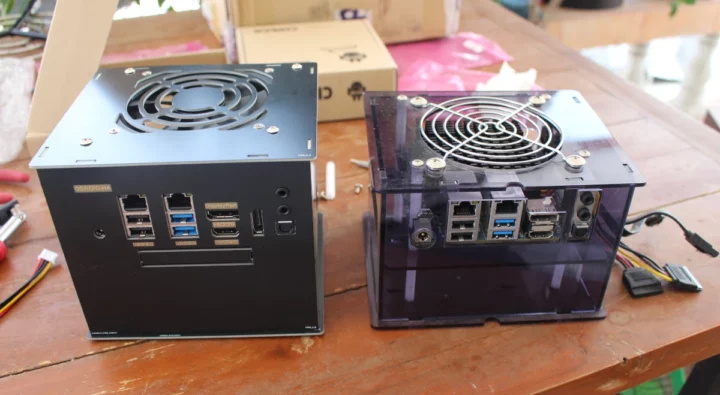
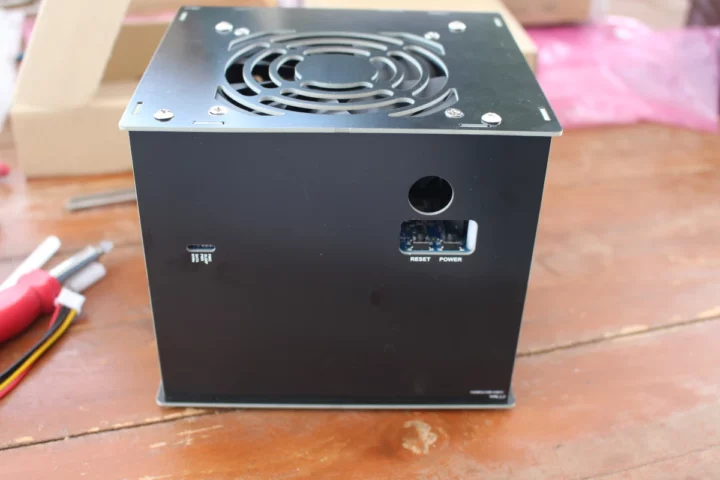
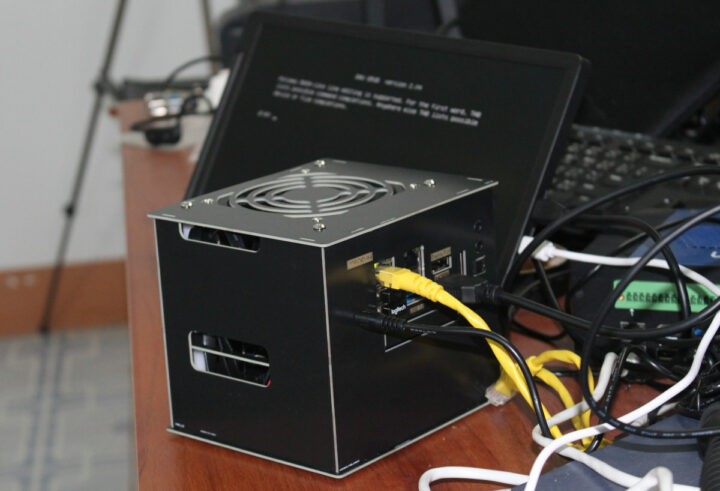
The final step is to push all side panels and insert the top cover on top before securing it with four more screws. The results can be seen above with the ODROID-H4+ with Type 3 case on the left, and the ODROID-H2+ with Type 3 Case on the right. The new design is sturdier but also bigger because it’s designed to take the Net Card with four 2.5 GbE ports. You’ll see another detachable panel under the USB and HDMI ports for this purpose.
Another improvement over the Type 3 case for the ODROID-H2 is much easier access to the Reset and Power buttons thanks to an opening. A round opening is still there for people wanting to add a large power button. It took me about one hour to complete the assembly including taking photos for the review. I estimate it would have taken around 45 minutes otherwise.
ODROID-H4+ first boot
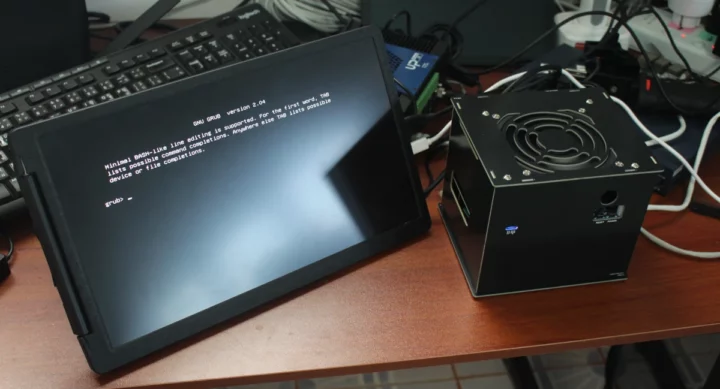
Time to give it a try. I’ve connected the ODROID-H4+ to an HDMI display (CrowView laptop monitor), two RF dongles for a wireless mouse and a wireless keyboard, and an Ethernet cable to one of the 2.5GbE ports. I finally connected the 60W power supply and pressed the power button.
I could immediately see the Hardkernel logo on the monitor, and the boot quickly ended up in Grub which should not be surprising since the system did not ship with storage (except for the 128Mbit SPI flash). I’ll have to install Ubuntu 24.04 on the M.2 NVMe SSD I installed in the kit. Important note: according to the Wiki, the first boot may take 3 minutes after you install the RAM, but mine already came equipped with RAM so the “RAM timing check” part was already done.
The power consumption is around 16.1 Watts at this stage, so I might have to take the ODROID-H4+ SBC out of its enclosure for further power consumption tests and fanless benchmarks parts of the review.
That will be all for today. I’d like to thank Hardkernel for sending the ODROID-H4+ kit for review. Readers can reproduce this exact setup with the following items:
- ODROID-H4+ SBC – $139
- H4 Type 3 case – $17
- 15V/4A power adapter – $9.40 as an option when ordering the board. Note a 19V~20V laptop power supply would also work. Just make sure to check the polarity.
- SATA data and power cables – $3 per set, or $12 in total
- RTC backup battery – $2.50
- 92x92x15mm PWM cooling fan – $4
- Samsung 32GB DDR5-5600 SO-DIMM – $95 on Hardkernel. Not a bad deal when we compare the price to the Samsung 32GB DDR5-5600 memory sticks sold on Amazon. CRUCIAL ones are a little cheaper
That would be $278.90 plus shipping in total to which you’d have to add an M.2 SSD for the OS (unless you’re fine running the OS from one of the SATA drives) and a few SATA drives.
Continue reading ODROID-H4 Plus review – Part 2: Intel N97 NAS Kit and fanless SBC tested in Ubuntu 24.04.

Jean-Luc started CNX Software in 2010 as a part-time endeavor, before quitting his job as a software engineering manager, and starting to write daily news, and reviews full time later in 2011.
Support CNX Software! Donate via cryptocurrencies, become a Patron on Patreon, or purchase goods on Amazon or Aliexpress. We also use affiliate links in articles to earn commissions if you make a purchase after clicking on those links.


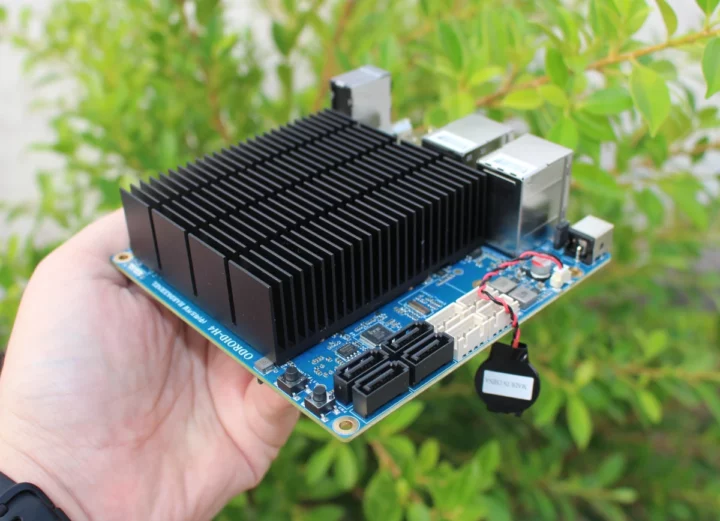



It is not clear whether a RTC backup battery is included with the motherboard. I have seen an unboxing video with a battery already present in the box.
Mine was also attached to the board, but I don’t see the RTC battery in the photos of the SBC on the store, and the RTC battery is also sold separately.
I remember hearing that batteries are not welcome in certain countries or post-offices, so I suspect they prefer to keep the option of sending or not sending them depending on the destination address.
I’m not sure about receiving batteries, but my post office won’t send anything with a battery abroad (within Thailand that’s OK), and I would have to go through DHL and pay extra for battery shipping compliance.
I did receive a kit shipped from the US once with a small CR1225 coin-cell battery. It had some compliance documents and the full datasheet printed out…
OMG! What’s fun is to imagine that at this point there might be as much elementary lithium (as any other component) in the kilogram of paper than in the battery itself 🙂
Thanks a lot for the review. I have seen a second YouTube unboxing review. The reviewers ended up with 2 RTC batteries, one inside the sealed plastic of the board and a second one bought separately.
IBECC! I’ve been hearing about it for a long time, but thought it wasn’t present in any of the Nxx processors, just in older Atoms
Can’t wait to read your in-depth analysis of this feature, specially regarding performance impact (I’ve heard it’s bad) and power consumption (haven’t heard anything about that yet).
Enabling IBECC will slightly lower the available memory due to parity bits. I will be testing the performance. Not sure about power consumption, because I don’t expect it to have any or very limited impact.
> I will be testing the performance.
Please let also Geekbench 6 run in both modes since a simple single-threaded tinymembench/ramlat run might not tell the full story. Geekbench might need to be exexuted a few times in a row according to this source.
A simple way to do this is a ‘for i in 1 2 3 ; do sbc-bench -G ; done’ directly after reboot and adjusting settings in UEFI 🙂
@Jean-Luc Aufranc (CNXSoft):
Not sure about Geekbench, but
sbc-bench.shwould be very welcome, specially if you publish the URL with the complete uploaded results — it’s what I’ve been using to compare systems.Yes, I’ll run all the usual benchmarks.
> Enabling IBECC will slightly lower the available memory due to parity bits.
I’ve seen numbers as high as 20% performance loss and more with IBECC enabled than without, but that was with older Atom CPUs.
I will be very happy if you manage to find better numbers than these.
> I will be testing the performance.
yay! \o/
Really looking forward to your testing.
> Not sure about power consumption, because I don’t expect it to have any or very limited impact.
I agree a substantial impact would be a surprise, but in the same manner that epistheme is always better than doxa, it’s always better to test than to presume…