
Quite a few months ago, I received an Energy Micro EFM32 Tiny Gecko Starter Kit, but I haven’t done much with it. But recently I saw a tweet from EnergyMicro about Simplicity Studio supports for Ubuntu, and I know it can be problematic to find proper tools for ARM MCU development in Linux, so I decided to give it a try. The first part is about Simplicity Studio, and energyAwareTools which are specific to Energy Micro, but the second part deals with setting up Eclipse and CodeSourcery ARM toolchain for MCU development which should be reusable for other MCUs from vendors such as Texas Instruments, NXP and STMicro. I’ve used a PC running Ubuntu 12.04 64-bit with the instructions below.
Installing Simplicity Studio and energyAwareTools in Ubuntu
Simplicity Studio is part of the 4 steps of the getting started guide with EFM32 MCUs. It has been available for Linux for a few months, here’s how to install it in a terminal window:
- Create a directory where you want to install the tools, e.g.:
12mkdir ~/edevcd ~/edev - Download and extract Symplicity Studio for Linux (This will create energymicro directory automatically):
12wget http://cdn.energymicro.com/dl/packages/studio_linux.tar.gztar xzvf studio_linux.tar.gz - Run Simplicity Studio:
1./energymicro/studio.py
That’s it. It’s very easy and it worked “out of the box” for me.
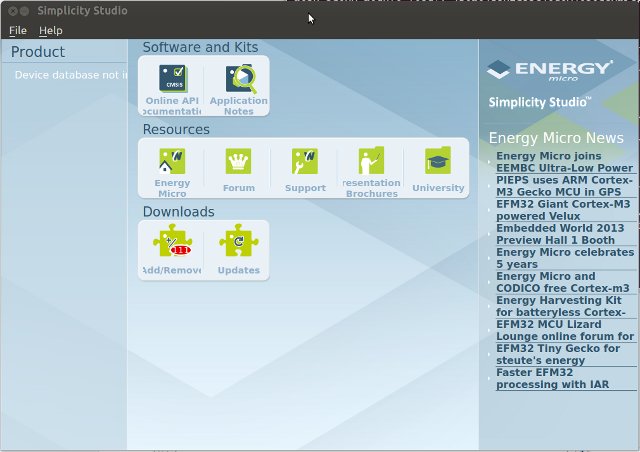
Then click on Add/Remove to install the required documentation, firmware and samples. I went the “brutal” way and just installed everything. It just took 15 minutes.
Energy Micro tools are not integrated (yet) with Simplicity Studio for Linux, but you can download the latest version on Energy Micro download page.
I first used the current stable version of the tools (eACommander, eAProfiler and eADesigner), and then installed the latest beta (2.72) for energyAwareCommander:
|
1 2 3 4 5 6 7 8 9 10 |
cd ~/edev wget http://cdn.energymicro.com/dl/packages/energyAwareTools_25052012.tgz tar xzvf energyAwareTools_25052012.tgz cd energymicro wget http://cdn.energymicro.com/dl/packages/energyAwareCommander_linux_pkg_2.72-beta.tar.gz tar xzvf energyAwareCommander_linux_pkg_2.72-beta.tar.gz cp eACommander/eACommander bin cp eACommander/JLinkExe bin cp eACommander/JLinkGDBServer bin cp eACommander/libjlinkarm.so.4 lib/libjlinkarm.so.4 |
Since the binaries are build for Linux 32-bit, you may have to install a few i386 packages such as:
|
1 |
sudo apt-get install libreadline5:i386 |
Don’t try to install “libicu48:i386” even if you see a warning, this will mess up your system. First I did not pay attention, blindly answered “Y”, and it removed 991MB from my installation include libreoffice, gimp and unity support…).
To be able to access the USB device as a standard user, you need to add a file for udev, and change some permissions:
|
1 2 3 |
sudo cp doc/45-jlink-NEW.rules /etc/udev/rules.d/ sudo groupadd plugdev sudo usermod -a -G plugdev <username> |
Restart your system. And you can try energyAware Commander:
|
1 2 |
cd ~/edev/energymicro ./eACommander.sh |
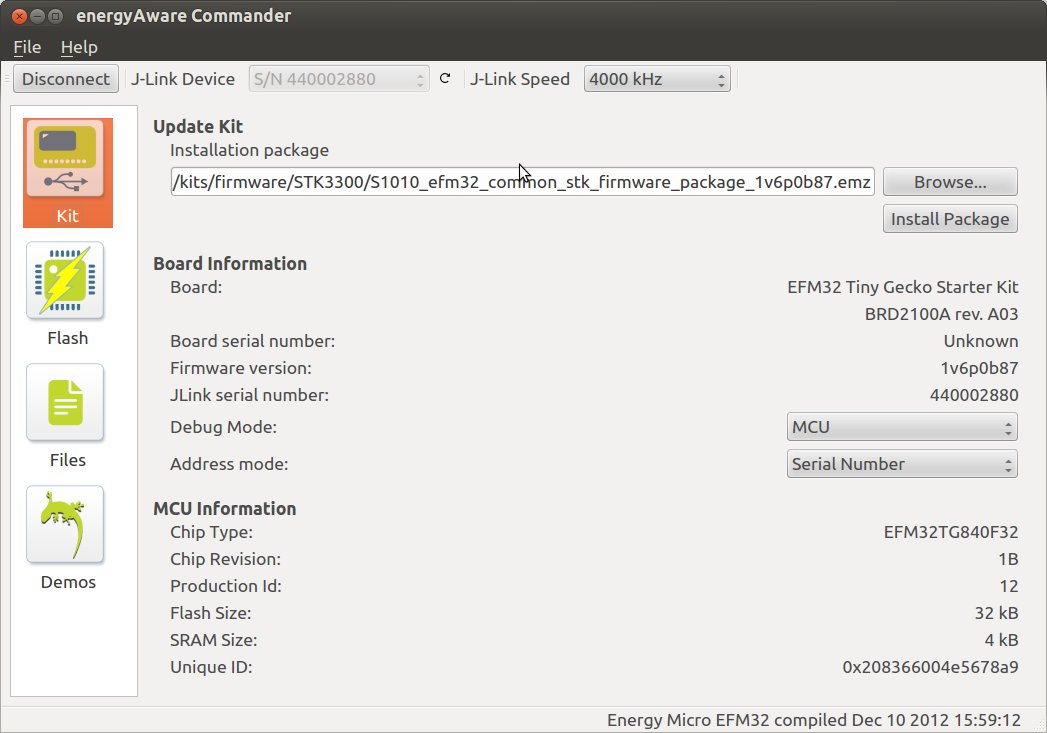
It can connect via J-Link, and detect the board but trying to update the firmware resulted in the error “Failed when asking kit to reset”. I’ve also tried to run the demos without success. Anyhow, let’s move to the next step that is building our own app in Linux, and run them on the target.
Installation Eclipse in Ubuntu for Energy Micro Gecko Starter Kits
I knew I wanted to use an IDE in Linux to build and debugging the code, but among the list of third party tools listed on Energy Micro website, I was not too sure where to go. Luckily, somebody asked for the “Recommended IDE on Ubuntu” on Energy Micro forums, and the answer seems to be Eclipse + CodeSourcery ARM EABI toolchain. There’s also an application note to do just that for Windows, and I’ll use that to write instructions for Ubuntu or other Linux distributions.
First download and install Sourcery CodeBench Lite for ARM EABI and eclipse:
wget https://sourcery.mentor.com/GNUToolchain/package10926/public/arm-none-eabi/arm-2012.09-63-arm-none-eabi-i686-pc-linux-gnu.tar.bz2

tar xjvf arm-2012.09-63-arm-none-eabi-i686-pc-linux-gnu.tar.bz2 -C ~/bin

sudo apt-get install eclipse
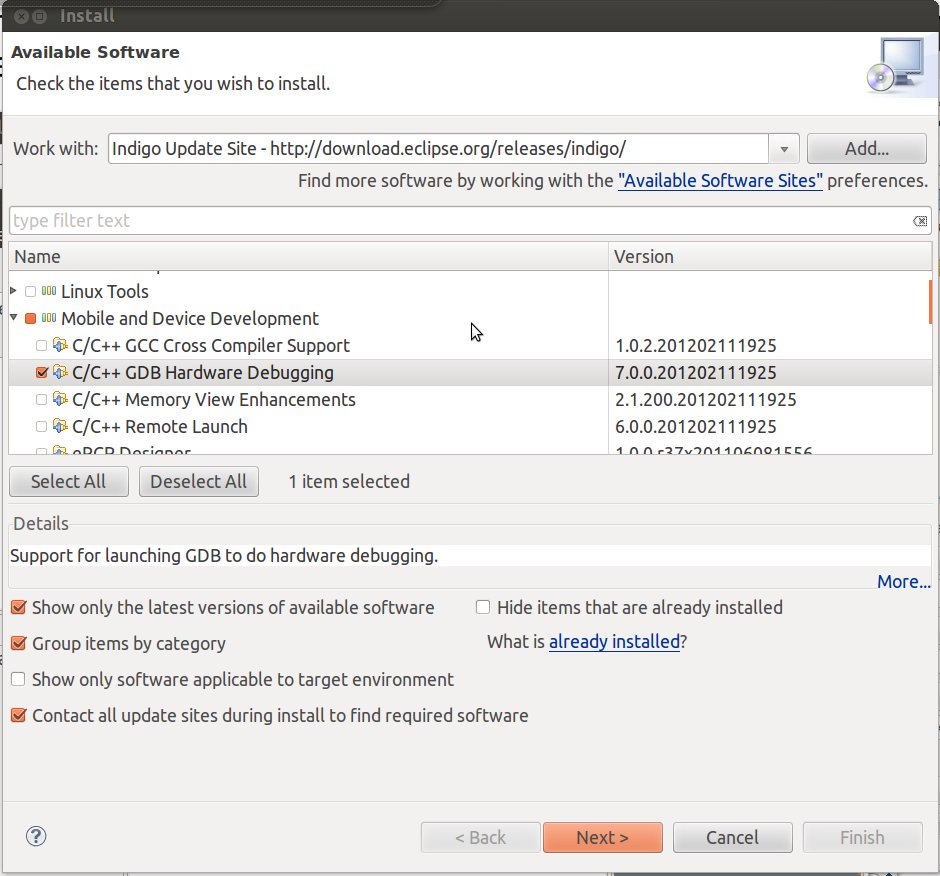
Now start eclipse, and install some plugins by going to “Help->Install New Software”, and add http://download.eclipse.org/releases/indigo to “Work With field”. Then browse to “Mobile and Device Development”, and select “C/C++ GDB Hardware Debugging”. Press the Next > button, and follow the instructions.
Repeat the same instructions with http://embsysregview.sourceforge.net/update to install Embsys Regview (Optional, and I haven’t tried it yet).
We can now start a new project using some sample code. I’ve tested it with blink and lightsense samples, and write the steps with blink sample below.
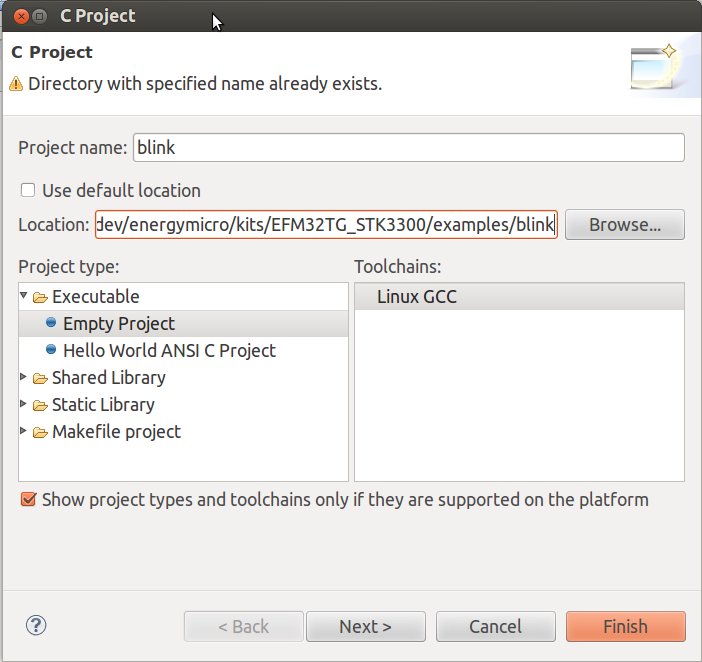
First go to File->New->Project-C/C++->C Project, and click Browser to navigate to blink sample project we’ve downloaded with Simplicity Studio (the path is energymicro/kits/EFM32TG_STK3300/examples/blink for my starter kit). Select Empty Project and “Linux GCC”, and click Finish.
Then click on Project->Properties, and do the following modifications:
- C/C++ Build: Modify build directory to ${workspace_loc:/blink/codesourcery}.
- C/C++ Build->Discovery Options: Uncheck the Automatic discovery of paths and symbols checkbox.
- C/C++ Build->Settings: Check the GNU Elf Parser checkbox.
Click the OK button. In blink/codesourcery, copy Makefile.bli
nk to Makefile, and change LINUXCS to the path you’ve installed CodeSourcery toolchain, e.g.:
|
1 |
LINUXCS ?= ~/bin/arm-2012.09/ |
We can now build the code. Select Project->Build Project, and within a few second you should see the build is successful in the Console tab.
Let’s configure the debugger. First run J-Link gdb server in a terminal window:
|
1 2 |
cd ~/edev/energymicro ./gdbserver.sh |
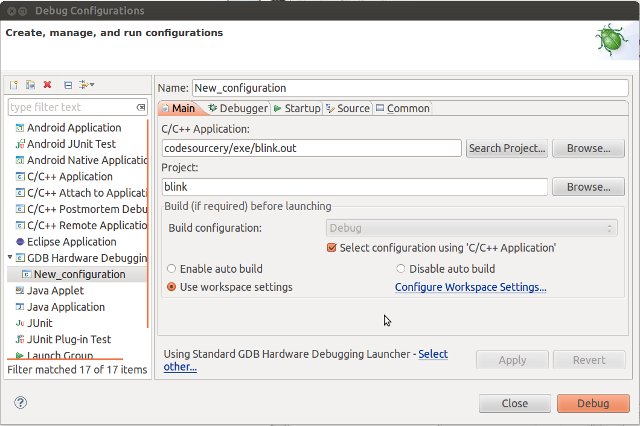
In Eclipse, click on Run->Debug Configuration, Highlight GDB Hardware Debugging, right-click to select New, and do the following modifications:
- Main tab: Click the Select other… link on the bottom where it says Using GDB (DSF) Hardware Debugging Launcher and select the Standard GDB Hardware Debugging Launcher instead, and apply by clicking the OK button.
- Debugger tab: Enter the full path to arm-none-eabi-gdb in the GDB command field. (e.g. /home/jaufranc/bin/arm-2012.09/bin/arm-none-eabi-gdb)
- Debugger tab: Make sure Use remote target is checked, with Generic TCP/IP JTAG Device and localhost as Host name, and set 2331 as Port number.
- Startup tab: In the Initialization Commands text box, enter:
set tdesc filename target-m3.xml
mon speed 4000
mon endian little
mon flash download = 1
mon flash device = EFM32TG840F32
mon reset 1 - Startup tab: Check the Set breakpoint at: checkbox in the Runtime Options frame, and write main in the textbox.
- Common tab: Check Debug checkbox in the Display in favorites menu frame.
Now click on Debug in the same Debug Configuration Window to start the program, the Eclipse display should change to Debug mode as shown below.
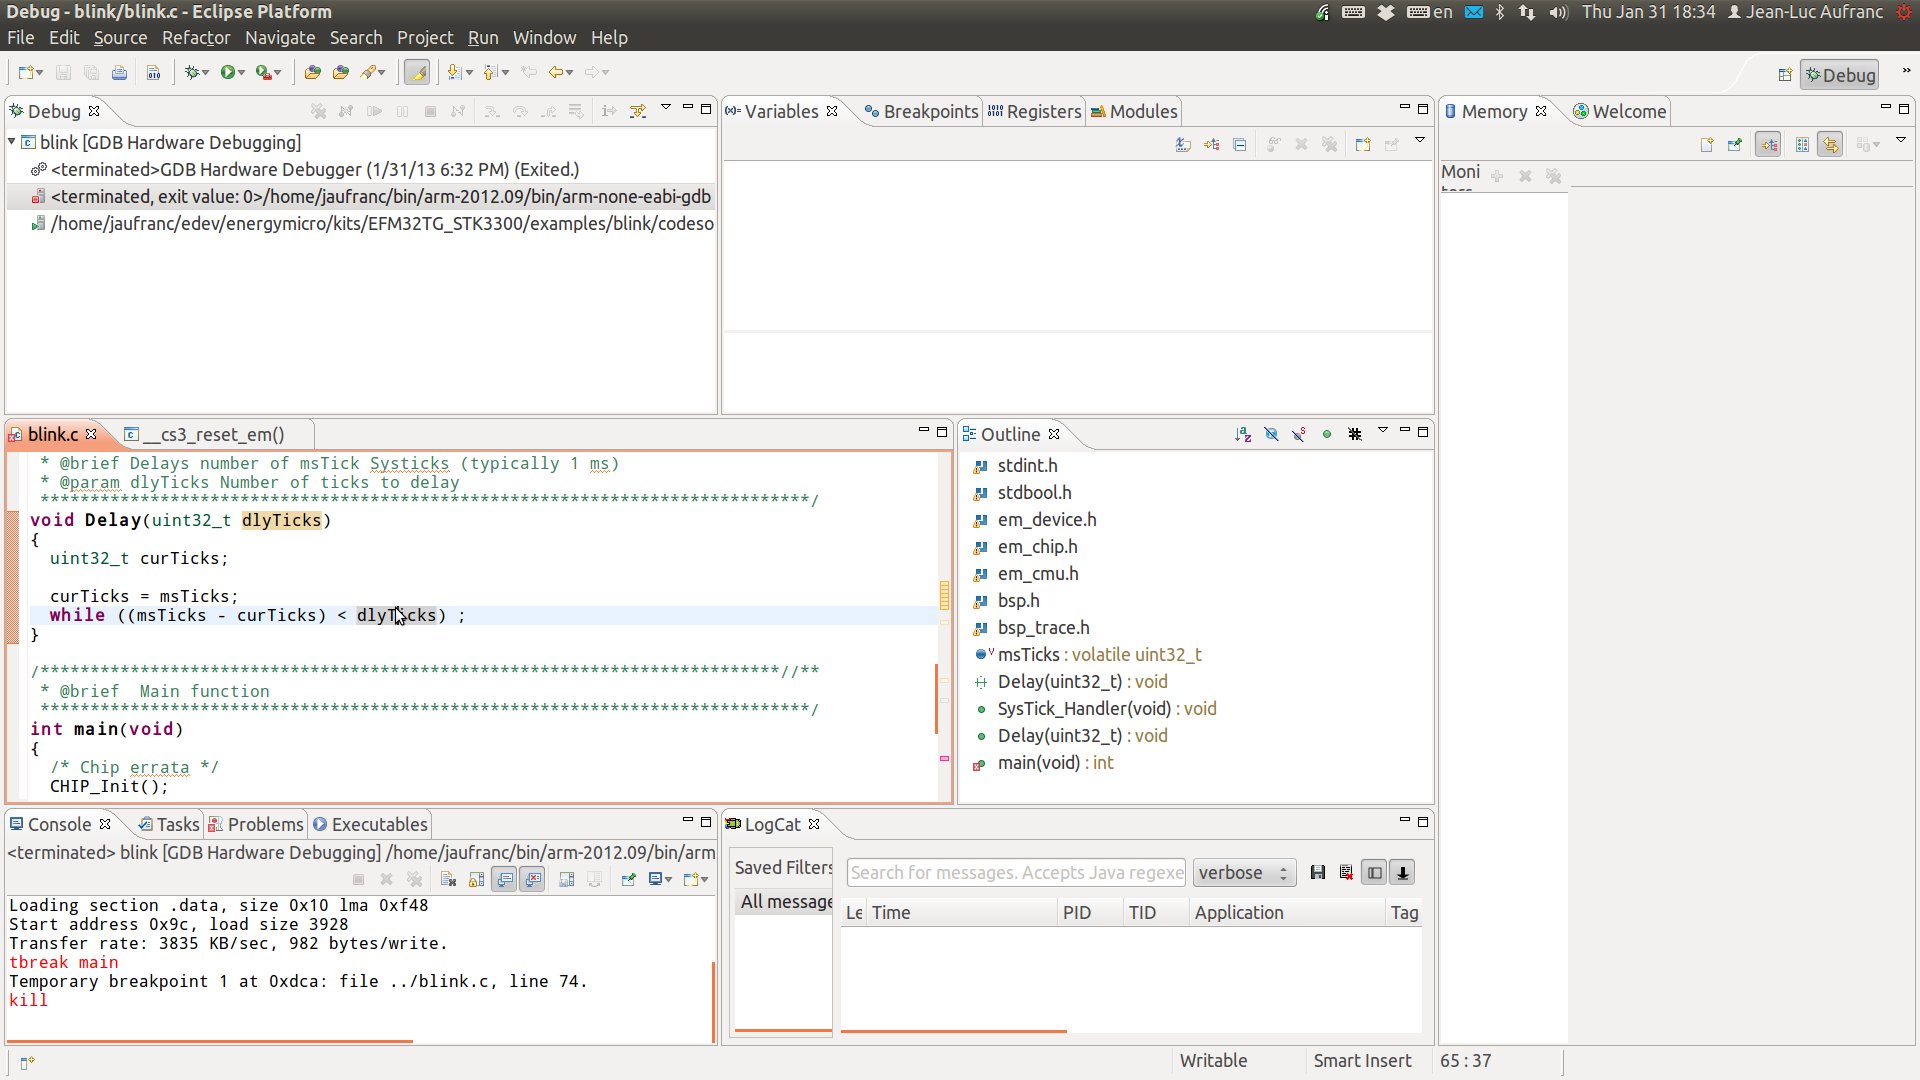
Now click on Resume (or press F8) to run the program (the USER LED should blink on the board), or add breakpoints, monitor variables as needed.

Jean-Luc started CNX Software in 2010 as a part-time endeavor, before quitting his job as a software engineering manager, and starting to write daily news, and reviews full time later in 2011.
Support CNX Software! Donate via cryptocurrencies, become a Patron on Patreon, or purchase goods on Amazon or Aliexpress. We also use affiliate links in articles to earn commissions if you make a purchase after clicking on those links.


I would like to see a review about the kickstarter gcw-zero here :-).
@TestABob
I’m always ready for reviews, but I need the hardware… Now I try not to buy things I don’t really need :). If I review something, it’s most likely that somebody sent it to me.
I’ve just tested your Tutourial, in Xubuntu : it worked.
In this step in eclipse:” C/C++ Build: Modify build directory to ${workspace_loc:/blink/codesourcery}.”
I had to give the full path (don’t know why).
Now Im testing it on Debian 7.
I want to write a german Version of your Toutourial and publish it on my blog (http://technik.blogbasis.net/). Are you fine with this?
@aberlin
Good to know it could help. No problem, go for the German version, but link back to this post would be welcomed.
@cnxsoft
If you want to make a look at: http://technik.blogbasis.net/efm-32-starter-kit-unter-linux-mit-eclipse-benutzen-08-06-2013
Hi!!
I can run python program for studio instalation, it says:
Unpacking Simplicity Studio…
Could not unpack Simplicity Studio:
ZipFile instance has no attribute ‘__exit__’
I don’t use python.. what could be wrong????
@Emile
I don’t really know Python either, but it looks like something is missing in a zip file. Maybe a corrupted download? Try to download again.