Zidoo X9S is getting some competition with Eweat R9 TV boxes based on the same Realtek RTD1295 processor with built-in SATA, Gigabit Ethernet, 4K VP9 and H.265, HDR, and USB 3.0. The company has three R9 models, and they sent me to top of the line R9 Plus with 2GB RAM, 16GB storage, a 3.5″ SATA bay, HDMI input, and dual Gigabit Ethernet ports for evaluation. I’ll start the first part of the review by checking out the hardware inside and out, before testing the firmware in the second part.
Eweat R9 Plus Unboxing
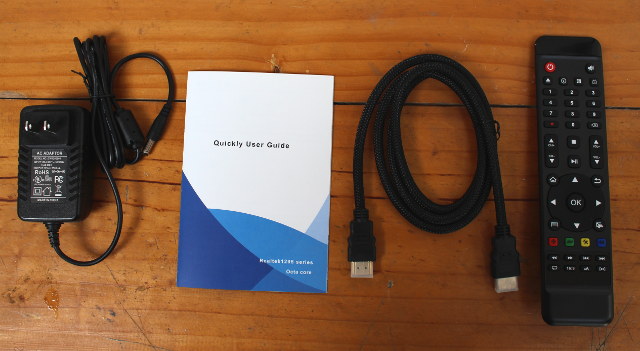
The device ships in a large package with a handle which can be convenient in brick and mortar shops since the whole package weights about 1.8 kilograms.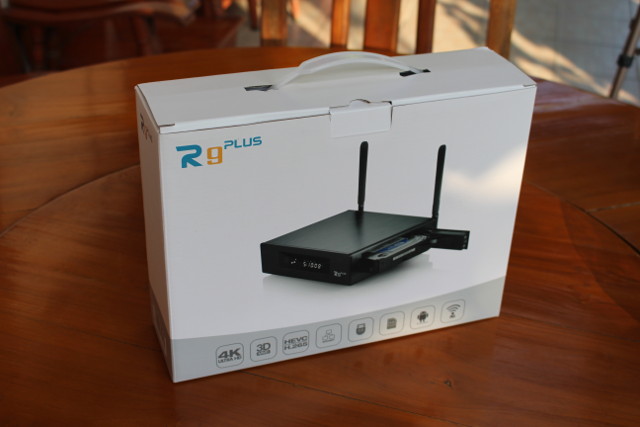 The package then contains a smaller package will all accessories: a 12V/2.5A power supply, a “Quickly User Guide” (sic.), a HDMI cable, and an IR remote control taking two AAA batteries.
You’ll also find the box packed between two polystyrene blocks. The device really feels of high quality thanks to its metal case.
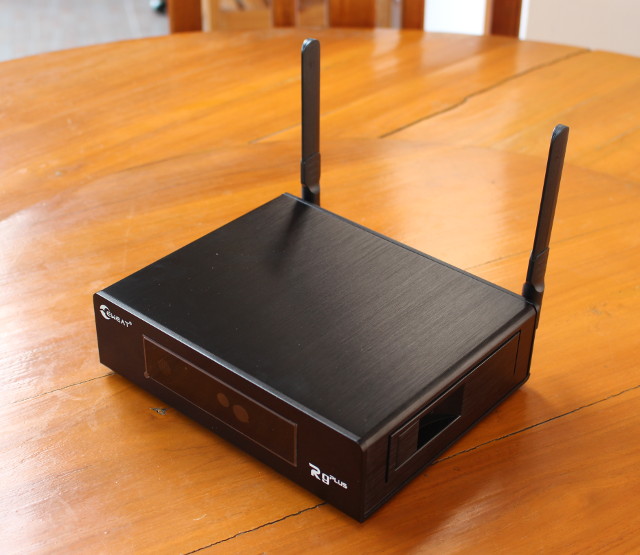
It’s also much heavier than your typical TV box. The front panel include an LCD display and an IR receiver window, while you’ll notice the SATA bay door on the right.
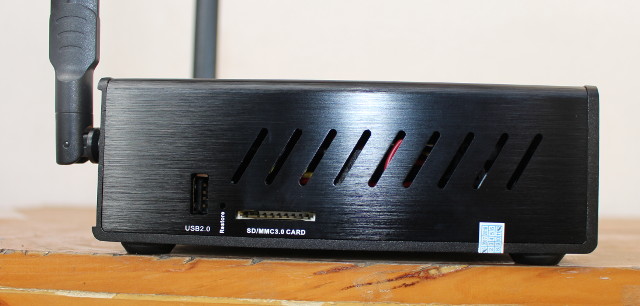
The other side has a USB 2.0 port, a recovery pinhole, an SD card slot, some ventilation holes, and a “don’t-think-out-it-this-will-void-your-warranty” sticker.
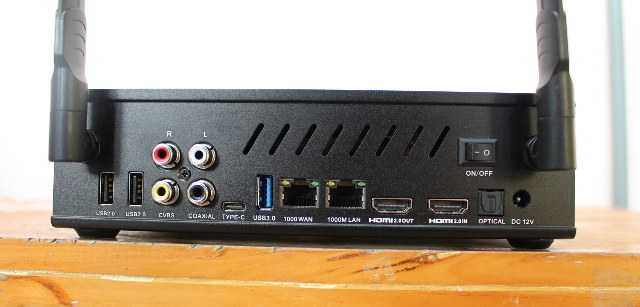
Bu the rear panel has all the cool goodies with two WiFi antennas, two more USB 2.0 host ports, four RCA connectors for stereo audio, coaxial S/PDIF and CVBS (composite), a USB type C port that can be used to connect storage devices or charge your phone, a USB 3.0 port, two Gigabit Ethernet ports, one HDMI 2.0 out port to connect to your TV, one HDMI 2.0 input port to record video from external sources, an optical S/PDIF port, the DC jack, and a mechanical power switch.

Inserting a hard drive is very easy. Pull the handle on the door, insert the hardware, and close the door and you’re done. If you want to remove the drive, open the door and as we’ll see below a small arm is pushing the drive out. The SATA bay mechanism looks solid, and feels much better than the plastic key mechanism used in Cloud Media’s Popcorn Hour A-500, which I broke after two tries.
You can see how easy it is to insert the hard drive in the unboxing video below.
Eweat R9 Plus Teardown
The hardware looks good out the outside, what about the inside? Let’s open it to find out. Remove the four sticky pad on the bottom of the case, and loosen the four screws.
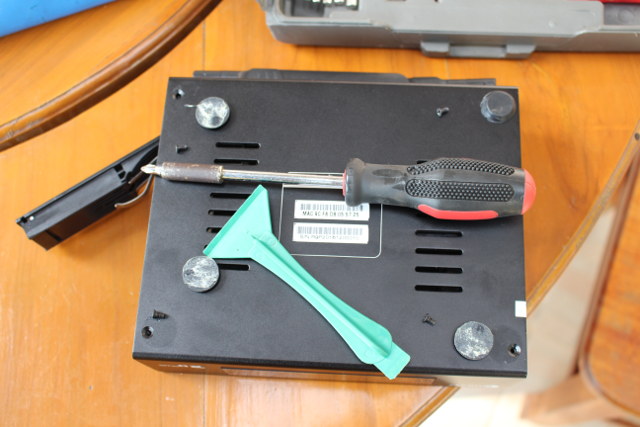
Click to Enlarge
Now you can lift the top cover, void the warranty, and have a closer look at the mechanical and thermal design of the device. The MAC address on the bottom of the device – 9C:F8:DB:xx:xx:xx – looks up to a company called Shenzhen Eyunmei Technology, who also manufactured the older M-195 TV box based on Realtek RTD1195 processor.
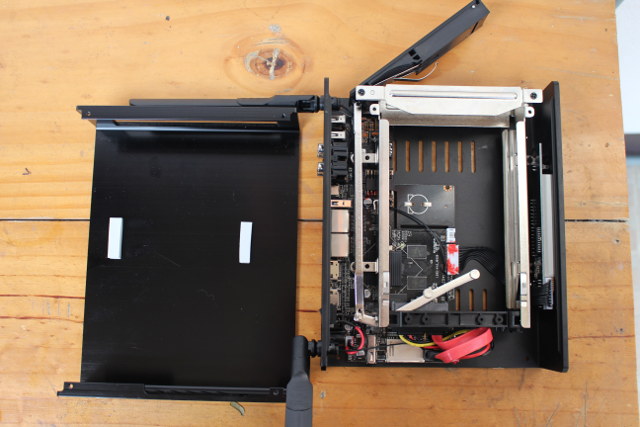
The metal top cover is connected to the SATA bay’s metal frame via two short thermal pads, and you can see the arm pushing the HDD out when your open the door in the bottom right of the photo.
Then I had to take a thinner screwdriver to loosen four more screws to remove the SATA bay mechanism, and checkout the board – named 1295-V4.0_161029 – itself.
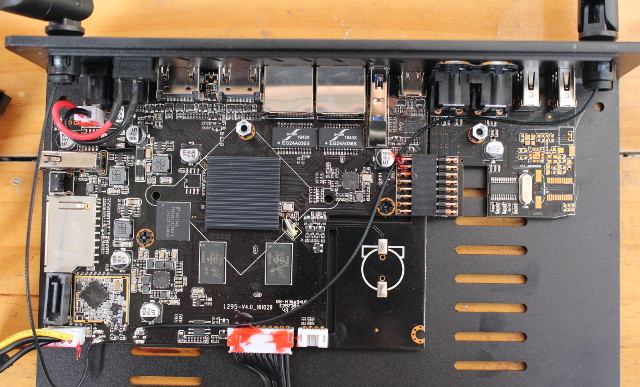
Realtek RTD1295 quad core Cortex A53 processor is covered by a heatsink, and connected to a 16GB Toshiba THGBMBG7C2KBAIL eMMC flash, and two Micron MT40A512M16JY-083E (I used FBGA & Component Marking Decoder to find out) 8 Gbit DDR4 chips (16 Gbit = 2GB in total). Gigabit Ethernet connectivity is achieved via one RTL8211F PHY transceiver and two E-Con EG24S036S magnetic transformers (only one transceiver is required since Realtek RTD1295 SoC comes with one Gigabit Ethernet MAC/PHY), and wireless connectivity is made possible through Realtek RTL8821AU USB 2.0 802.11ac and Bluetooth 4.0 LE also used in Zidoo X9S. There’s also a part reserved for a battery for the RTC, but Eweat decided not to populate it.
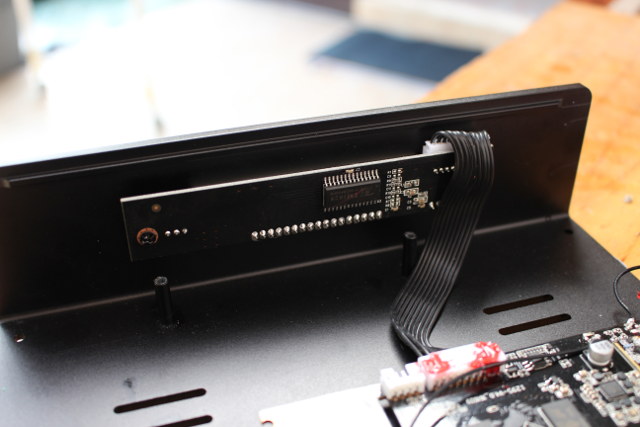
The front panel display is driven Titan Micro TM1628 LED Controller, just like the one on Zidoo X9S. You’ll need to loosen two more screws and two spacers attaching the board to the case, as well as the screw between the four RCA connectors on the rear panel to take the board out.
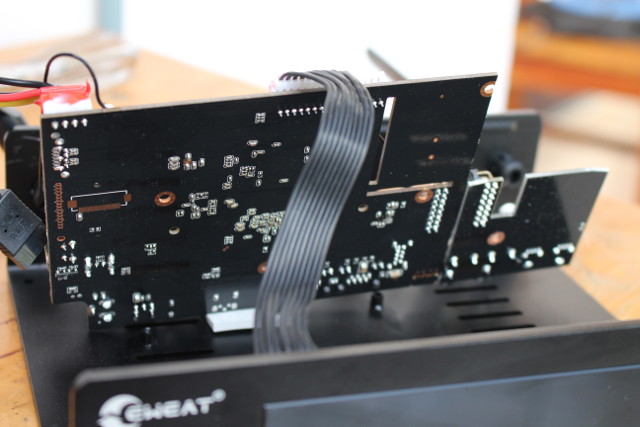
Some parts are glued, so I did not removed it completely, especially since there’s no much to be seen, except one expansion header, a footprint for another connector, and another thermal pad between the bottom of the board and the case.
I’d like to thank Eweat for sending the device for review. Interested resellers and distributions may want to contact the company via the company’s website, while individuals can purchase Eweat R9 Plus for $175.99 plus shipping on Aliexpress.
[Update: Part 2 is up @ Eweat R9 Plus TV Box Review Part 2 – Android, OpenWrt, and HDMI Recording ]

Jean-Luc started CNX Software in 2010 as a part-time endeavor, before quitting his job as a software engineering manager, and starting to write daily news, and reviews full time later in 2011.
Support CNX Software! Donate via cryptocurrencies, become a Patron on Patreon, or purchase goods on Amazon or Aliexpress





I presume you mean the RTL8111F for the Ethernet, there’s no RTL8711F.
@TLS
After double checking, it’s RTL8211F instead.
Any box like this with active cooling? I dread running an HDD without a fan.
@RK
They use the large metal case to dissipate the heat generated by the processor and the hard drive, so maybe that’s enough. The contact area between the hard drive and the case is however pretty small.
Egreat A10 (based on Hisilicon Hi3798CV200 processor) comes with a fan -> http://www.cnx-software.com/2016/11/17/egreat-a10-4k-android-media-center-comes-with-an-internal-3-5-sata-bay-an-external-sata-port-and-a-usb-3-0-port/
Any serial port on the board? Which kernel version does it run?
@Benjamin HENRION
Maybe the white 4-pin header close to the RTC? I have not started the box, but Zidoo X9S runs Linux 4.1.17, so I’d expect the same.
@cnxsoft I’ve measured full metal drive cases* and reached 80 degrees Celsius under 10-15min of benchmarking. This doesn’t happen with streamers since there’s enough RAM buffering and reading-ahead that the drive is idling most of the time. But for NAS, the drives just keeps spinning as the heat builds up… Anyhow, I’ve recently went through a complete disk failure and lost some data** so I’m in no rush to repeat that mistake any time soon.
Anyways, the e10 looks better though it’s a bit too much for what I have in mind. I think I’ll just use a spare case and short the atx supply to give off the power I need for an SBC, drive and fans while using a glue gun to stick it all in place… Ugly but should work 😀
* external supply and without a SoC so no extra heat sources other then the tiny USBSATA microcontroller
** drivers and software. I didn’t bother backing it up since I figured I could always re-download but I lost some stuff that’s virtually irreplaceable like bios firmwares of niche devices that were on some cloud and are gone now :/