
ClockworkPi Gameshell is a portable retro gaming console kit designed to be hackable being powered by Allwinner R16 processor to run Linux, as well as an Arduino compatible Atmel AVR MCU. It’s partially open source hardware with PDF schematics, and firmware source code available on Github.
The device launched last year on Kickstarter, raised close to $300,000, and started shipping to backers last summer. The company has now sent me a sample for review, so let’s have a look. The first part of the review will be more than just an unboxing, since the game console is meant to be assembled by the end user, and I’ll report my experience doing so.
ClockworkPi Gameshell Unboxing
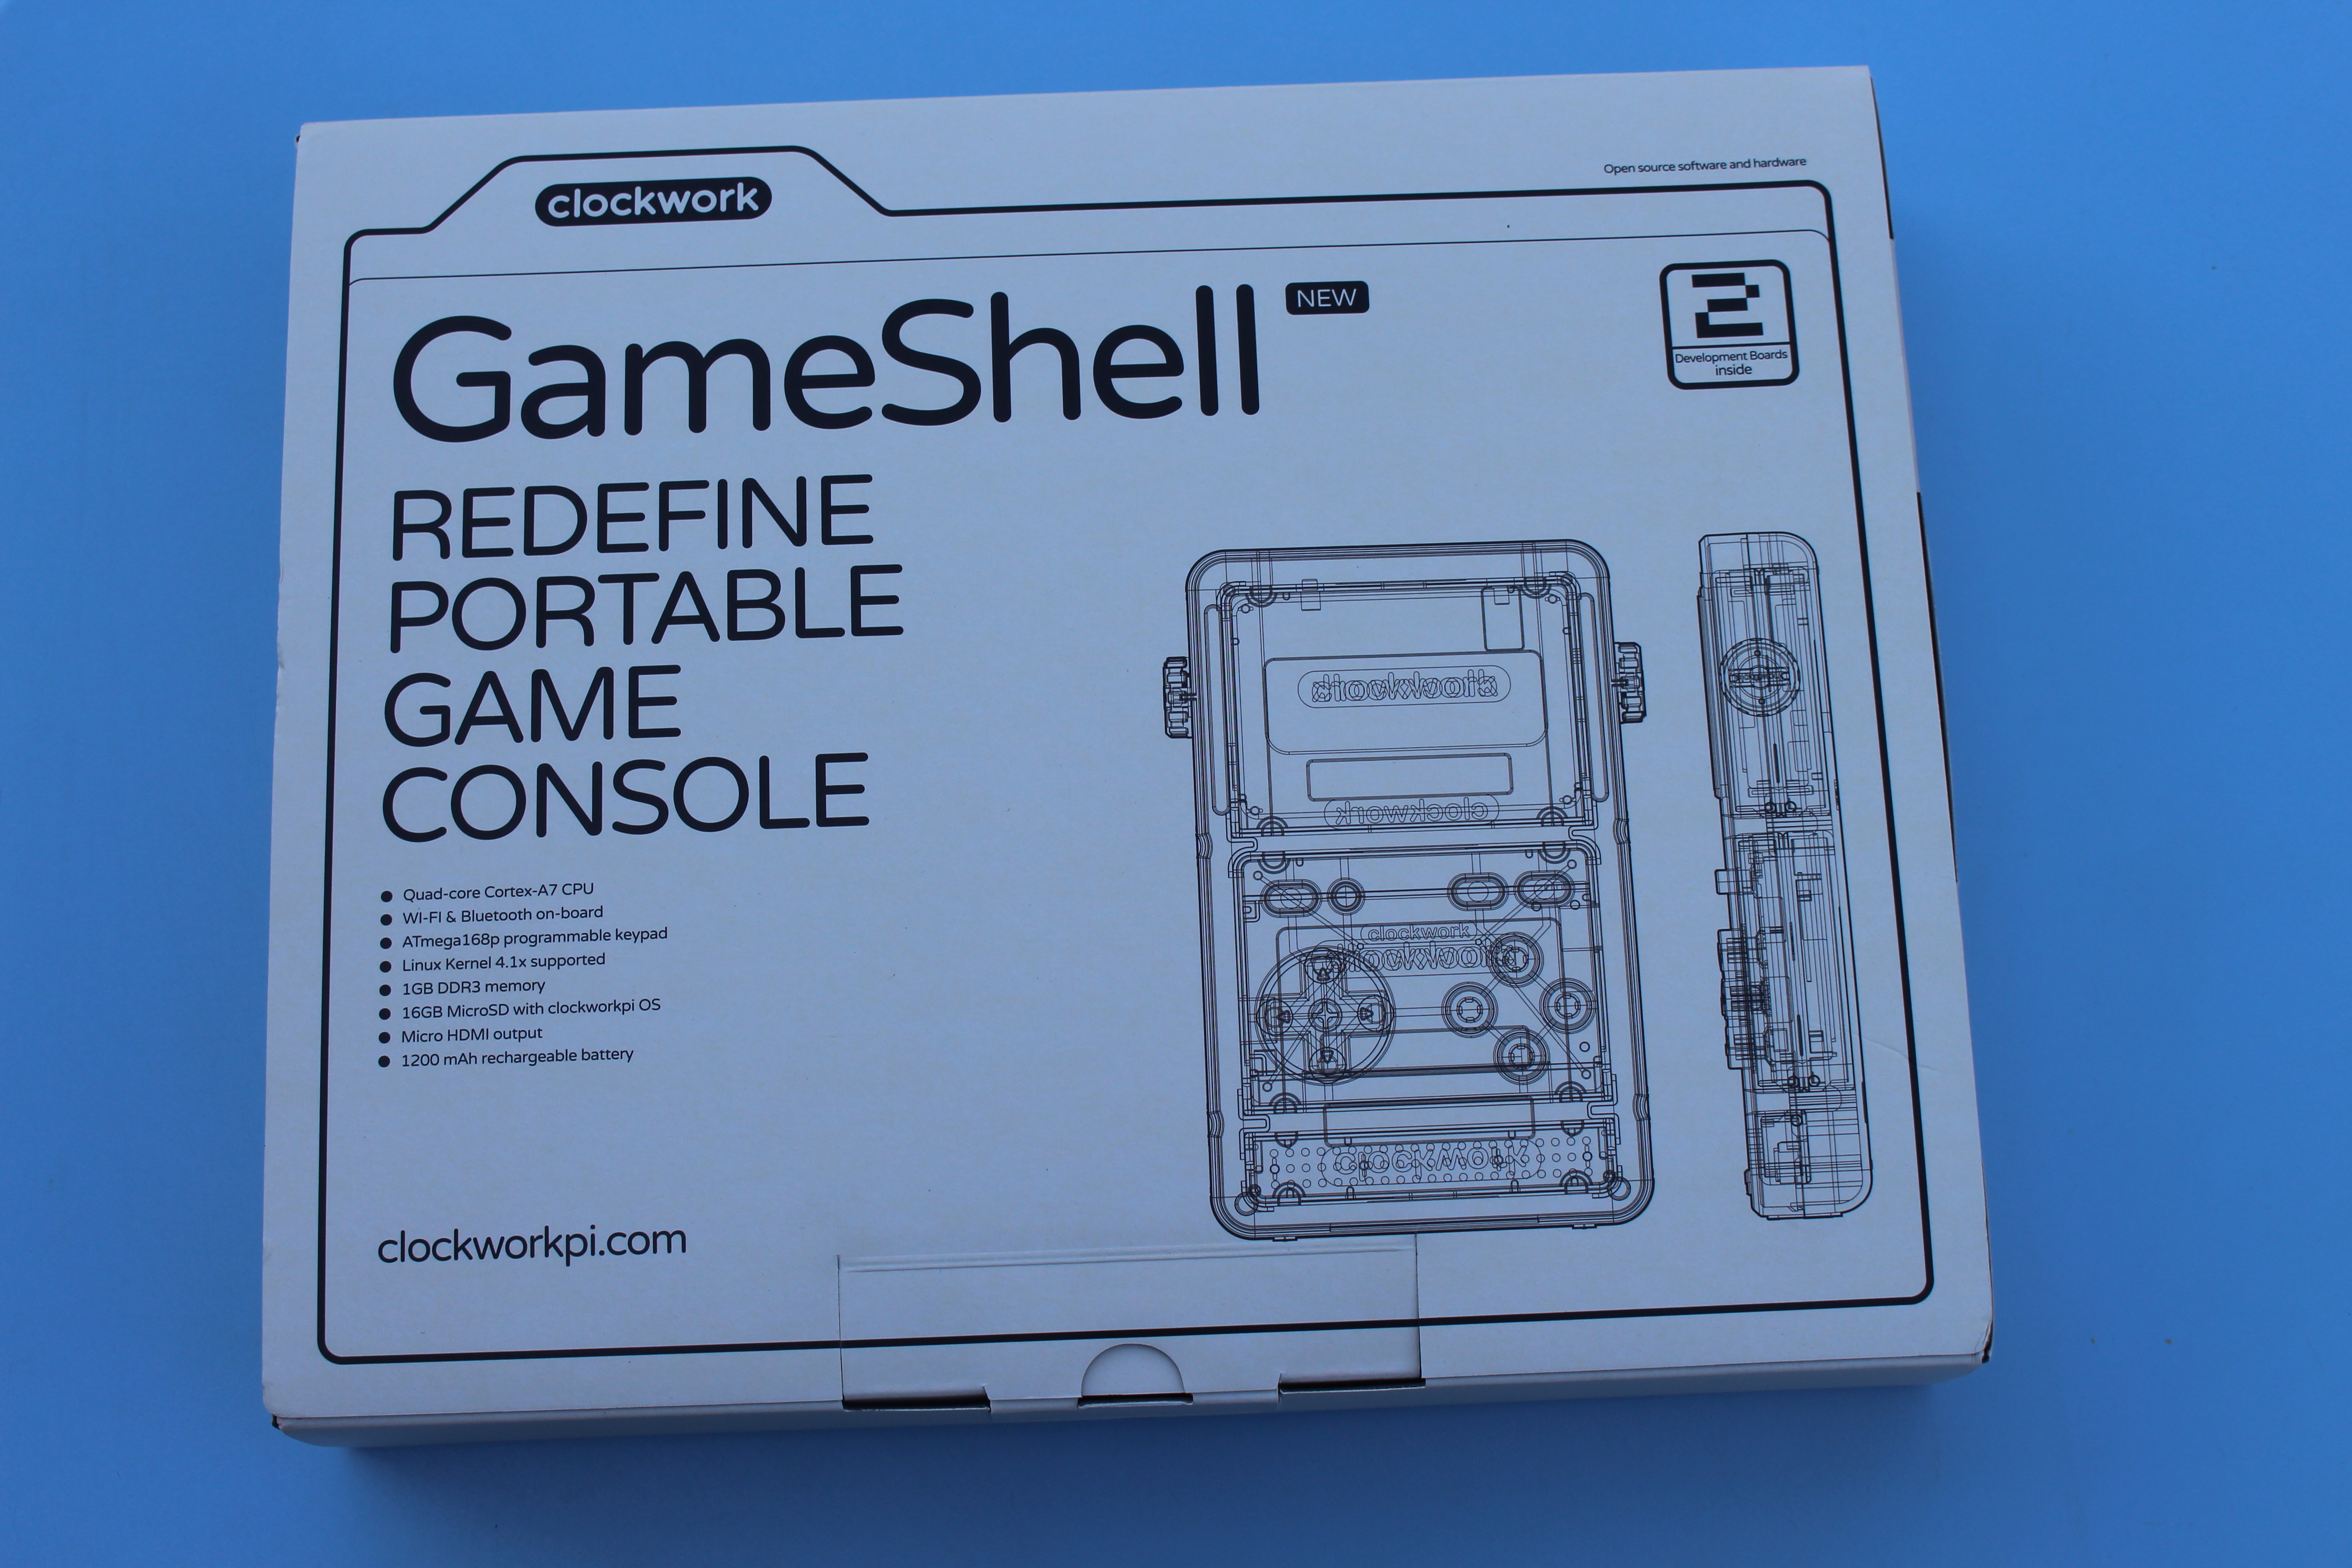
The kit comes in a fairly large package that reads “GameShell – Redefine Portable Game Console” and lists the main specifications with quad core Cortex A7 processor, WiFi and Bluetooth connectivity, 1GB RAM, 16GB micro SD storage with OS, micro HDMI output, and a 1,200 mAh battery.
Once we open the package it feels like a neatly organized suitcase…
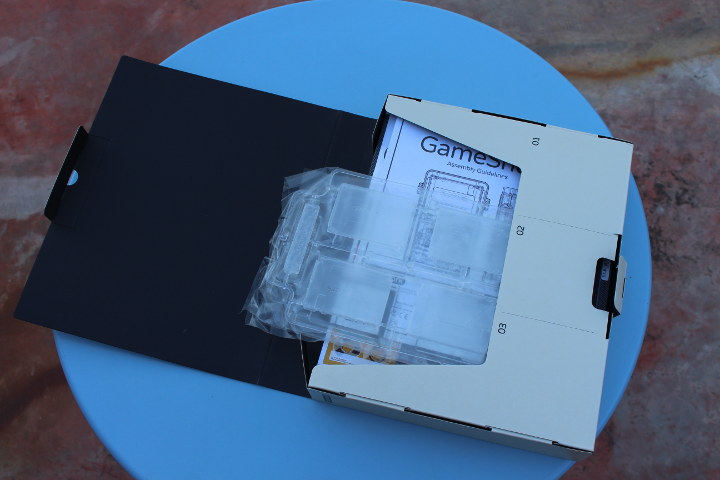
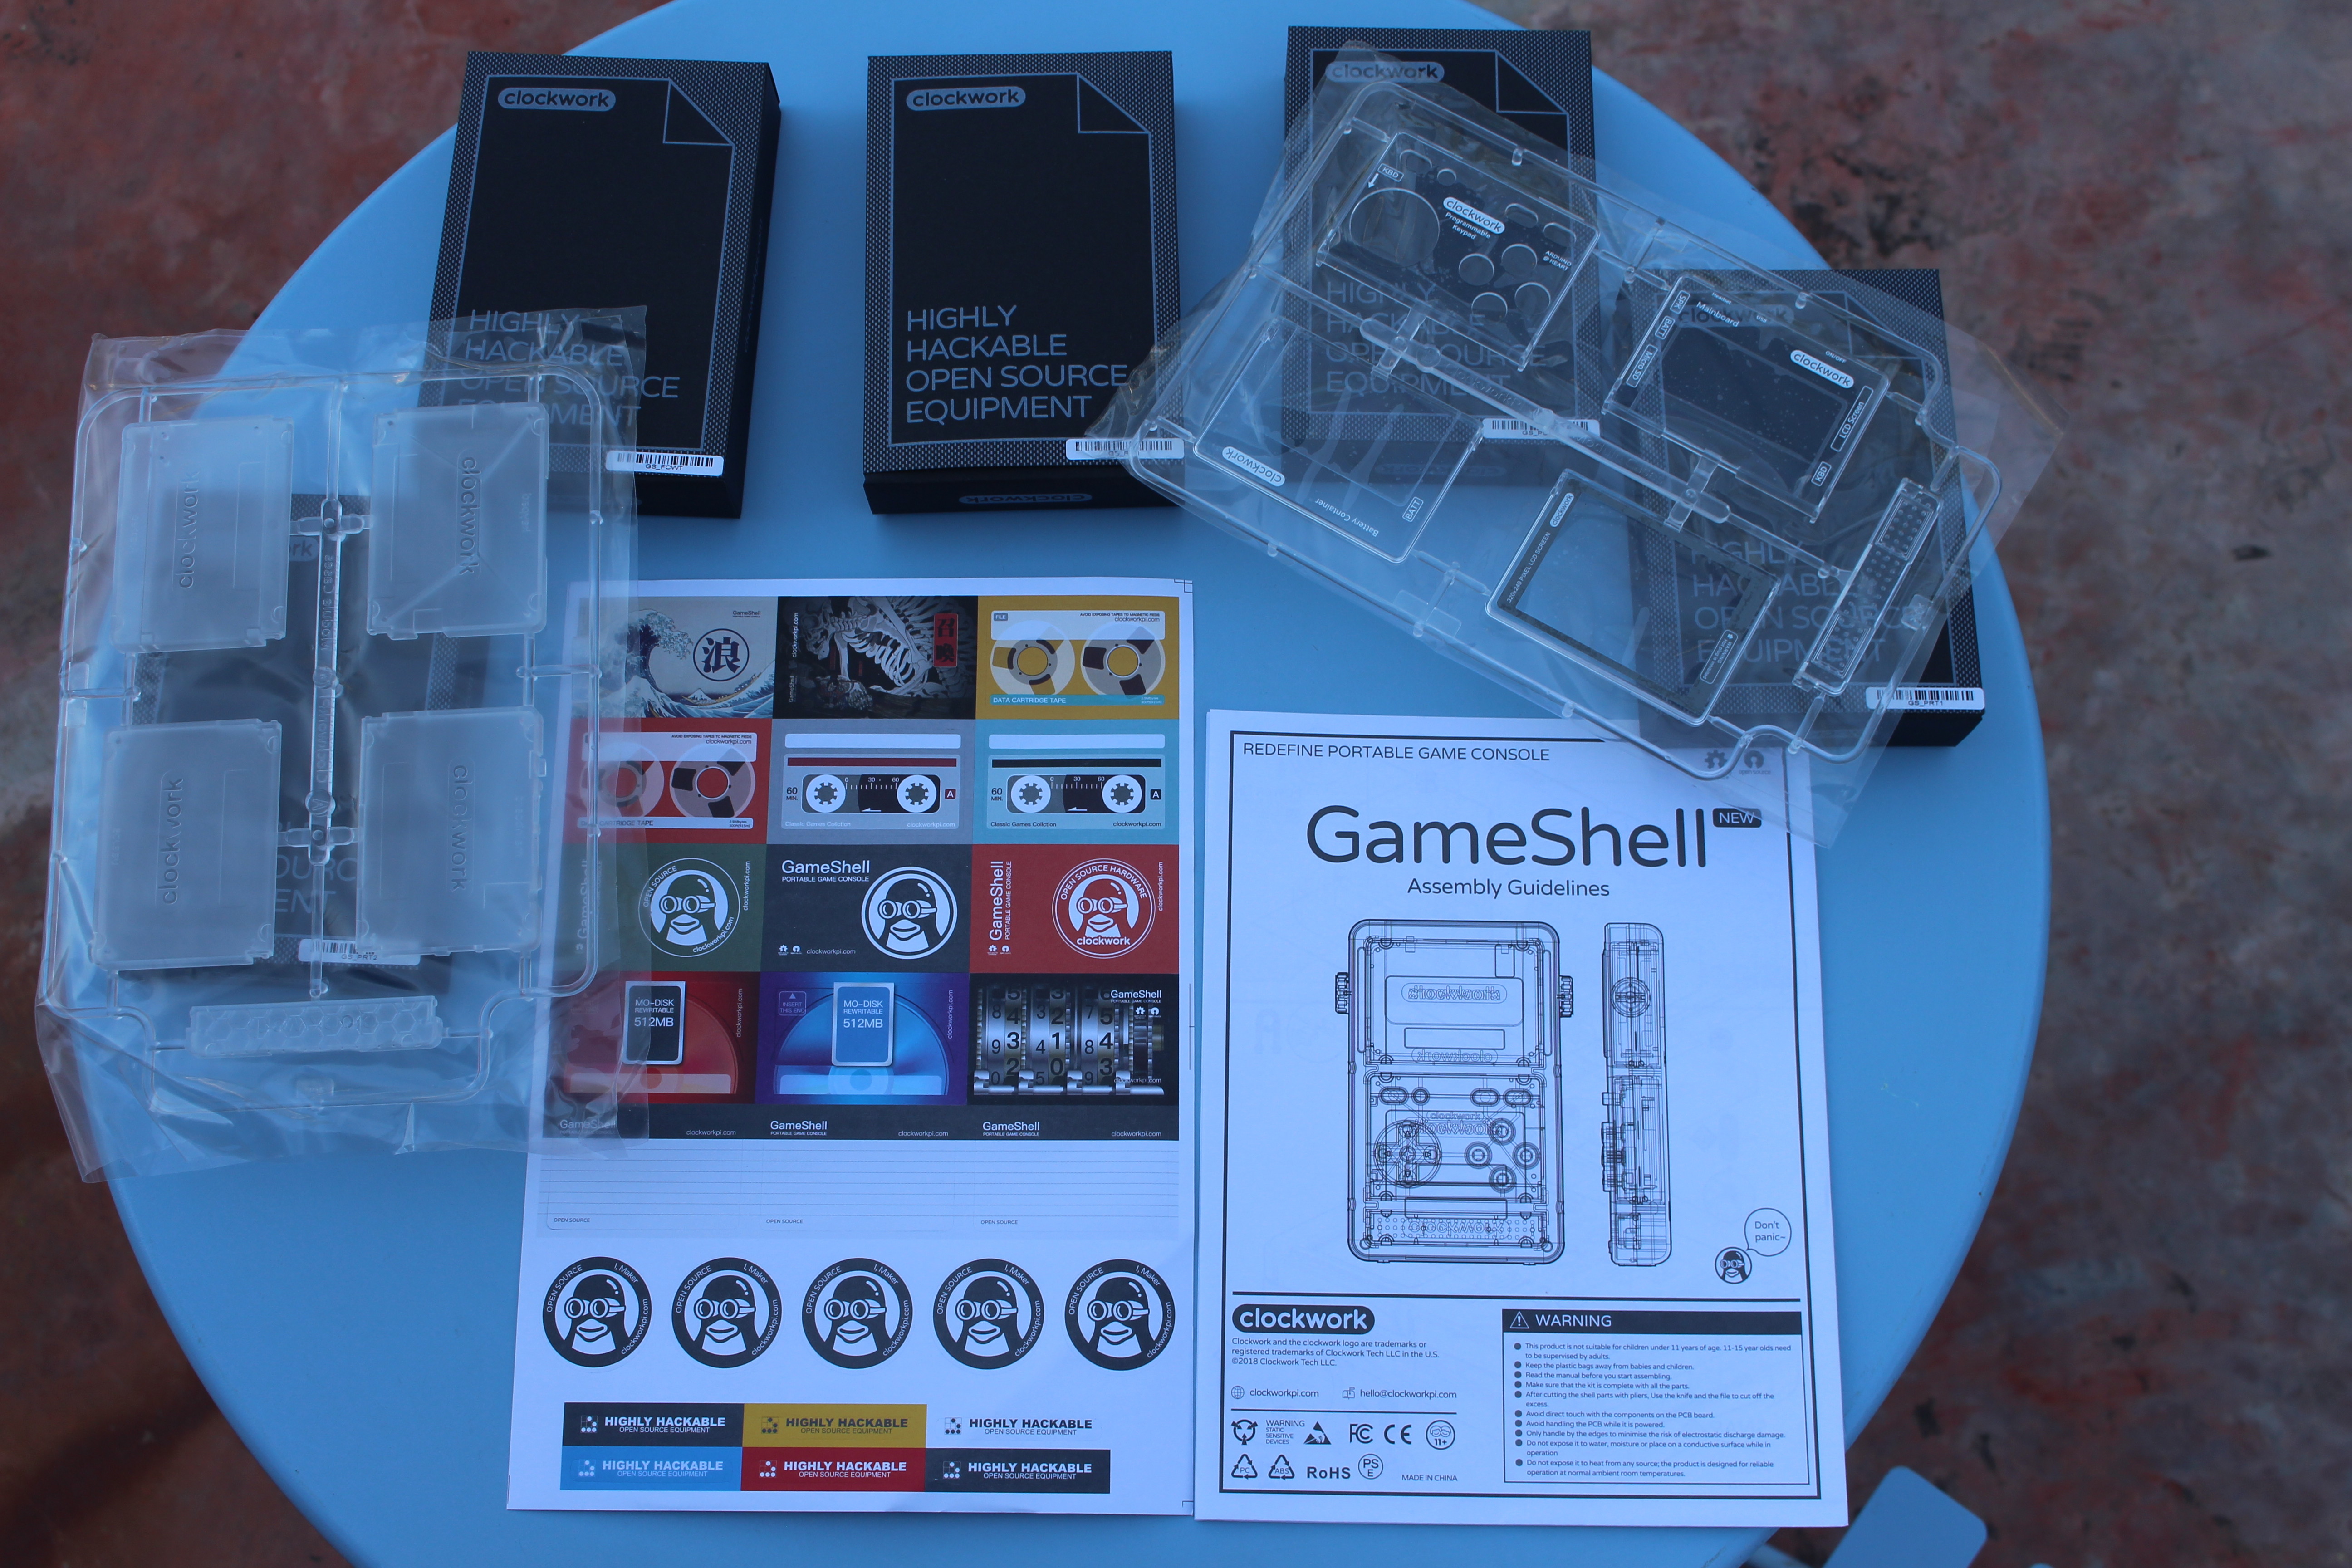
… and inside we’ve find two main plastic sets for parts of the enclosure, five black package with “highly hackable open source equipment”, a sheet of stickers, and an assembly guide.
Time to open all those black boxes…
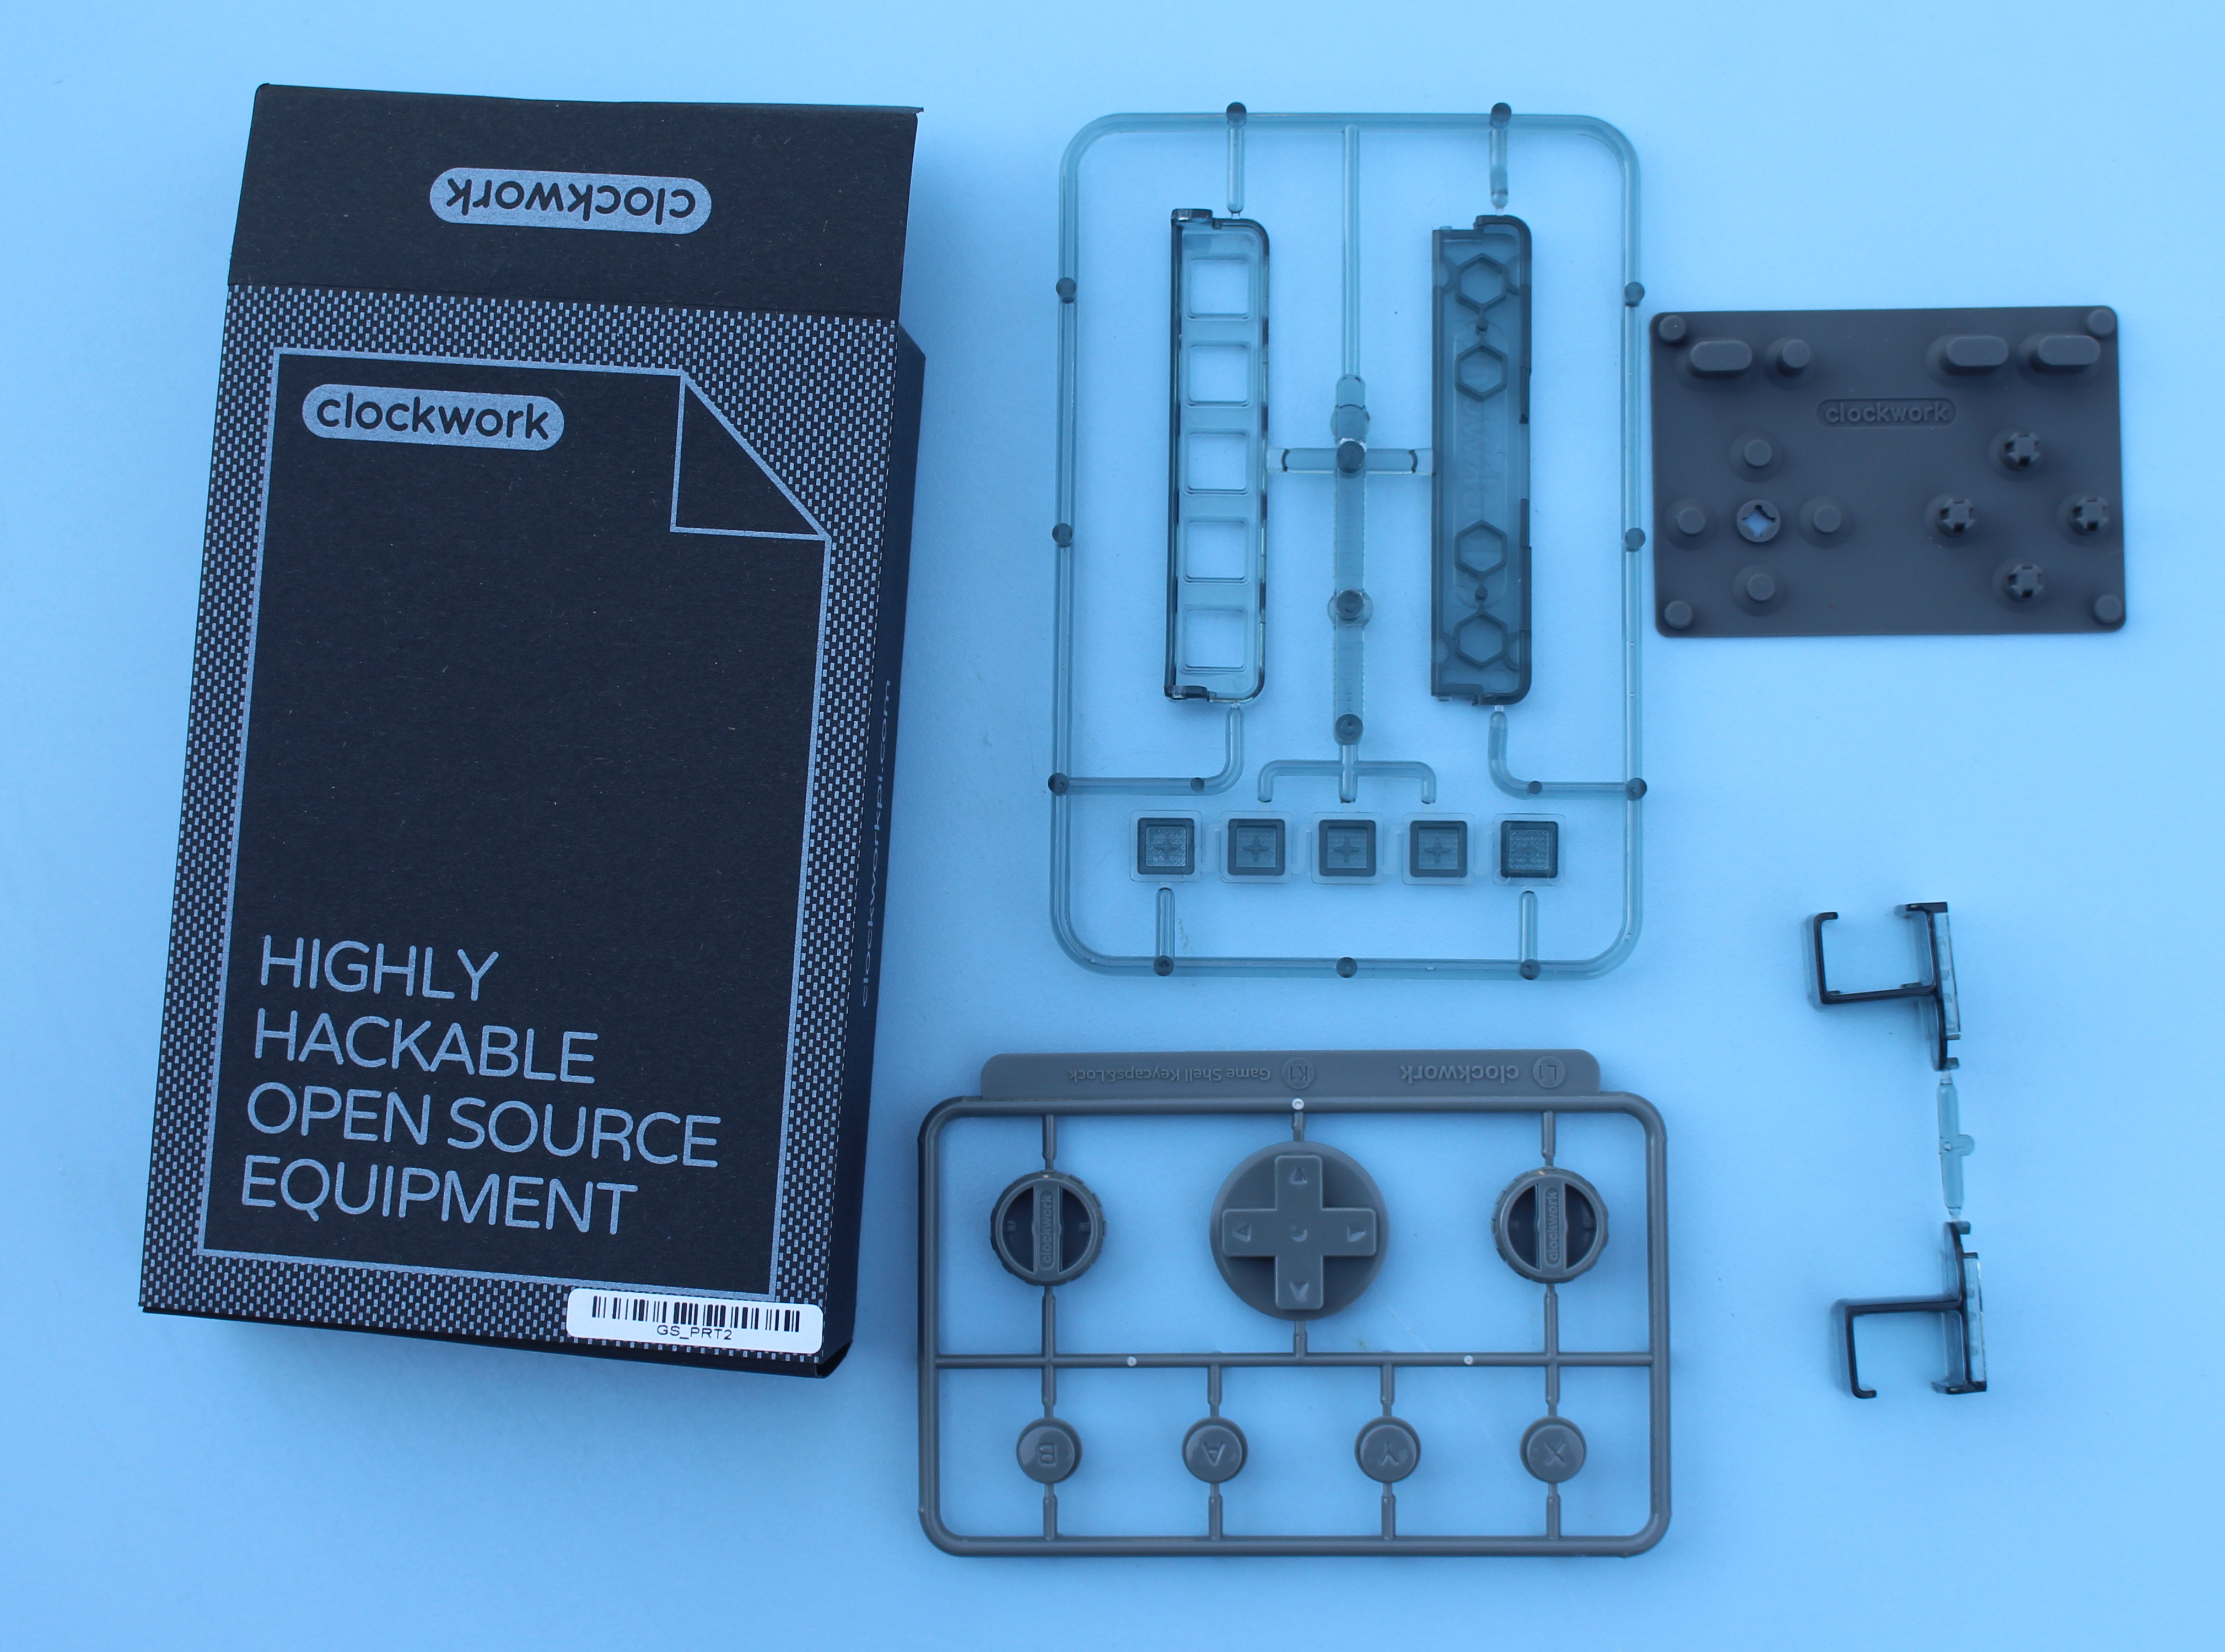
GS_PRT2 package combines with parts related to buttons.
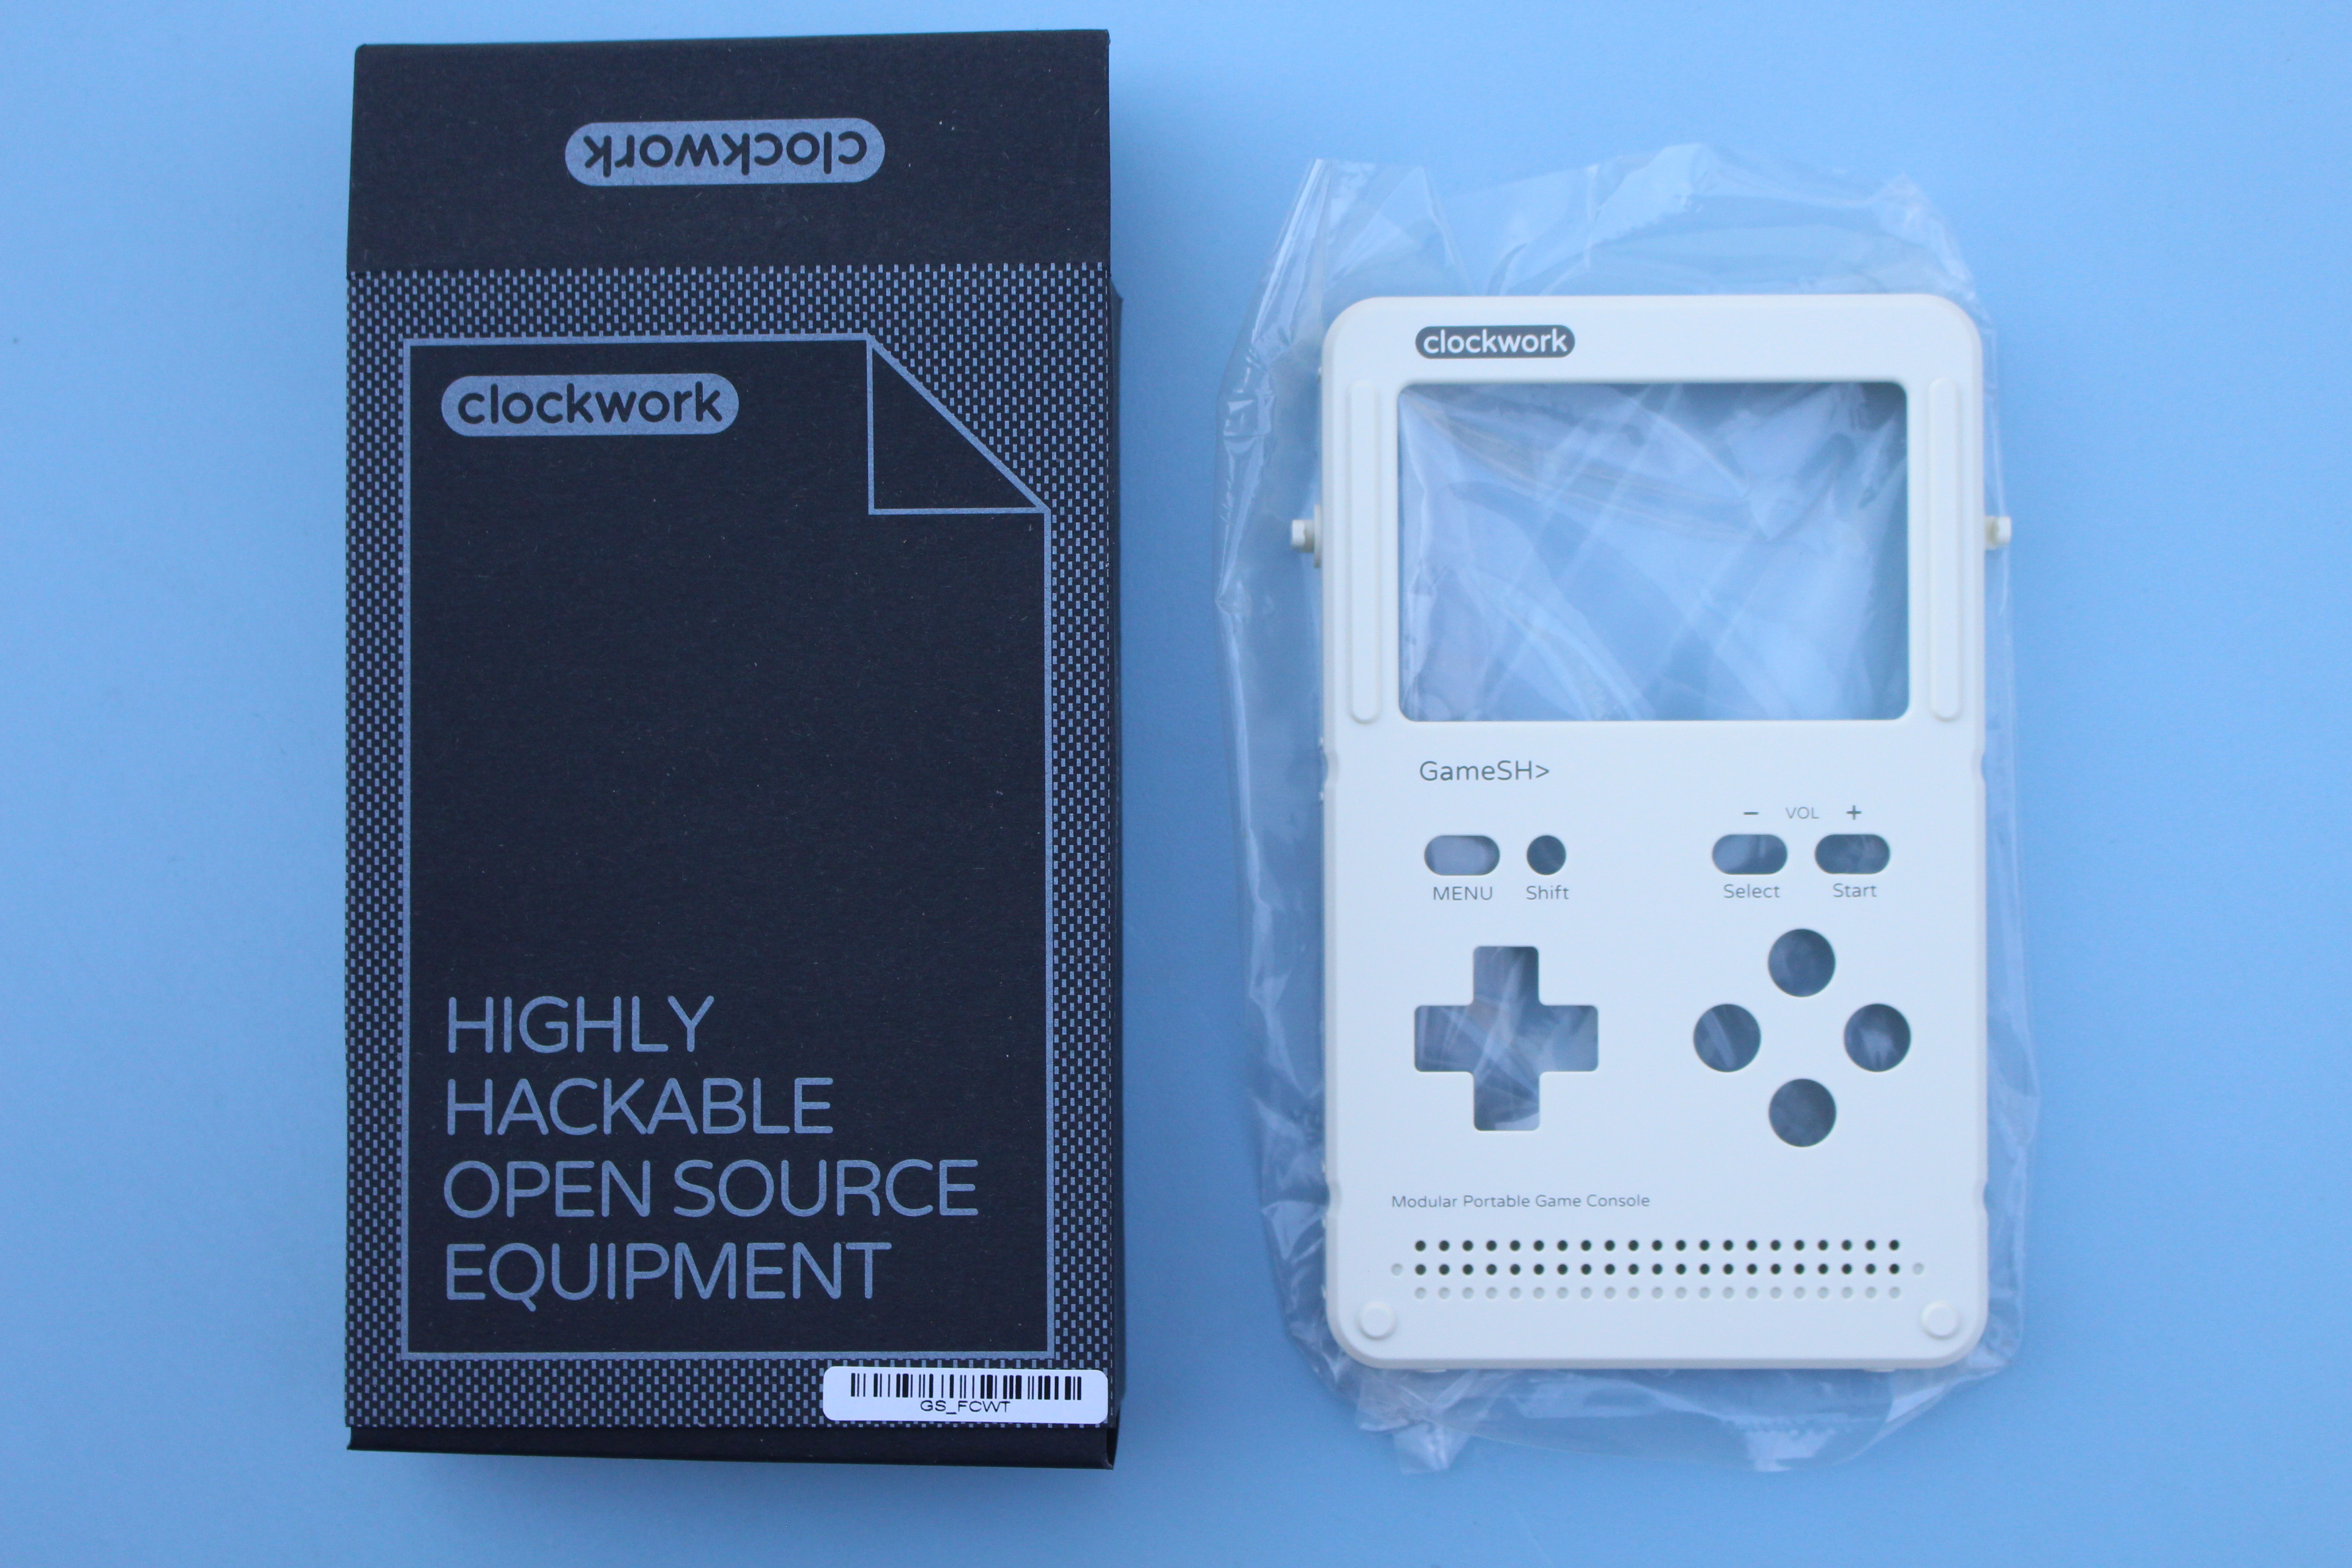
GS_FCWT package is for the top cover of the game console.
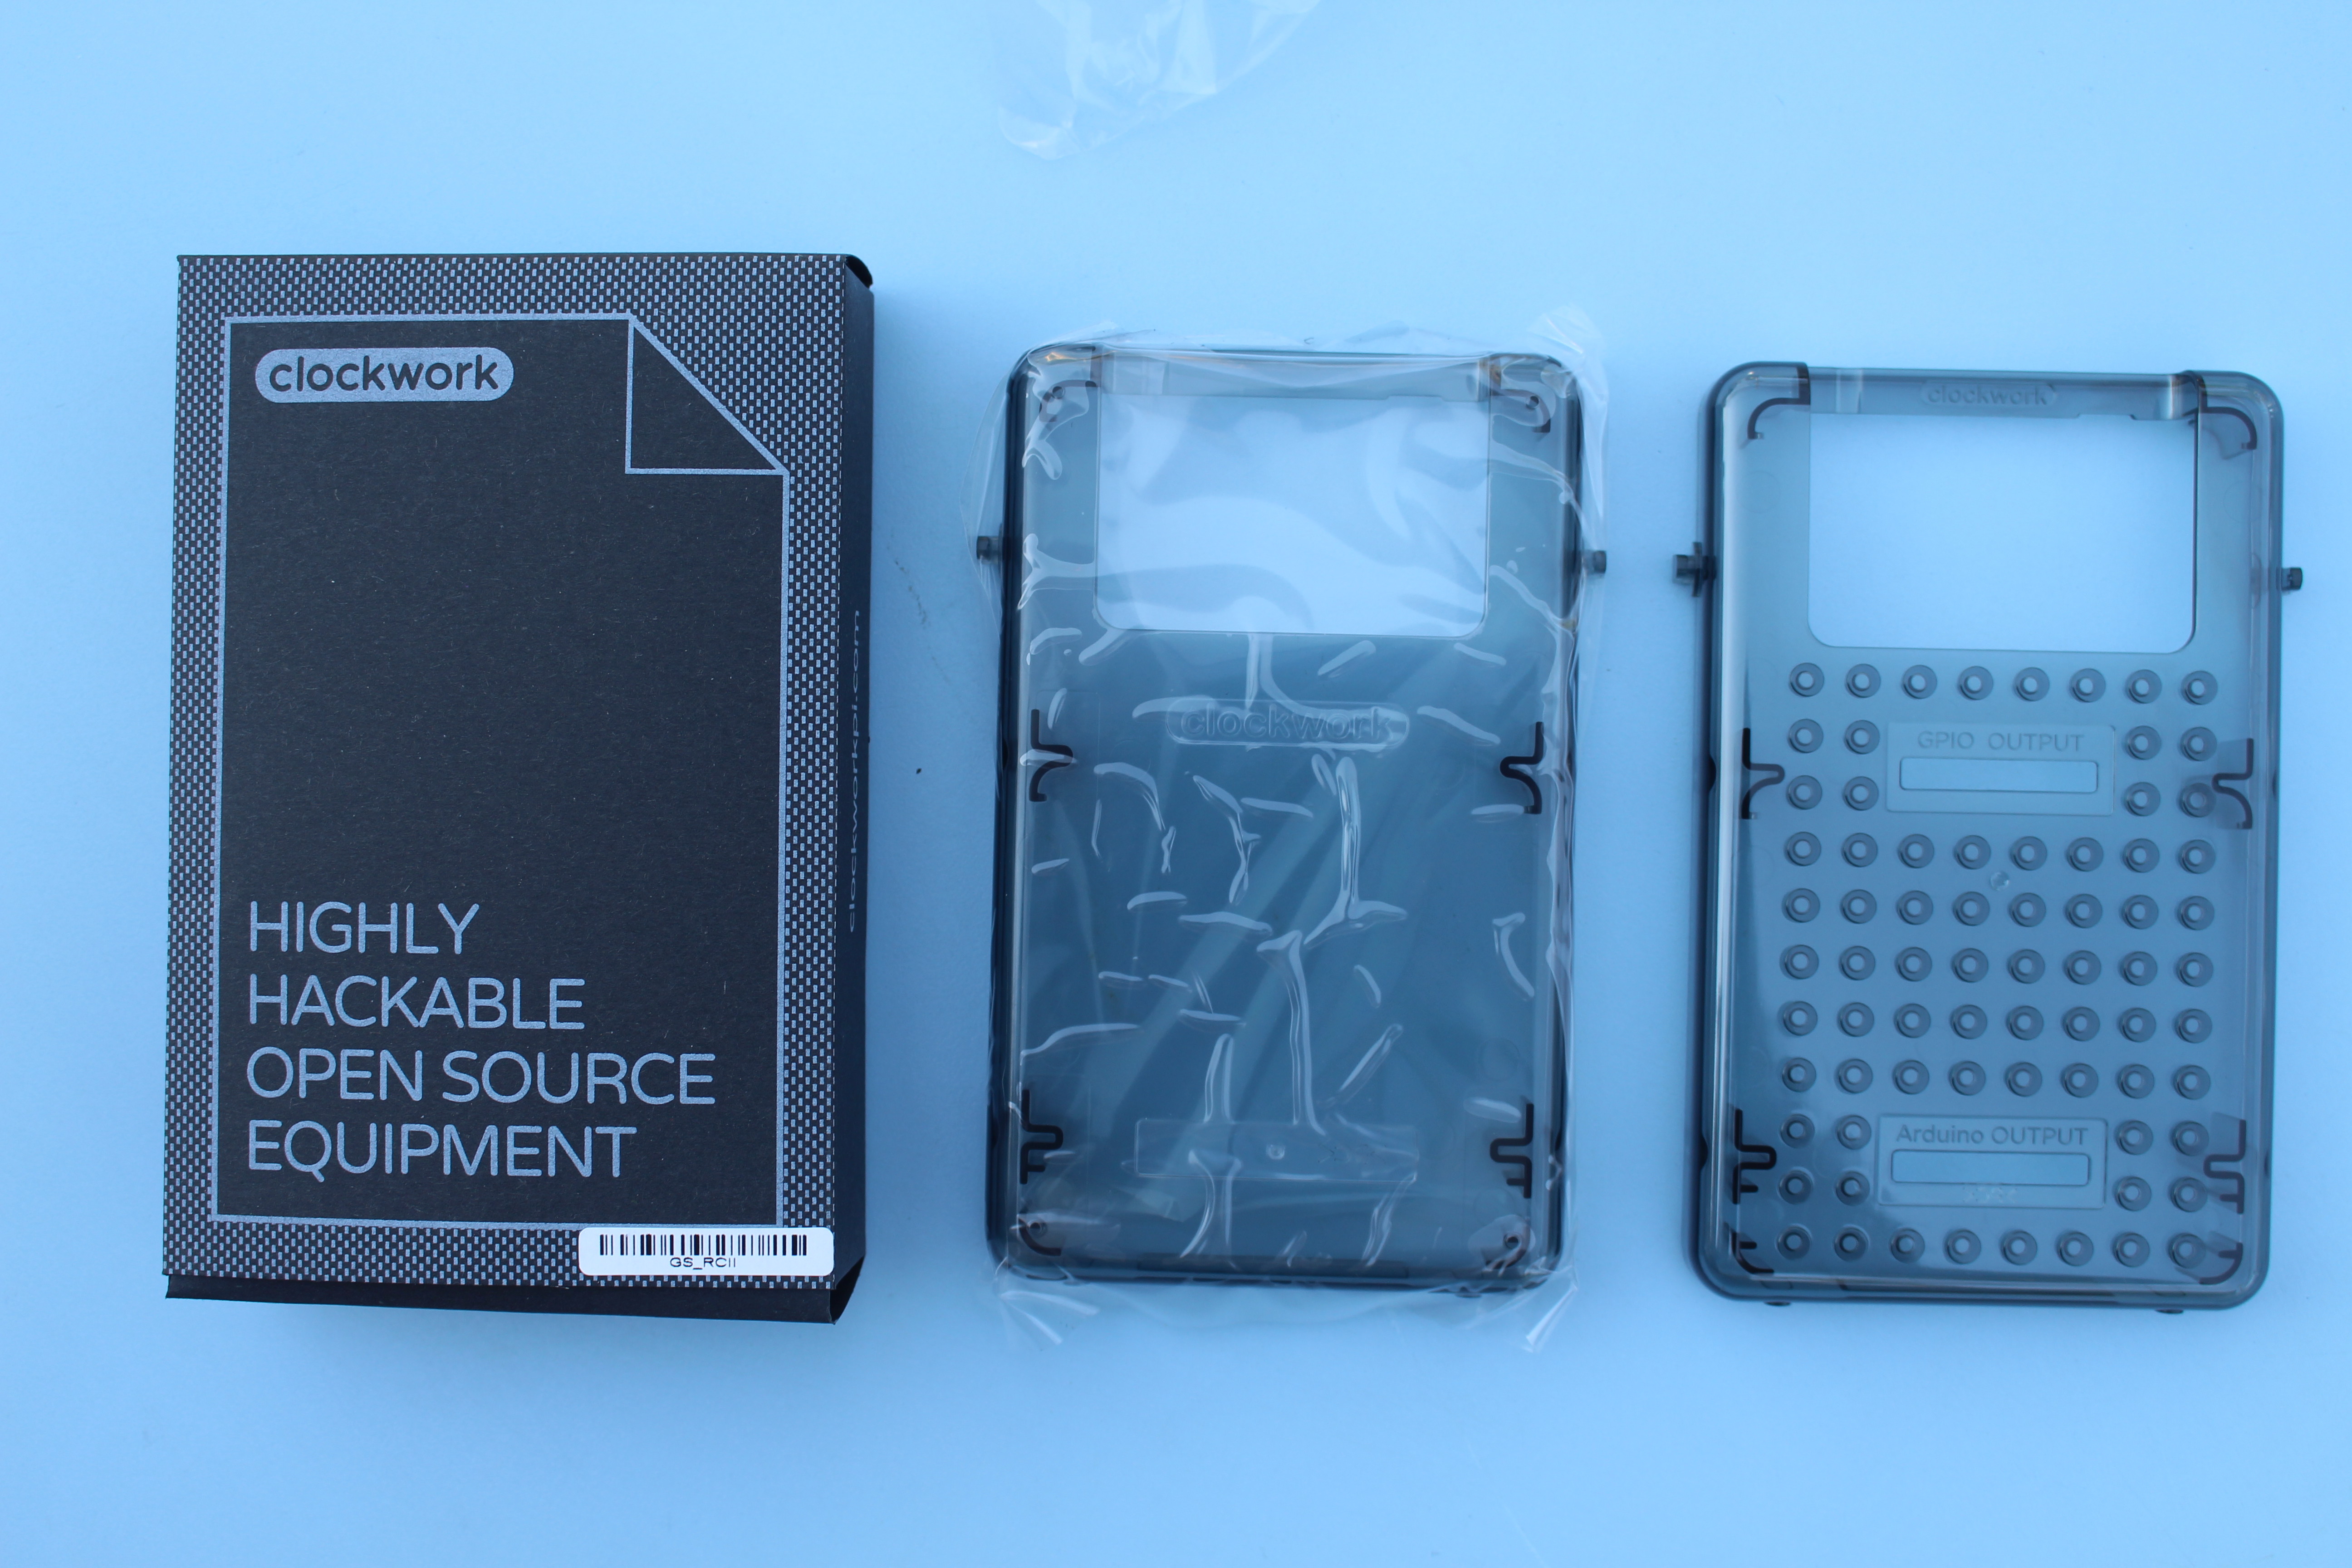
GS_RCII includes the standard back cover, as well as the maker back shell that gives access to Arduino GPIOs and five more buttons called LightKey parts.
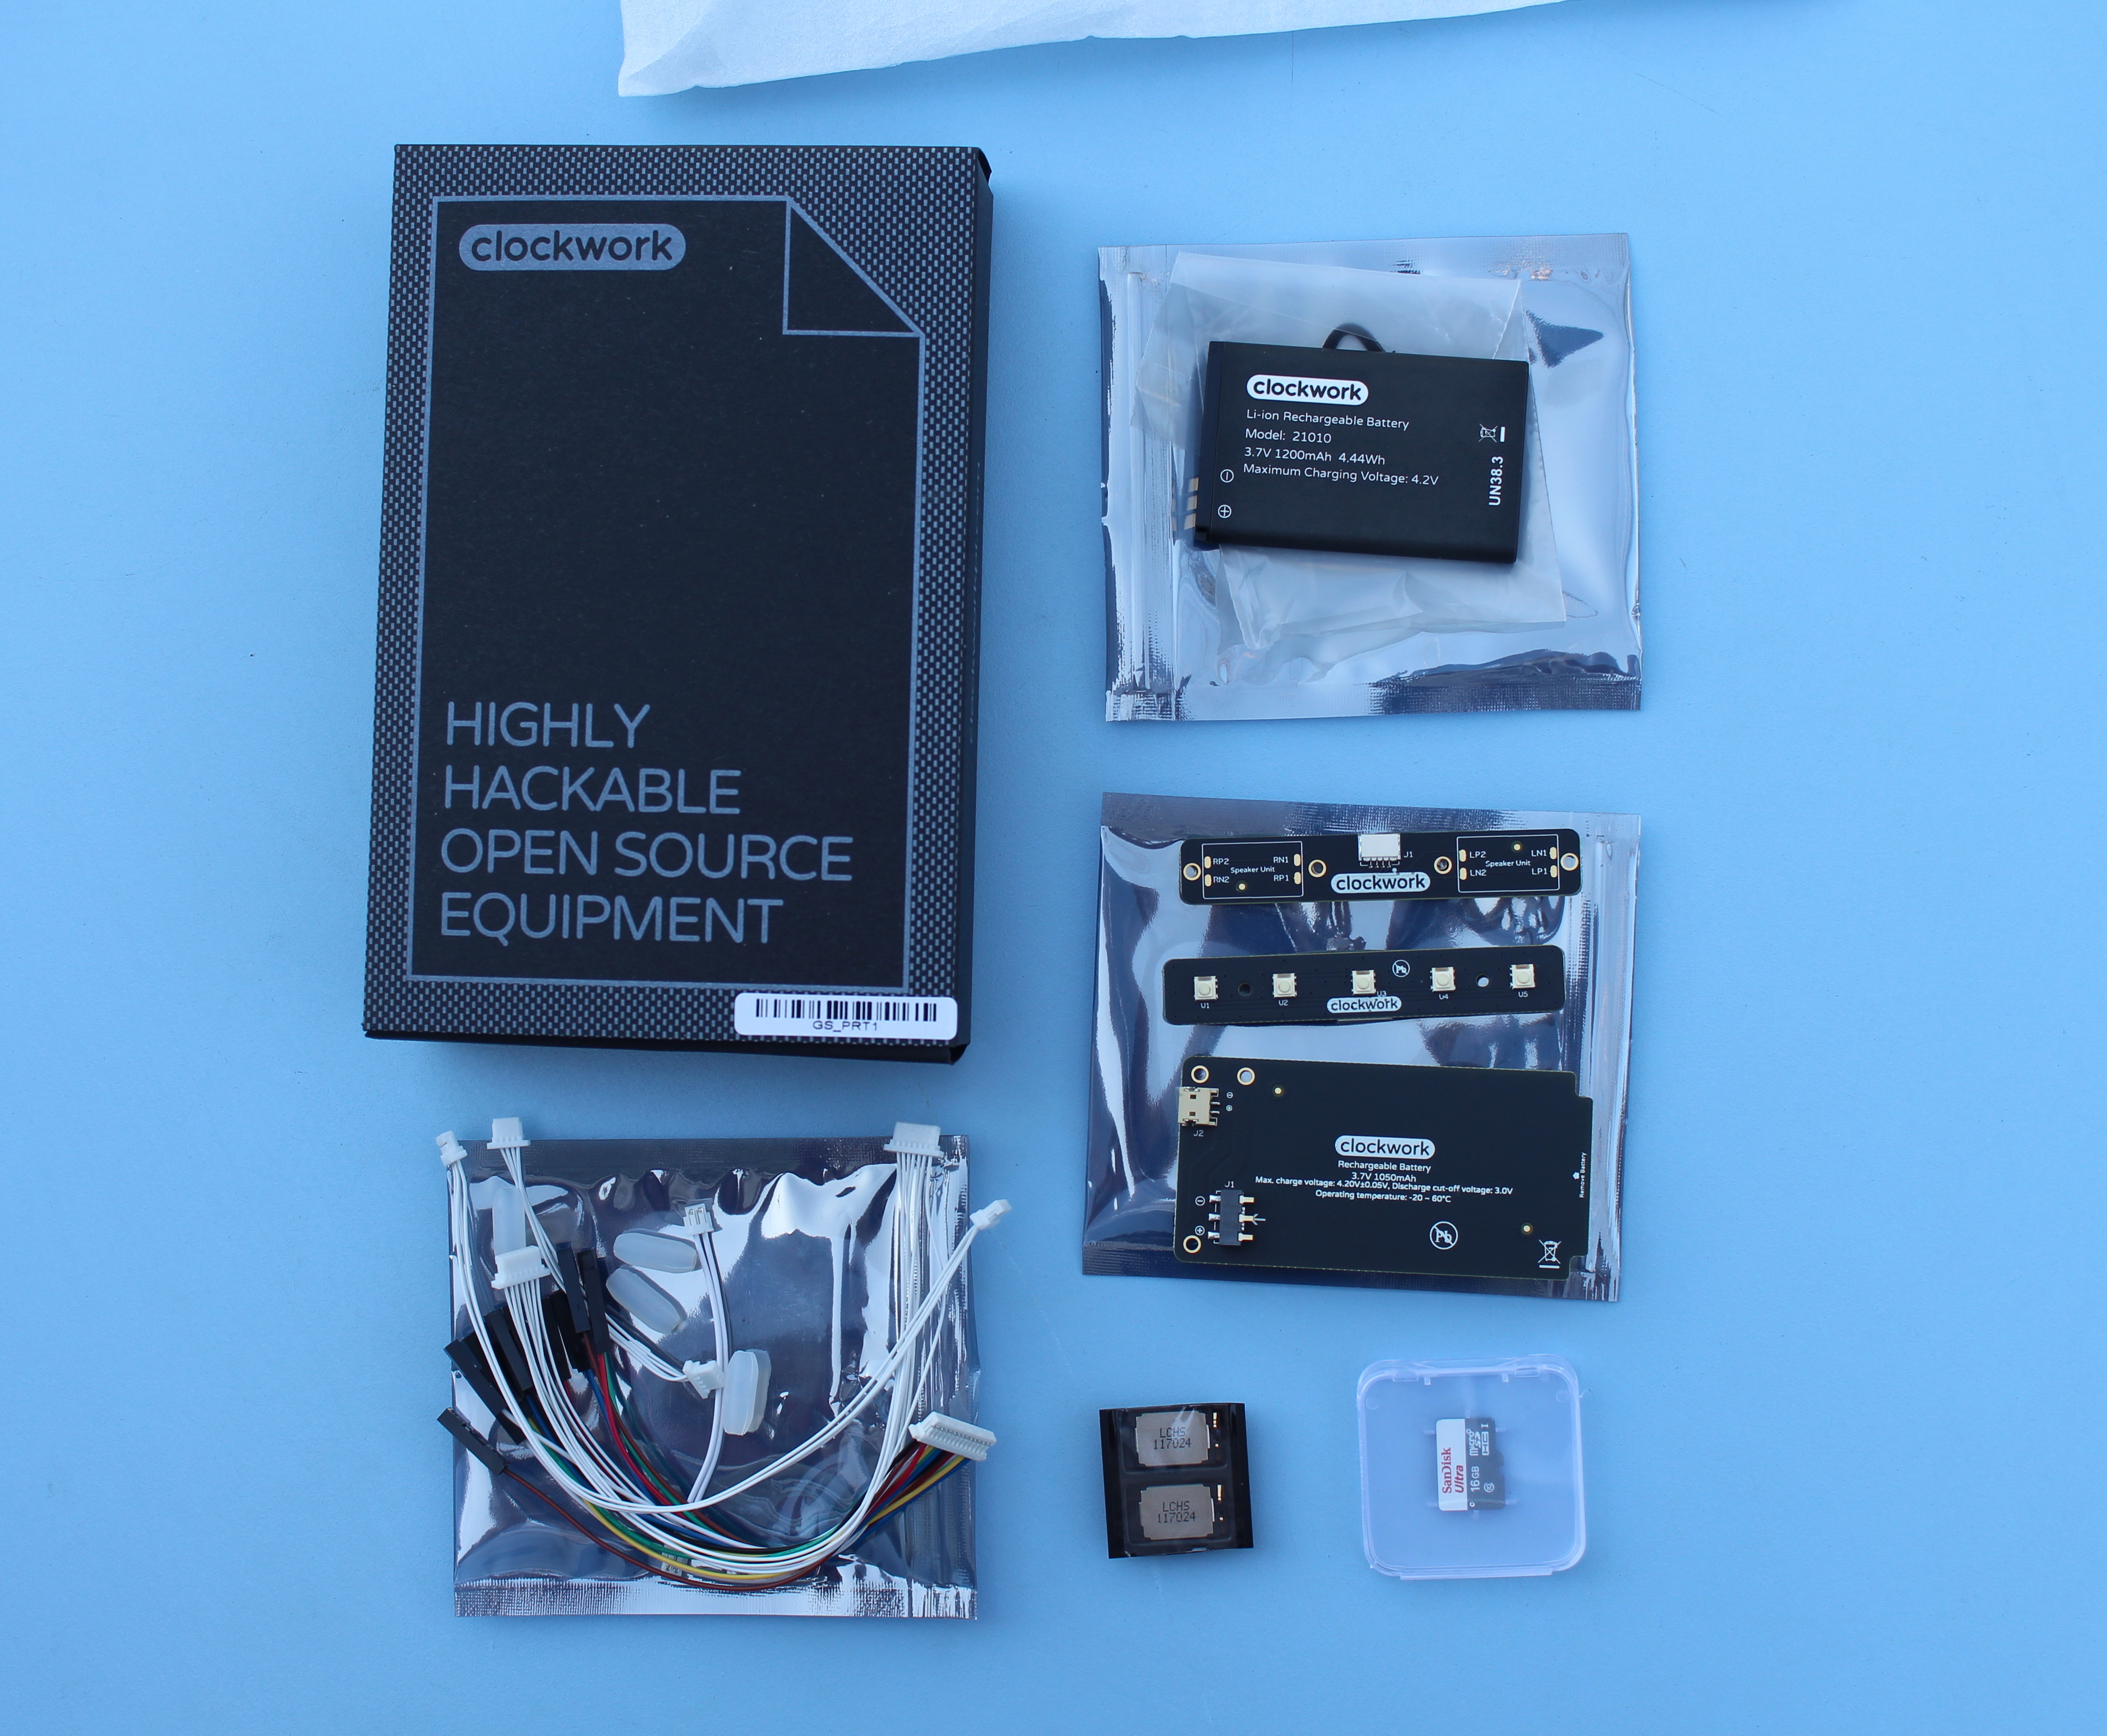
We start to get some electronics part with GS_PRT1 package namely boards for the battery, buttons, and speakers, as well as all cables needed for assembly, the two speakers, the 1,200 mAh battery, and a 16GB micro SD card pre-loaded with Linux based Clockwork OS.
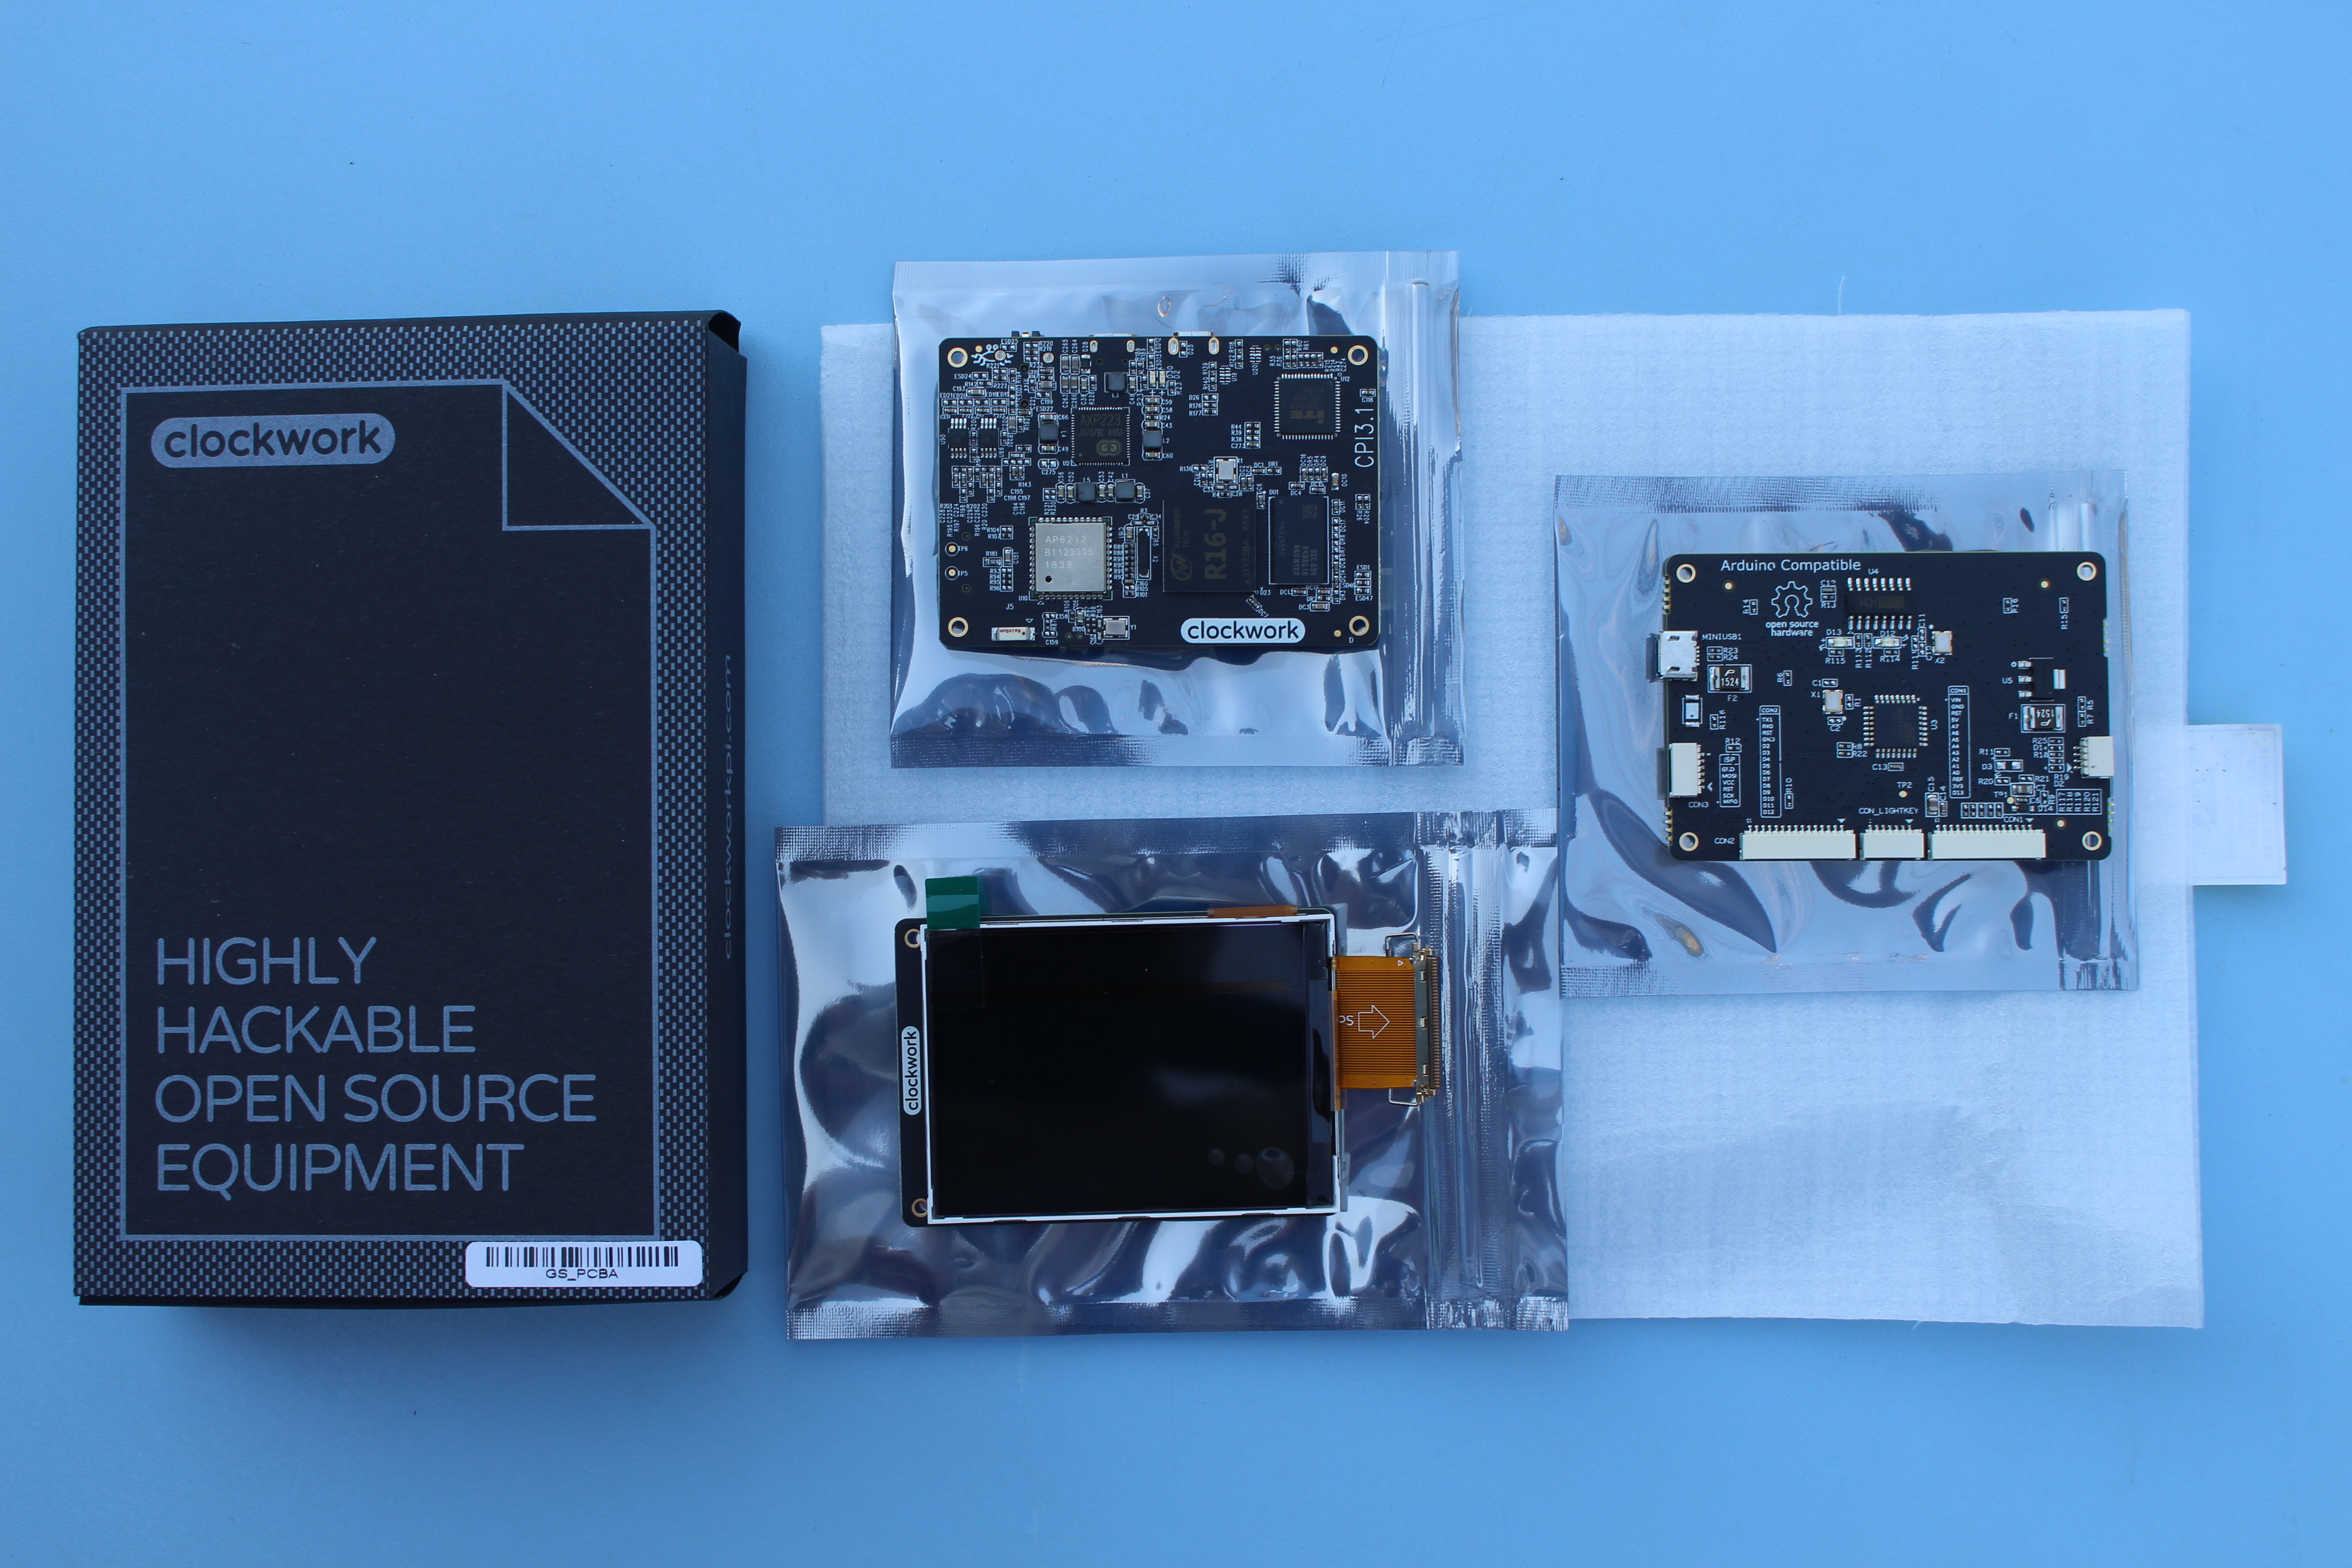
As it names implies GS_PCBA package features the main boards with ClockworkPi Allwinner R16 board running Linux, an Arduino compatible board handling the keyboard among other things, and the display module.
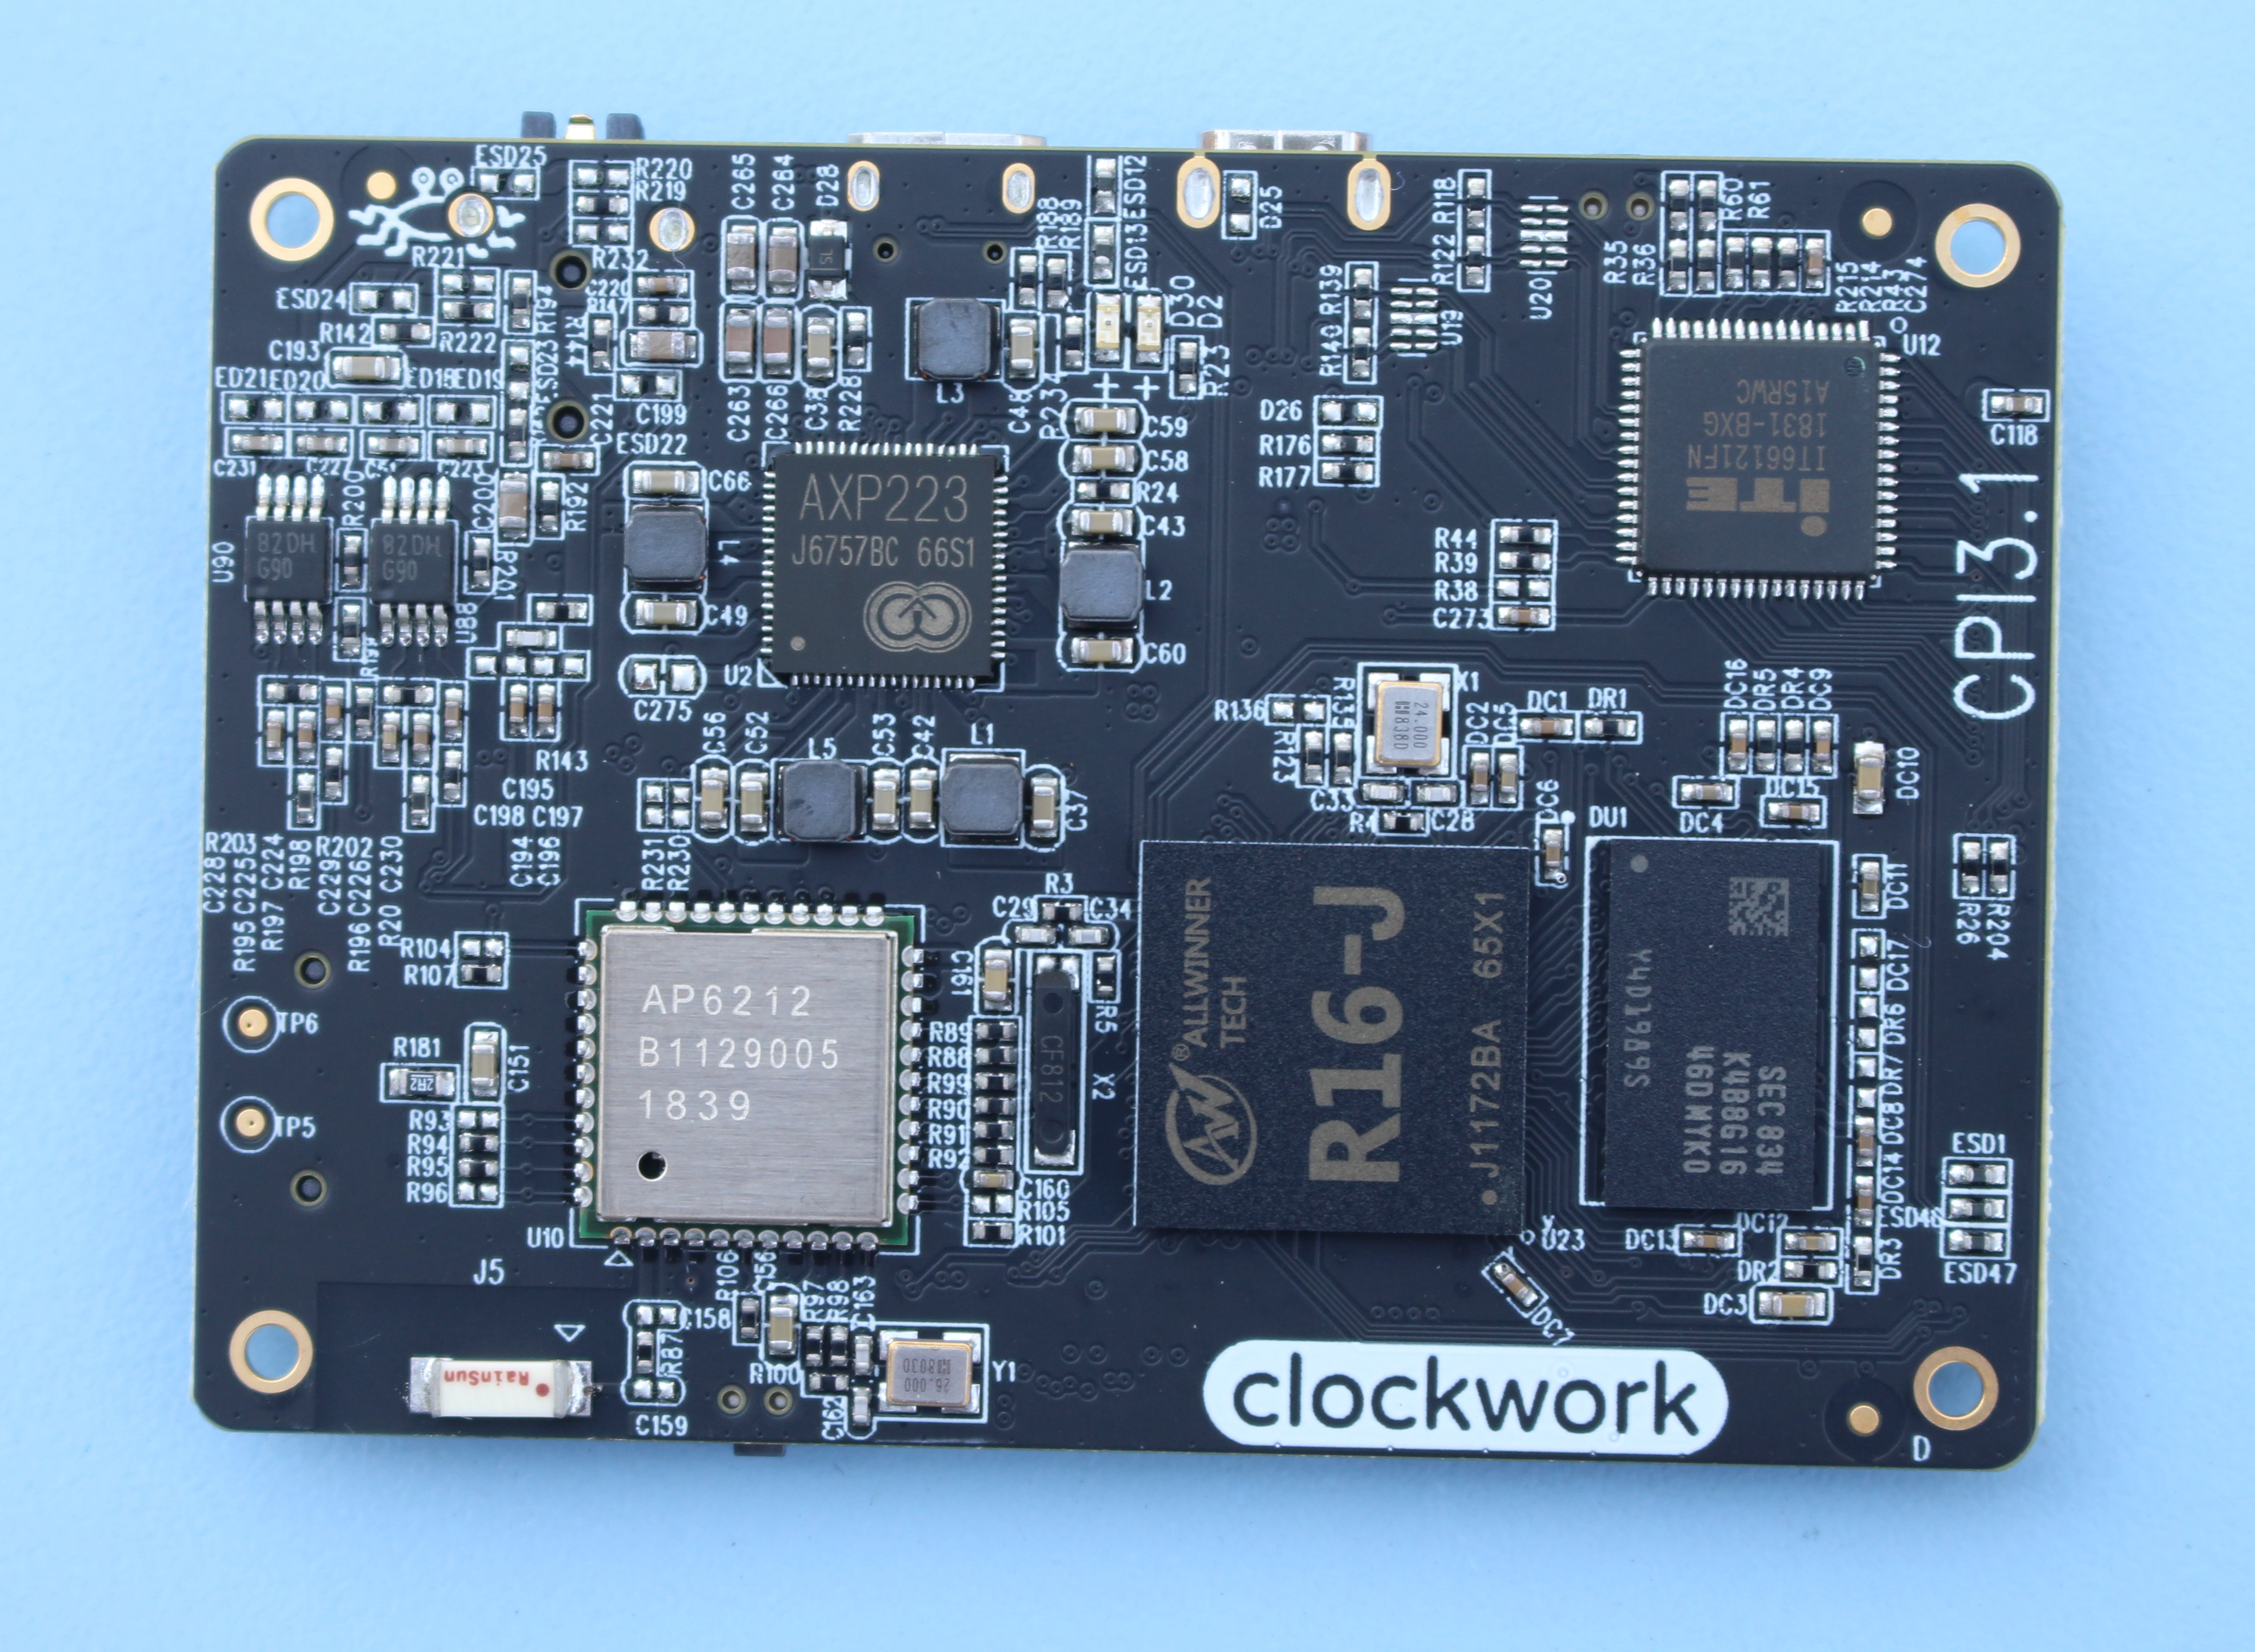
Having a closer look at ClockworkPi (CPI) 1.3 board reveals Allwinner R16-J quad core Cortex A7 processor, Samsung K4B8G1646D-MYK0 1GB DDR3 RAM chip, Ampak AP6212 2.4GHz WiFi 4 and Bluetooth 4.1 wireless module, AXP223 power management IC, and ITE IT66121FN HDMI 1.4 transmitter.
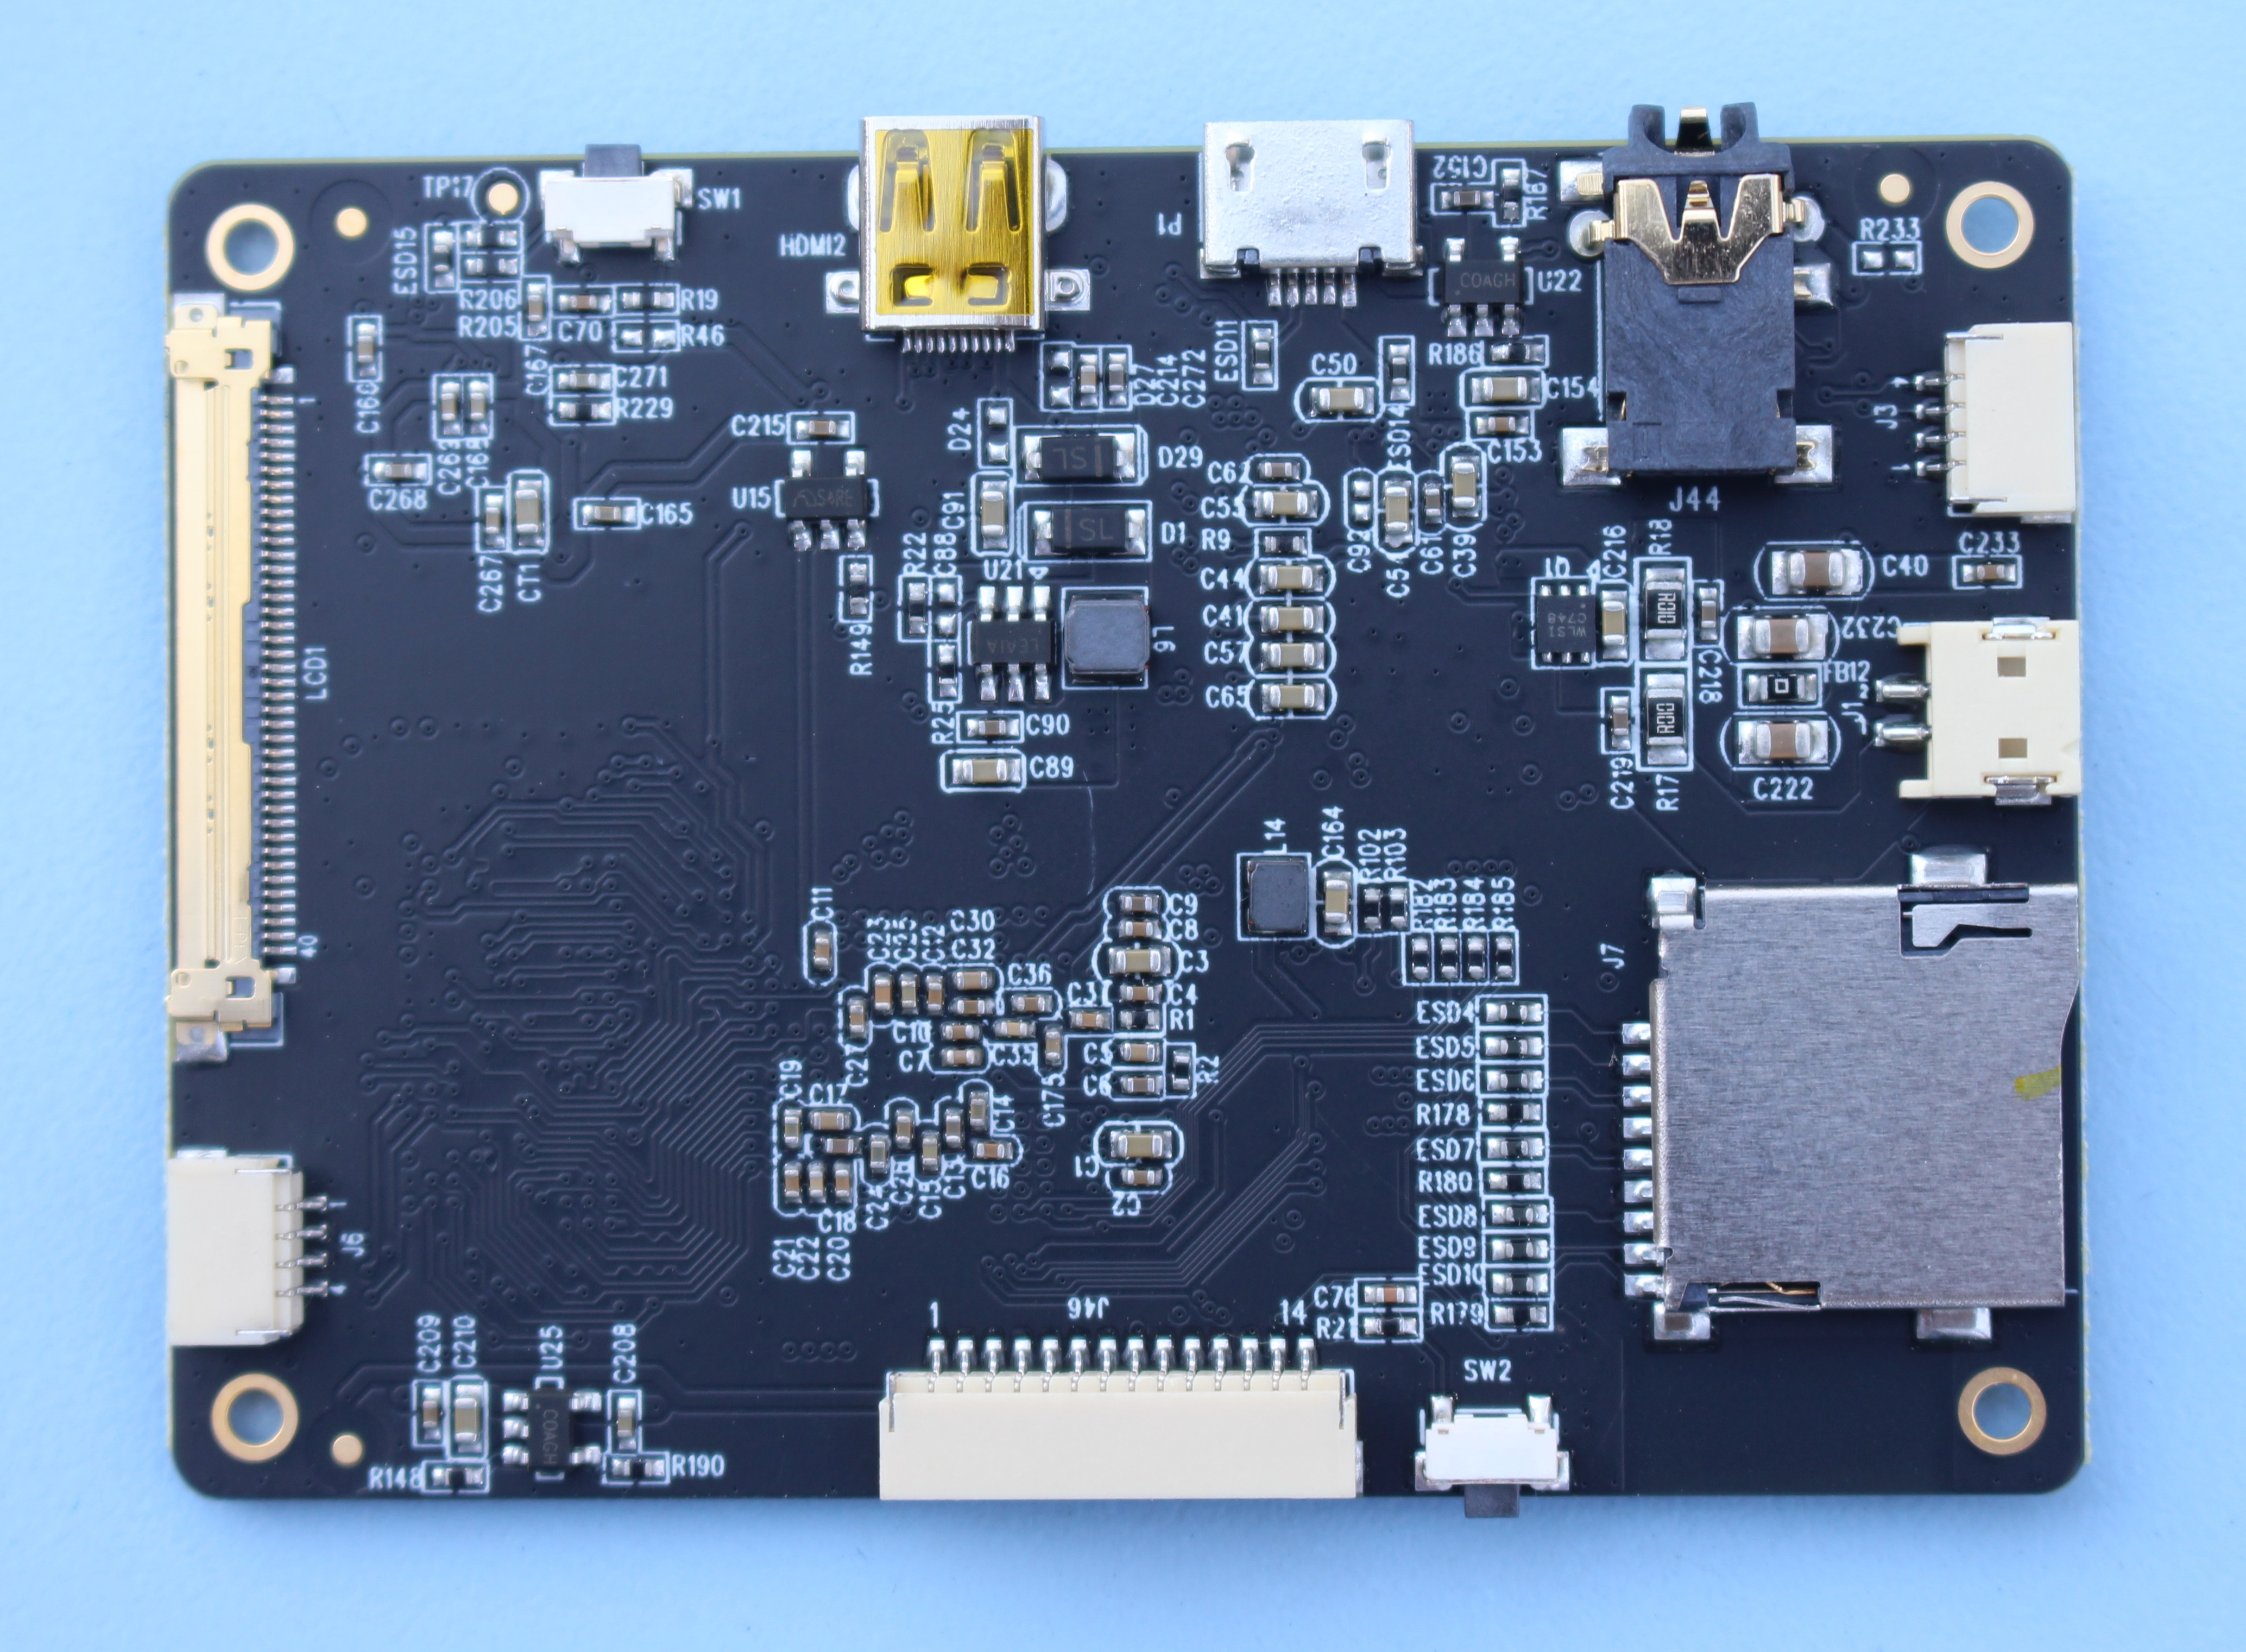
The other side of the board includes the micro SD card slot, a micro HDMI port, a micro USB port, a 3.5mm audio jack, various buttons, and connectors for the display, battery, Arduino board / keyboard and more.
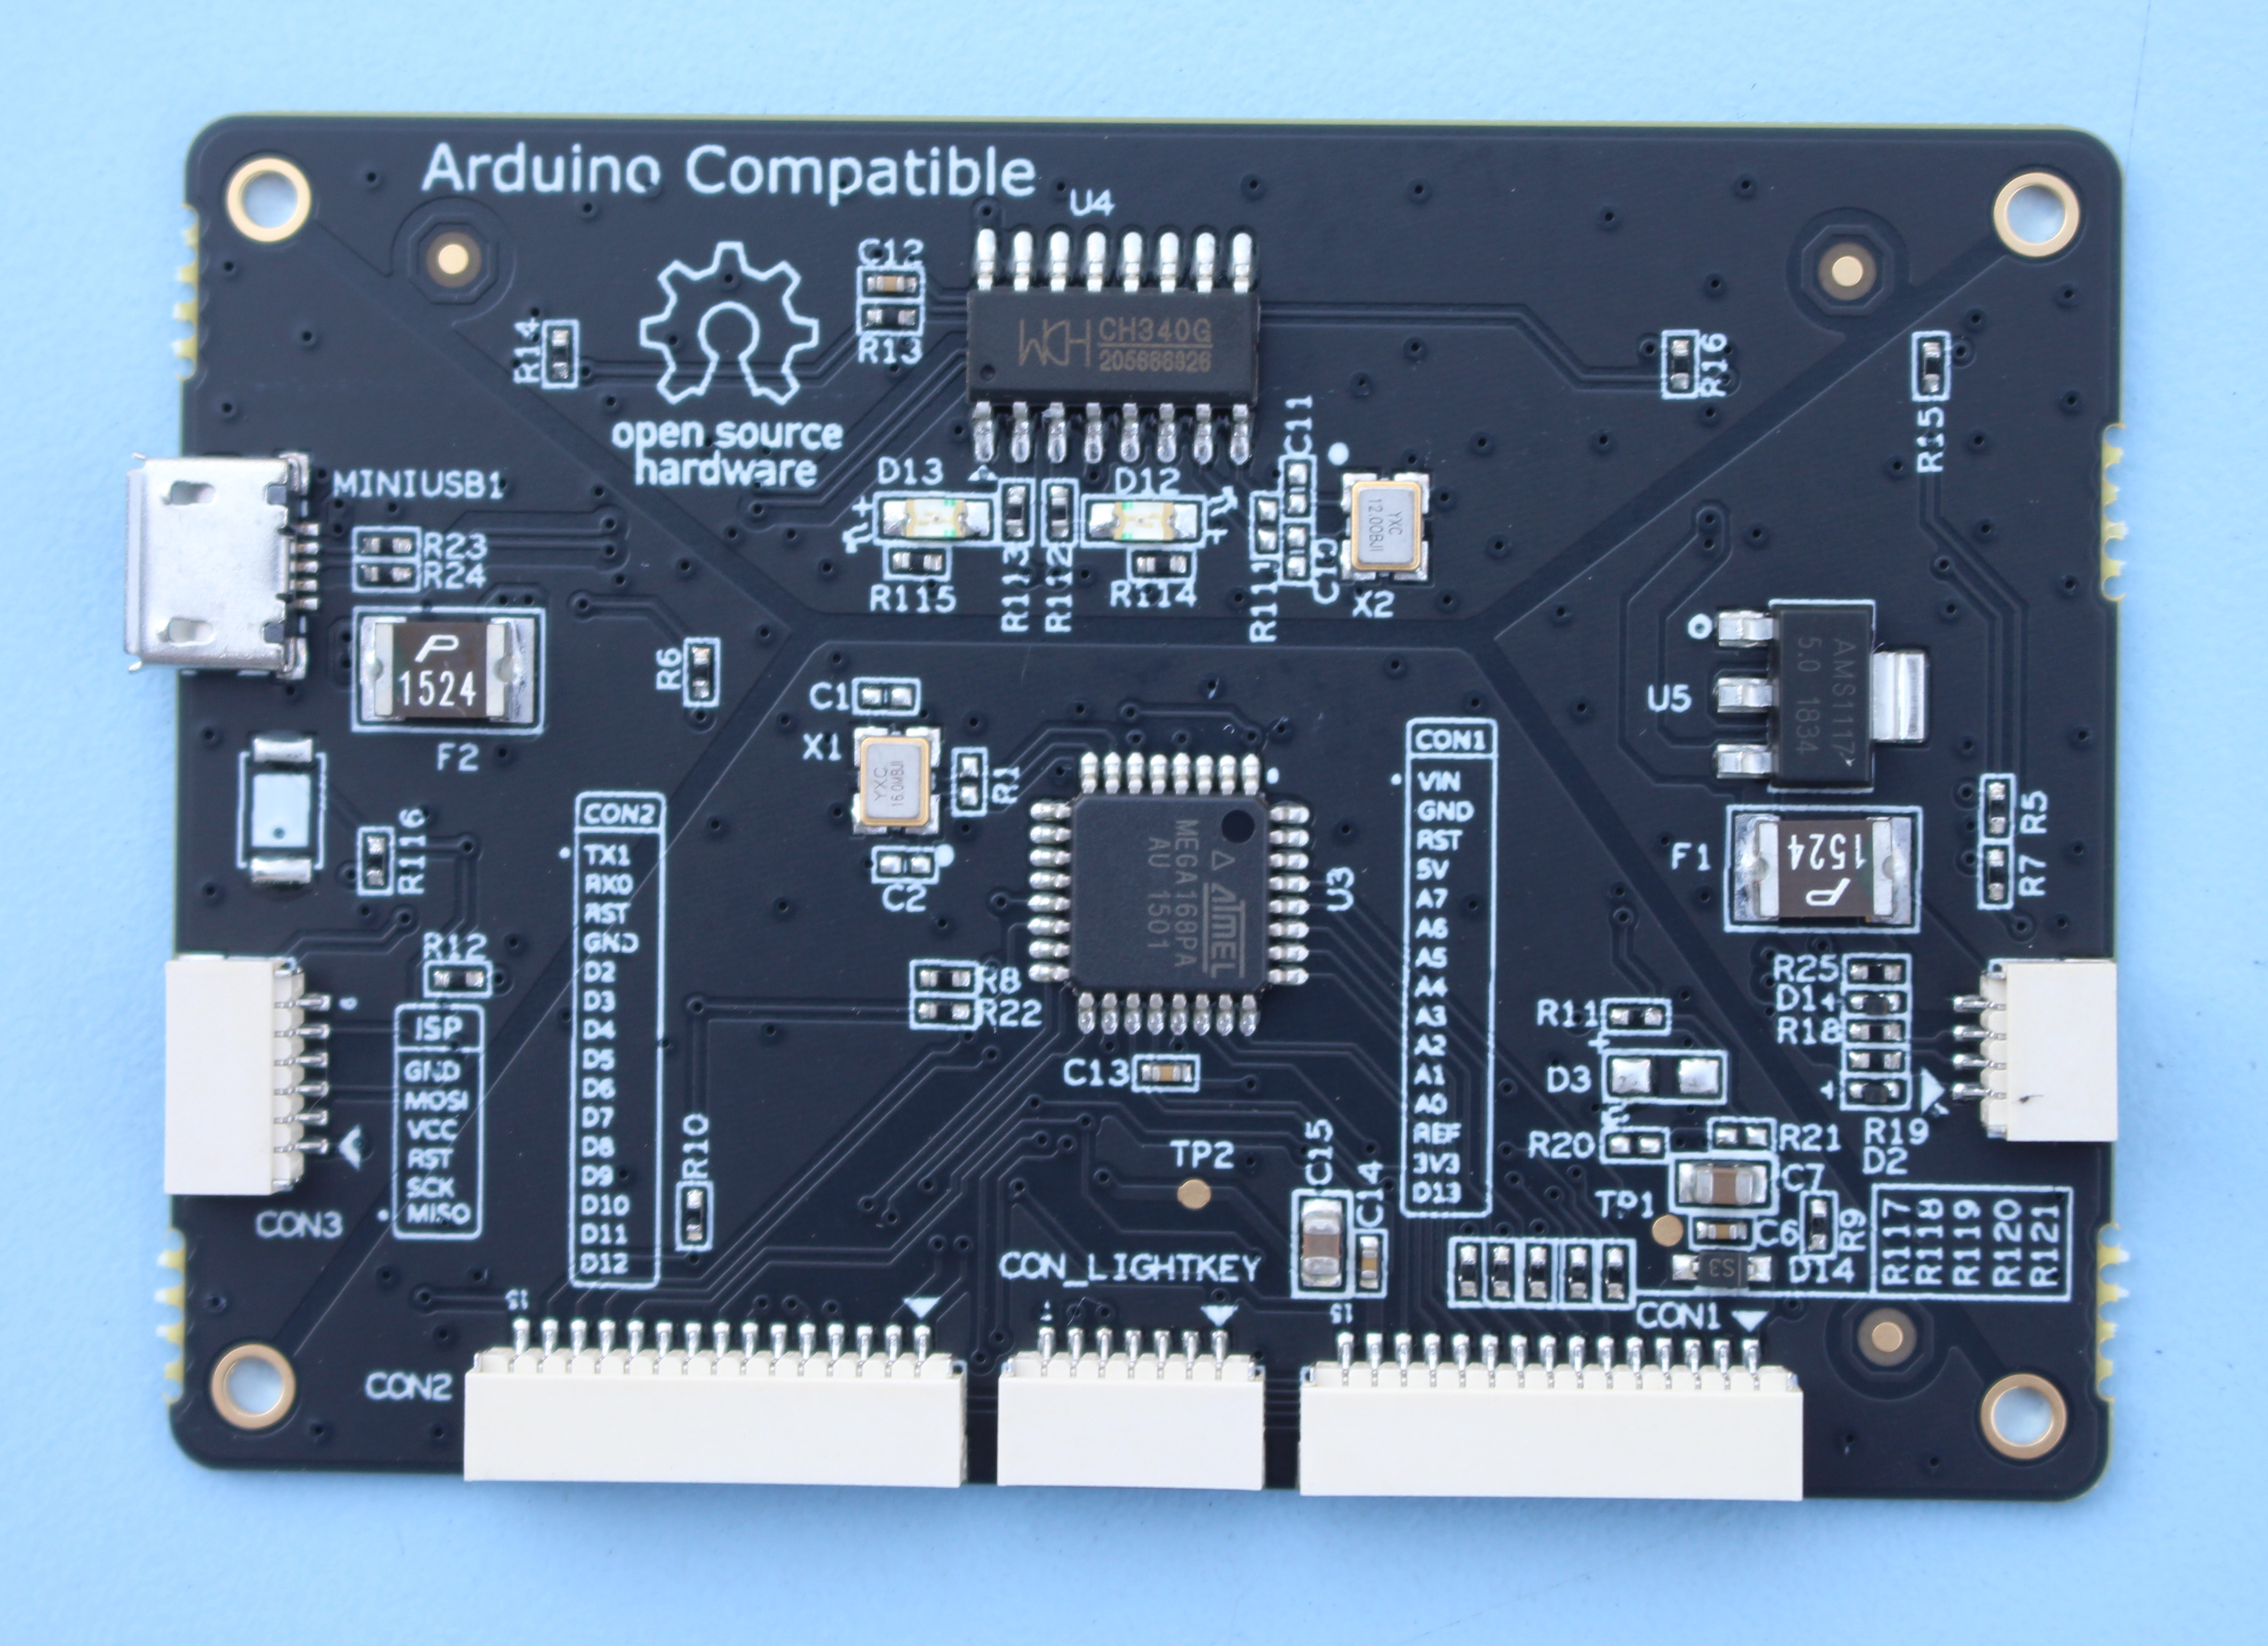
The Arduino board is based on Microchip Atmel ATMEGA168PA 8-bit AVR MCU, and comes with a micro USB port, and connectors to connect the 5 “LightKeys”, and other I/Os.
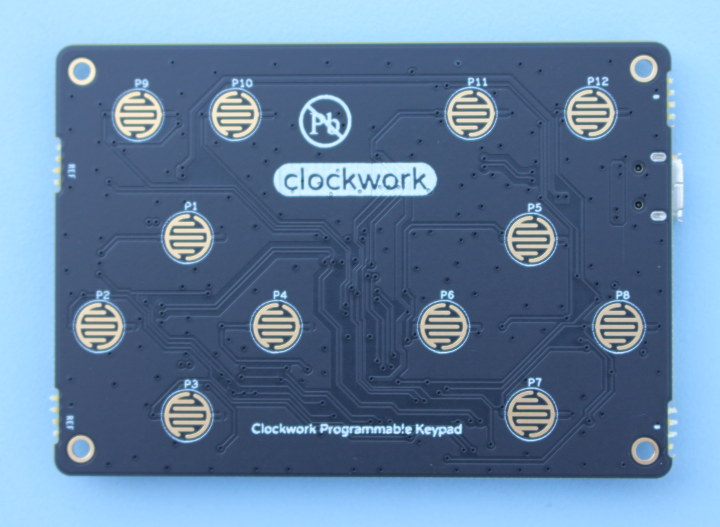 The other side of the board features the programmable keyboard comprises of touch pads.
ClockworkPi Gameshell Assembly Guide
Now that we should have a fairly good understanding of the part of the kit, it’s time to have some fun and assemble it.
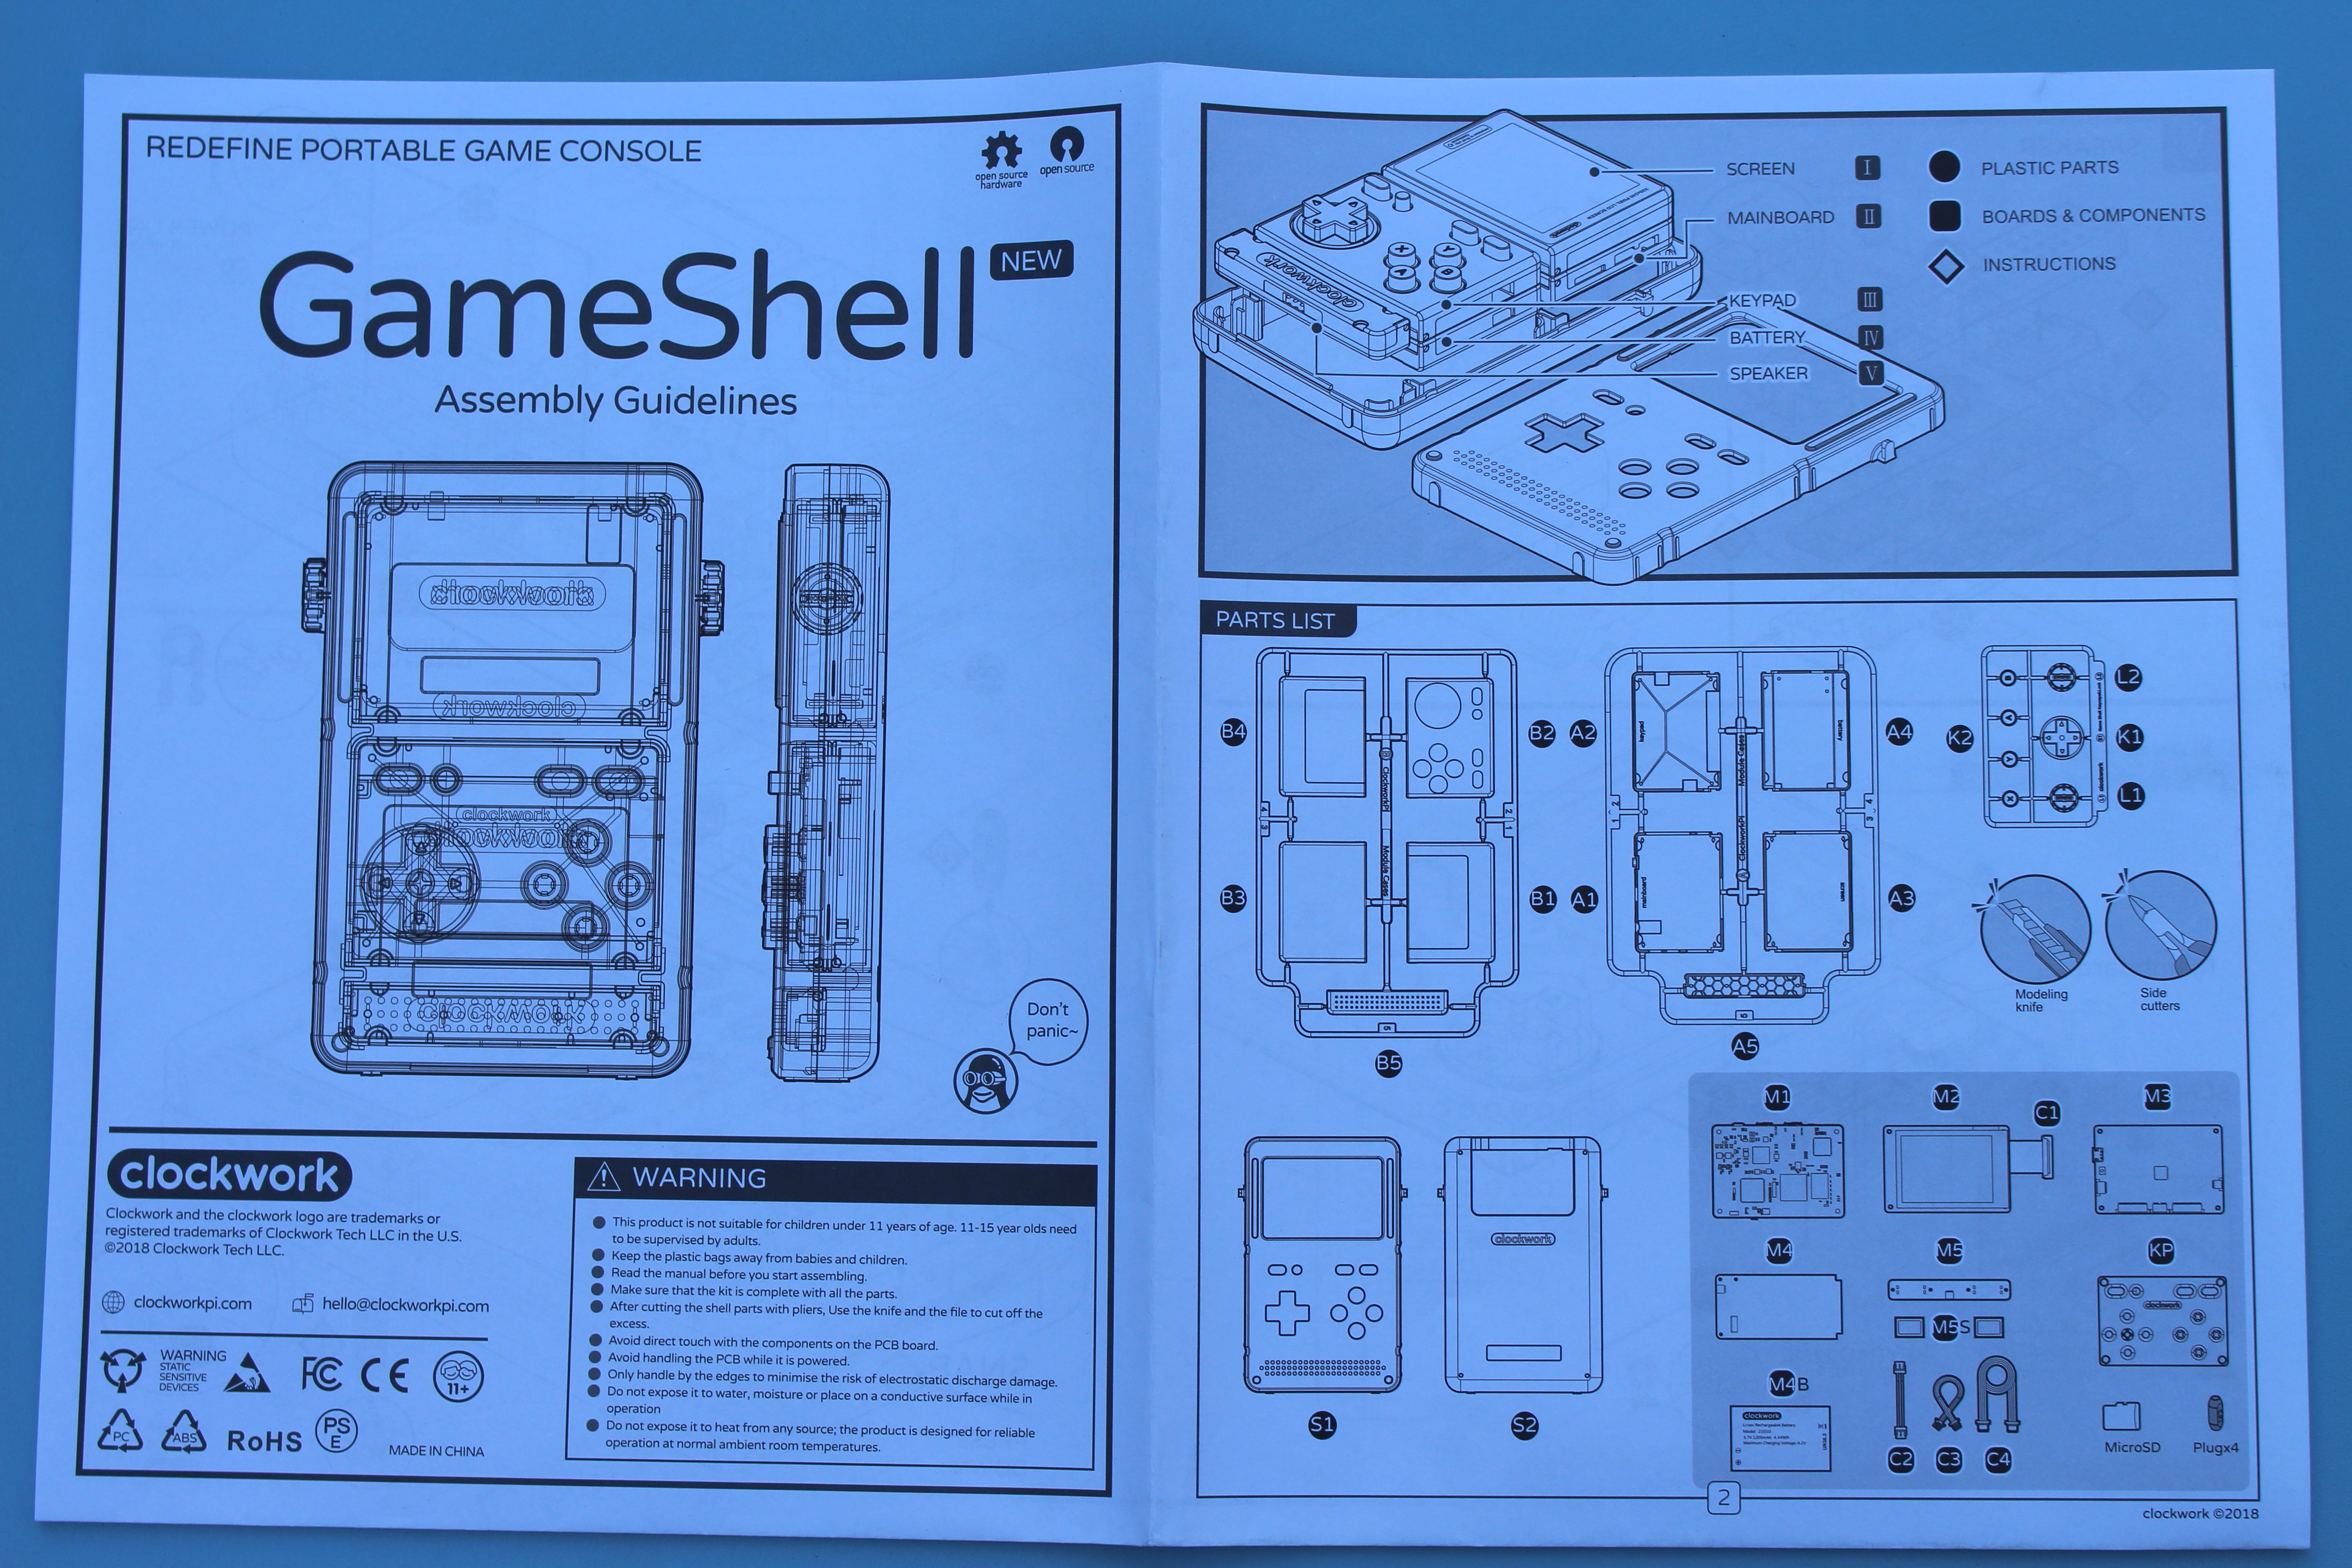
Assembly is pretty straightforward thanks to the provided guide. The numbered part list is the important part as you’ll have to refer to it in every step. Tools are recommended, but I personally did the complete assembly with bare hands which require to be a bit more careful if you don’t want to break plastic parts. I’d still recommend to use tools as you’ll end up with slightly neater end result.
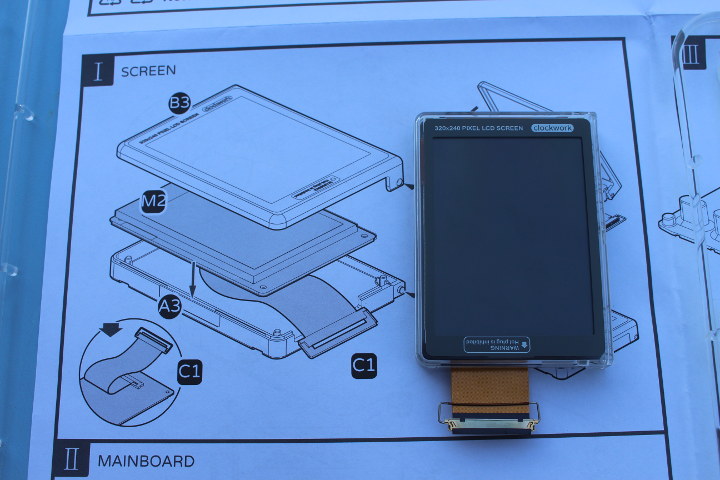
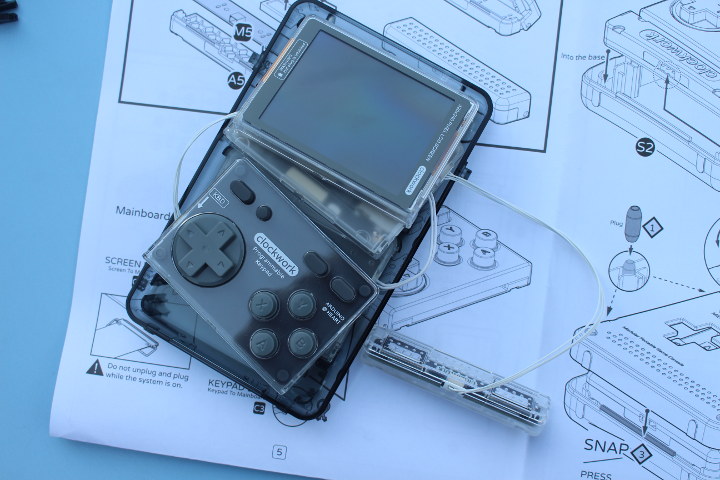
First, you’ll be asked to assemble the display module. Get B3 and A3 plastic covers as well as M2 display module with the already attached C1 flat cable. The instructions are pretty much self-explanatory, and the only trick is to make sure you fold the flat cable during assembly. Clip the top cover to the bottom cover at an angle, and close the top cover to complete the build of the display module.
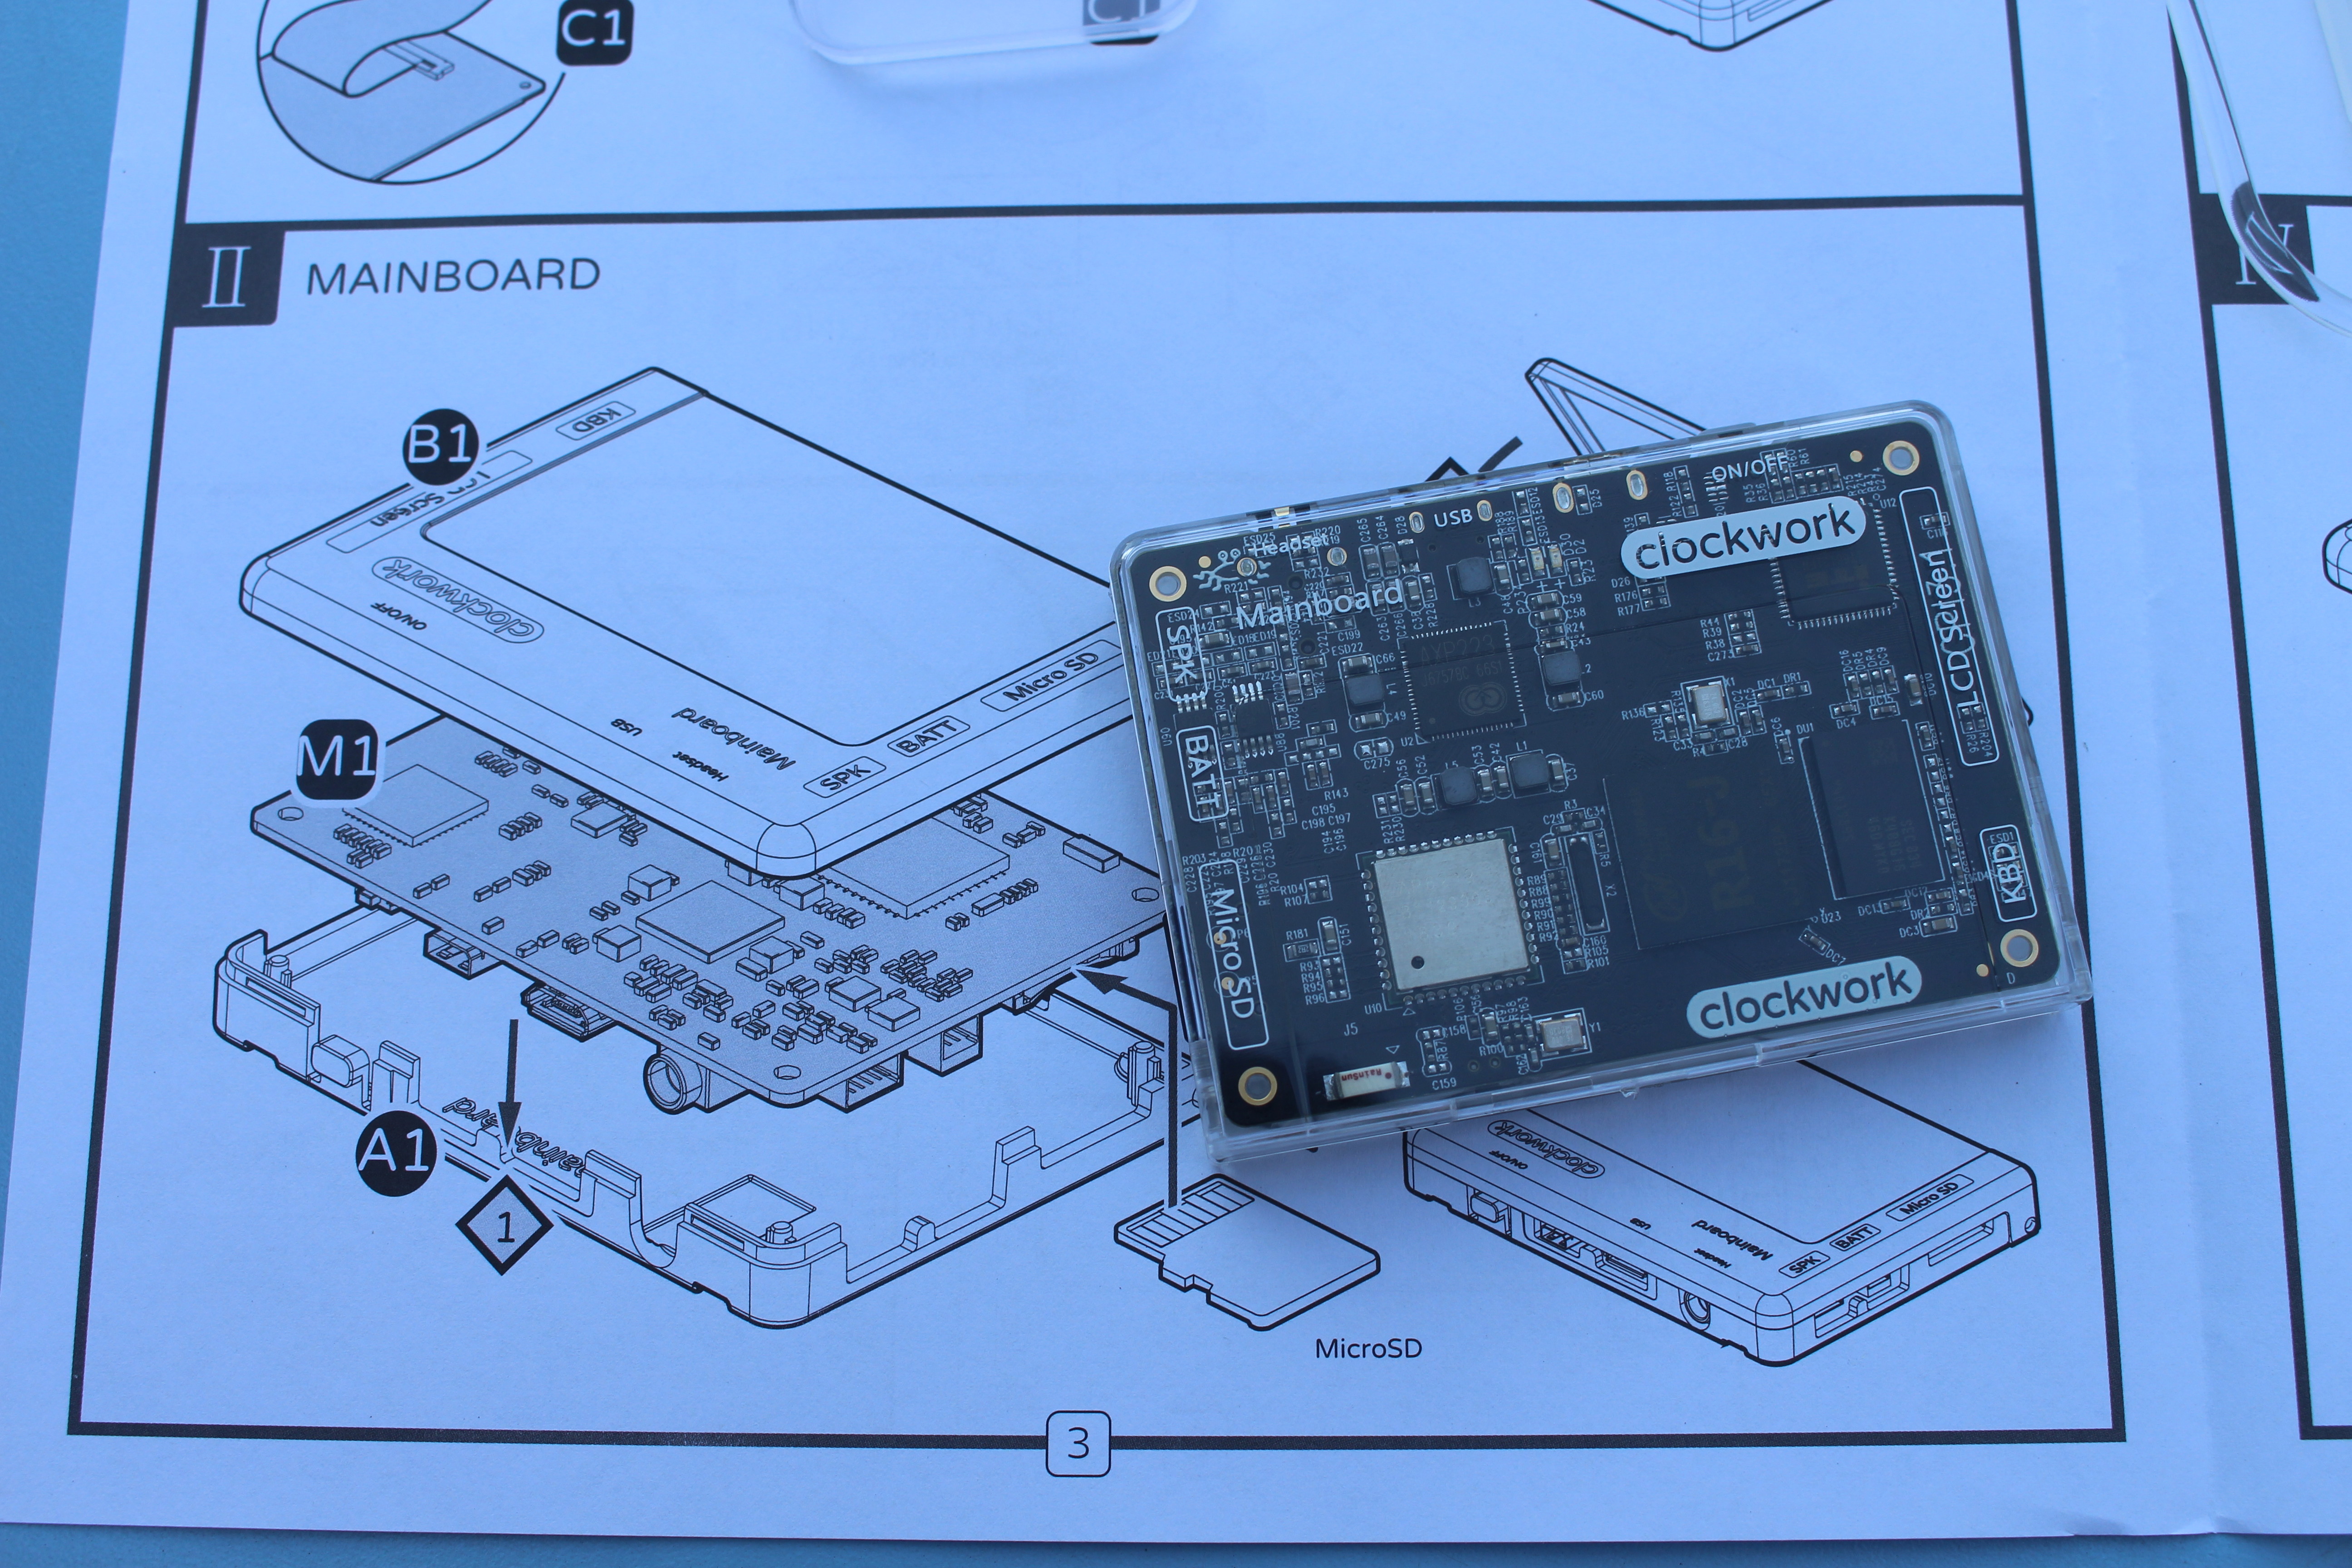
All other steps follow the same principles, and the second module is assemble is the main board. 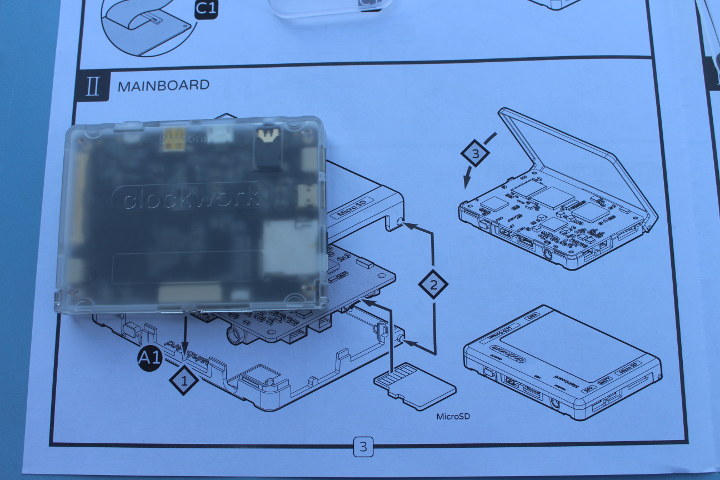 Don’t forget to insert the provided micro SD card once it is complete.
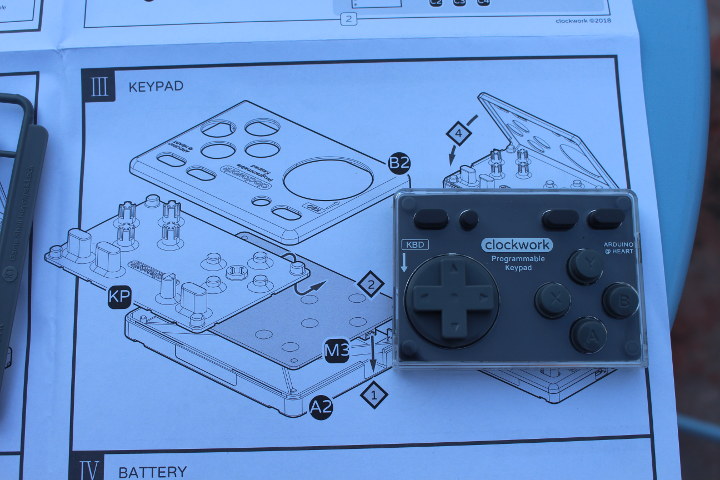
The keypad has many more part, but it’s also fairly easy to assemble, the D-Pad will fall off the case if you turn the keypad module around, but that’s normal, and won’t be an issue once the build is complete.
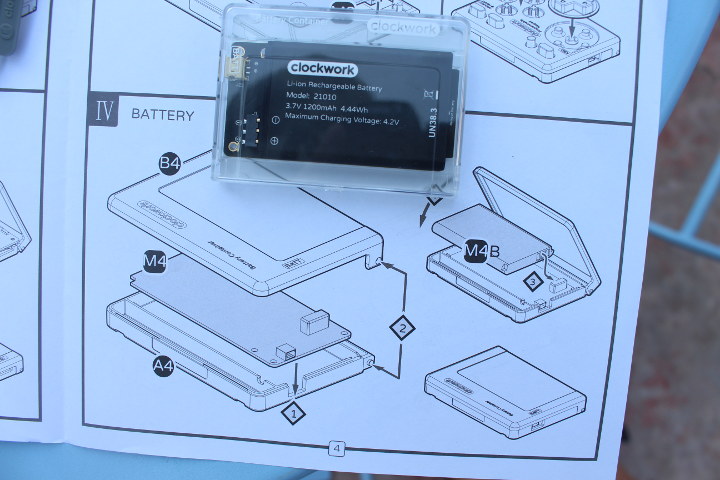
There’s no real challenge for the battery module, except to place the board in the right position. No cables are needed at this stage.
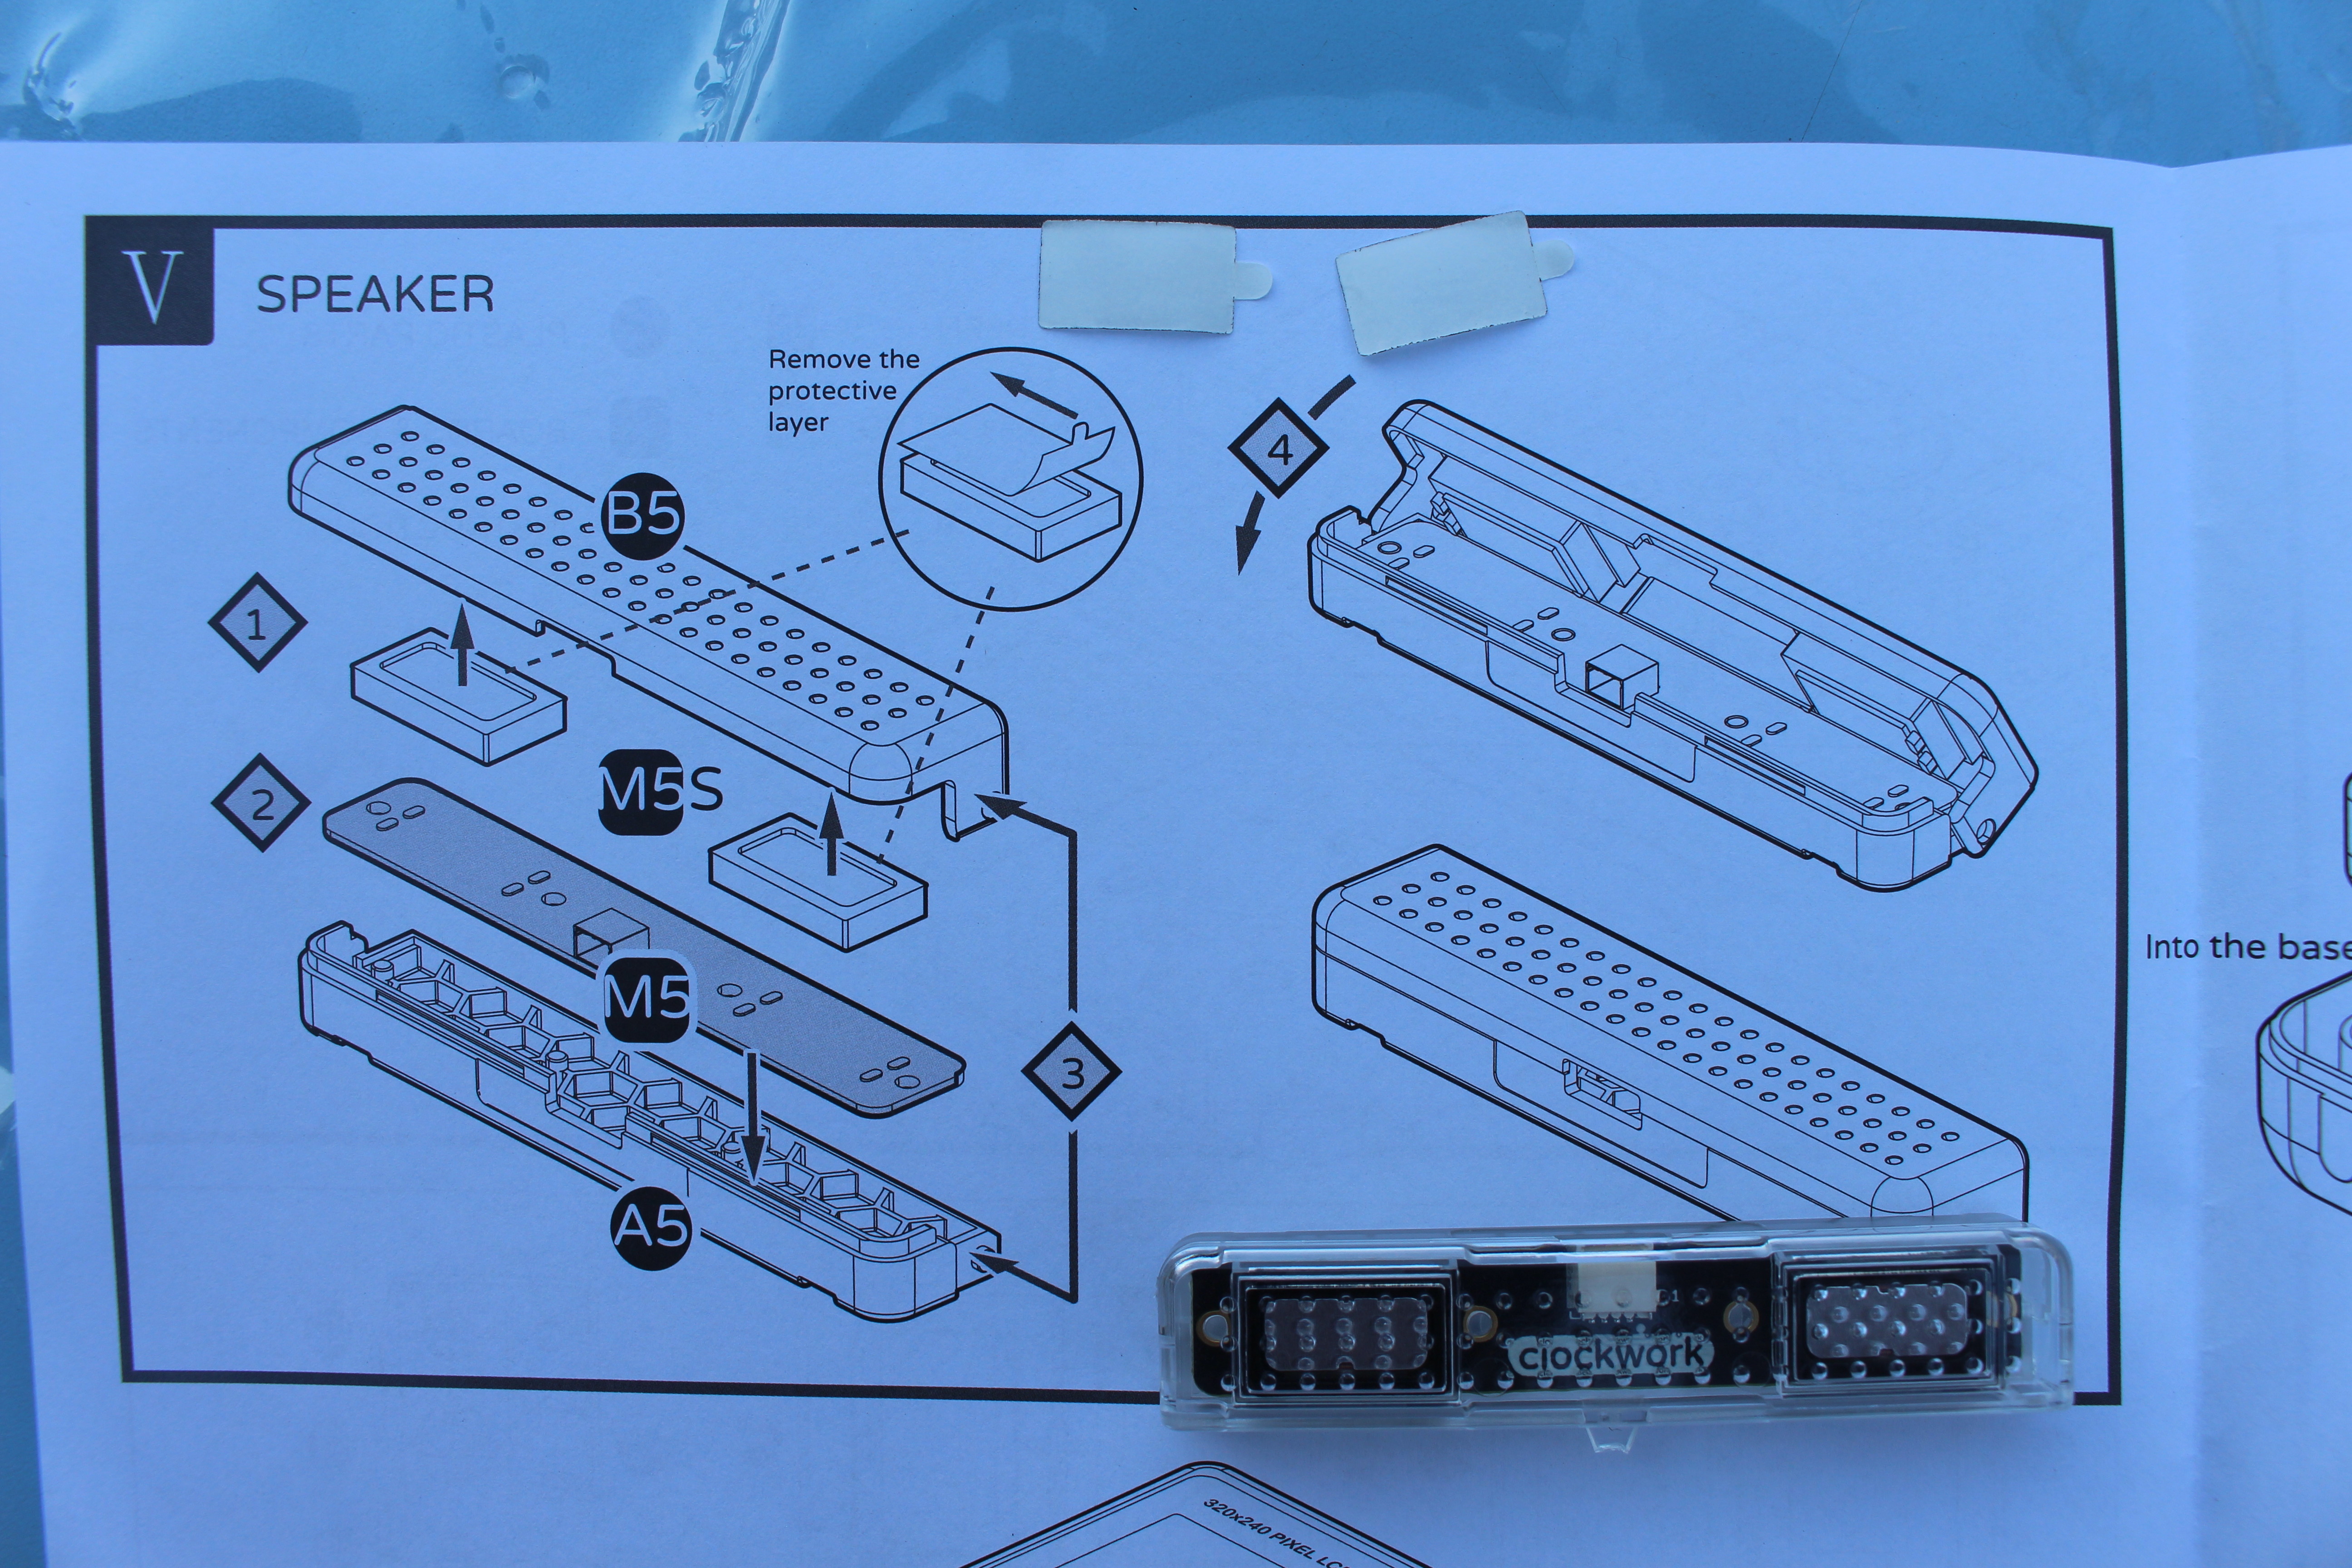
The final module to assemble for the default GameShell is the one holding the two speakers. Just remember to remove the protective covers, and make sure the speaker connections touch the pads on the speaker board.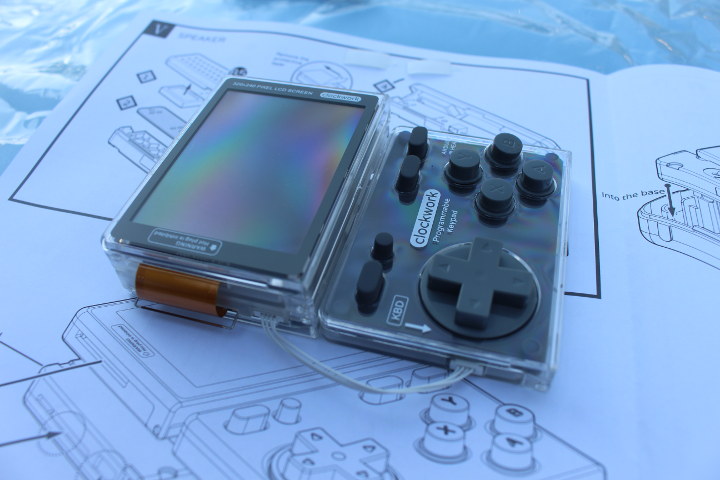
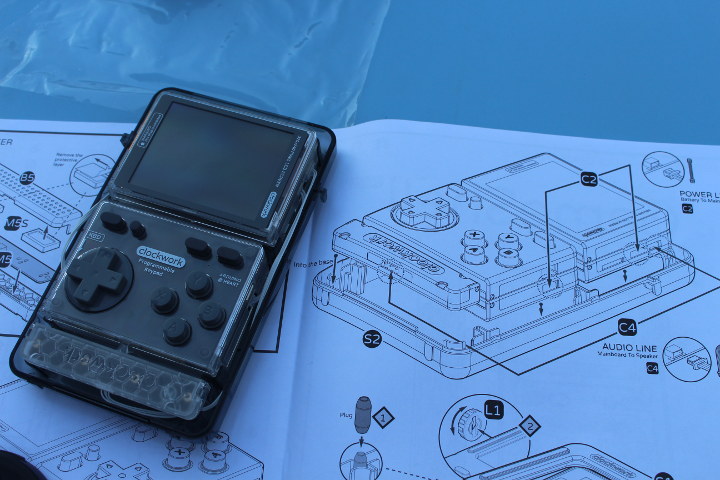
One we have our five module ready, you can get started with cabling. Connect the display and Arduino keyboard to the mainboard…
… then the speaker and battery modules.
 We can now place everything in the back shell, install the four flexible plastic bits, place the top cover…
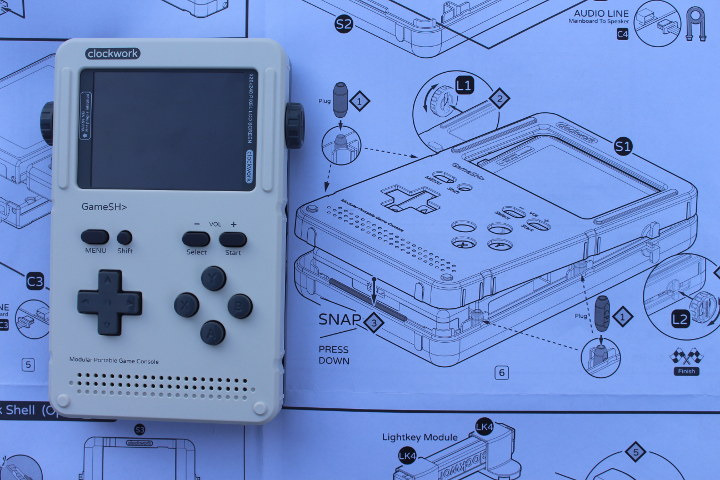
and tighten everything with the L1 and L2 plastic “things”. Congratulations! You should now be done!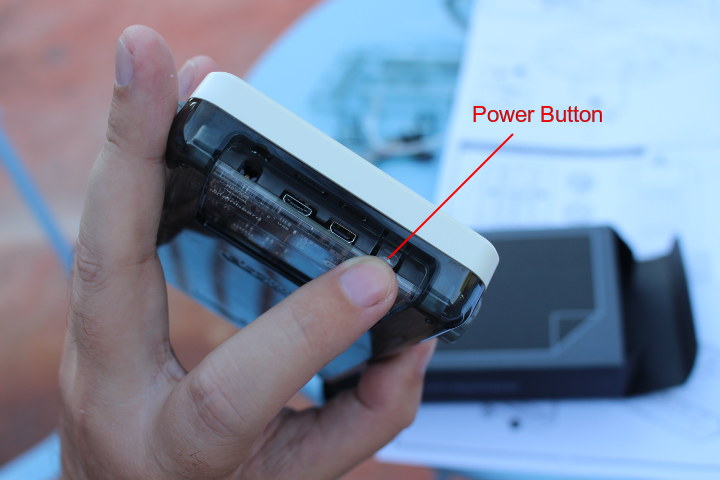
Now let’s press the power button on the back to check if we can boot the game console.
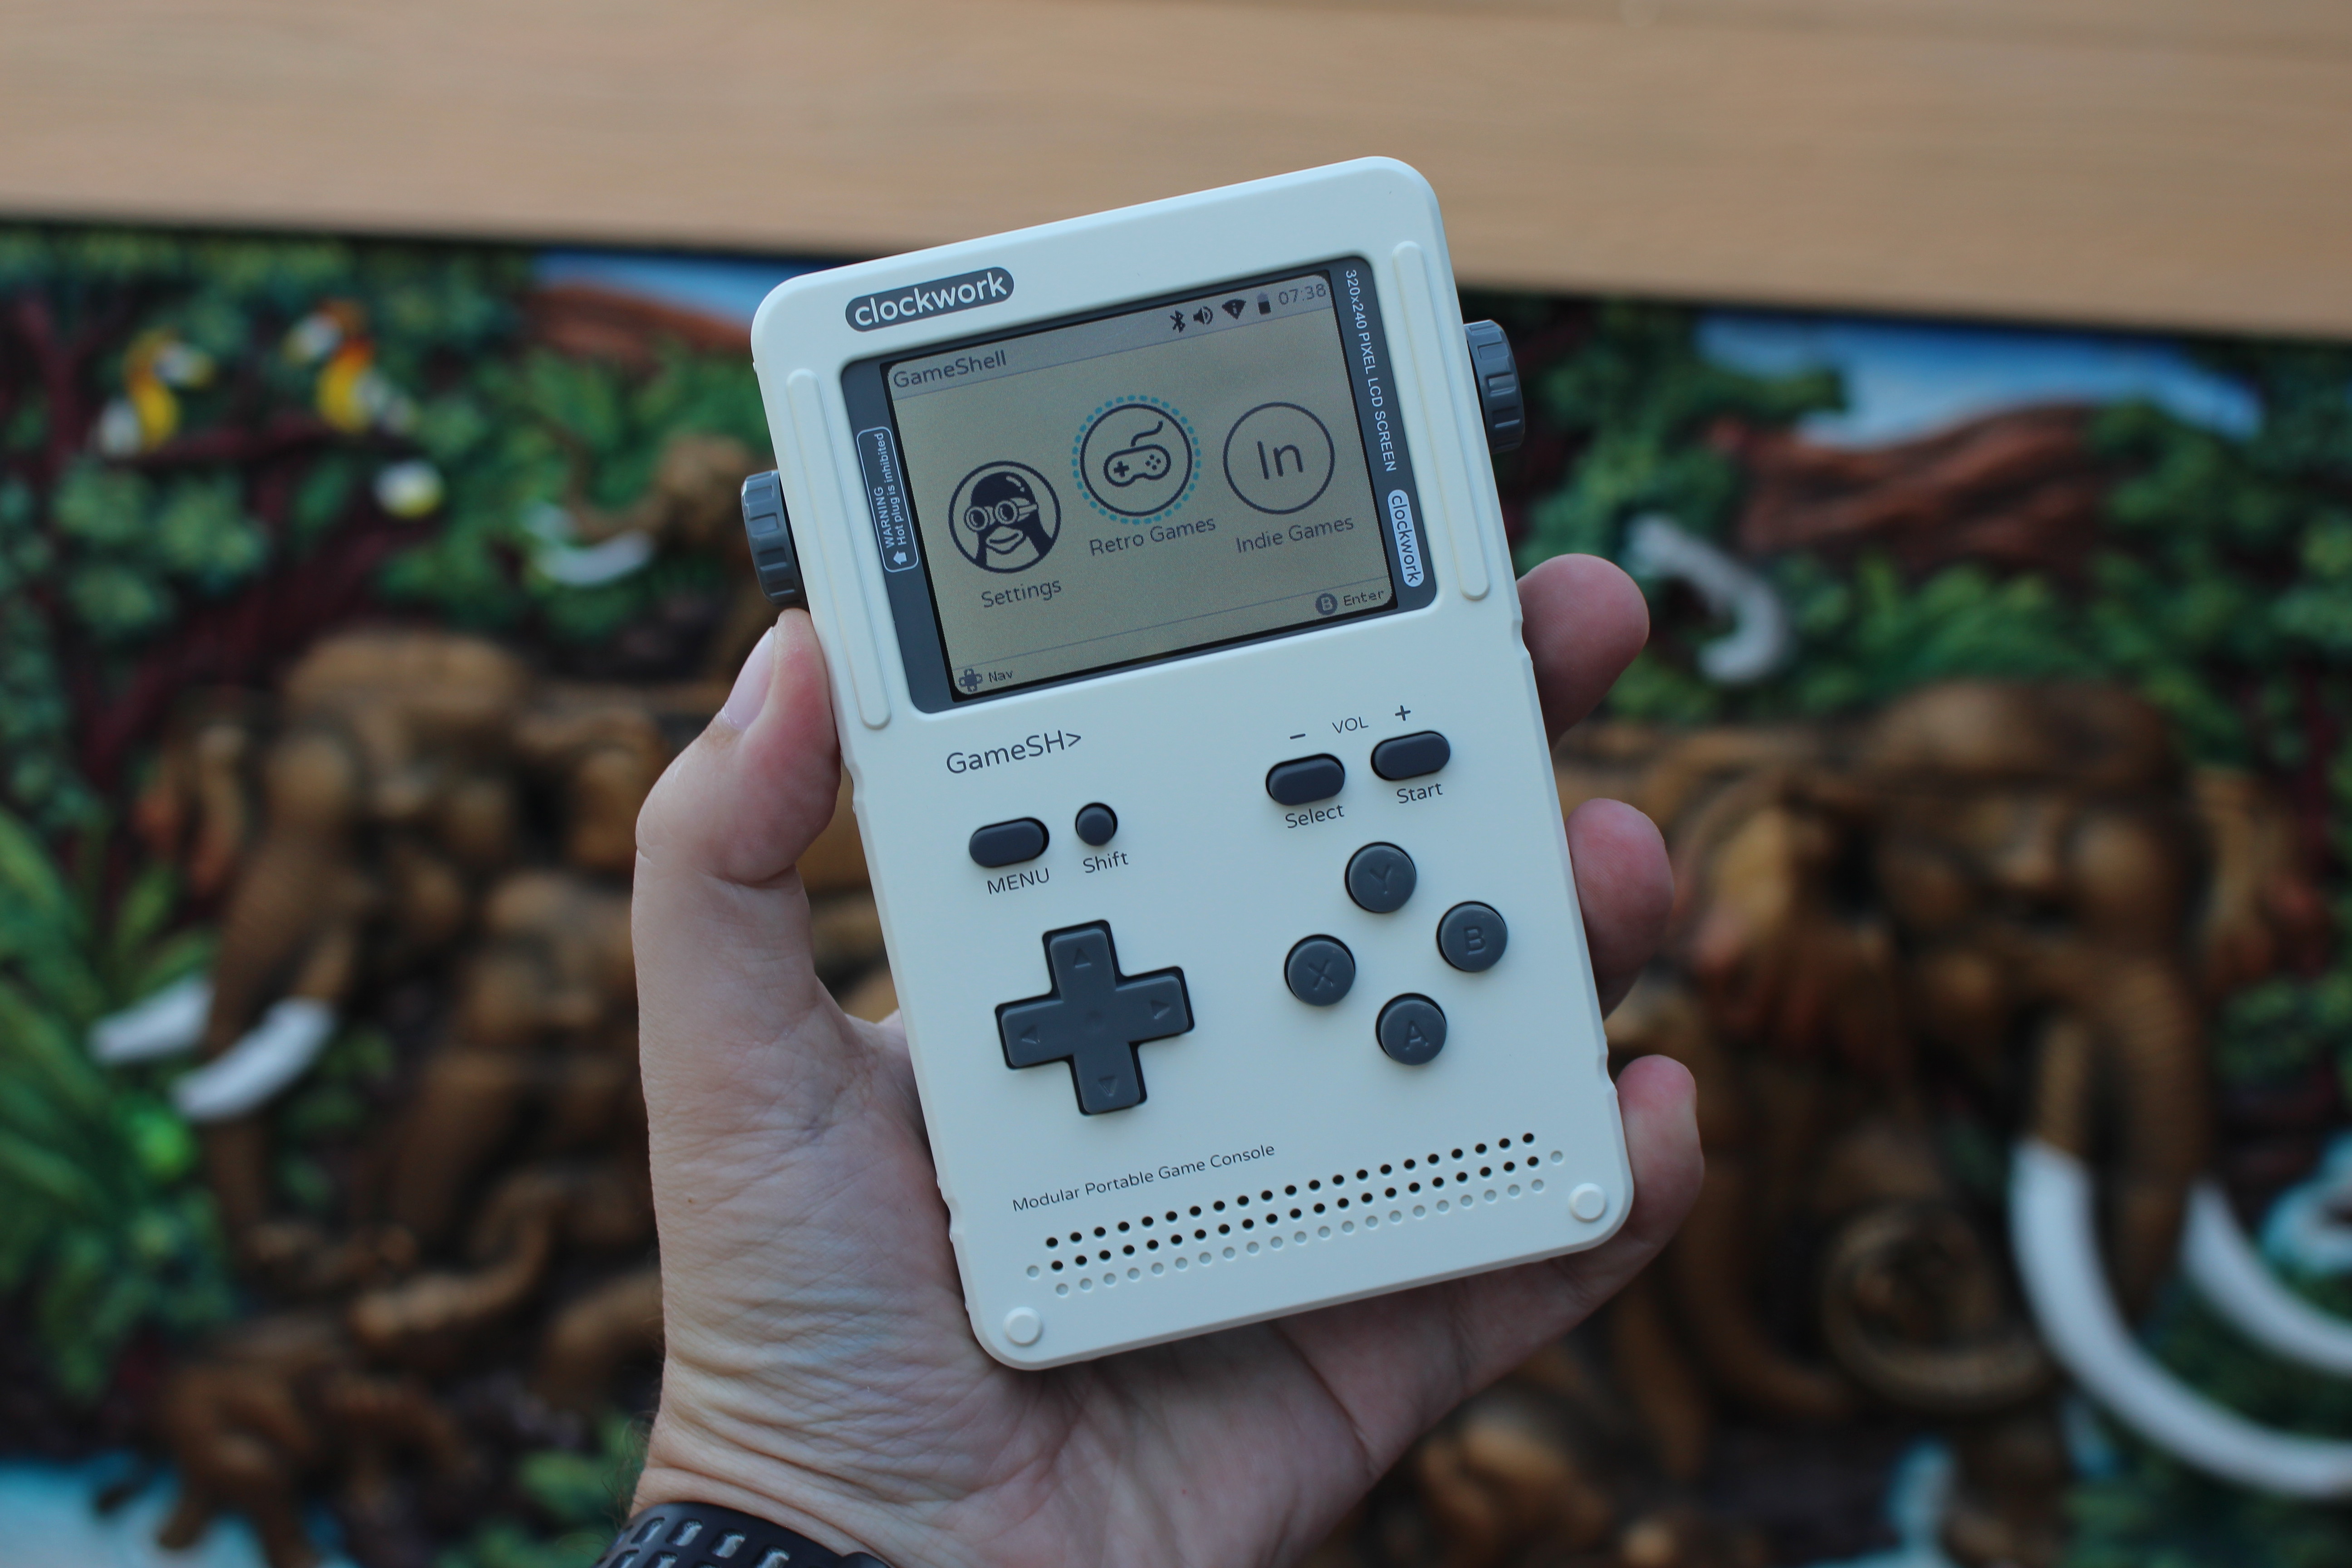
Success! The battery has a fair amount of charge, so we could use the console straightaway. I could also navigate the menu with the D-Pad and A/B keyboard, so everything looks good.
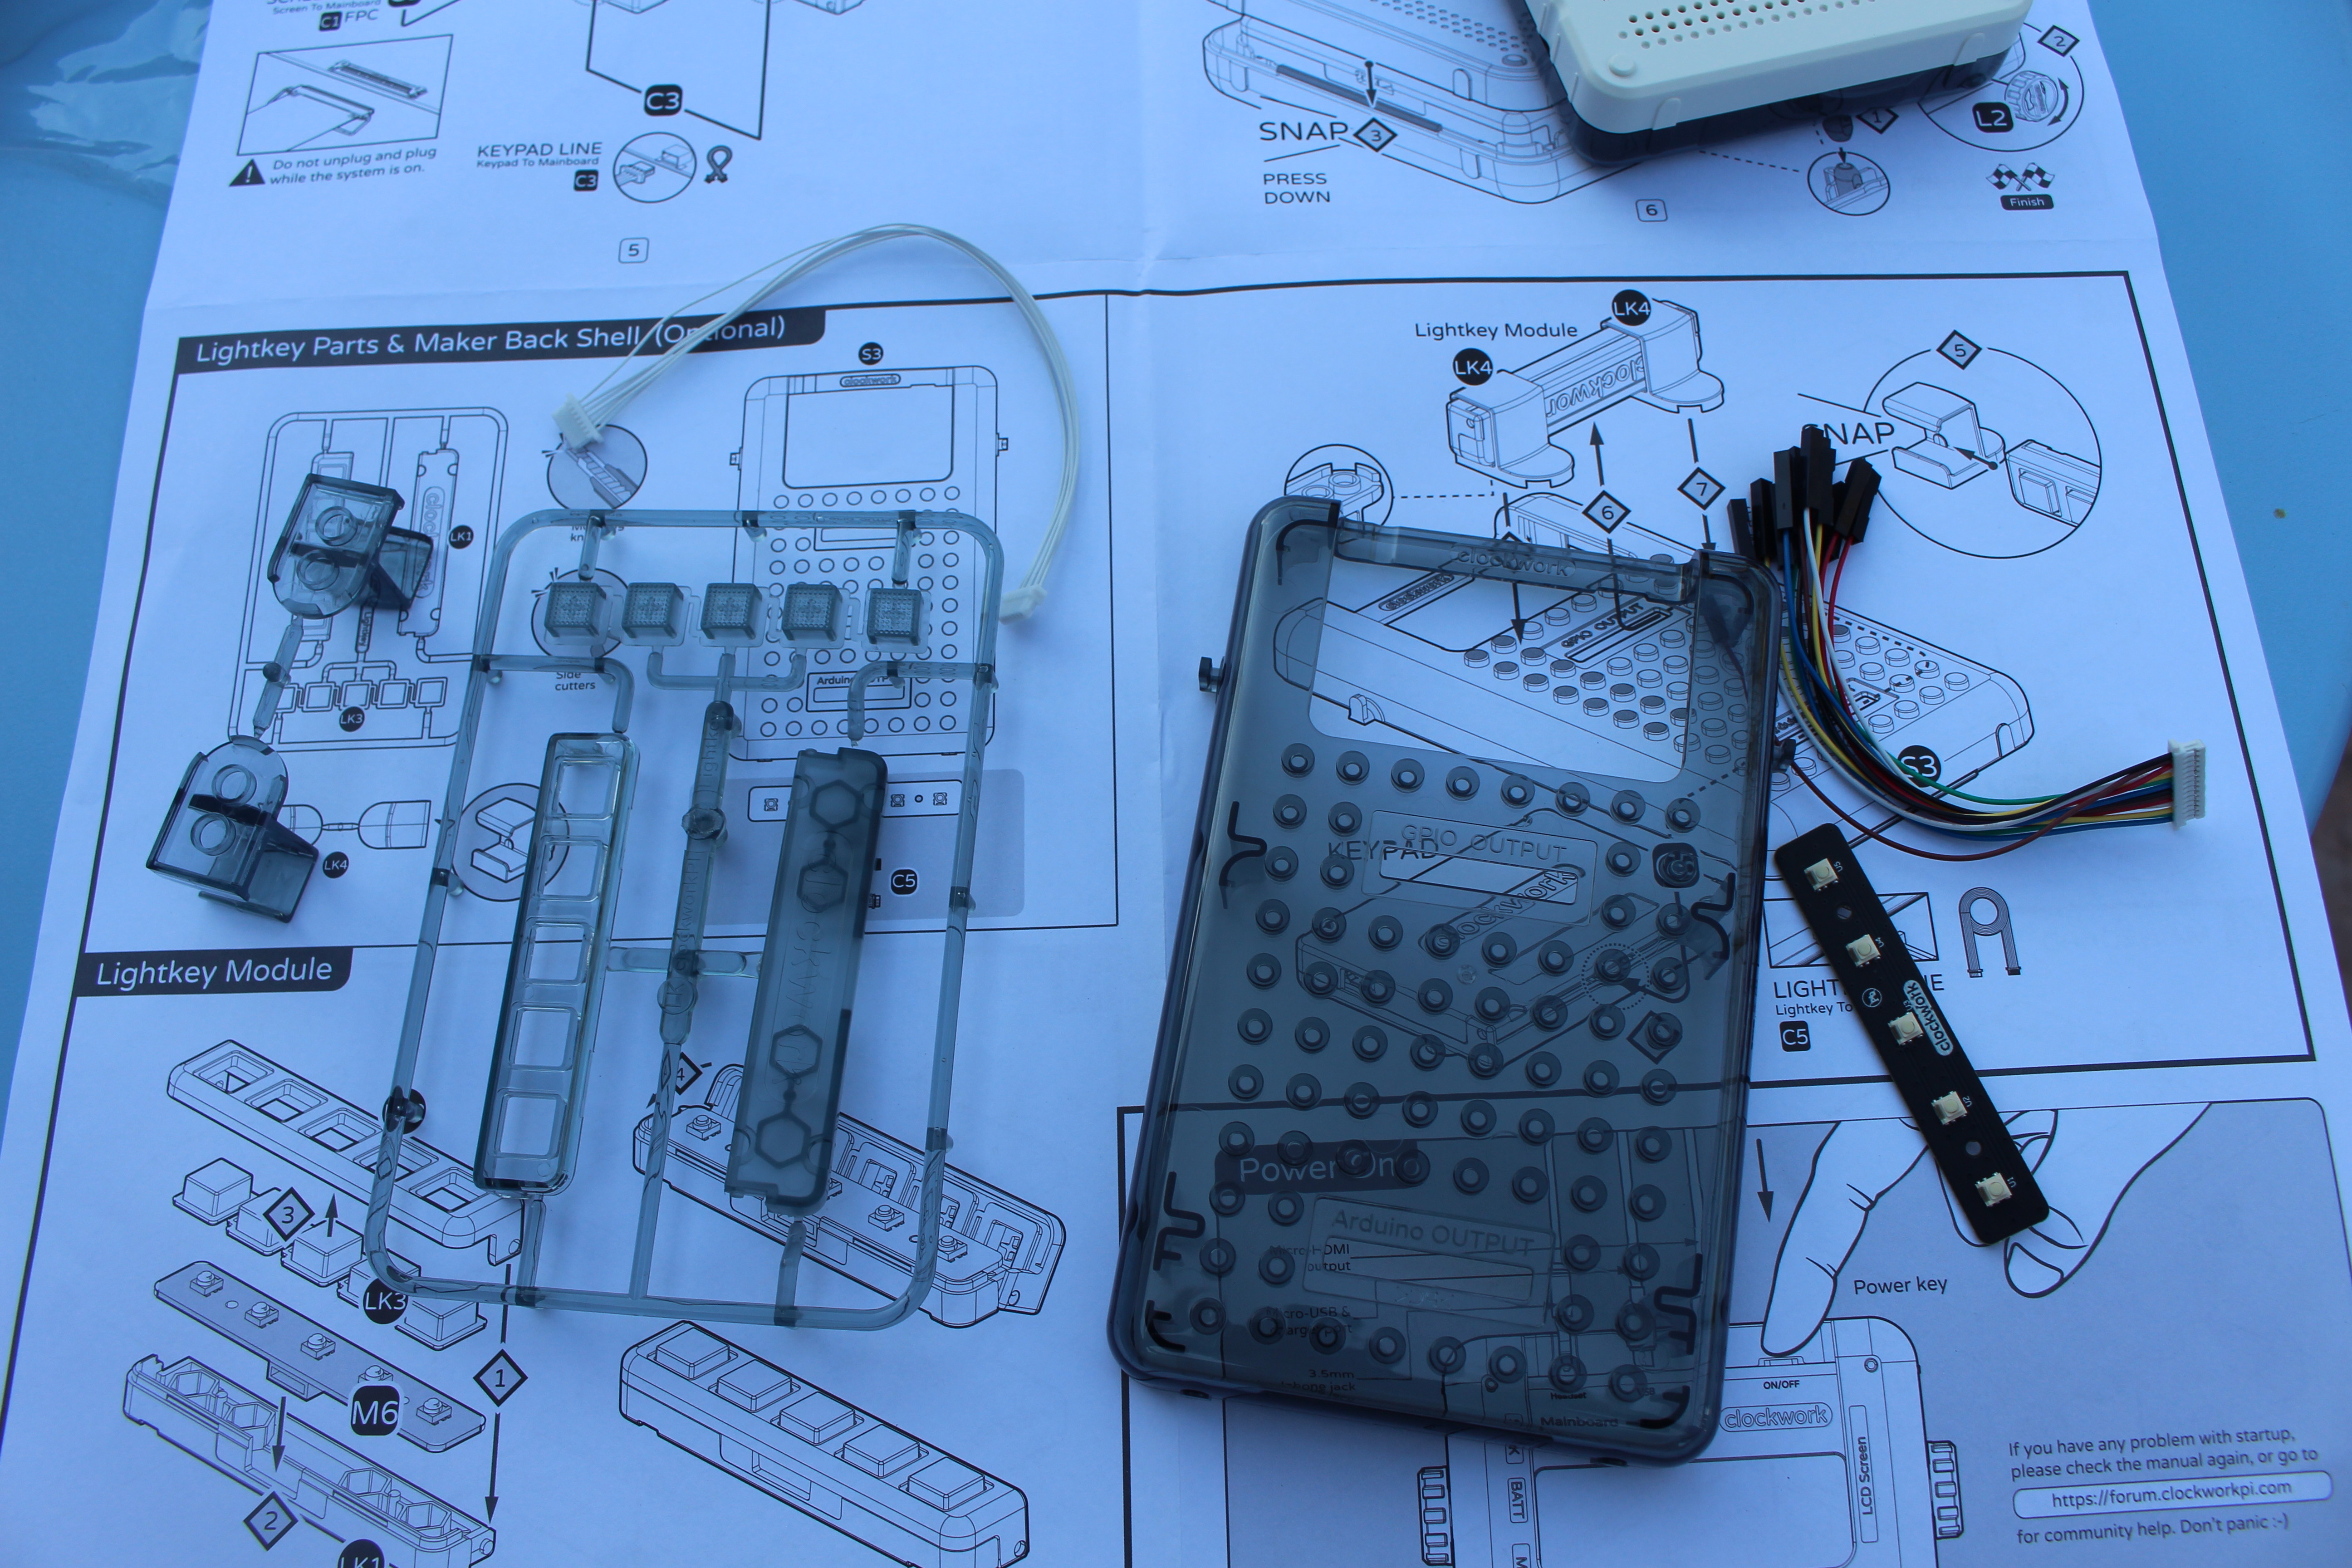
We still have some parts left however. Those are for the alternative & optional LightKey parts and maker back shell which adds 5 user keys, a back shell compatible with LEGO, and opening for jumper cable connected to the Arduino board.
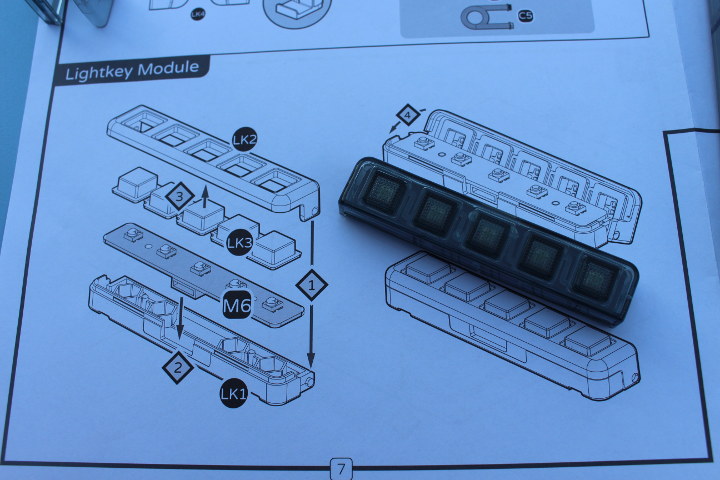 I could assemble the LightKey module, but in the process I slightly damaged LK3 keys. The five keys are normally hold together via a thin plastic thread, and I broken one of them. It does not seem to affect their use, but that mistake would have been prevented if I use tools to cut the plastic.
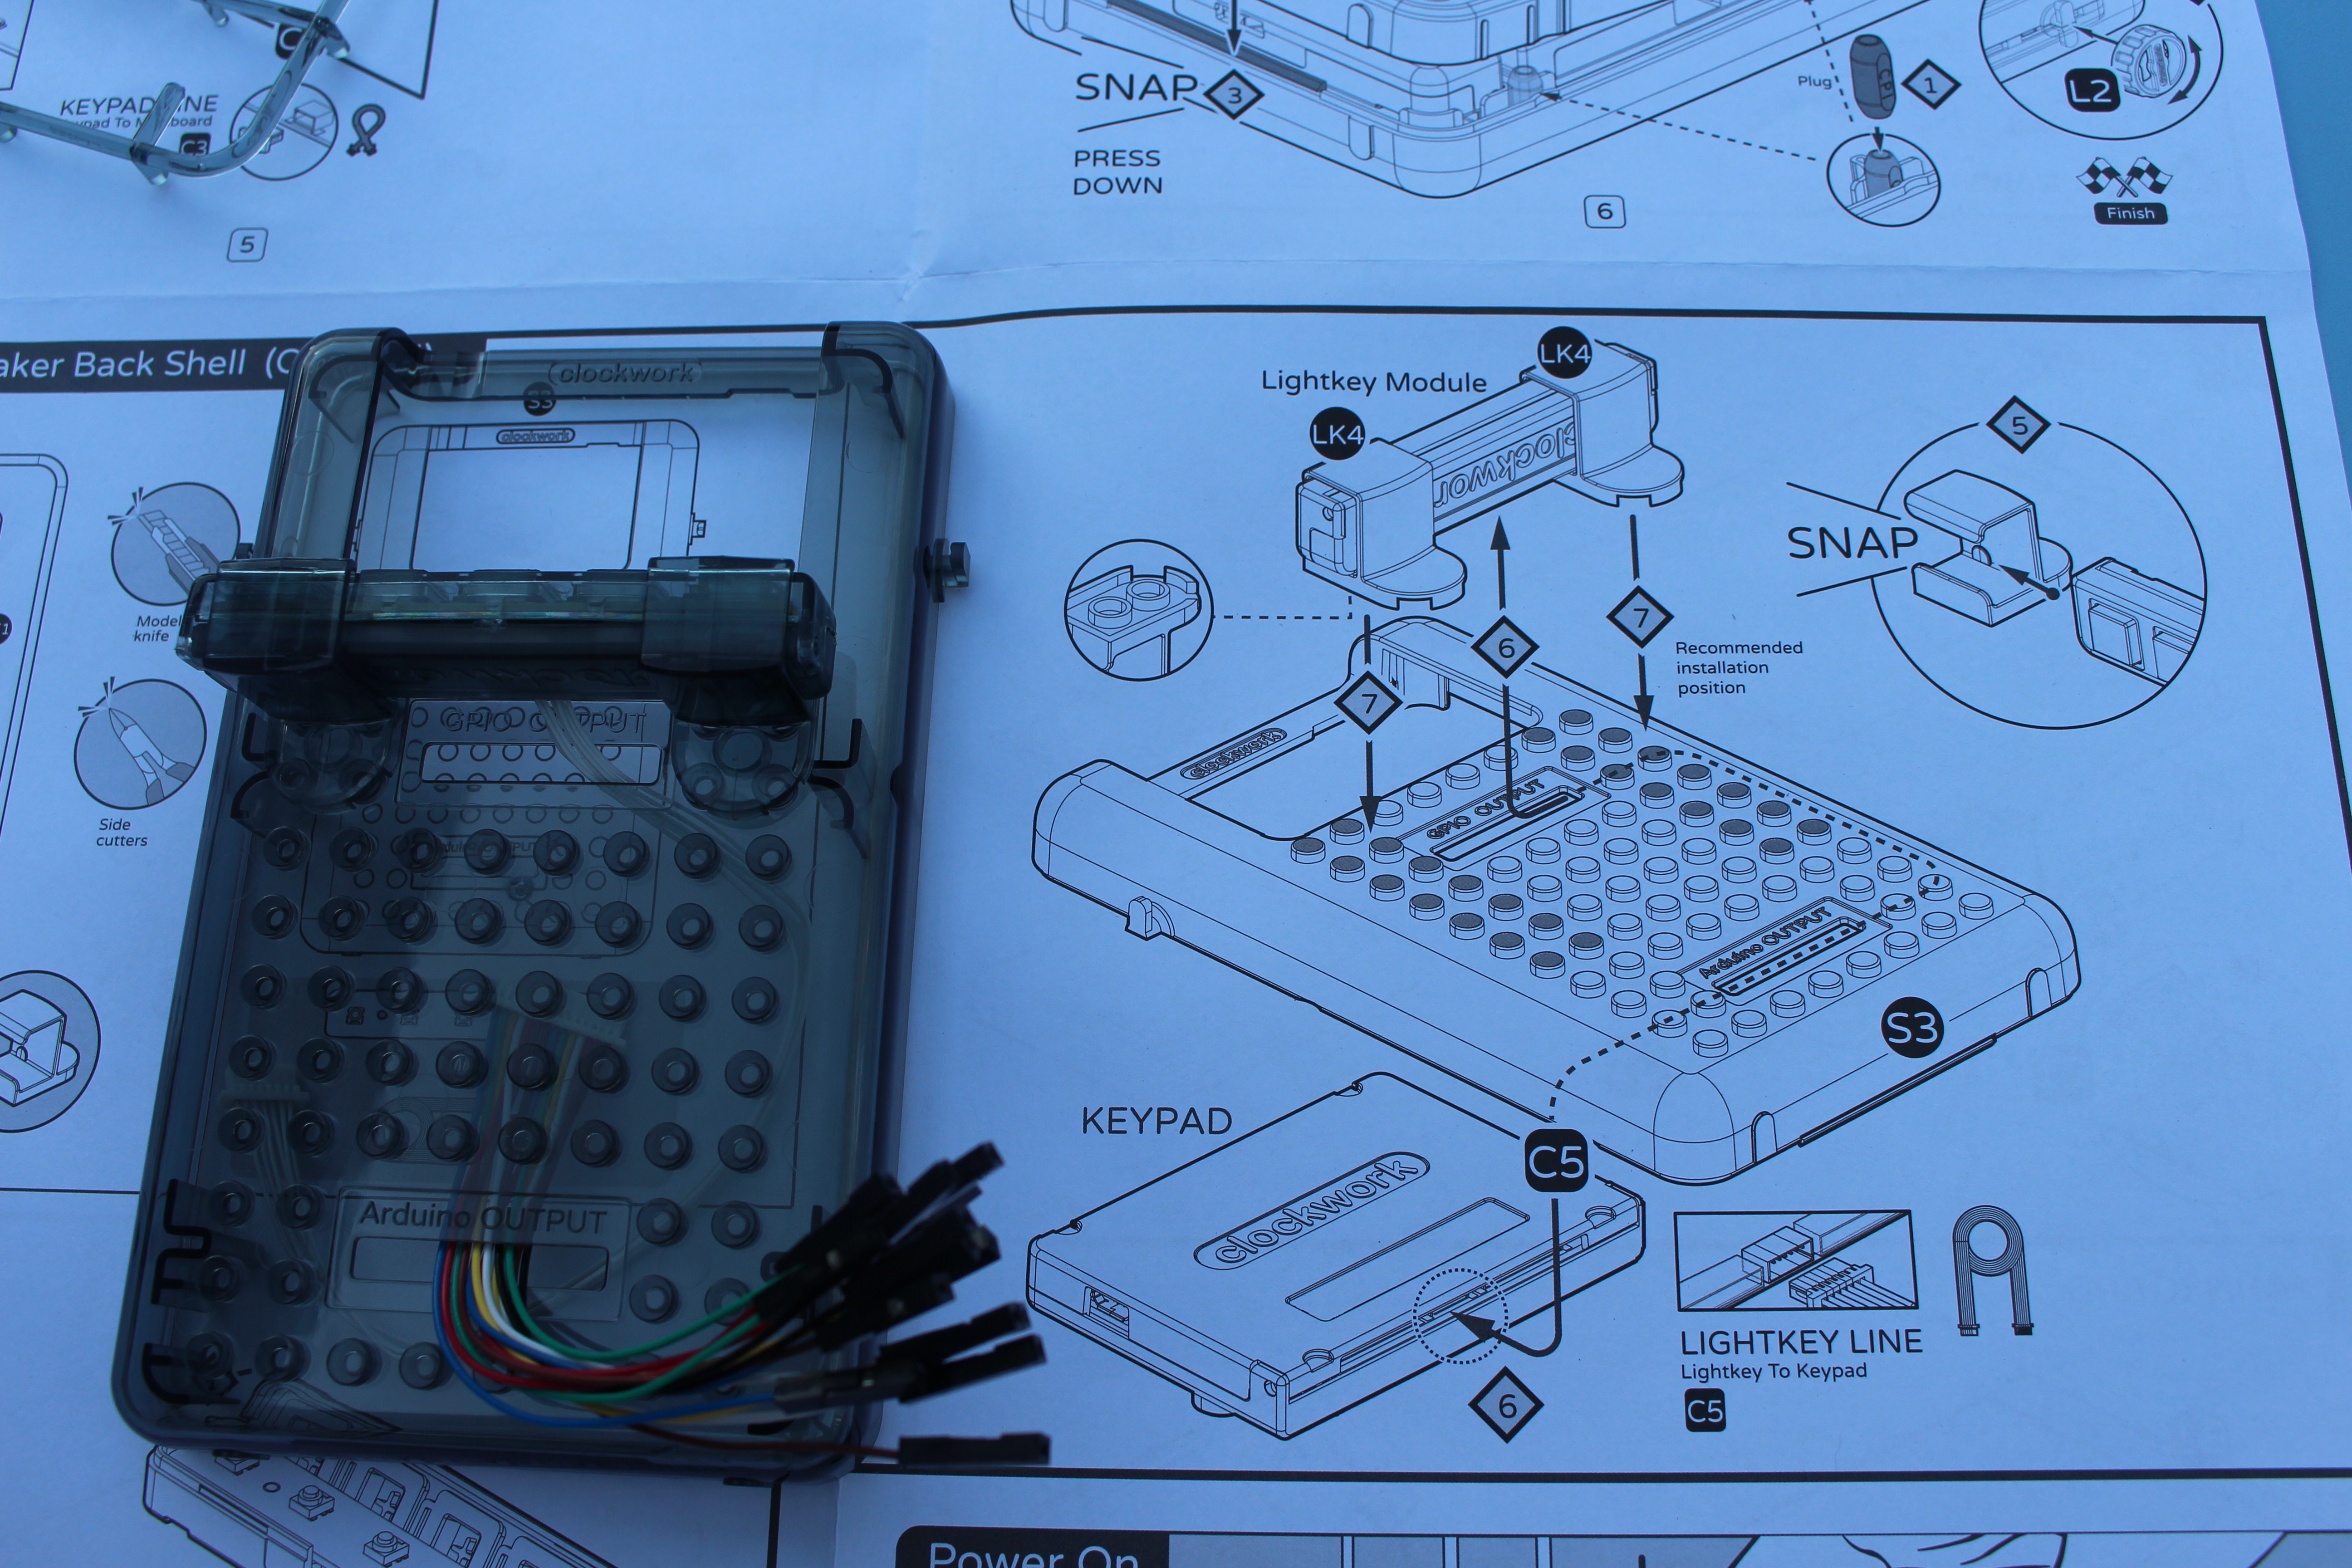
The final step is to slide the LightKey module into two holders, and stick it to the back shell like a LEGO brick. I also place the jumper cables to show how it would stick out of the case. I have not try to fit it to the main case yet, since I’ll likely do it in the second part of the review, after testing the default configuration.
The full build, including the time to take photos, took around one hours, and I found it to be quite fun, so for now I have a good opinion of the device, which remind me a bit of the PocketCHIP except the latter came to me fully assembled. In theory, it should also be a good STEM education platform with kids being able to create their own games, learn about Linux and Arduino, but in this case educational materials are just as important as the hardware, and I’ll check this out in the second part of the review.
I’d like to thank Clockwork for sending Gameshell Kit for review. If you are interested in the kit, you can pre-order it for $159 with Fedex/DHL shipping on their website with shipping scheduled for January.
Continue reading GameShell Kit Review – Part 2: An Hackable Retro Gaming Console

Jean-Luc started CNX Software in 2010 as a part-time endeavor, before quitting his job as a software engineering manager, and starting to write daily news, and reviews full time later in 2011.
Support CNX Software! Donate via cryptocurrencies, become a Patron on Patreon, or purchase goods on Amazon or Aliexpress


I love the modular design — all the thought that went into it!
Self build seems popular, even Sinclairs nephew has launched one
https://www.grantsinclair.com/en/kit-computers/poco-kit-white.html
It gets around a few choice import duties and taxes.
Few holes to backplate and copper sheet together with thermal tape as heatsink on top of the components, feels good.
Fun project – like the r16 and Arduino – if they could do a qwerty keypad on the Arduino daughter board…
Pricing says they’re actually good here…
What is the Allwinner R16-J? Any info on that? Is it the same of the R16 and A33?