balena Fin is a carrier board for Raspberry Pi Compute Module 3/3+ designed specifically for industrial applications leveraging fleet management services provided by Balena. I received balenaFin developer kit last month, and in the first part of the reviewed shows how to assemble the kit.
I’m now had time to spend more time with the kit, as well as BalenaOS Linux based operating system optimized for running Docker containers on embedded devices, and balenaCloud services to manage a fleet of devices from a web dashboard.
I’ve mostly followed the instructions in the getting started guides here and there, and will document what I had to do to prepare the image, flash it to the board, and load a sample docker application locally, and through balenaCloud.
Downloading and Configuring BalenaOS for balena Fin
You’ll find BalenaOS in the download page. While we are using hardware based on a Raspberry Pi Compute Module, make sure to select “Fin” instead of “Raspberry Pi”.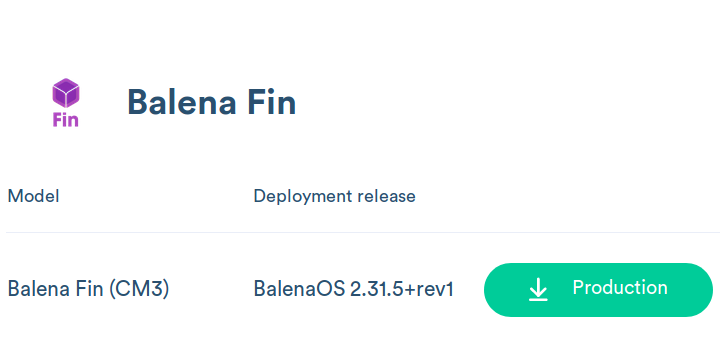 I initially downloaded the “Production” release instead of the “Development” one, but in hindsights better go with the latter first, I’ll explain why later on.
Once we get our file, we can unzip the firmware:
|
1 |
unzip balena.img.zip |
The next step is to install Balena CLI, a node.js based command line tool used to develop balenaOS based application containers. First we’ll need the latest version of node.js & npm which we’ll install using nvm (Node Version Manager) script:
|
1 |
wget -qO- https://raw.githubusercontent.com/creationix/nvm/v0.34.0/install.sh | bash |
Exit the current terminal, and restart one to install node:
|
1 |
nvm install node |
and finally we can install balena-cli itself:
|
1 2 3 |
sudo chown -R $USER:$GROUP ~/.npm sudo chown -R $USER:$GROUP ~/.config npm install --global --production --unsafe-perm balena-cli |
Note that I had to run the two chown commands to avoid the following type of permission issues:
|
1 |
Unhandled rejection Error: EACCES: permission denied, open '/home/jaufranc/.npm/_cacache/tmp/6f8b51b1' |
I first tried to install npm via apt, but I got into various issues, so I recommend sticking with nvm.
With most embedded devices, you’d flash the image, then boot the device, and configure everything on device, but with BalenaOS it’s a little different, We can first configure balenaOS image to connect to the WiFi network, configure the board hostname, and disable persistent logging to lengthen the life of the eMMC flash from the host computer:
|
1 2 3 4 5 6 7 |
$ sudo env "PATH=$PATH" balena local configure balena.img ? Network SSID CNX-SOFTWARE-ZTE ? Network Key superSecretPassword ? Do you want to set advanced settings? Yes ? Device Hostname cnxsoft-balena ? Do you want to enable persistent logging? No Done! |
I had to add env “PATH=$PATH” to the command line, or balena command would be found by sudo. Running as a normal user would fail too.
Flashing balena.img firmware with balena Etcher
Now that our image is ready, we can flash it over USB using balena Etcher GUI program. I thought installing the program via apt would be a good idea:
|
1 2 3 4 |
echo "deb https://deb.etcher.io stable etcher" | sudo tee /etc/apt/sources.list.d/balena-etcher.list sudo apt-key adv --keyserver keyserver.ubuntu.com --recv-keys 379CE192D401AB61 sudo apt update sudo apt install balena-etcher-electron |
But then I realized this currently installs balena Etcher v1.4.9, and Raspberry Pi CM3+ flashing was only added to version 1.5.0. So instead, I downloaded the Linux x64 “AppImage” to get the latest v1.5.19 on my system.
After connecting the board to your computer via the micro USB port and provided USB cable (the power supply is not needed for this step),
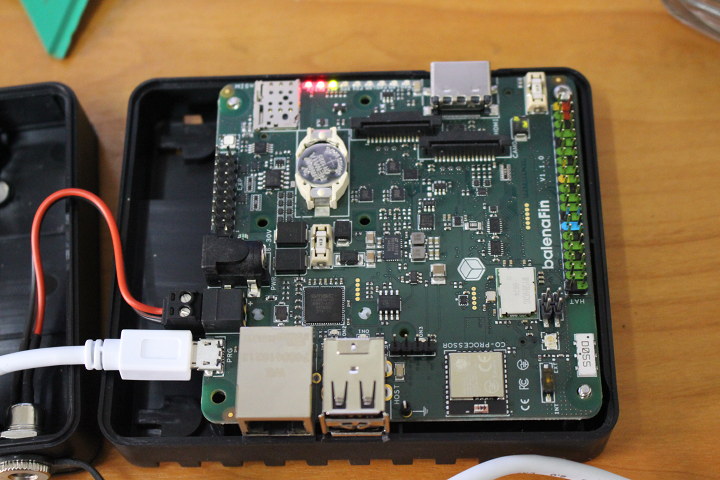
we can select the image (balena.img), and should be able to select the Compute Module in balena Etcher, except we couldn’t.
The board is indeed properly detected.
|
1 2 3 4 5 6 |
[43548.078939] usb 1-2.1: new high-speed USB device number 8 using xhci_hcd [43548.279965] usb 1-2.1: config index 0 descriptor too short (expected 55, got 32) [43548.281093] usb 1-2.1: New USB device found, idVendor=0a5c, idProduct=2764, bcdDevice= 0.00 [43548.281096] usb 1-2.1: New USB device strings: Mfr=1, Product=2, SerialNumber=0 [43548.281098] usb 1-2.1: Product: BCM2710 Boot [43548.281100] usb 1-2.1: Manufacturer: Broadcom |
So I decided to open a terminal, and launch the tool with sudo:
|
1 |
sudo ./balenaEtcher-1.5.19-x64.AppImage |
and.. success!
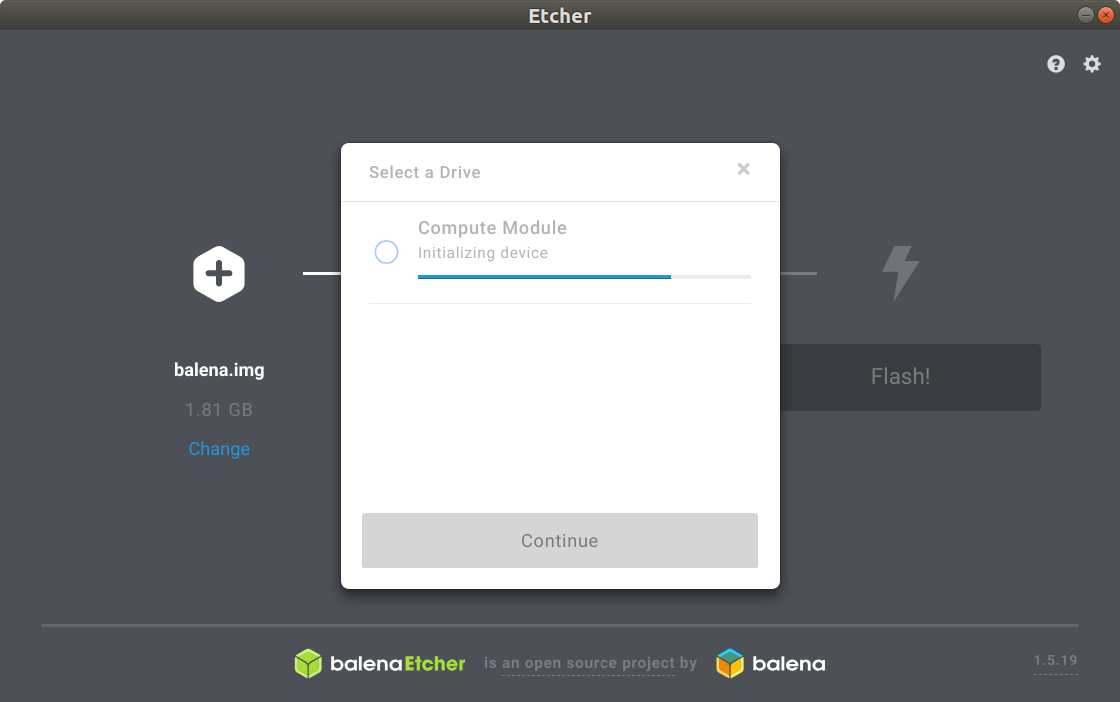
It will take a few seconds to initialize the Compute Module, and after it will show as a 7.82 GB storage device, and we can finally click on Flash to complete the installation which took around 4 minutes here.
The board will not run by being powered from the USB port, so we need to connect it to the provided power supply to have it up and running, and then we can try to ping it after a few seconds:
|
1 2 3 4 5 6 7 8 9 10 11 |
ping cnxsoft-balena.local PING cnxsoft-balena.local (192.168.1.7) 56(84) bytes of data. 64 bytes from cnxsoft-balena (192.168.1.7): icmp_seq=1 ttl=64 time=85.0 ms 64 bytes from cnxsoft-balena (192.168.1.7): icmp_seq=2 ttl=64 time=3.91 ms 64 bytes from cnxsoft-balena (192.168.1.7): icmp_seq=3 ttl=64 time=1.91 ms 64 bytes from cnxsoft-balena (192.168.1.7): icmp_seq=4 ttl=64 time=1.93 ms 64 bytes from cnxsoft-balena (192.168.1.7): icmp_seq=5 ttl=64 time=1.92 ms ^C --- cnxsoft-balena.local ping statistics --- 5 packets transmitted, 5 received, 0% packet loss, time 4003ms rtt min/avg/max/mdev = 1.914/18.941/85.022/33.049 ms |
Good that mean the board could connect to the WiFi router automatically. In theory, we should also be able to ssh directly to the board with:
|
1 |
sudo env "PATH=$PATH" balena local ssh mydevice.local --host |
But this did not work for me:
|
1 |
root@cnxsoft-balena.local: Permission denied (publickey). |
So I tried an alternative command without sudo:
|
1 |
ssh root@cnxsoft-balena.local -p22222 |
But same result, and after some research, I found out this may only work with the Development version of BalenaOS.
So I repeated the steps above with the development version of balenaOS, and I could finally login to the system, and run a few commands:
|
1 2 3 4 5 6 7 8 9 10 11 12 13 14 15 16 17 18 19 20 21 22 23 24 |
sudo env "PATH=$PATH" balena local ssh cnxsoft-balena.local --host root@cnxsoft-balena:~# uname -a Linux cnxsoft-balena 4.14.98 #1 SMP Fri Mar 22 07:02:01 UTC 2019 armv7l armv7l armv7l GNU/Linux root@cnxsoft-balena:~# balena-engine version Client: Version: 17.12.0-dev API version: 1.35 Go version: go1.9.7 Git commit: fe78e2c9a69313007c53c83fff4b5525fbc2ba45 Built: Mon Mar 11 15:28:35 2019 OS/Arch: linux/arm Experimental: false Orchestrator: swarm Server: Engine: Version: 17.12.0-dev API version: 1.35 (minimum version 1.12) Go version: go1.9.7 Git commit: fe78e2c9a69313007c53c83fff4b5525fbc2ba45 Built: Mon Mar 11 15:28:35 2019 OS/Arch: linux/arm Experimental: true root@cnxsoft-balena:~# |
I had a few more challenges to overcome that I would have expected just to install the image, but it’s finally done.
Running a Container in balena Fin
Now we can clone a demo project in our host computer:
|
1 |
git clone https://github.com/balena-io-projects/multicontainer-getting-started.git |
Enter the directory, and issue a command to build and load the demo into the board:
|
1 2 |
cd multicontainer-getting-started/ balena push 192.168.1.7 |
Note that we need to use the IP address instead of the hostname (i.e. cnxsoft-balena.local).
Here’s the output for my first try:
|
1 2 3 4 5 6 7 8 9 10 11 12 13 14 15 16 17 18 19 20 21 22 23 24 25 26 |
[Info] Starting build on device 192.168.1.7 [Info] Compose file detected [Build] [data] Step 1/7 : FROM balenalib/fincm3-debian-node:10-stretch-run [Build] [frontend] Step 1/12 : FROM balenalib/fincm3-debian-node:10-stretch-run [Build] [proxy] Step 1/3 : FROM arm32v6/haproxy:1-alpine [Build] [proxy] ---> 4e28d48faf2e [Build] [proxy] Step 2/3 : COPY haproxy.cfg /usr/local/etc/haproxy/haproxy.cfg [Build] [proxy] ---> bb68b59f16e3 [Build] [proxy] Step 3/3 : LABEL "io.resin.local.image"='1' "io.resin.local.service"='proxy' [Build] [proxy] ---> Running in 598214b13ea1 [Build] [proxy] Removing intermediate container 598214b13ea1 [Build] [proxy] ---> 6b45ce51a36e [Build] [proxy] Successfully built 6b45ce51a36e [Build] [proxy] Successfully tagged local_image_proxy:latest Some services failed to build: frontend: Get https://registry-1.docker.io/v2/: net/http: TLS handshake timeout data: Get https://registry-1.docker.io/v2/: net/http: TLS handshake timeout Additional information may be available in debug mode. Prefix the command line with DEBUG=1, i.e.: DEBUG=1 balena ... If you need help, don't hesitate in contacting our support forums at https://forums.balena.io For bug reports or feature requests, have a look at the GitHub issues or create a new one at: https://github.com/balena-io/balena-cli/issues/ |
Some timeout which have been caused by network issue, but I still restarted the command with DEBUG=1:
|
1 |
DEBUG=1 balena push 192.168.1.7 |
and this time it could complete:
|
1 2 3 4 5 6 7 8 9 10 11 |
[Logs] [4/10/2019, 8:00:37 PM] [frontend] [Logs] [4/10/2019, 8:00:37 PM] [frontend] > resin-websocket@1.0.0 start /usr/src/app [Logs] [4/10/2019, 8:00:37 PM] [frontend] > node index.js [Logs] [4/10/2019, 8:00:37 PM] [frontend] [Logs] [4/10/2019, 8:00:37 PM] [data] [Logs] [4/10/2019, 8:00:37 PM] [data] > resin-websocket@1.0.1 start /usr/src/app [Logs] [4/10/2019, 8:00:37 PM] [data] > node index.js [Logs] [4/10/2019, 8:00:37 PM] [data] [Logs] [4/10/2019, 8:00:38 PM] [frontend] server is listening on port 80 [Logs] [4/10/2019, 8:00:40 PM] Started service 'proxy sha256:6b45ce51a36e917161594bf5ed5b307012c0ee6516e4abadfb451183cb674ef9' [Logs] [4/10/2019, 8:00:39 PM] [proxy] [NOTICE] 099/130039 (1) : New worker #1 (7) forked |
so we really just had a network issue previously. Click here for the full log.
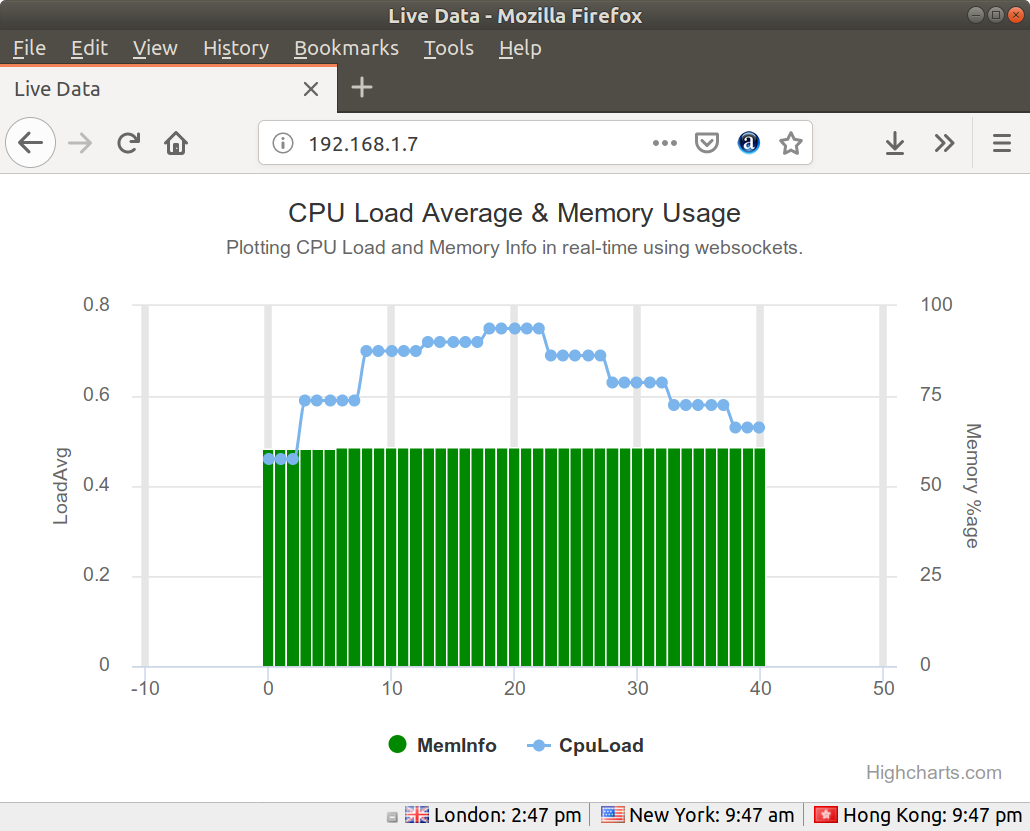
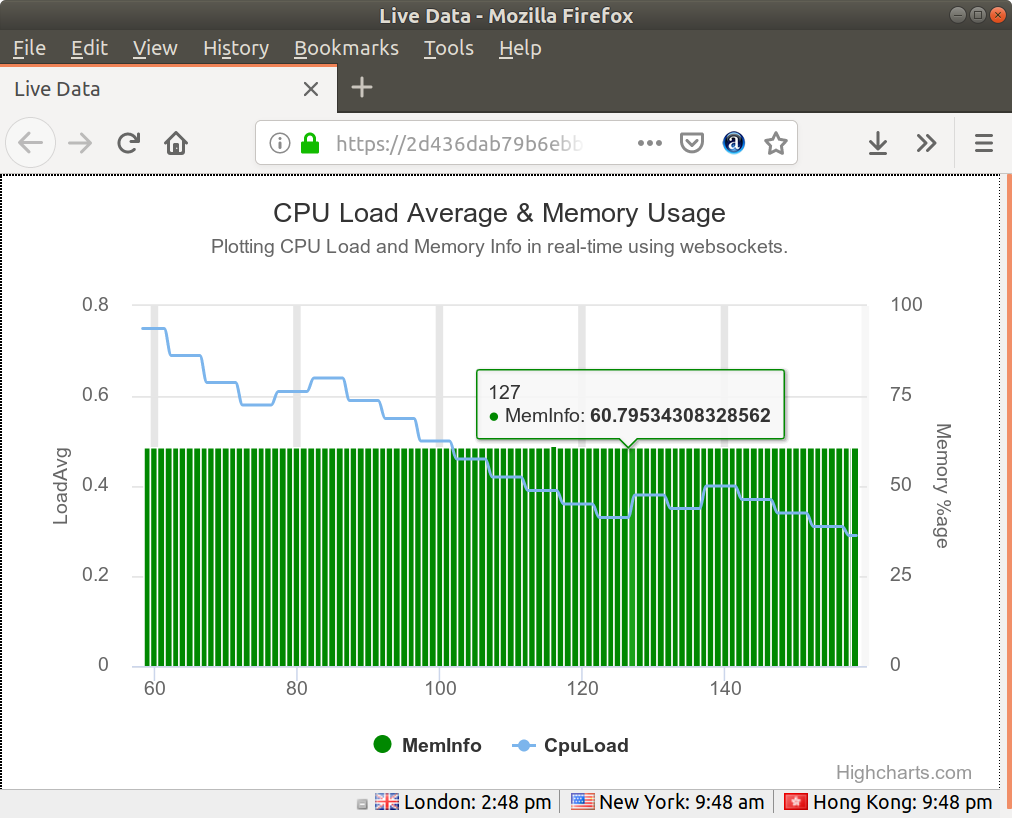
The application creates a plot of our device’s CPU load average and memory usage, which can access in a web browser by simply typing the IP address or entering the hostname in the address bar.
Managing balenaFin from balenaCloud
Using balenaCloud is optional, but it’s really convenient since you have easily work on an application push it to the cloud, and have it pushed to all your devices over the air.
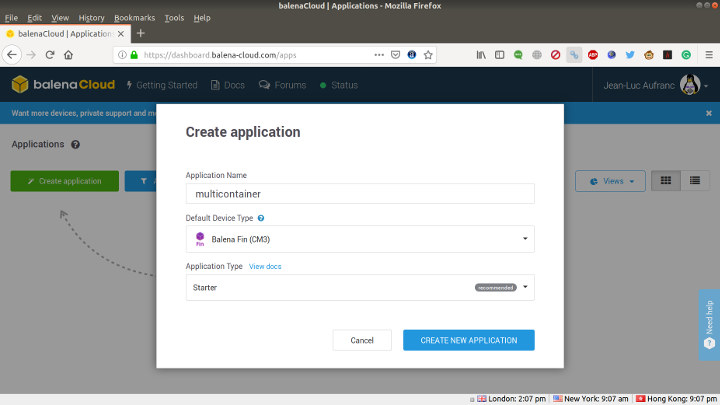
After signing-up for a balenaCloud account (free for up to 10 devices), we can click on the Create application button, fill an application name (e.g. multicontainer), select Balena Fin (CM3) device type, as well as Starter application type before clicking on Create New Application button.
Now click on Add Device, request the development edition, enabled Ethernet+WiFi (if you plan to use WiFi), enter the WiFi credentials, and click on Download balenaOS button. After the download is complete, we can flash it to the board as we’ve done previously. There’s also an option to download the configuration file, and this may have been a better option in our case since we already flash the OS previously. I think we can just push the file to /boot/config.json (over SSH) to update the board (TBC).
Now we can go back to our multicontainer-getting-started directory which we checked out from Github in the previous section to upload it to our balenaCloud account:
|
1 |
git remote add balena <username>@git.balena-cloud.com:<username>/<applicationname>.git |
Where <username> is your balenaCloud account username, and applicationname the name of your application defined in the dashboard, and in this case “multicontainer”. That command took a little over a minute and ended up successfully:
|
1 2 3 4 5 6 7 8 9 10 11 12 13 14 15 16 17 18 19 20 21 22 23 24 25 26 27 28 29 30 31 32 33 34 35 36 37 38 39 |
[Success] Successfully uploaded images [Success] Release successfully created! [Info] Release: 89ae9a1f756843db93cf0fa02ce7f2c4eb4db6ea (id: 868612) [Info] ┌──────────┬────────────┬────────────┐ [Info] │ Service │ Image Size │ Build Time │ [Info] ├──────────┼────────────┼────────────┤ [Info] │ frontend │ 191.04 MB │ 50 seconds │ [Info] ├──────────┼────────────┼────────────┤ [Info] │ proxy │ 16.95 MB │ 5 seconds │ [Info] ├──────────┼────────────┼────────────┤ [Info] │ data │ 191.66 MB │ 14 seconds │ [Info] └──────────┴────────────┴────────────┘ [Info] Build finished in 1 minute, 8 seconds \ \ \\ \\ >\/7 _.-(6' \ (=___._/` \ ) \ | / / | / > / j < _\ _.-' : ``. \ r=._\ `. <`\\_ \ .`-. \ r-7 `-. ._ ' . `\ `, `-.`7 7) ) \/ \| \' / `-._ || .' \\ ( >\ > ,.-' >.' <.'_.'' <' To git.balena-cloud.com:cnxsoft/multicontainer.git * [new branch] master -> master |
After a little while, we should see our balena Fin board being updated with our docker application right in the dashboard.
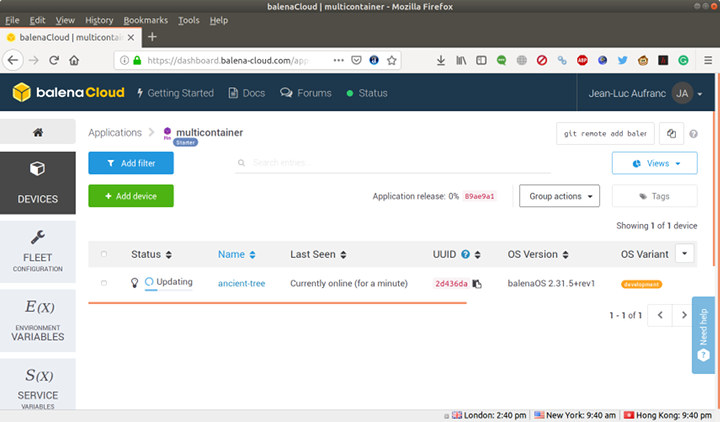
Once this is done, we can click on the device name “ancient-tree”, to access more information, and enable the “PUBLIC DEVICE URL”
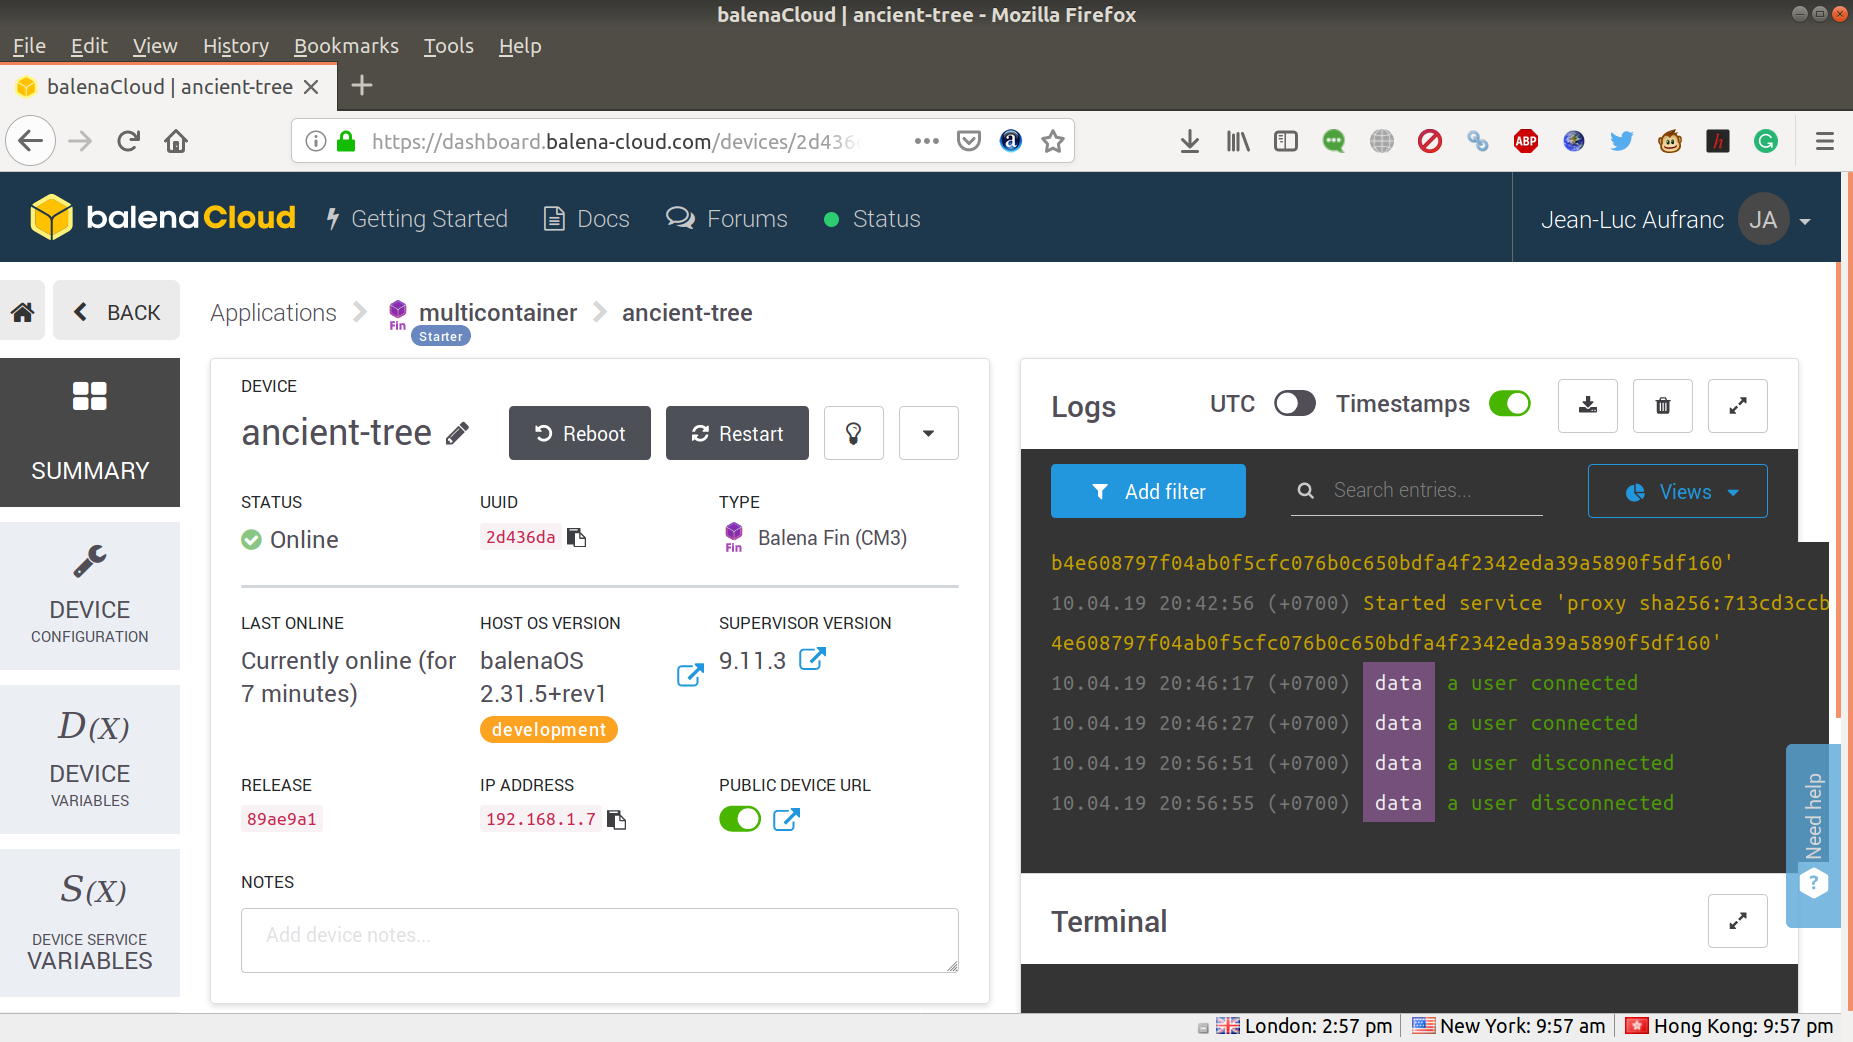
Click on the rising blue arrow right next to it, to open a new browser window showing the CPU load average & memory usage.
The idea with balenaCloud is that you can add all the devices from your fleet link them to specific applications as needed, and you can transparently update them all easily once the initial configuration is done.
To go further, you can study the documentation to help you develop, deploy and manage docker applications with Balena ecosystem.
The balena Fin developer kit reviewed here sells for $199.00 plus shipping on balena store. If you don’t need the DIN rail enclosure you can save $20 by selecting “no case” option.

Jean-Luc started CNX Software in 2010 as a part-time endeavor, before quitting his job as a software engineering manager, and starting to write daily news, and reviews full time later in 2011.
Support CNX Software! Donate via cryptocurrencies, become a Patron on Patreon, or purchase goods on Amazon or Aliexpress. We also use affiliate links in articles to earn commissions if you make a purchase after clicking on those links.


