
Late last year, ITEAD launched Sonoff Micro WiFi USB switch that allows you to turn on and off USB powered devices over WiFi using eWelink app for Android or iOS. It integrates with Amazon Alexas and Google Home, and does the job, but people who like to use the open-source Tasmota firmware will be disappointed to learn it’s not based on ESP8266 processor hence not compatible.
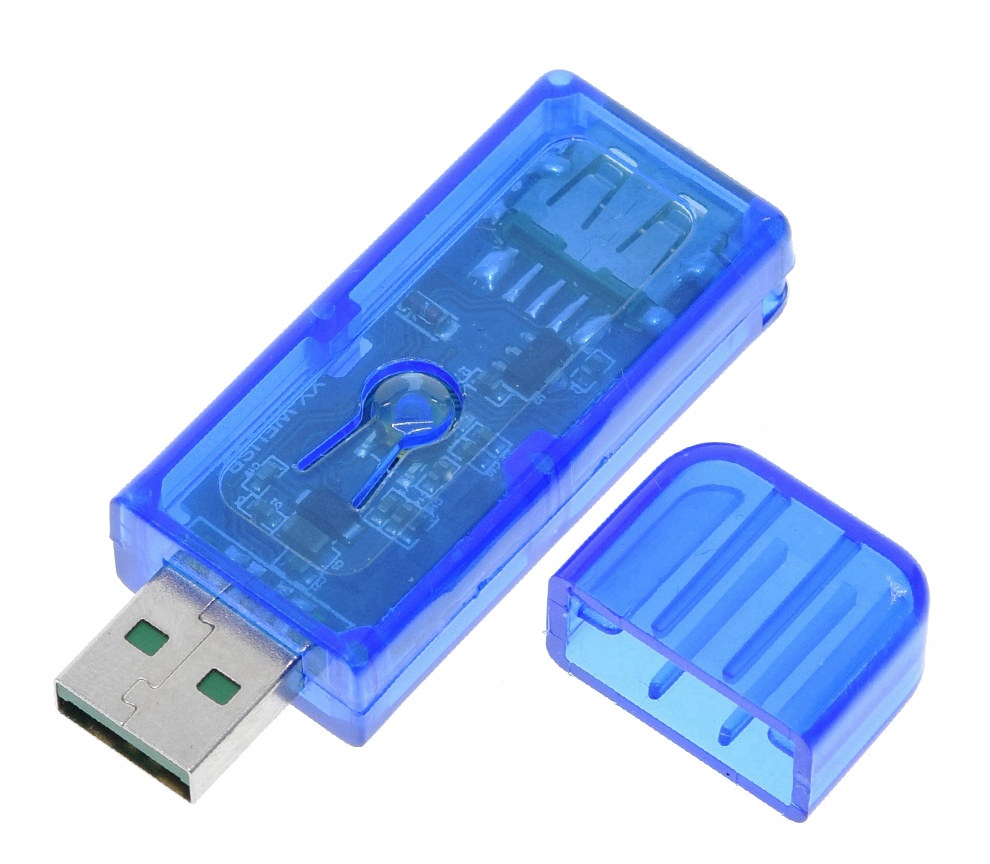
Luckily, there’s another option: Sinilink WiFi USB switch (aka XY-WFUSB) based on ESP8266 WiFi SoC, and supporting up to 20V/5A according to the manufacturer. It is currently sold for under $5 including shipping on Aliexpress.
Sinilink XY-WFUSB specifications:
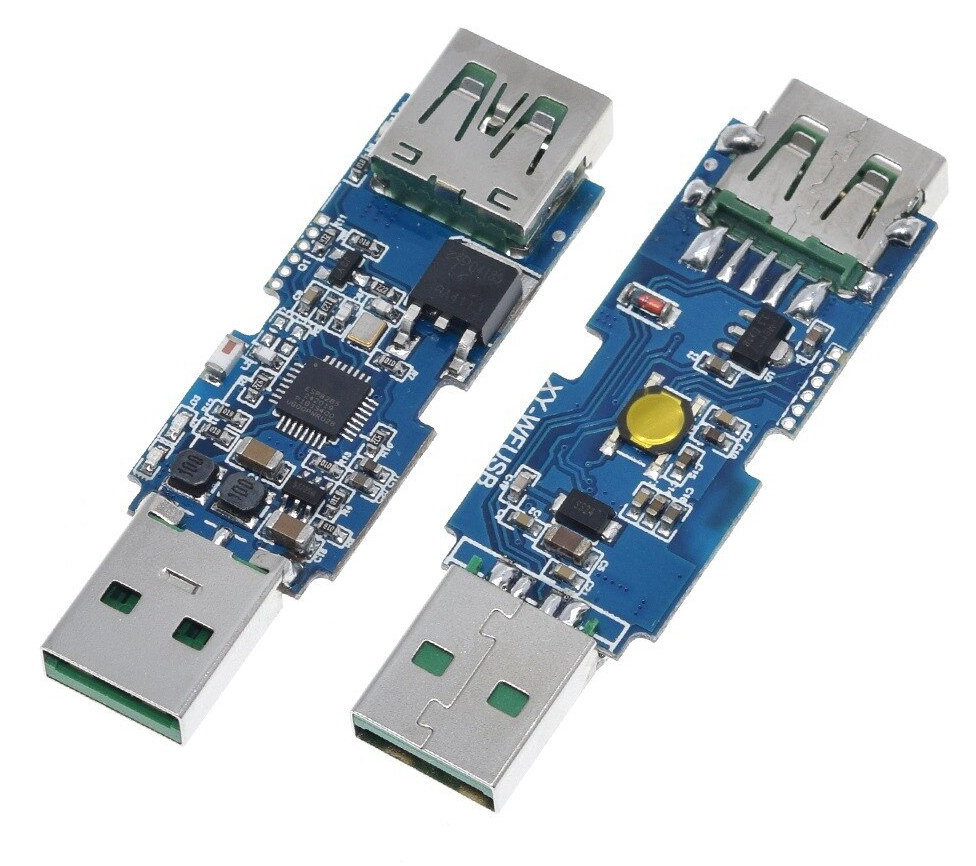
- WiSoC – Espressif ESP8266 processor with 802.11b/g/n WiFi 4
- USB Input – USB type-A female port supporting 3.5V to 20V up to 5A (100 Watts max)
- USB Output – USB type-A male port up to 100W
- Misc
- On/off button – Pressing 5 seconds also change the pairing mode between AP mode and “touch mode”
- LEDs – USB output (red), WiFi (blue), and mode switch (green)
- Dimensions – 64 x 22 x 11 mm
The mobile app for Android / iOS allows you to turn the device on and off, set timers, and schedules. Support for up 20V should allow you to control all types of devices up to 100W.
Pete Scargill bought one, and shared his impressions after trying it out with the stock firmware and mobile app:
The product does not work, the APP store version of the APP keeps showing Chinese dialogs, I downloaded the APK, regardless, the unit will not work. I need a refund as I’ve spent too much time on this already.
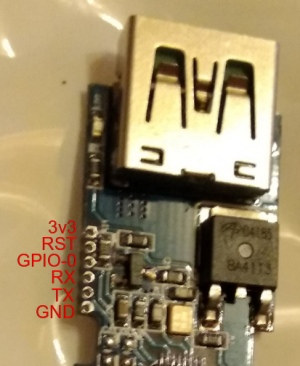
If you want to flash Tasmota to Sinilink switch, the first thing you need to do is to connect a USB debug board to the device following the pinout described on blakadder website.
The 1.27mm pitch for the header does not make it super convenient, and if you don’t want to solder some tiny wires to the board Pete found out that sewing pins from his wife worked just great. Another reader mentioned using pins from 2.54mm headers alternatively on each side (1,3,5 on one side and 2,4 on the other side) also worked. Another option is to use 1.27mm to 2.54mm adapter boards.
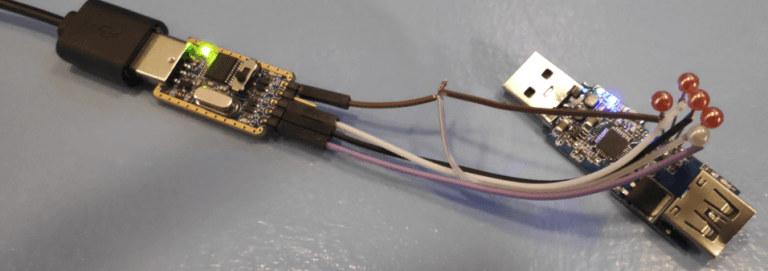
Now you can download the latest version of Tasmota firmware and flash it with esptool, or alternatively via Tasmotizer GUI program.
That’s about it as then you should be able to access the usual Tasmota web interface and turn on and off the switch via the interface. It also works with Amazon Alexa integration as showcased by Pete in the video below.
Thanks to Zoobab for the tip.

Jean-Luc started CNX Software in 2010 as a part-time endeavor, before quitting his job as a software engineering manager, and starting to write daily news, and reviews full time later in 2011.
Support CNX Software! Donate via cryptocurrencies, become a Patron on Patreon, or purchase goods on Amazon or Aliexpress


For programming firmware another option is to use the Open Smart Module Test Tool PCB Test Fixture 1 * 6P 1.27mm Pitch Gold-plated Probe – https://www.aliexpress.com/item/32959606674.html
Thanks. I’ve just changed the link because yours was out of stock.
That is a nice thing to have. I use “test hook clips” (like under the link below) for such cases. They are cheaper but it is also a bit tricky to install them one by one.
https://www.aliexpress.com/item/32840253843.html
Mine have finally arrived with the whole covid slowdown and I have just set them up in the app and they are working great with it. However with no alexa support that is about as good as useless to me. Since this isn’t as popular as Tuya or ewelink I dont expect anyone will be working on a non invasive way to tasmotize them, which is a shame since they have both this good usb switch as well as a board with screw terminals but no silly clicky relay in their portfolio. There is an offer of a new firmware… Read more »
Thank you for your iinformation on the USB power switch.
I managed to flash tasmota. But which tasmota configuration is usefull ?
Which GPIO of the esp8285 is switching the usb ?
Thank you in advance for your help
Sven
You should normally be able to turn on/off the switch from Tasmota web interface.
Many people use MQTT for integration into home automation systems such as Domoticz.
Another way to attach the pins for programming assuming you’re not going to be doing this often: small pogo-pins stuck into silicone ear plugs. I’m sure any other putty-like substance such as blue tack will do too. Method: stick pogo pins into the programming holes bend them all in different directions in order to create distance between them jam the ear plug (or blue tack) down from above attach crocodile plugs to the pogo pins and your programmer It’s not pretty, but it really just takes a few minutes to do and it beats having to wait for special bits… Read more »
Hello,
Does it support data transfer? Thanks.