
I’ve reviewed a few solar-powered security cameras in the last year, and from time to time, I’m being asked to review more from time to time, but I asked for a change, and instead, I wanted to look into security network video recorders (NVR).
HeimVision offered this opportunity with its HM241 HD NVR Kit which they also call a “wireless security camera system”, and comes with 4 Full HD security cameras besides the NVR itself. In the first part of the review, I’ll check out the hardware, and take the opportunity to install a 3.5″ hard drive, before doing a proper installation, and report my experience about the software in one or two extra articles.
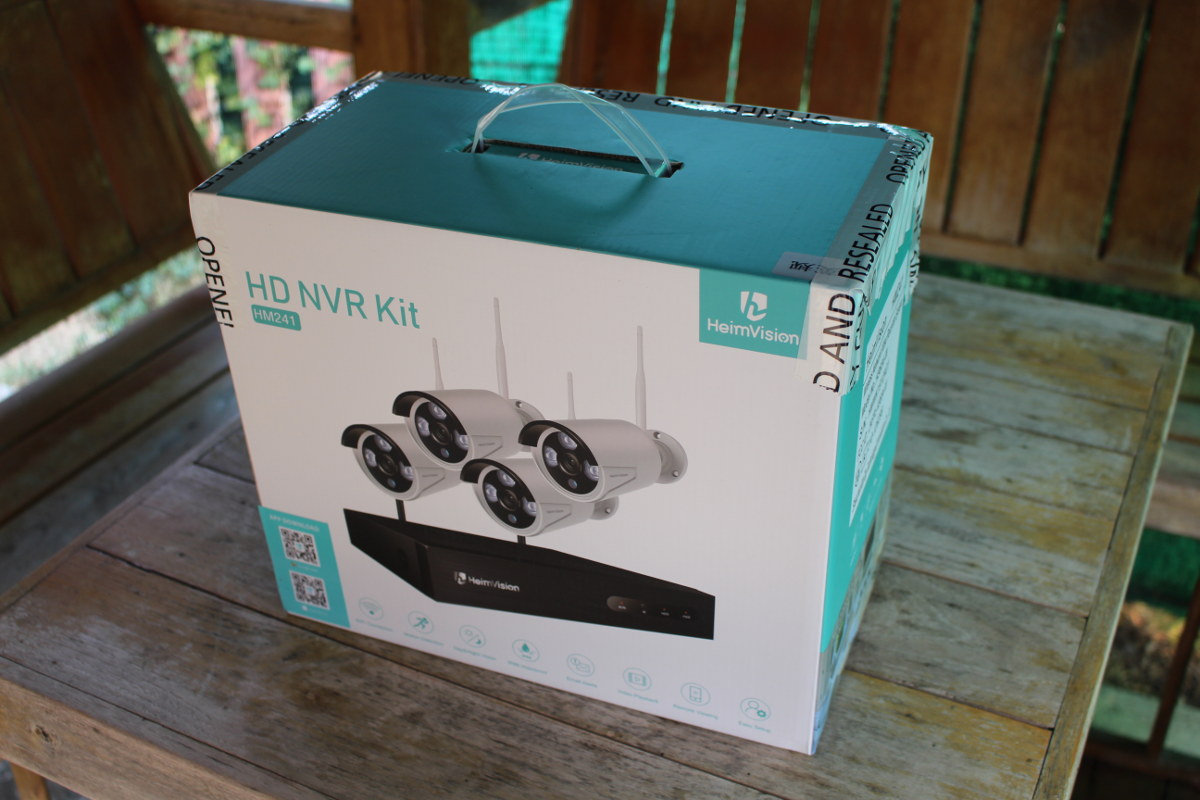
HM241 HD NVR Kit Unboxing
People working at customs seem to be fond of larger packages, checked it out in details hence the “Opened and Releases” sticker on the package, and I had to pay customs duties.
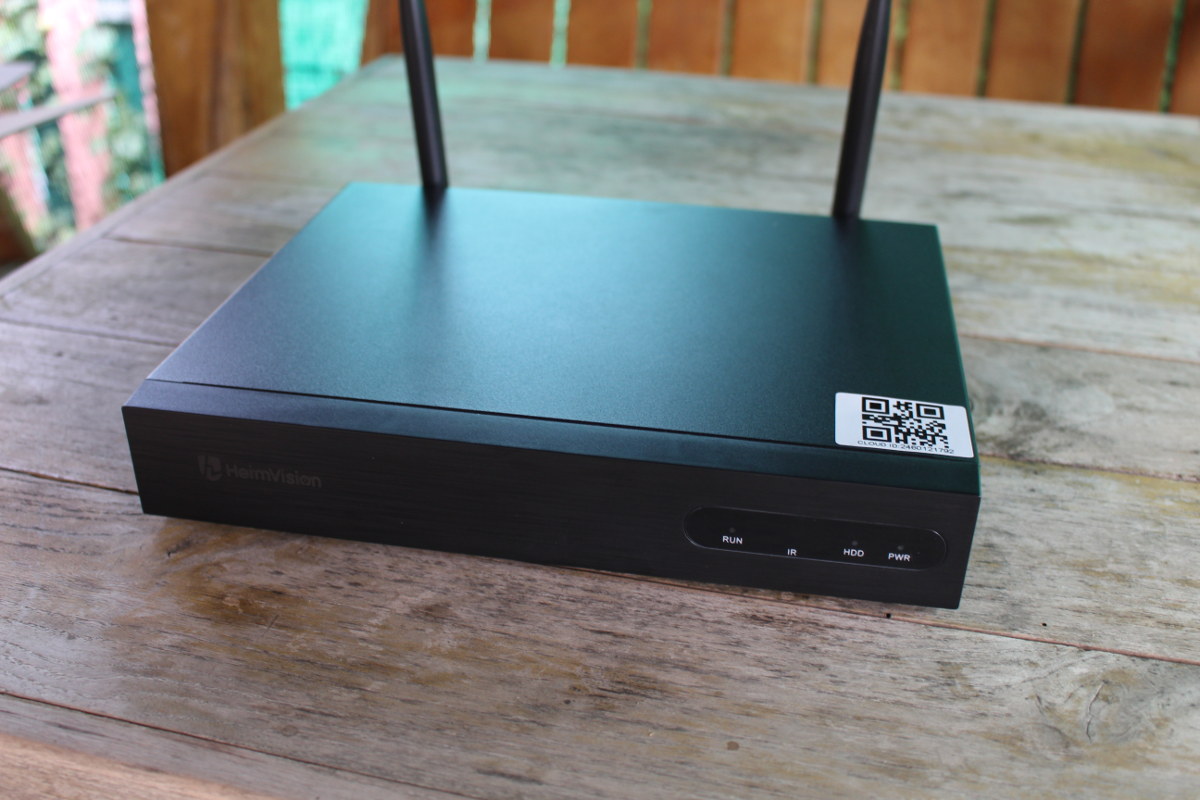
Let’s check out the NVR first. The front panel does not have much except some status LED for power HDD, and run mode, as well as a window for an IR receiver.
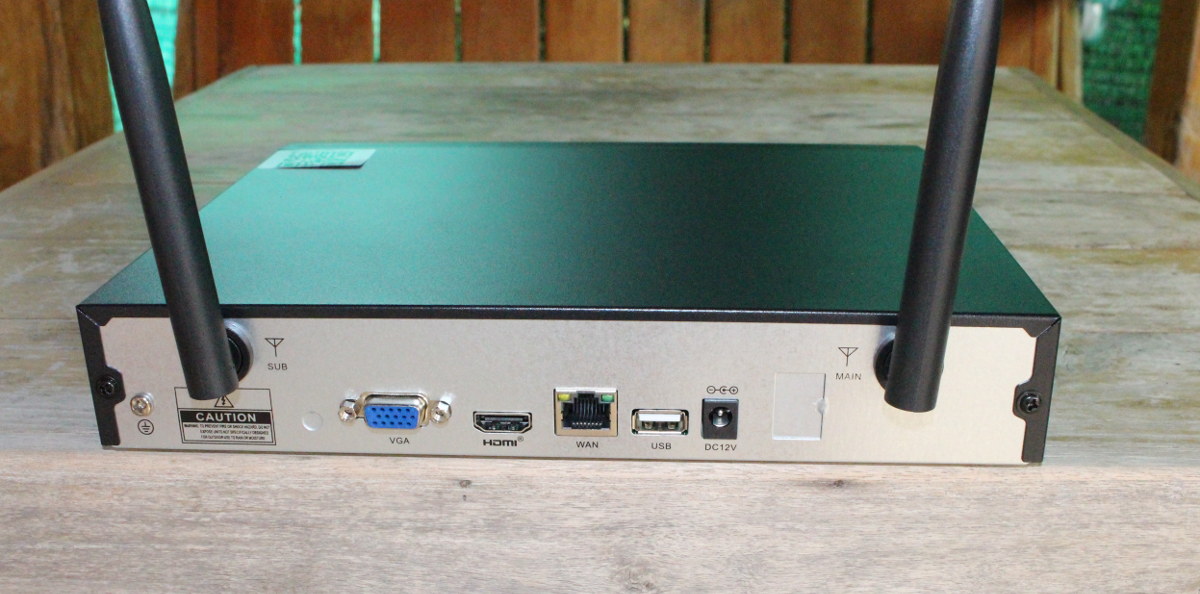
The rear panel includes the two WiFi antennas, VGA and HDMI output for optional control monitor, a Fast Ethernet port, a USB 2.0 port, and the 12V DC jack.
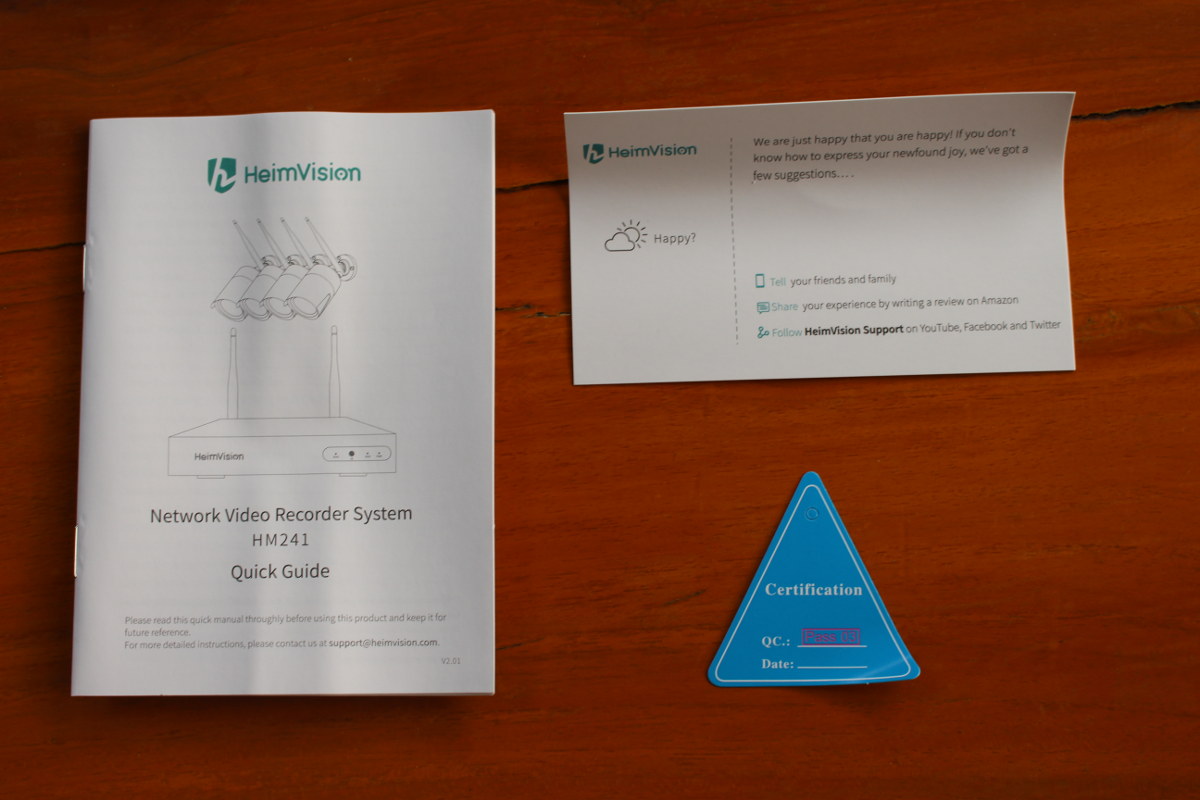
The bubble wrap for the NVR also included a Quick Guide for HM241 entirely in English and useful to install the system, as well as a welcome card and a QC label.
The user guide also explains about software, and for example, you can monitor the cameras either by connecting a VGA or HDMI display, remotely using a web interface, or a mobile app available for Android and iOS.
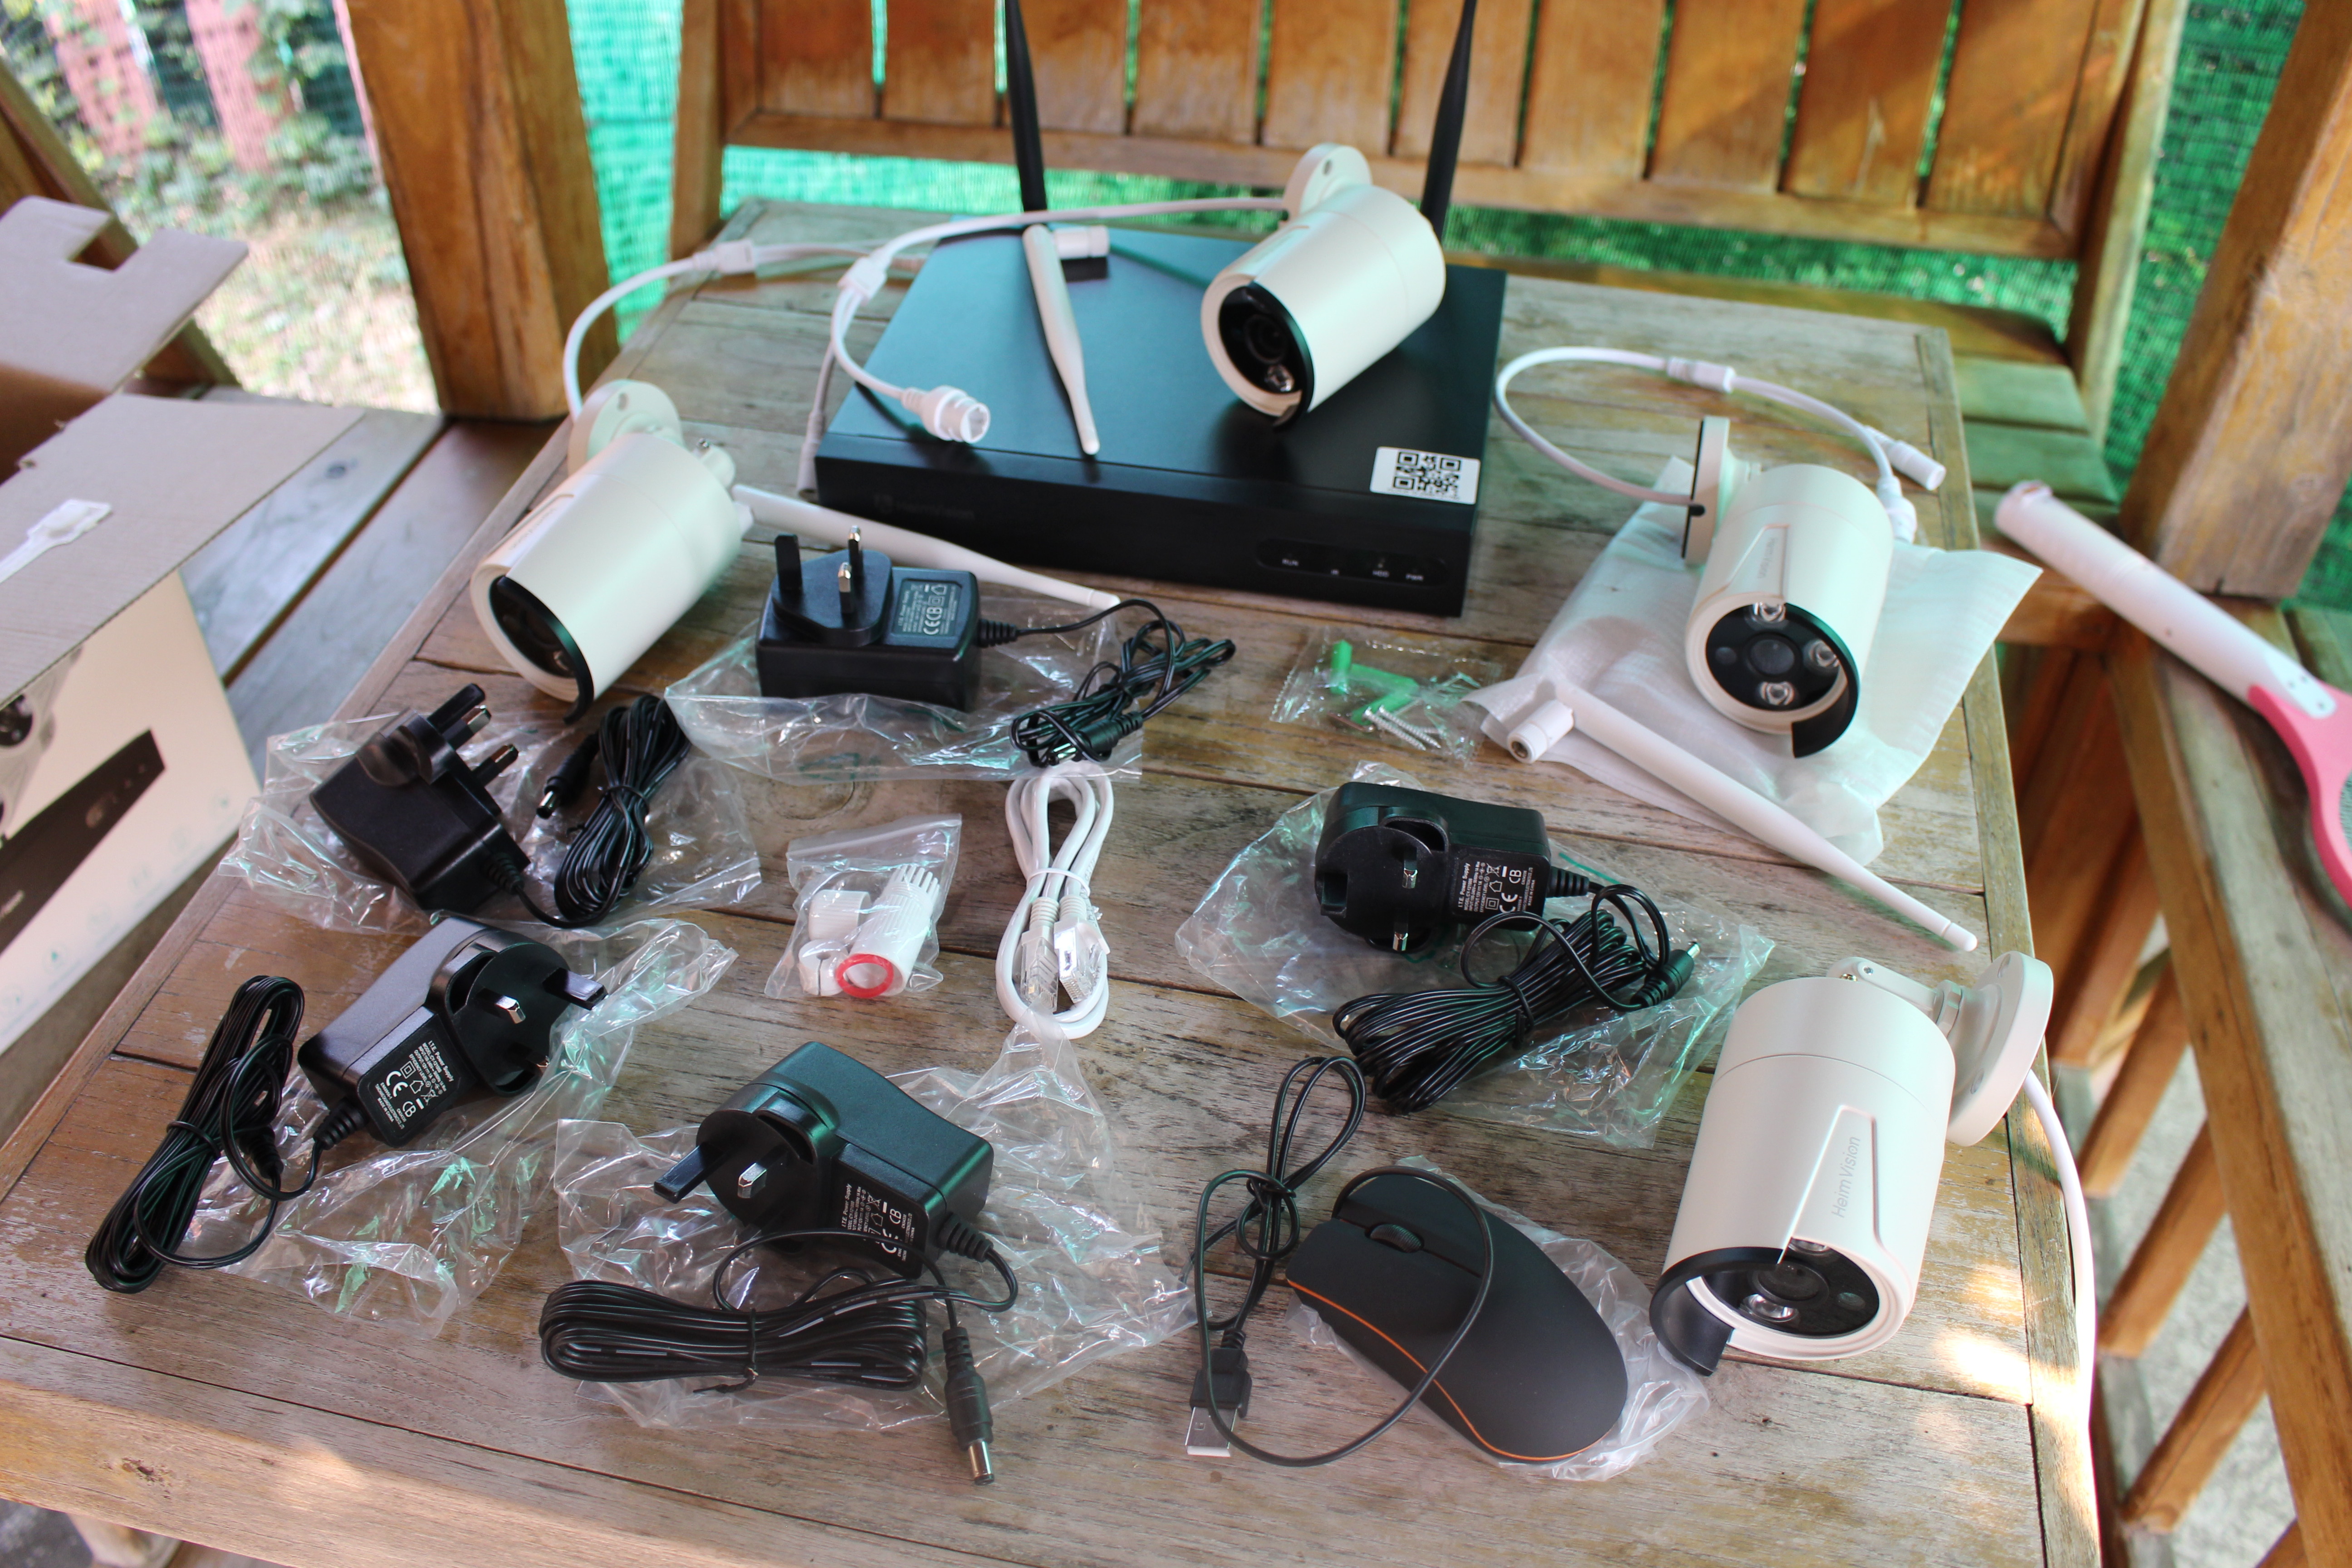
Time to take all the bits from the package. We have four cameras with their WiFi antenna and mounting kit, five power supply for the NVR and camera, an Ethernet cable, as well as a USB mouse.
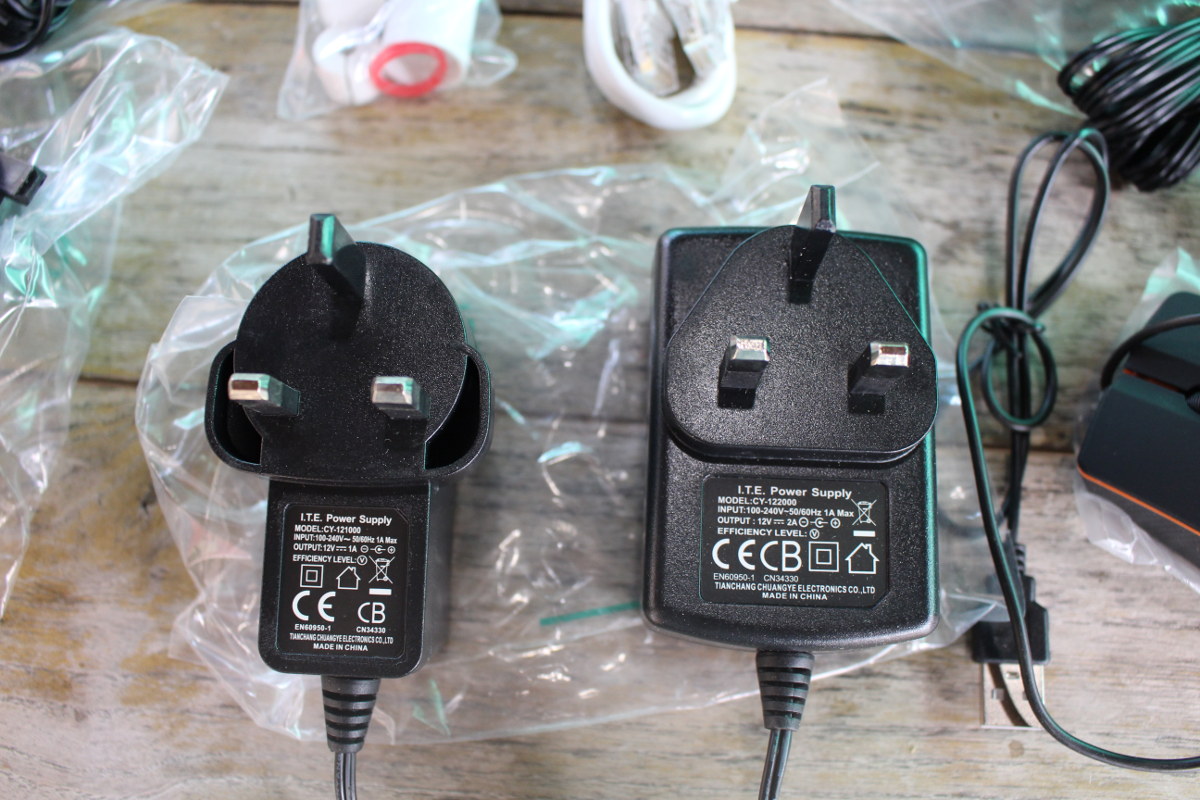
The camera power supplies are rated 12V/1A, while the NVR power supply delivers up to 24 Watts (12V/2A).
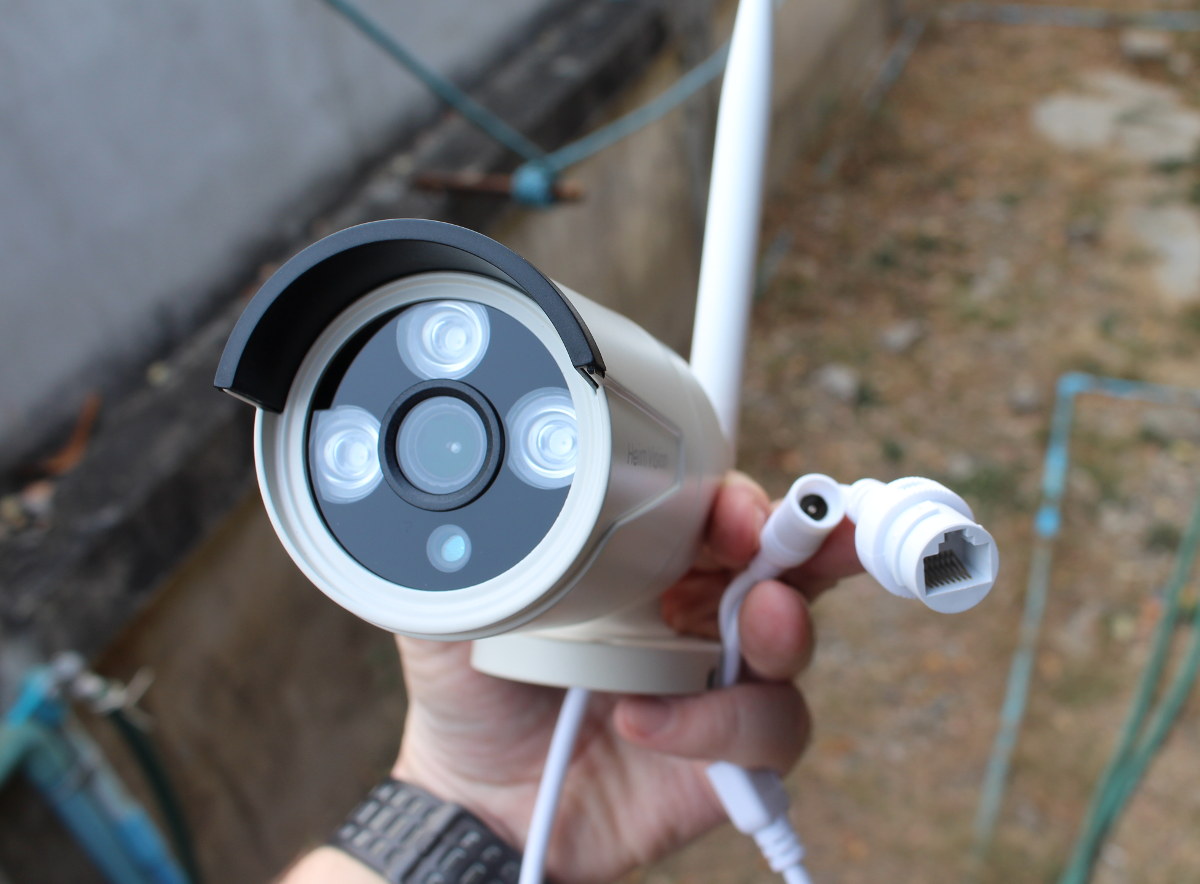
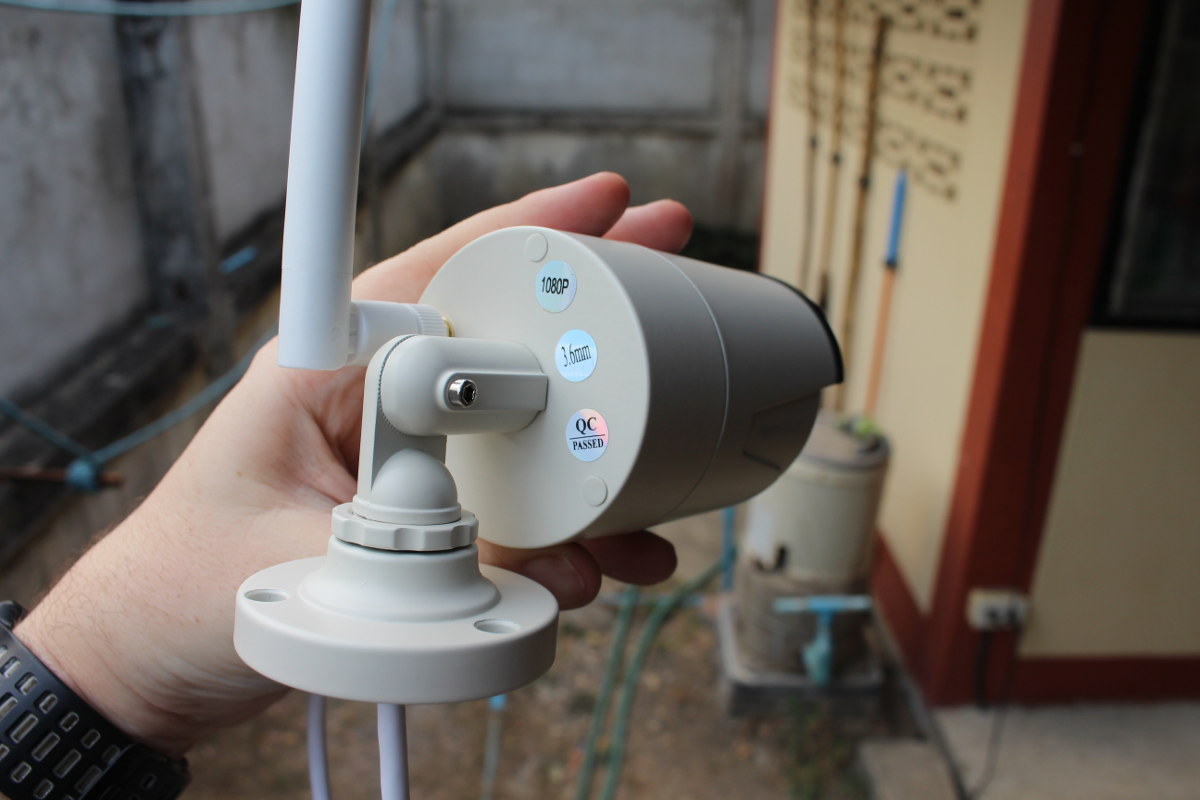
The cameras have night vision, and come with waterproof connectors for power and Ethernet. I’ll probably not use Ethernet at all for the camera since relying on WiFi is much so easier.
HM241 Teardown and HDD Installation
You’ll need to install a 3.5″ SATA drive with the NVR, otherwise, all you’d be able to do is to monitor the live streams. Take out the four black screws on the rear panel and both side of the NVR.
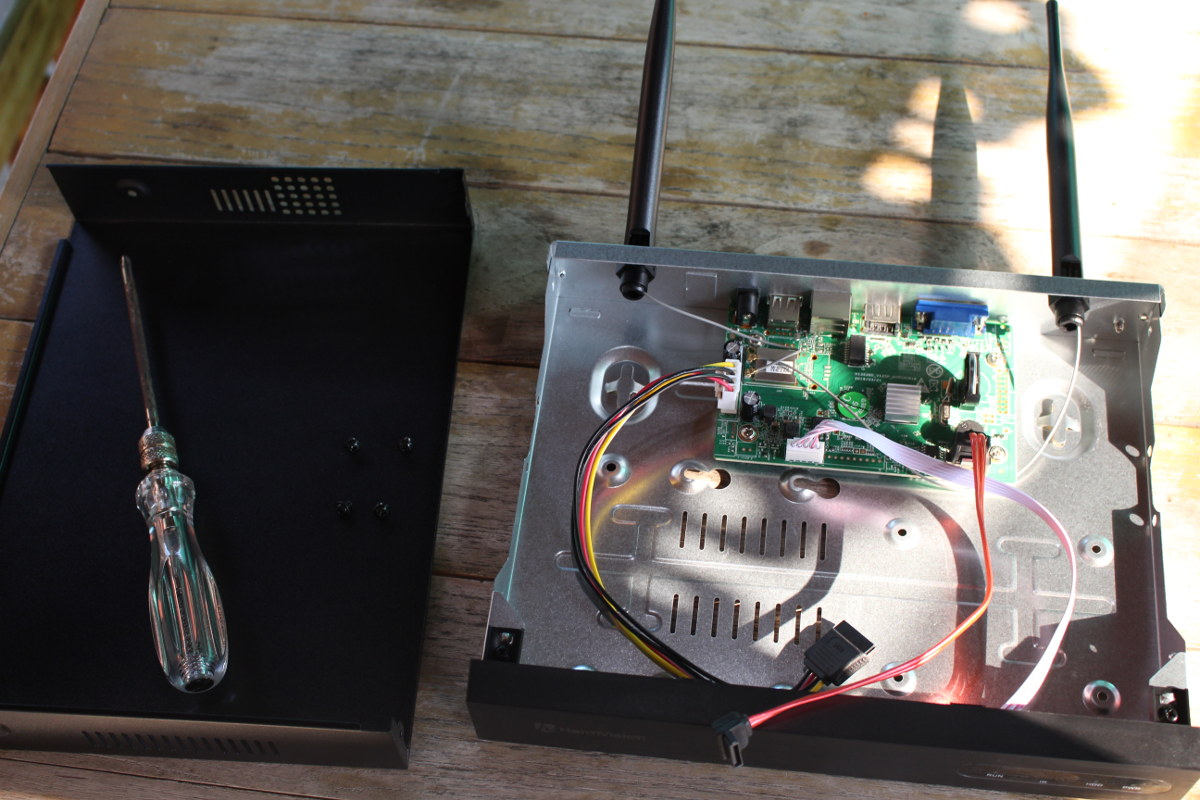
There’s plenty of space to leave space for the hard drive. While the box is opened let’s check out the board itself.
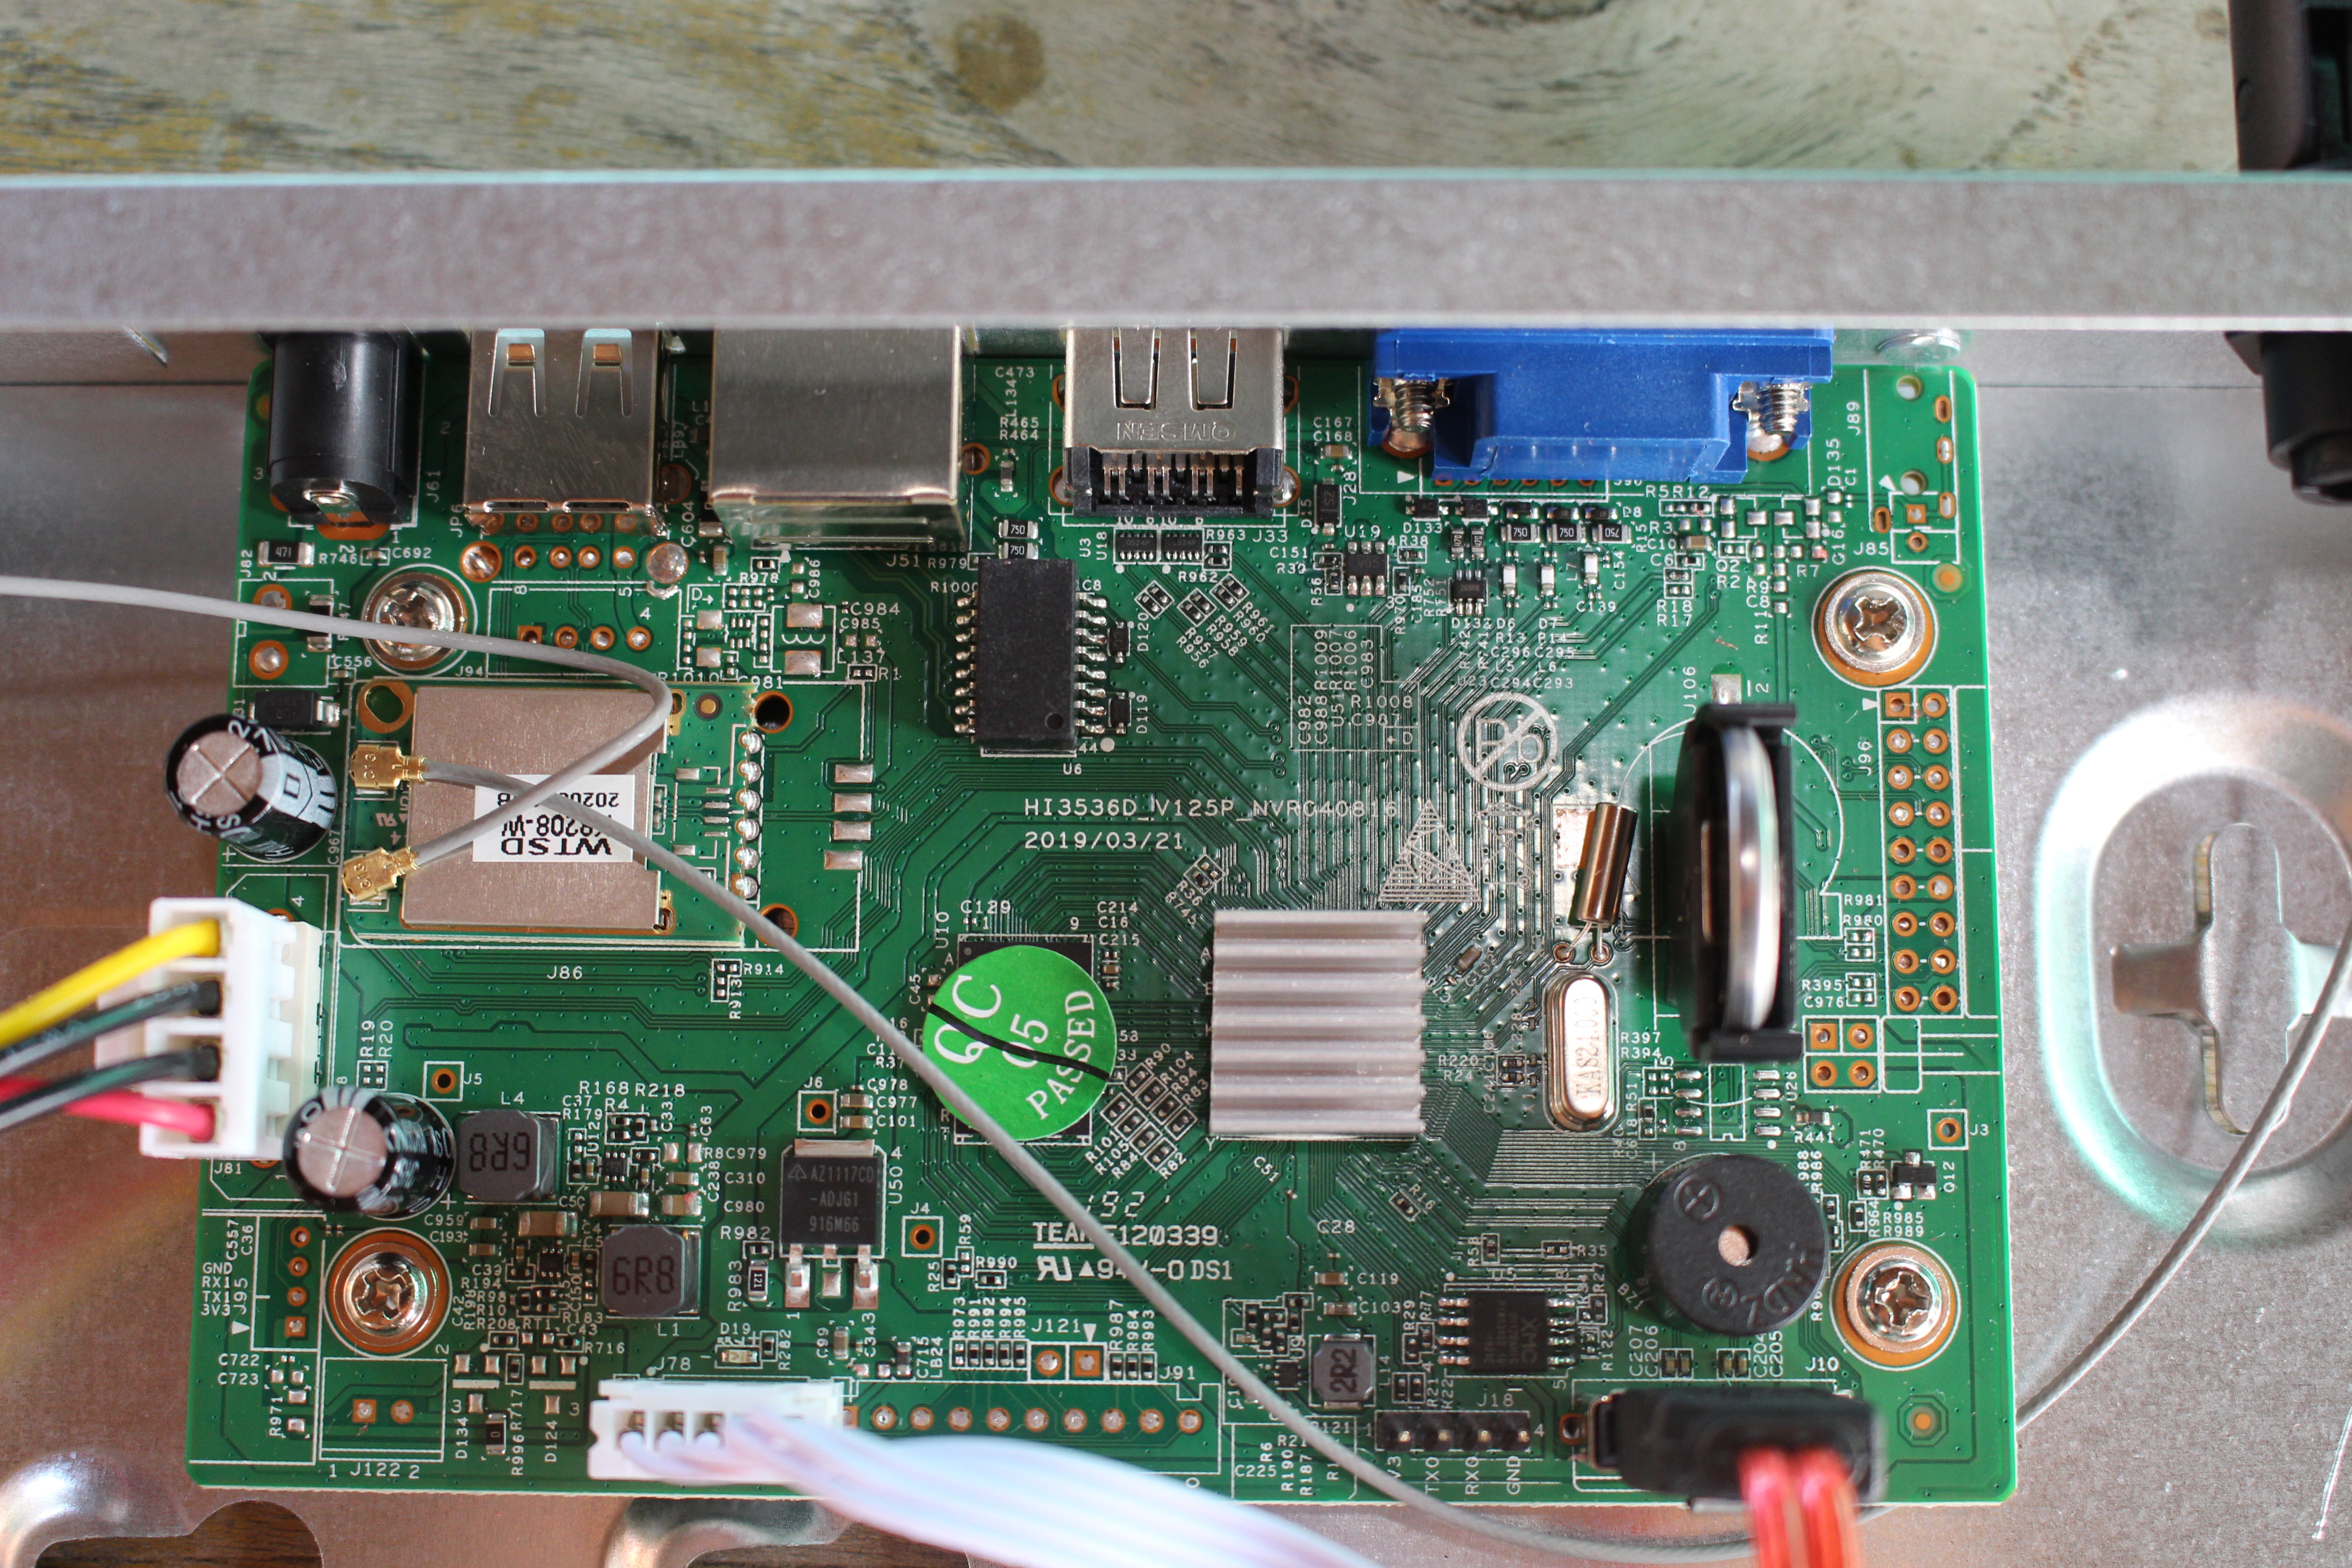
The board is apparently based on Hisilicon Hi3536D Cortex-A7 processor that can handle up to 4x 1080p H.265/H.264 encoding/decoding at up to 20 fps. In case you want to access the serial console, there are two UART headers, one of the bottom left, and the other close to the SATA port, and I suppose at least one is working…
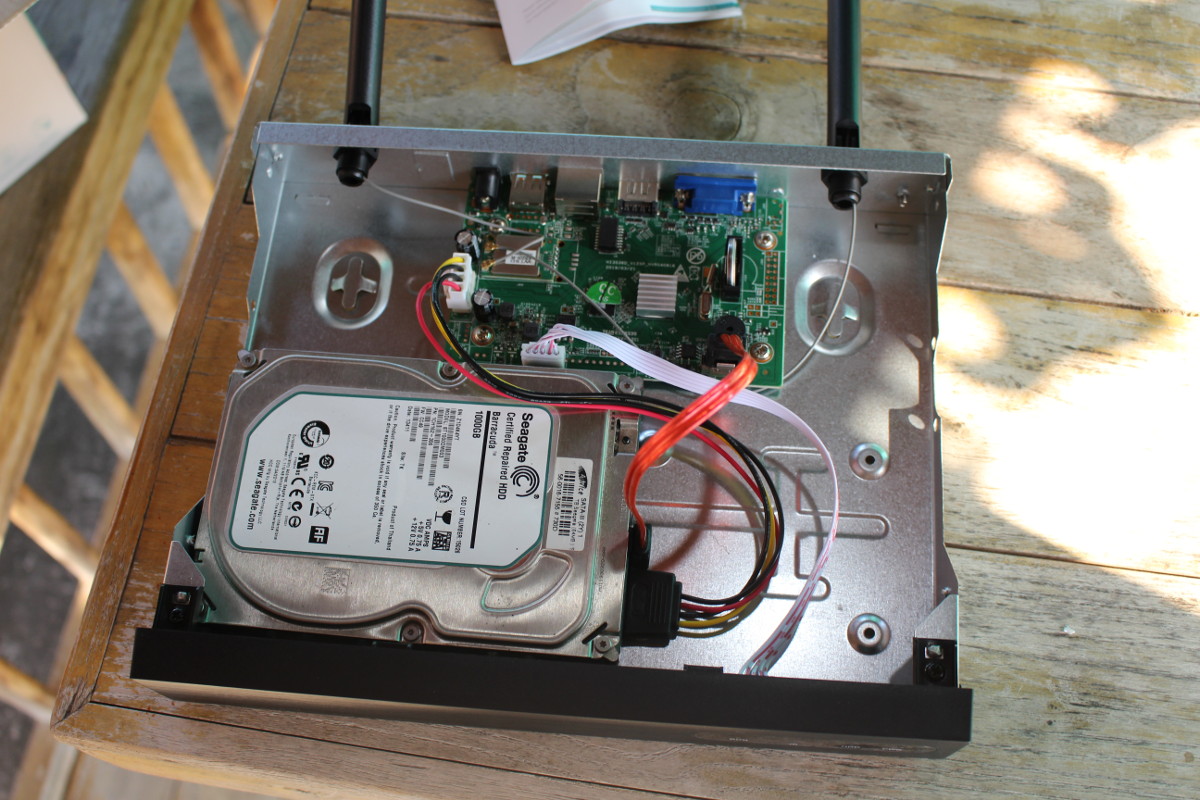
The hard drive installation is pretty easy. First, connect the two SATA cable to your 3.5″ hard drive, then place the hard drive on the left side making it touch with the case, and hold it with your hand, while turning the NVR upside down…
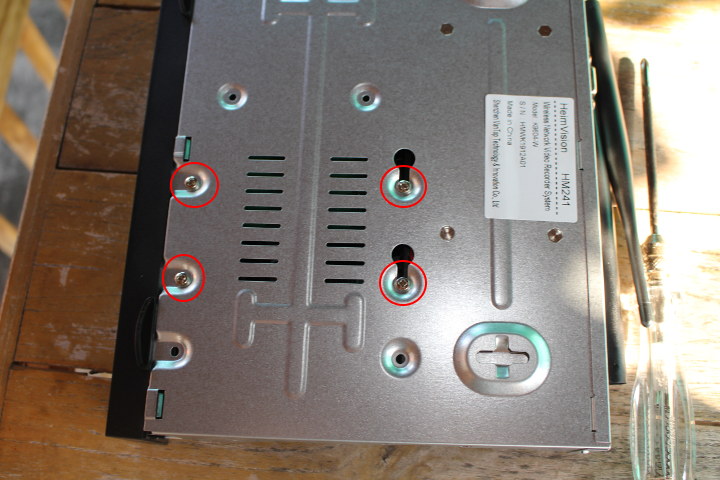
… in order to tighten the four HDD mounting screws which are provided with the kit. Place the top cover back in place, and you’re good to go.
HeimVision HM241 Camera Teardown
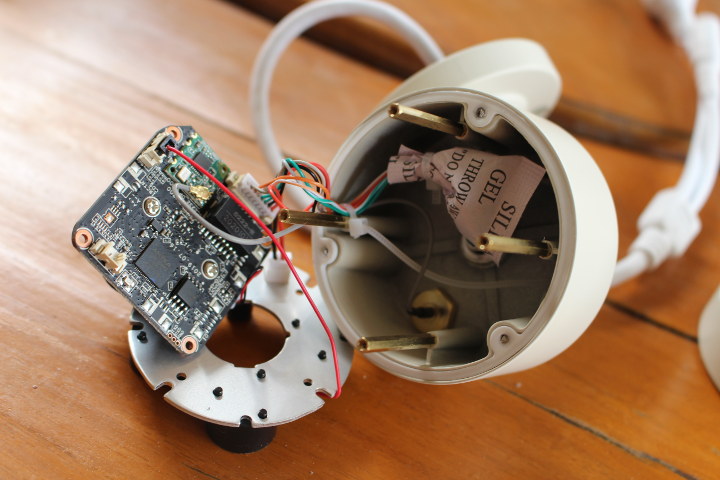
Usually, I don’t open waterproofed devices, since a teardown may negatively affect their waterproofness. But since I was nicely asked, and I have four cameras to play with, I opened one. There are three rubber pads on the back of the camera that can be removed, and then I was able to loosen three screws to open the device easily.
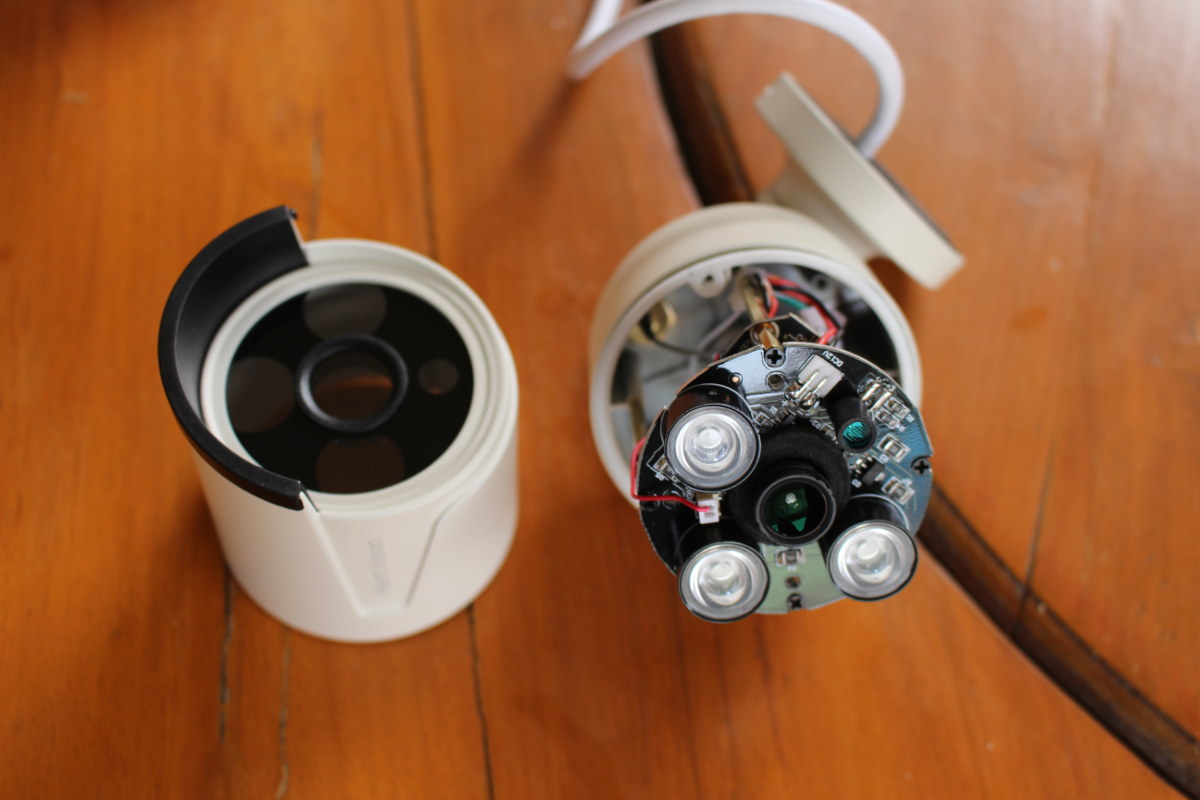
There are two boards. One board with the IR sensors for night vision, and the camera board. The top of the latter board includes the lense and RTL8201F 10/100M Ethernet PHYceiver.
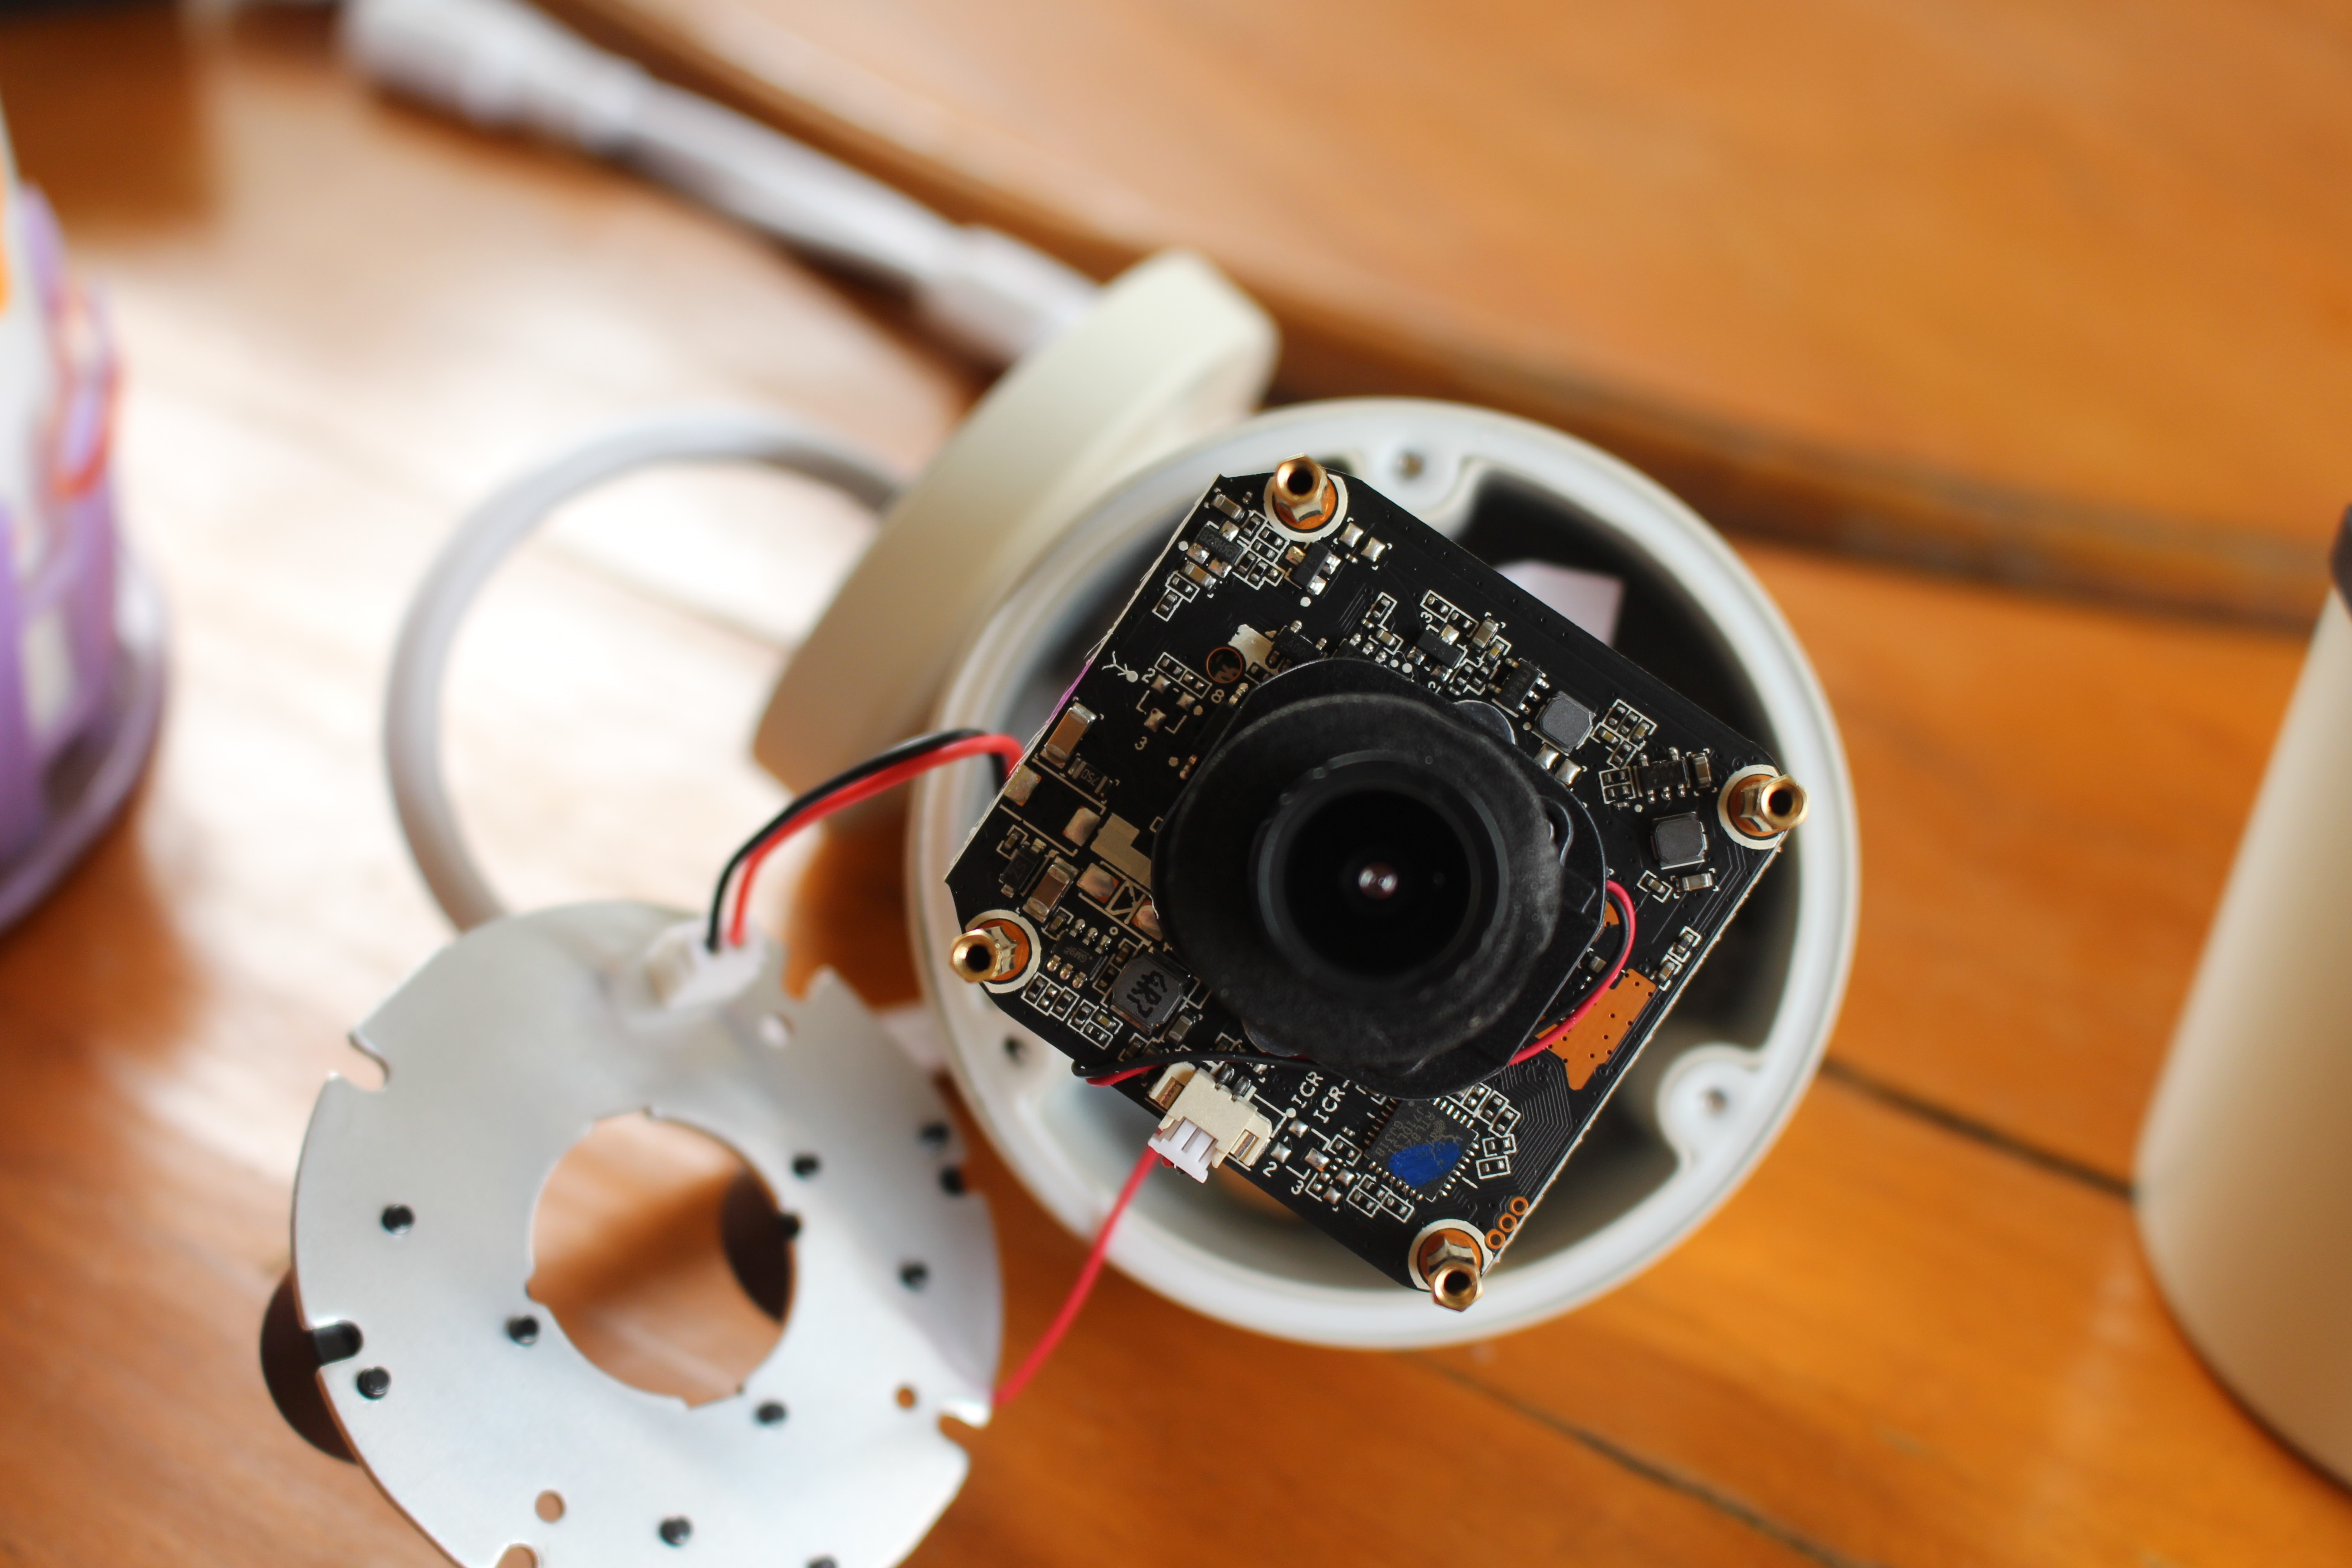
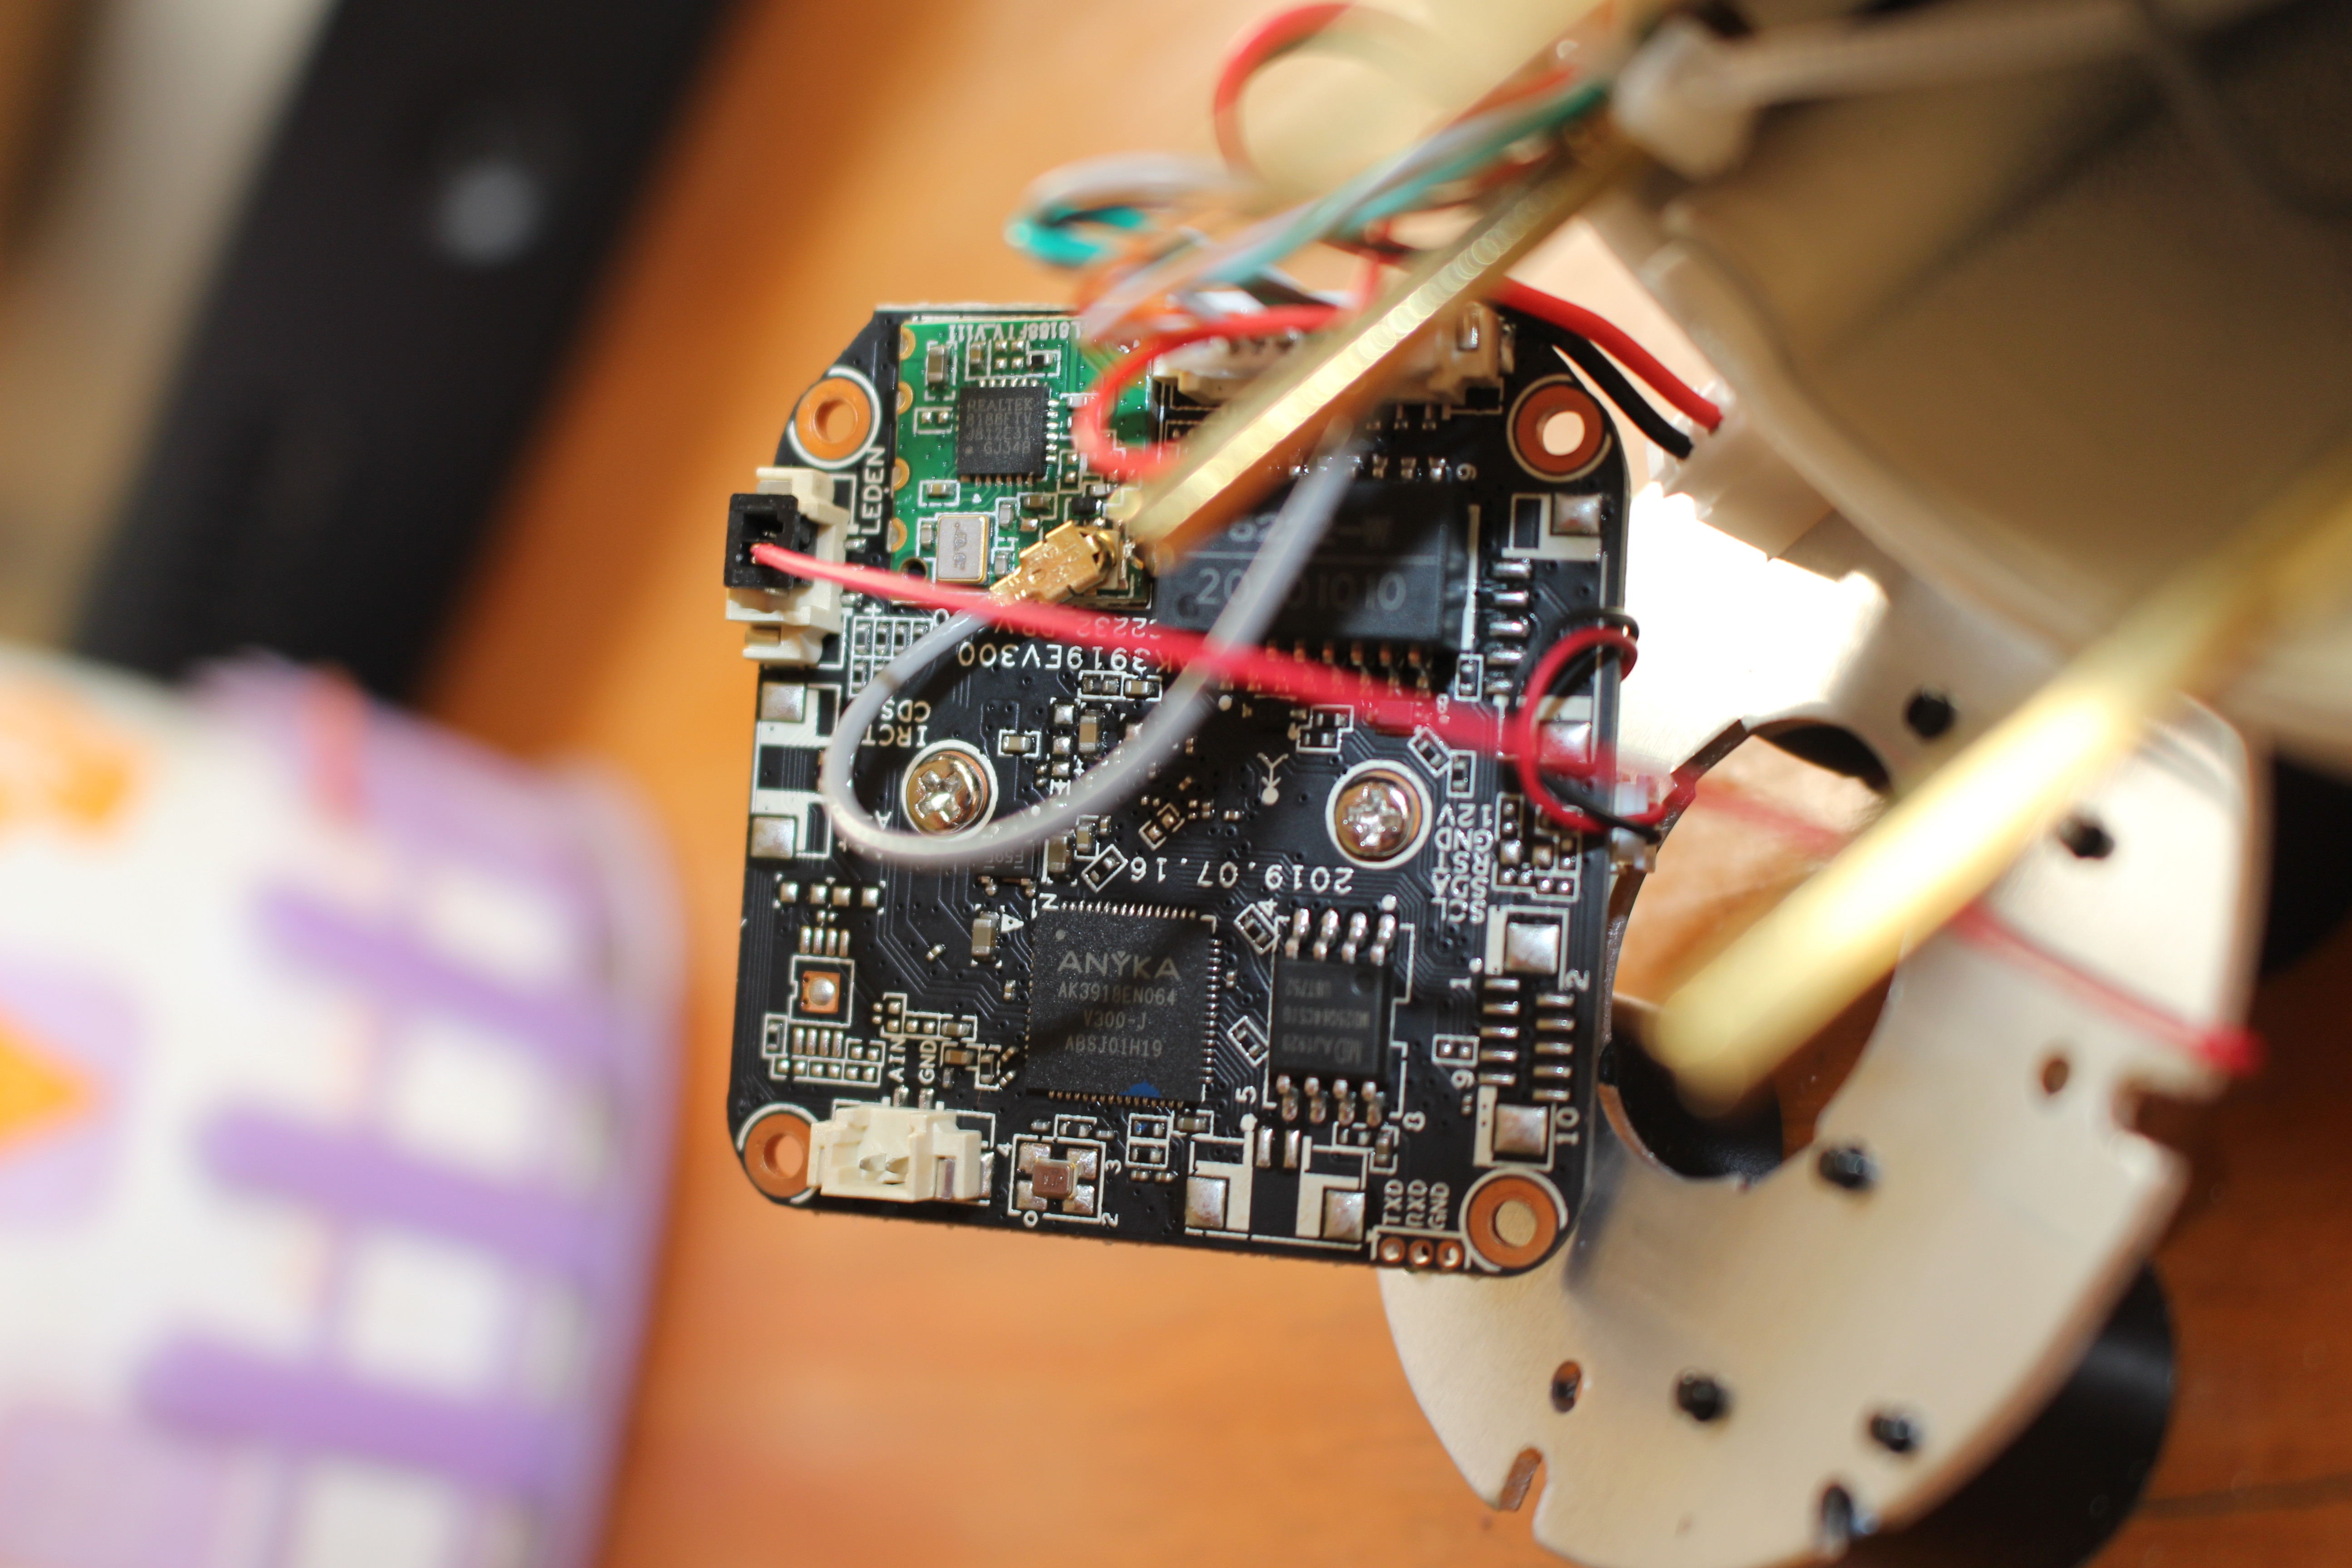
The main chip is Anyka AK3918 ARM9 processor that was launched many years ago, and for instance, found in SinoVoIP BPI D1 board launched in 2014. WiFi is handled by 8188FTV 2.4 GHz 802.11b/g/n module
Interestingly, there’s a silica gel bag inside the camera to keep everything dry.
What’s next?
Next, I’ll have to install some UK sockets close to where I plan to install the cameras, then attach the cameras to the wall, after having configured WiFi, and made sure we can get the video signals displayed via the NVR either via a monitor connected to the device, a PC web browser or the mobile app.
Continue reading “HeimVision HM241 NVR Review – Part 2: Installation Tips, Video Interface, Android App“.

Jean-Luc started CNX Software in 2010 as a part-time endeavor, before quitting his job as a software engineering manager, and starting to write daily news, and reviews full time later in 2011.
Support CNX Software! Donate via cryptocurrencies, become a Patron on Patreon, or purchase goods on Amazon or Aliexpress


You haven’t teardown the camera. What sensor it is using?
I usually avoid tearing down waterproofed parts. Maybe I’ll try a bit later.
I’ve added the teardown photos for the camera. Not sure about the sensor, but the main chip is AK3918.
Can you please write the number of the wifi card on the board?
WT SD K8208-W
That does not give any clue about the actual WiFi module used though.
K8208-W is the product code for the NVR. It looks the same as mine from FCC photos: https://fccid.io/2APRB-K8204-W/Internal-Photos/Internal-Photos-4050903
For what it’s worth TP-LINK have some similar devices like this https://www.tp-link.com.cn/product_1497.html#tag
The chip in those has a leaked kernel 4.9 so they should be easy to get running on mainline. They have some with a 4 port poe switch built in too. I’m thinking they’d be useful for powering and running tftp/nfs for stuff like LoRaWAN gateways.
I am very confused how the cameras are powered once mounted on the walls. Do you need to plug them with a wire in an outlet? Or are they battery operated?
Thxs a lot
Pat
There are five power supplies in the kit, one of the NVR system, and four for the cameras. The cameras are not battery operated. If you want a system that works 24/7 using batteries is not an option. I have other battery-powered cameras using a PIR sensor to wake up and record video when motion is detected. They are also connected to a solar panel, so it’s super convenient, and I did not have to wire anything. But I can tell you it’s not 100% reliable. So you’ll have plenty of false negatives and sometimes it will miss events. So… Read more »
Have you tried using the HM241 with a PTZ camera, besides the CA01 camera included?
I haven’t tried any PTZ camera with HM241.