
GOLE has designed GOLE 360 video camera to connect to your smartphone via its micro USB, or USB type C port, and let you shot 360 degrees videos or photos. The company has sent me a review sample with a USB type C port in order to test it with Vernee Apollo Lite Android smartphone. I’ve spent about two days playing with it, so I’ll report my experience with the 360° camera, and my attempts at playing the videos back on my computer.
GOLE 360 Unboxing
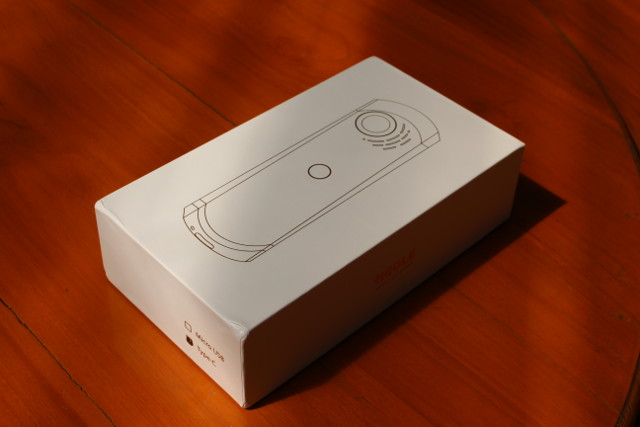
The camera is sent in a white retail box with “Micro USB” or “Type C” option, and as requested I got the latter.
The camera comes with a pouch, a useful user’s manual in English, and a USB to USB type C cable. I did not use the latter since I instead charge the camera with my phone’s power adapter and cable.

One side of device comes with a wide angle camera and the power button, while the other includes another wide angle camera, two LEDs: blue for recording status, orange & green for power & charging status, a small microphone opening on another side, and on the bottom: a reset button, a USB type C port for charging, and a micro SD slot.
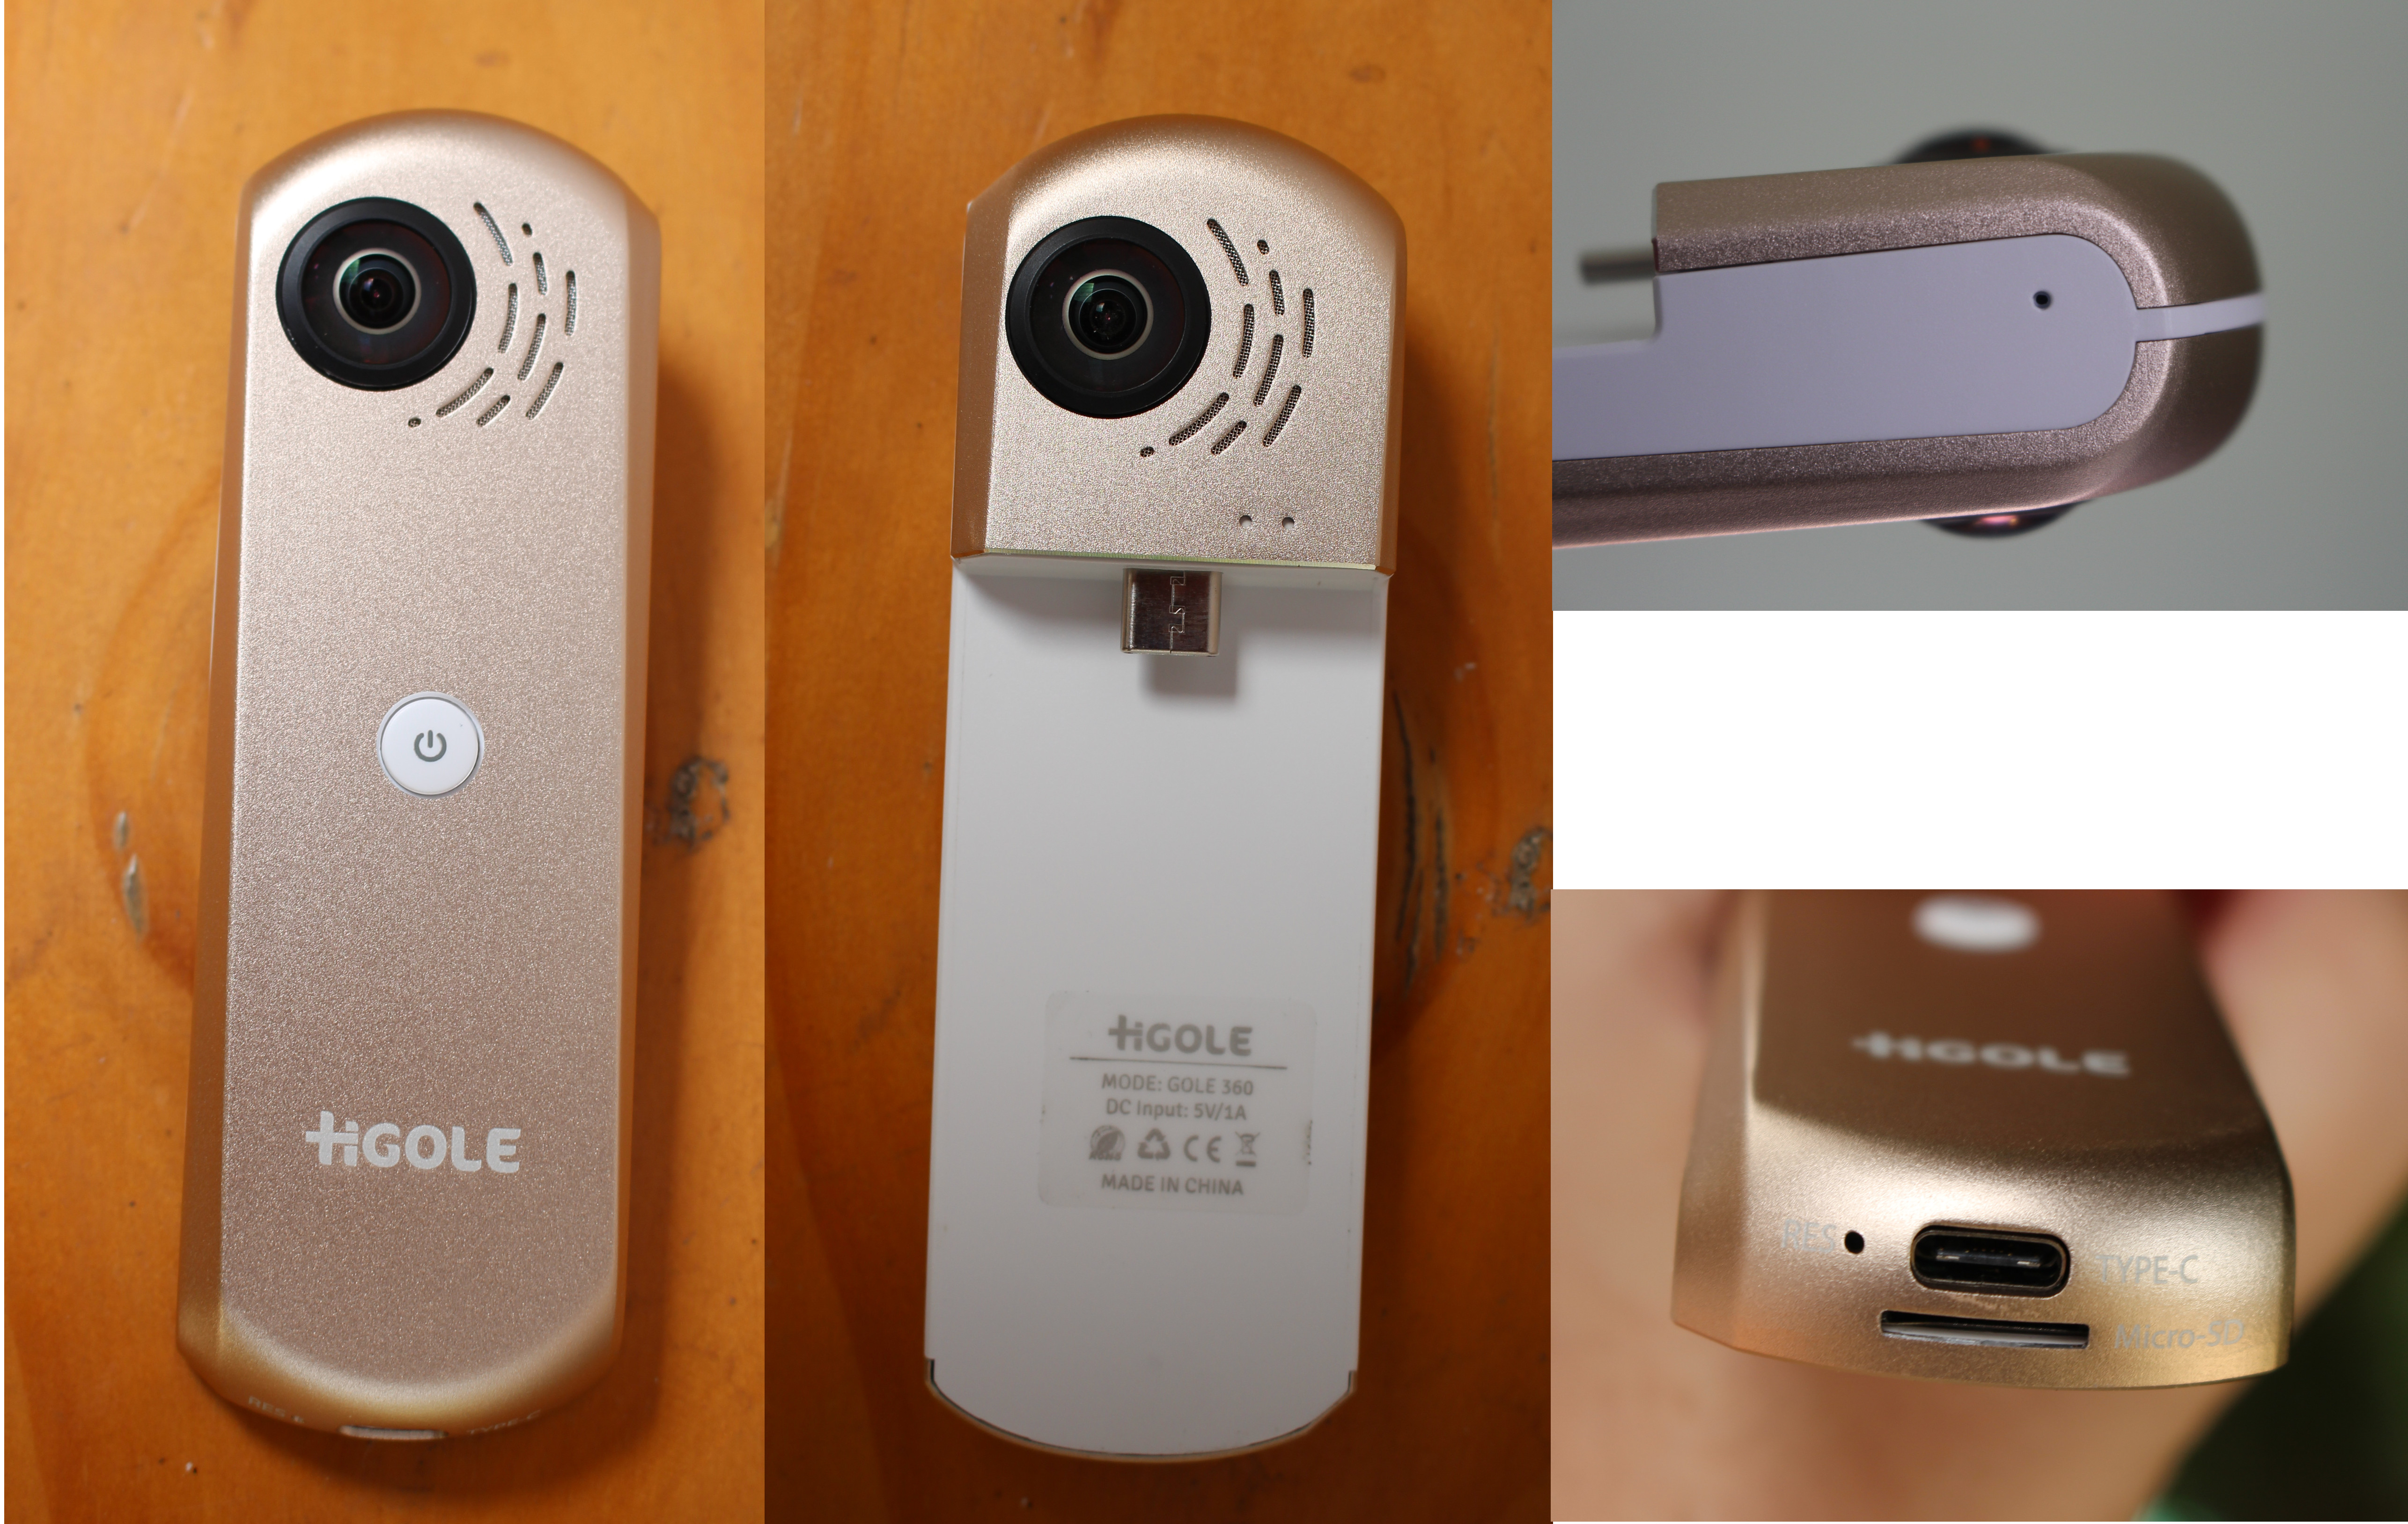
If you have ordered the micro USB port version, you’ll get a micro USB port for the phone connector, and the same USB Type-C port shown above for charging.
Gole 360 Initial Setup
The camera’s battery should have some charge, but you may still want to fully charge it before using it. The LED will blink with orange color during charging, and blink with green color once it is fully charged.
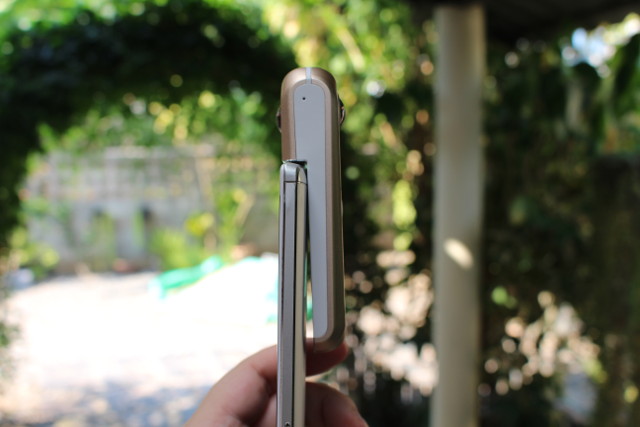
My phone is up to 1 cm thick in the area around the USB type C port, and the camera does not fit perfectly, but it still usable.
You can scan the QR code in the user’s manual, or download it directly in order to install GOLE 360 Android app. I used Gole%C2%A0360_1.0.2.apk & HiGole_1.0.6.apk (from the previous link) for this review, but I did not see any obvious differences. You’ll also want to insert a micro SD card formatted with FAT32, as the app cannot record photos or videos directly into your phone’s storage.
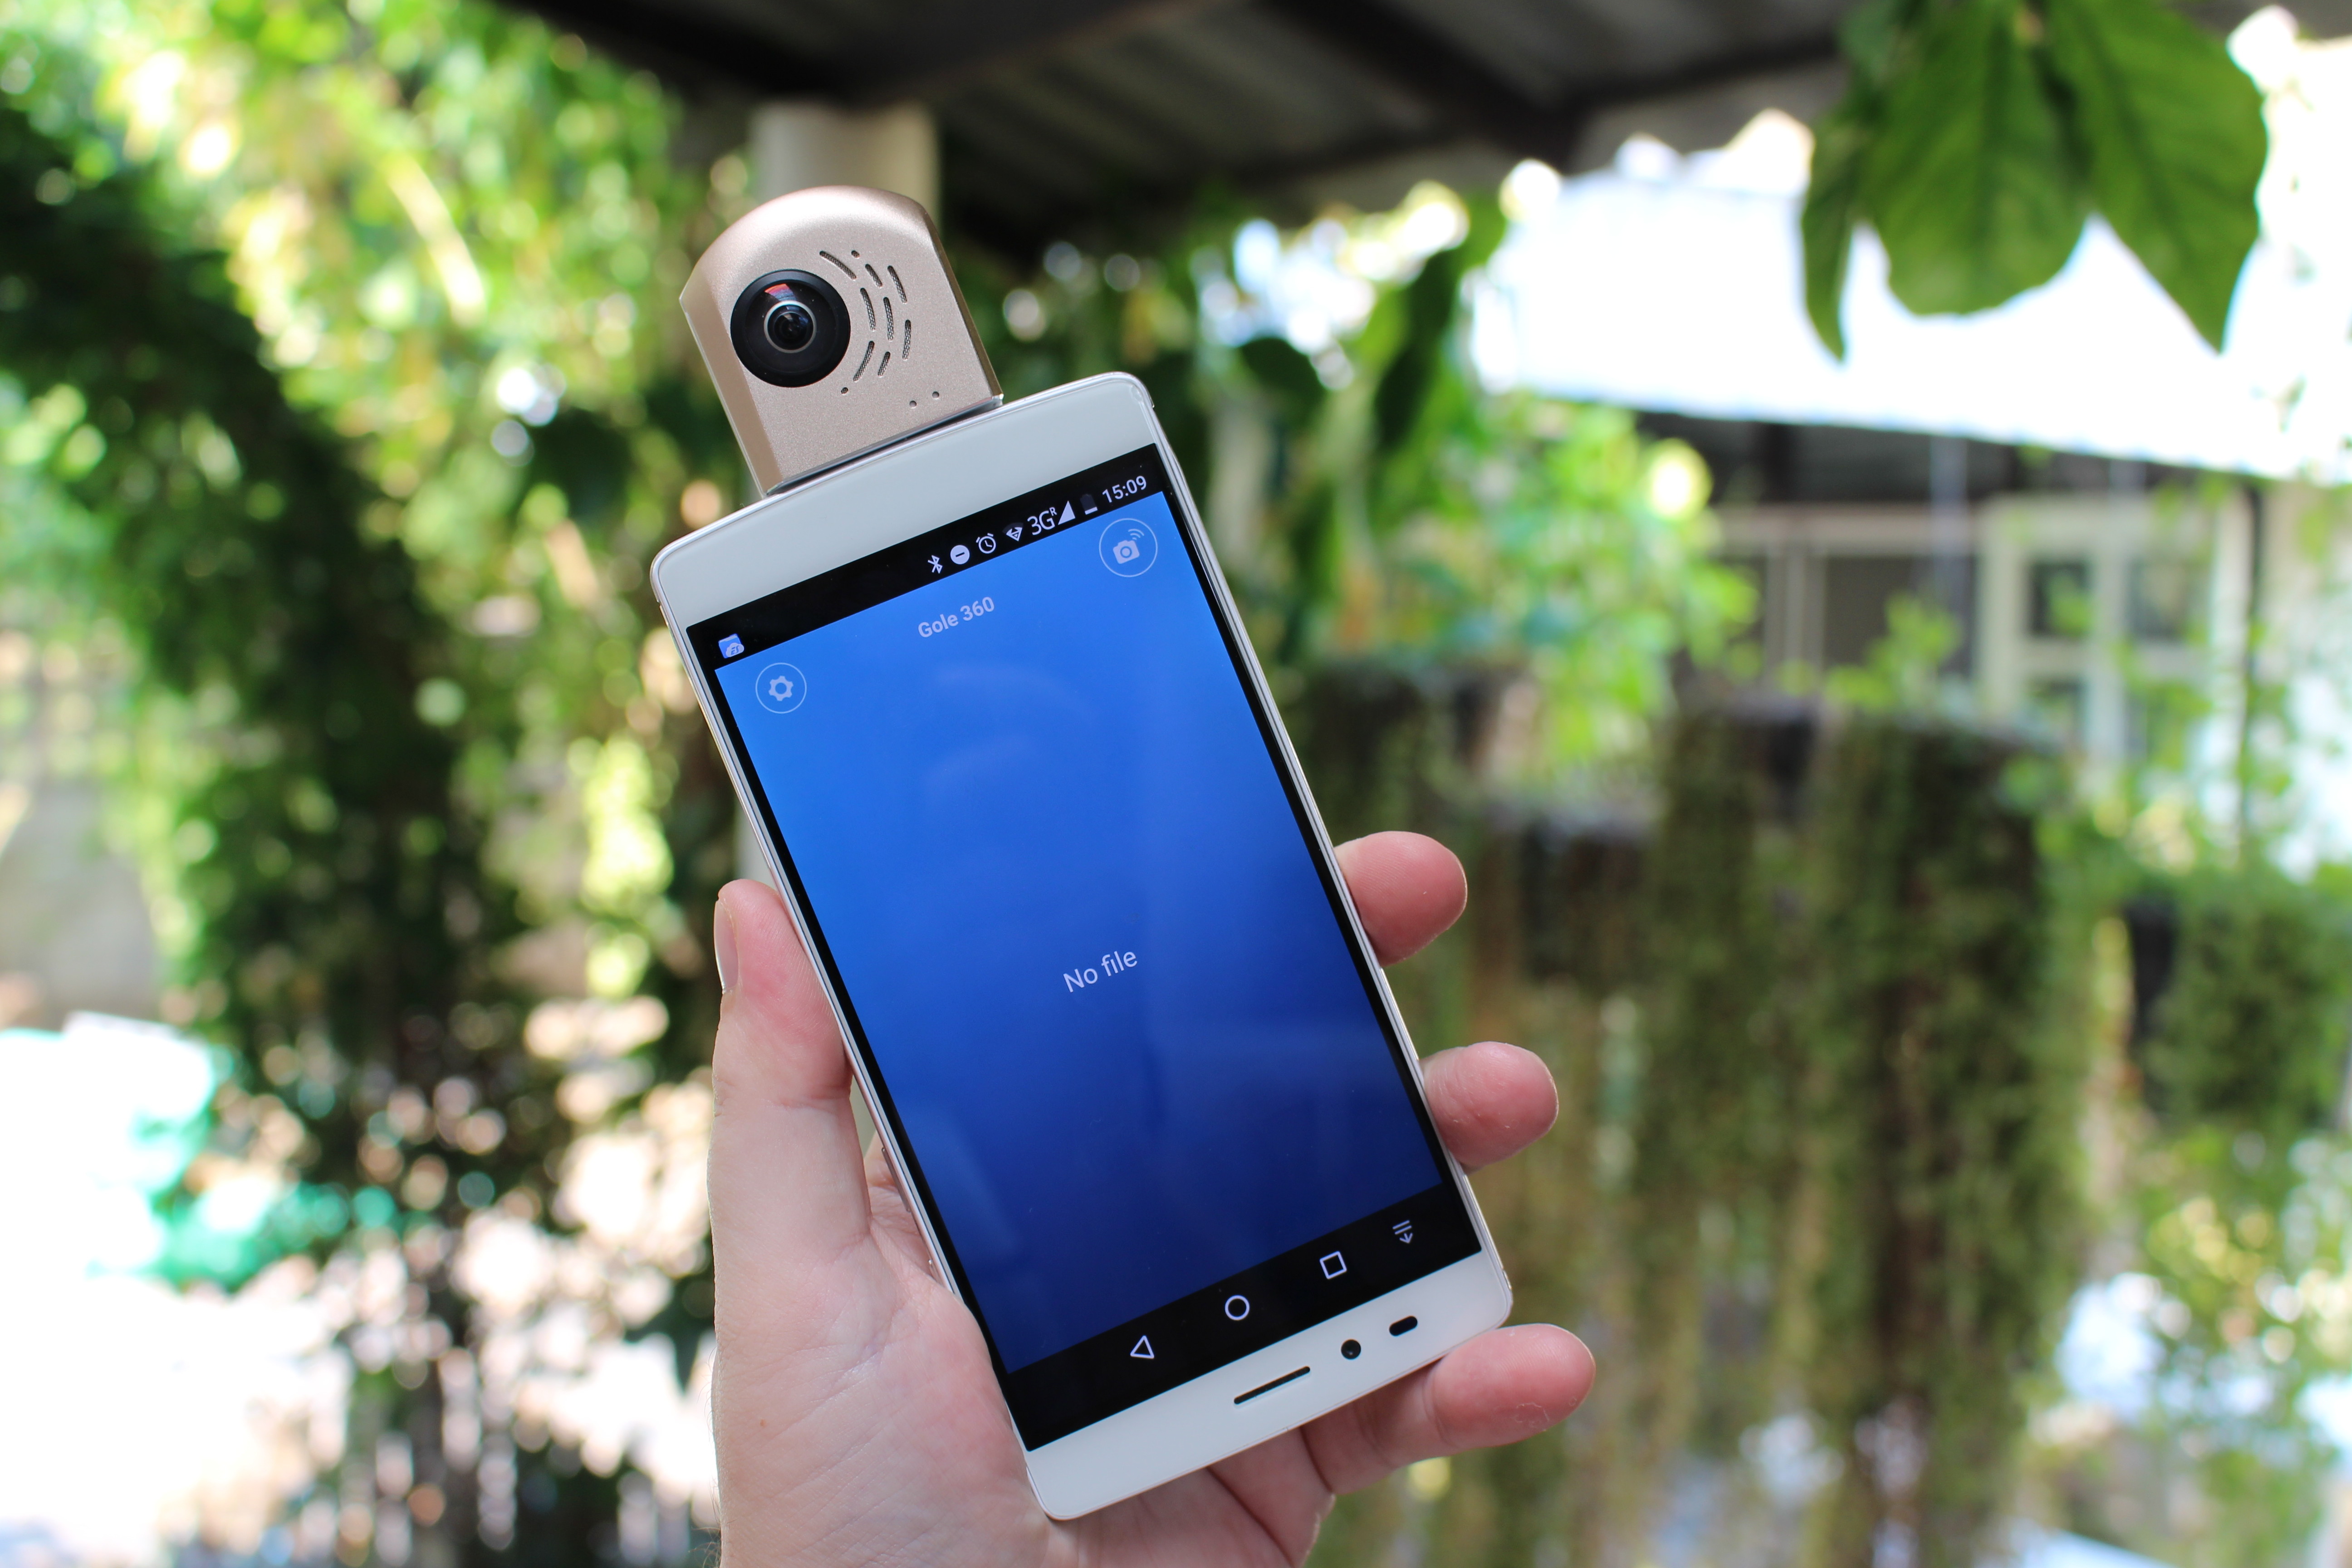
As soon as you start Gole 360 app, the screen with rotate upside down, and you should see a blue screen showing no file. This will be fine for most phones, but in case your manufacturer decided to put the USB port on the top of the phone, it might not be convenient to use. Now we can press the power button for five seconds in order to start the camera and use it. The green LED should be on at this stage. Note that the LEDs are not very bright, and while that’s good enough indoors, they are very difficult to see outdoors. The user’s manual also explains how to use the camera in standalone mode. i.e. without smartphone, but I don’t think it would be very convenient so I skipped that part.
Gole 360 App and 360° Photo Shots and Video Recording
We now need to press the top right “camera” icon to connect to the camera by enabling USB Tethering. I had to do that each time I started the app, except for the middle step after selection “Do not prompt”.
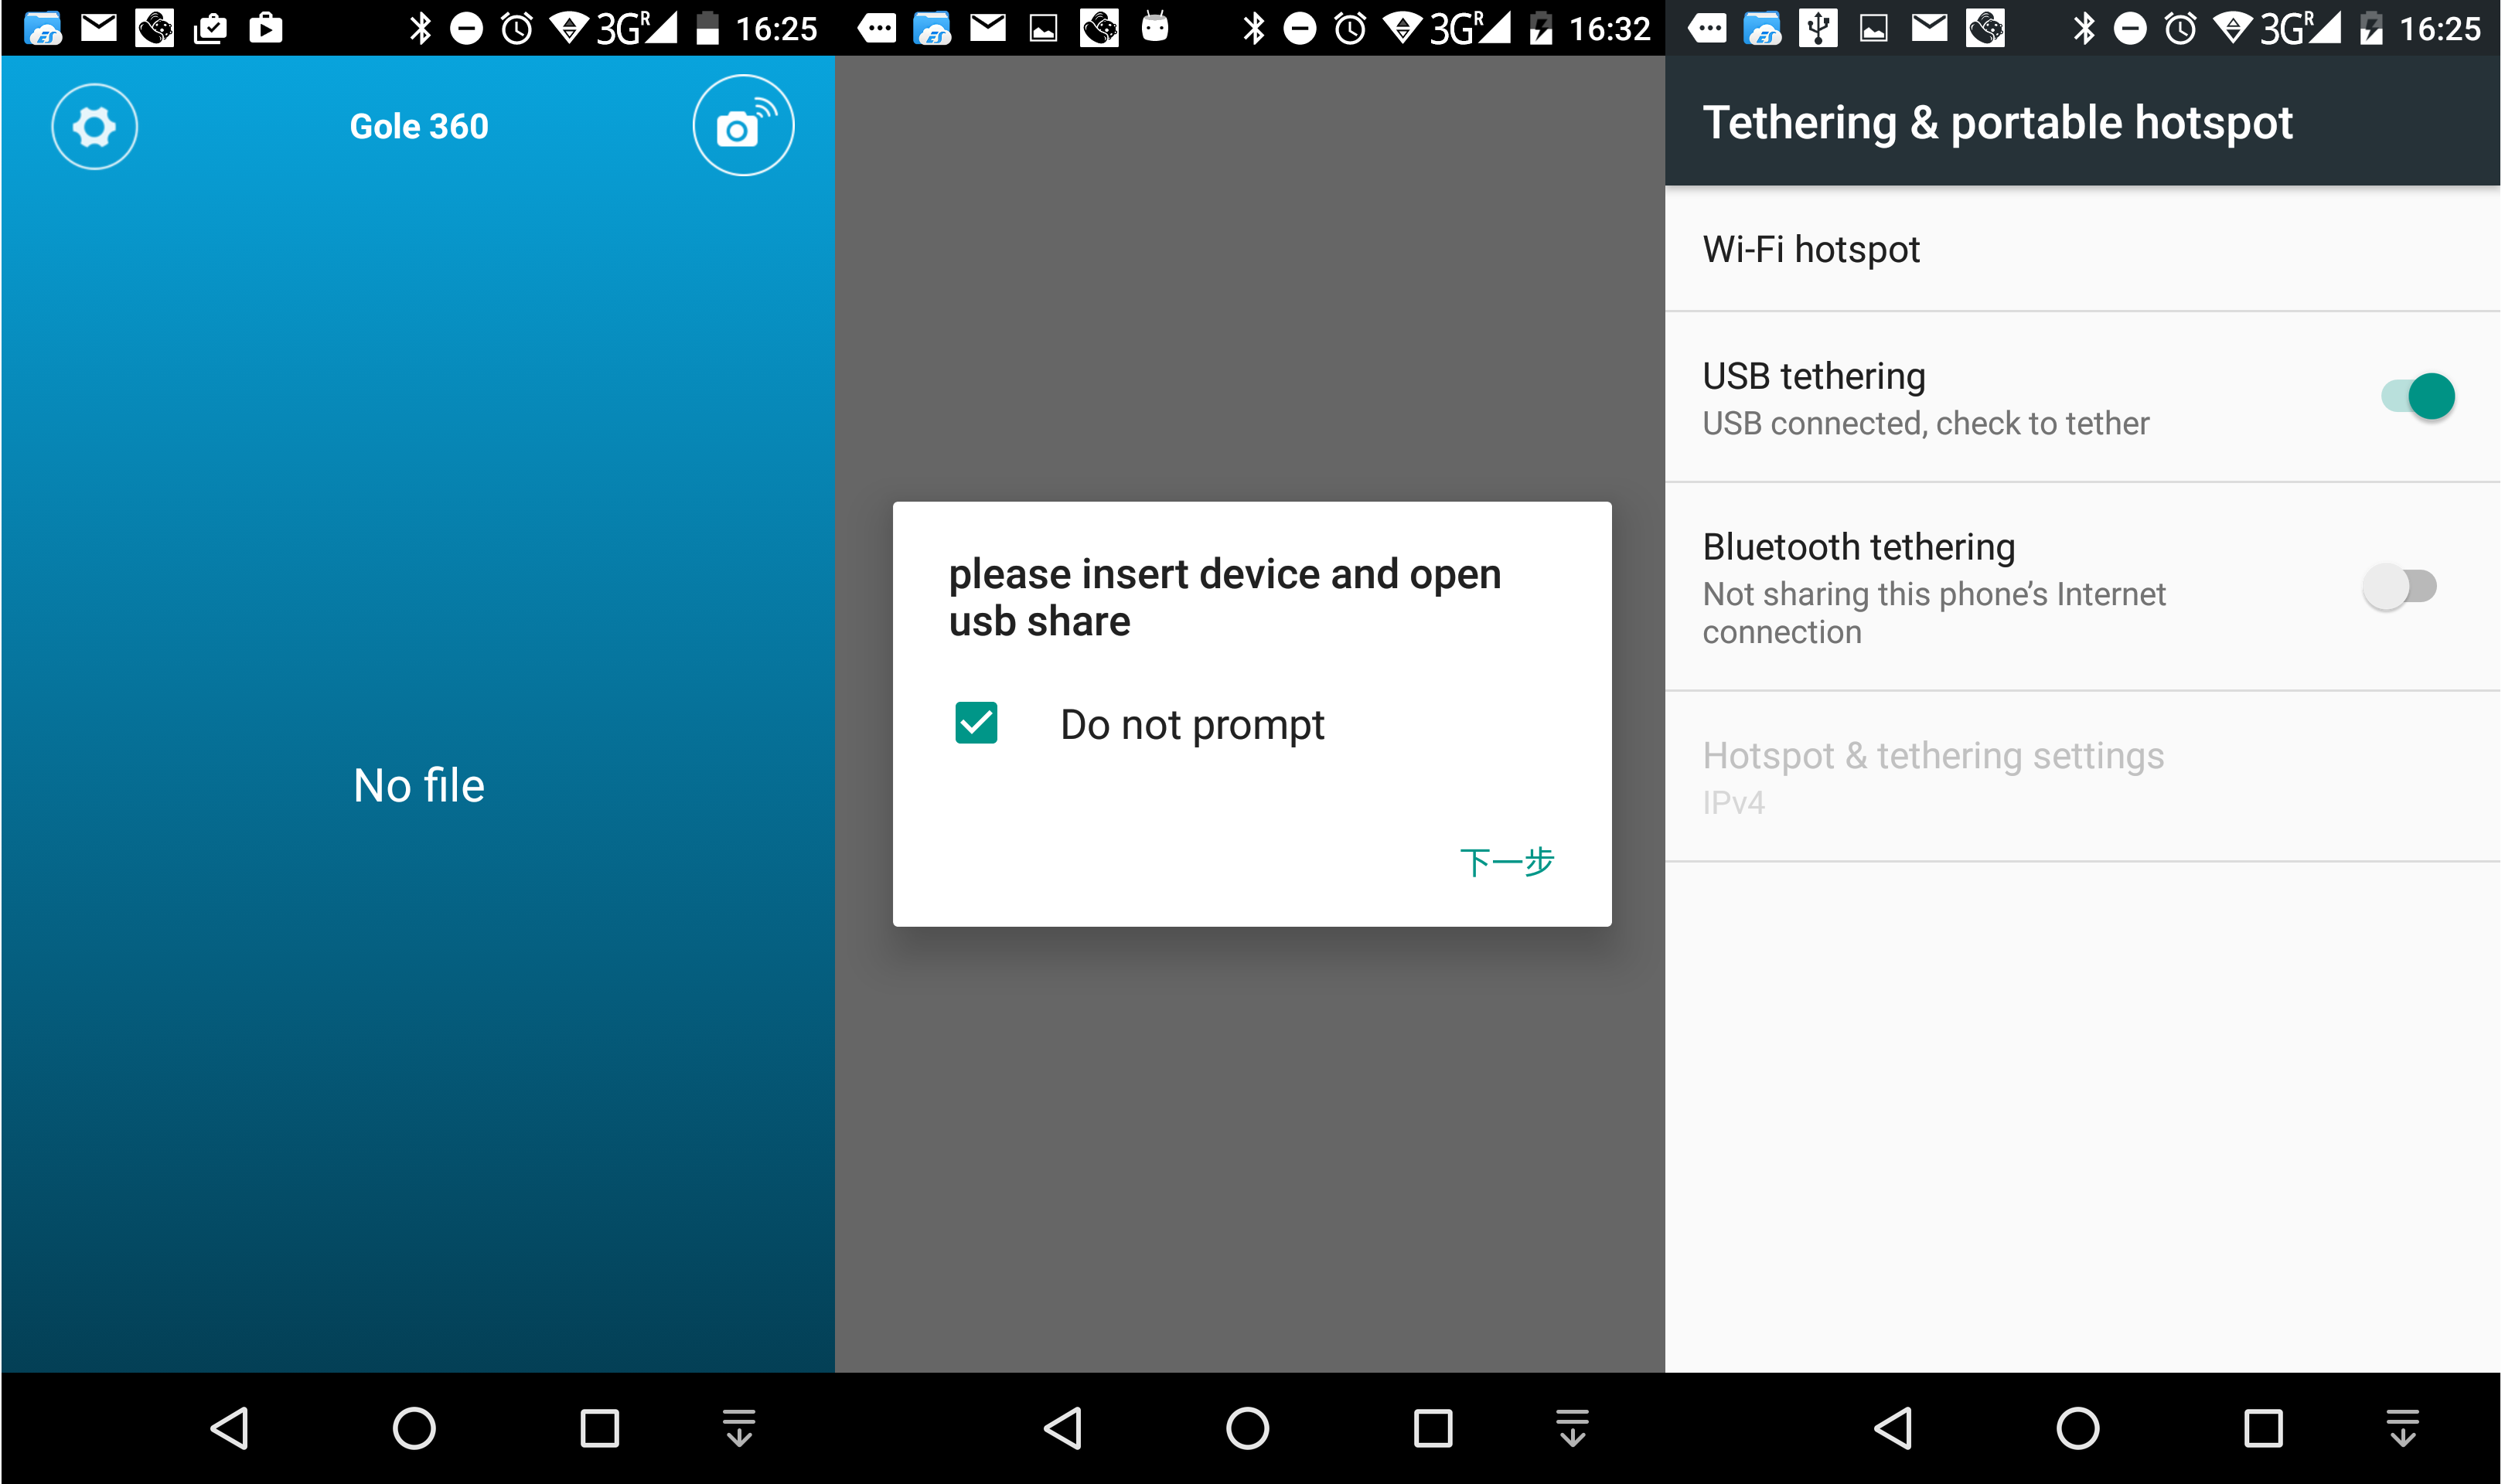
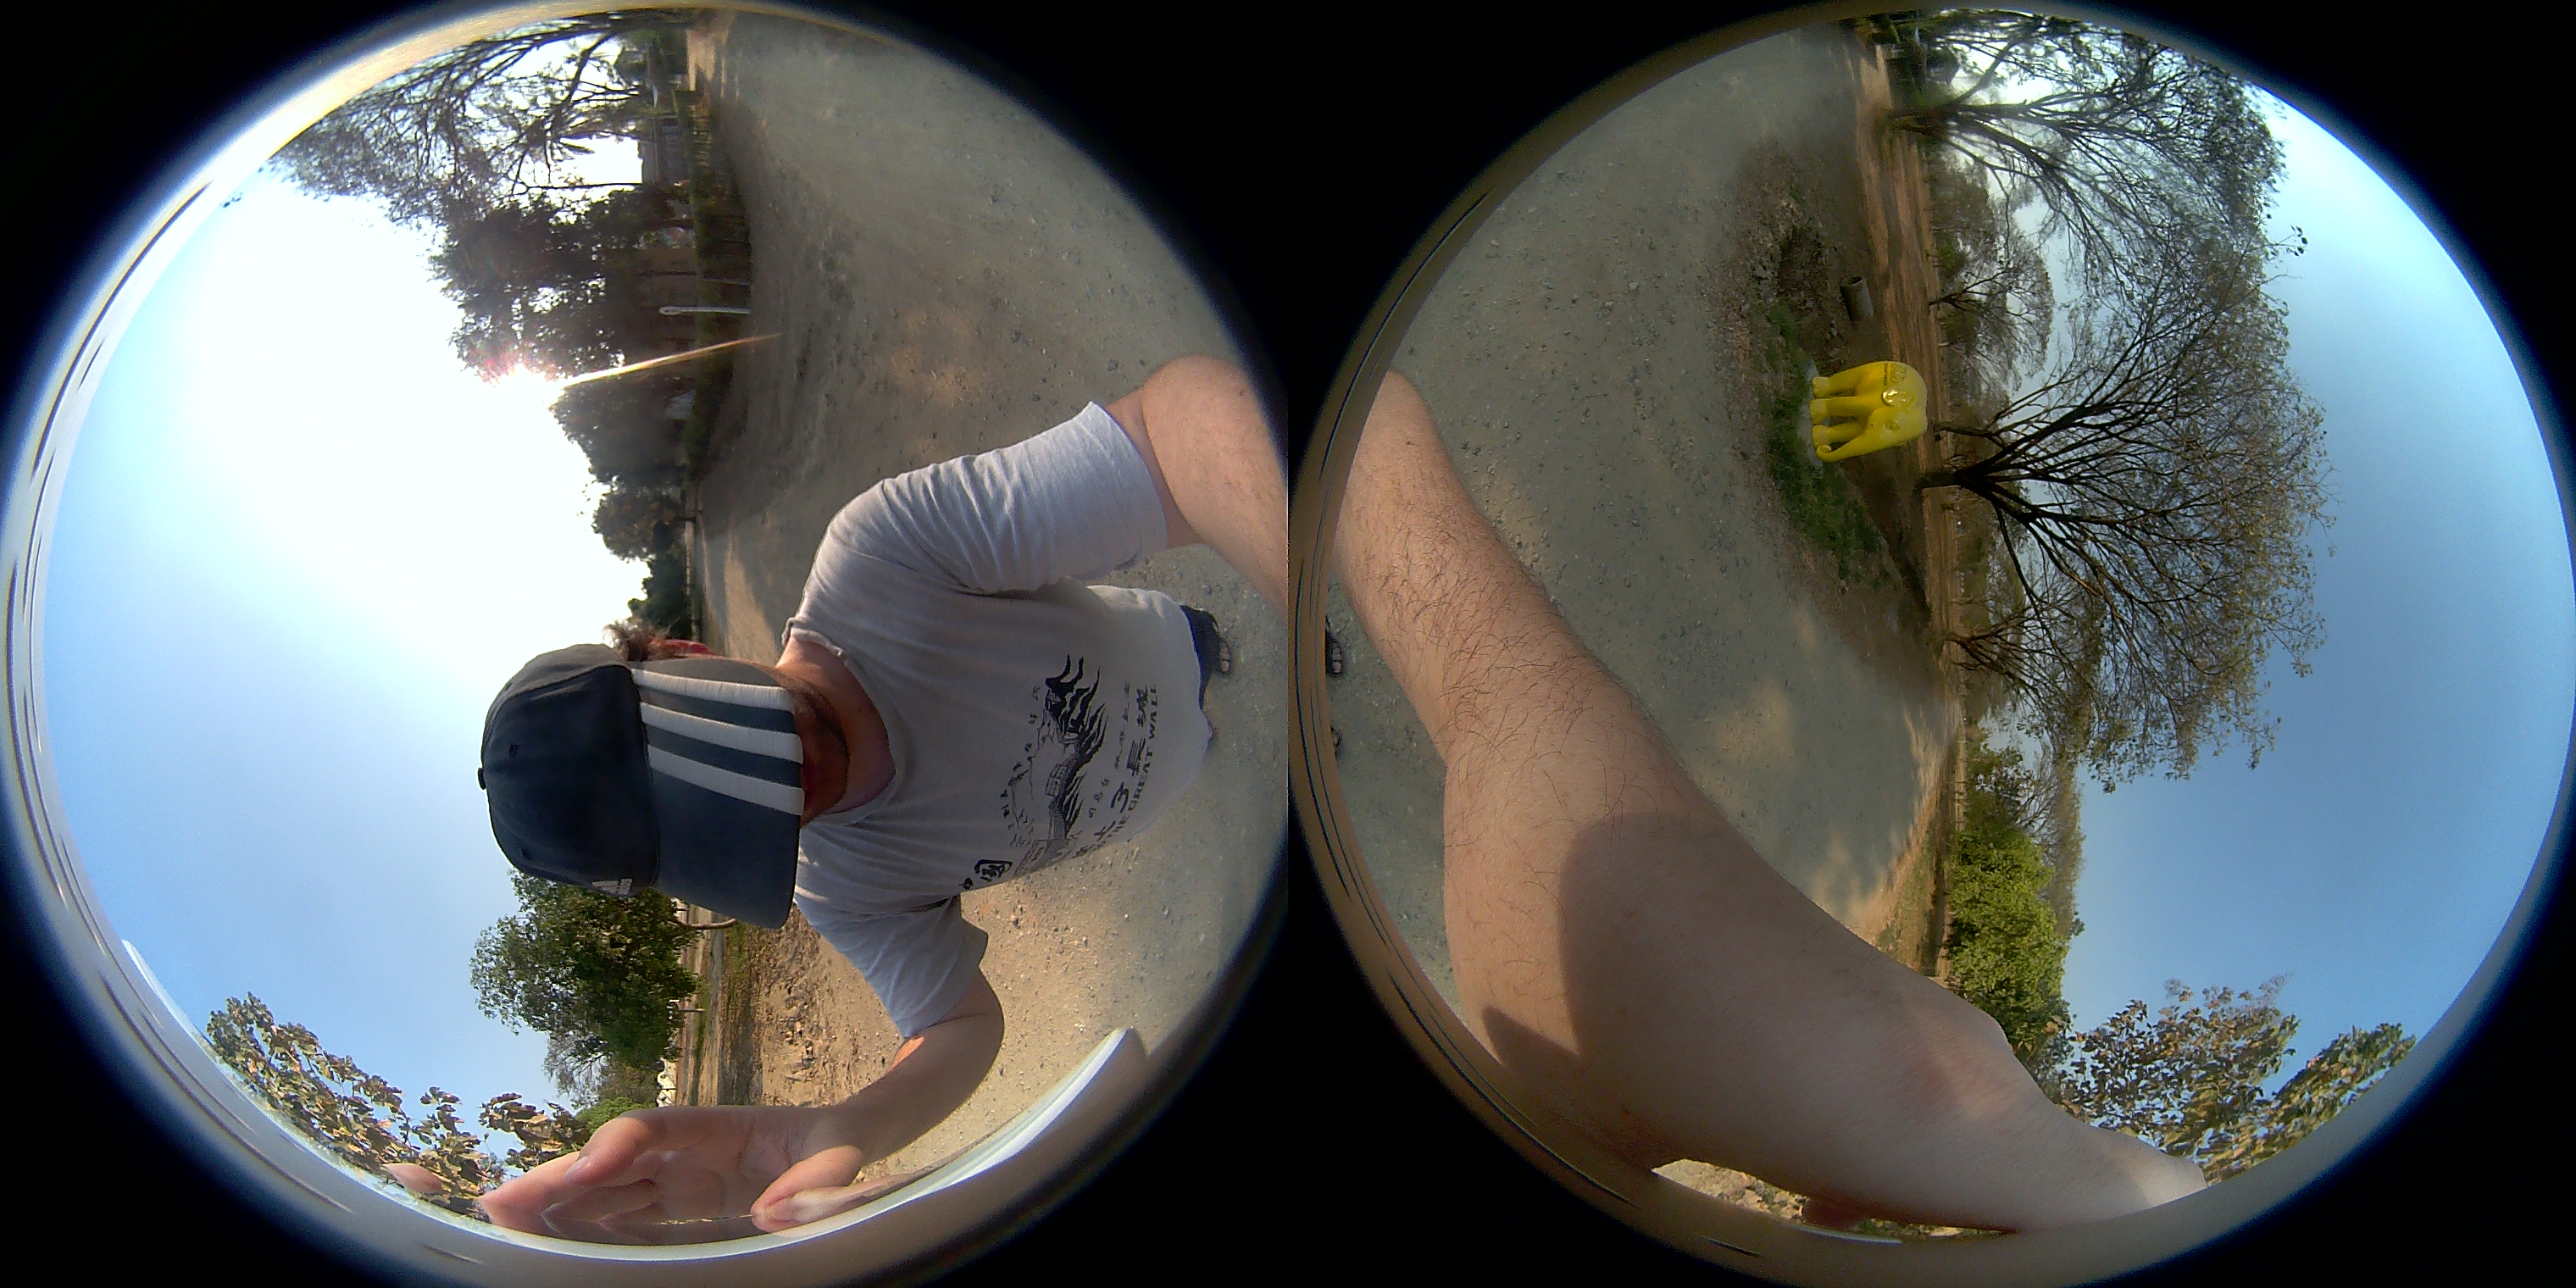
Once USB tethering is enabled go back and you should see the camera output in sphere mode (left), but you can also switch to planet mode (center), or flat mode (right) using the bottom left icon in the main zone. You can pinch to zoom in/out, ad swipe to move up/down and/or left/right in all three views.
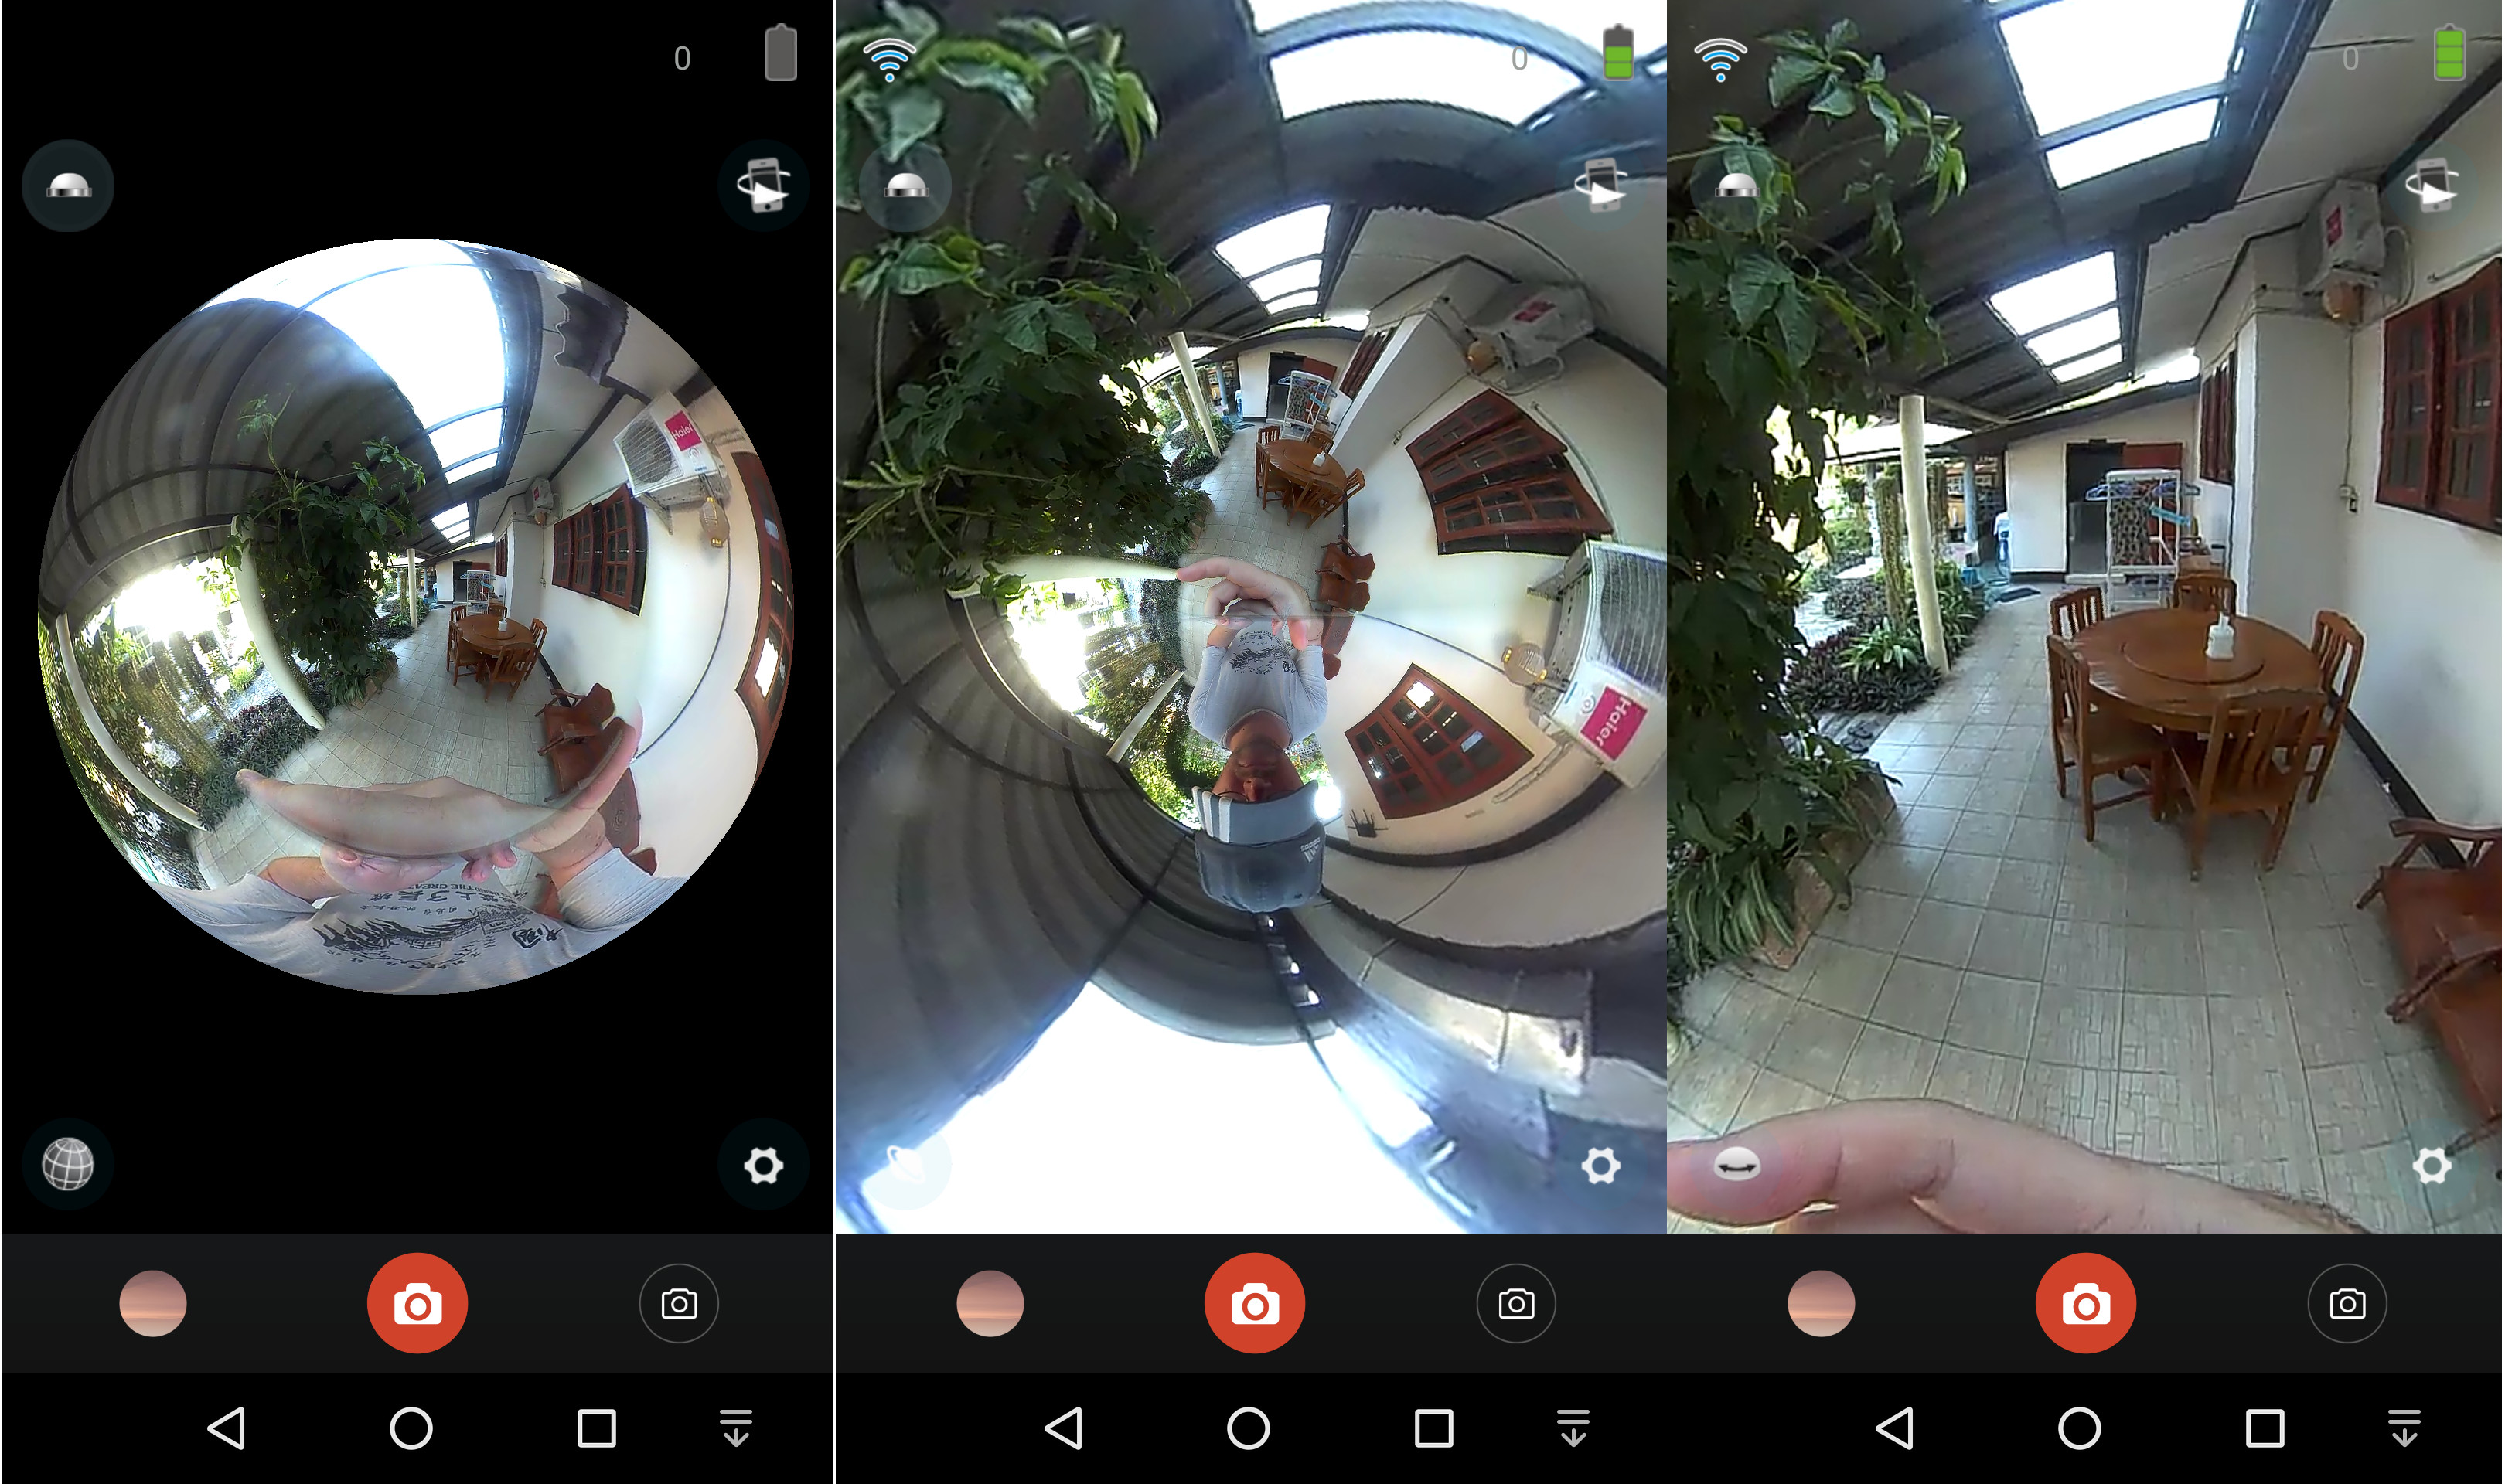
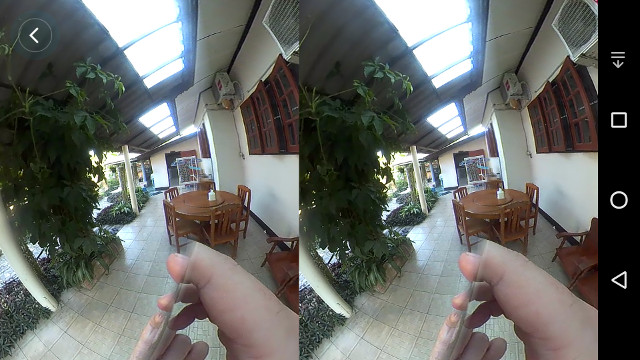
The battery level is shown on the top right together with the remaining number of photos or video time based on the free space on the micro SD card. I had not installed a micro SD card at that time thinking I could record to the phone’s storage, and that’s why it shows “0”. Another option is “virtual reality mode”, but it can only be used during live preview or playback, as this mode is designed to be used with virtual reality headsets while watching the video.
The bottom bar of the app has three icons for file manager, shot photo/record video, and switch between photo/video mode. At first I recorded videos in sphere, planet , and flat modes, but I soon felt stupid, as I discovered it does not change the output format of the photo or the video, only the way it is shown.
You may also want to change the settings by pressing the bottom right button.
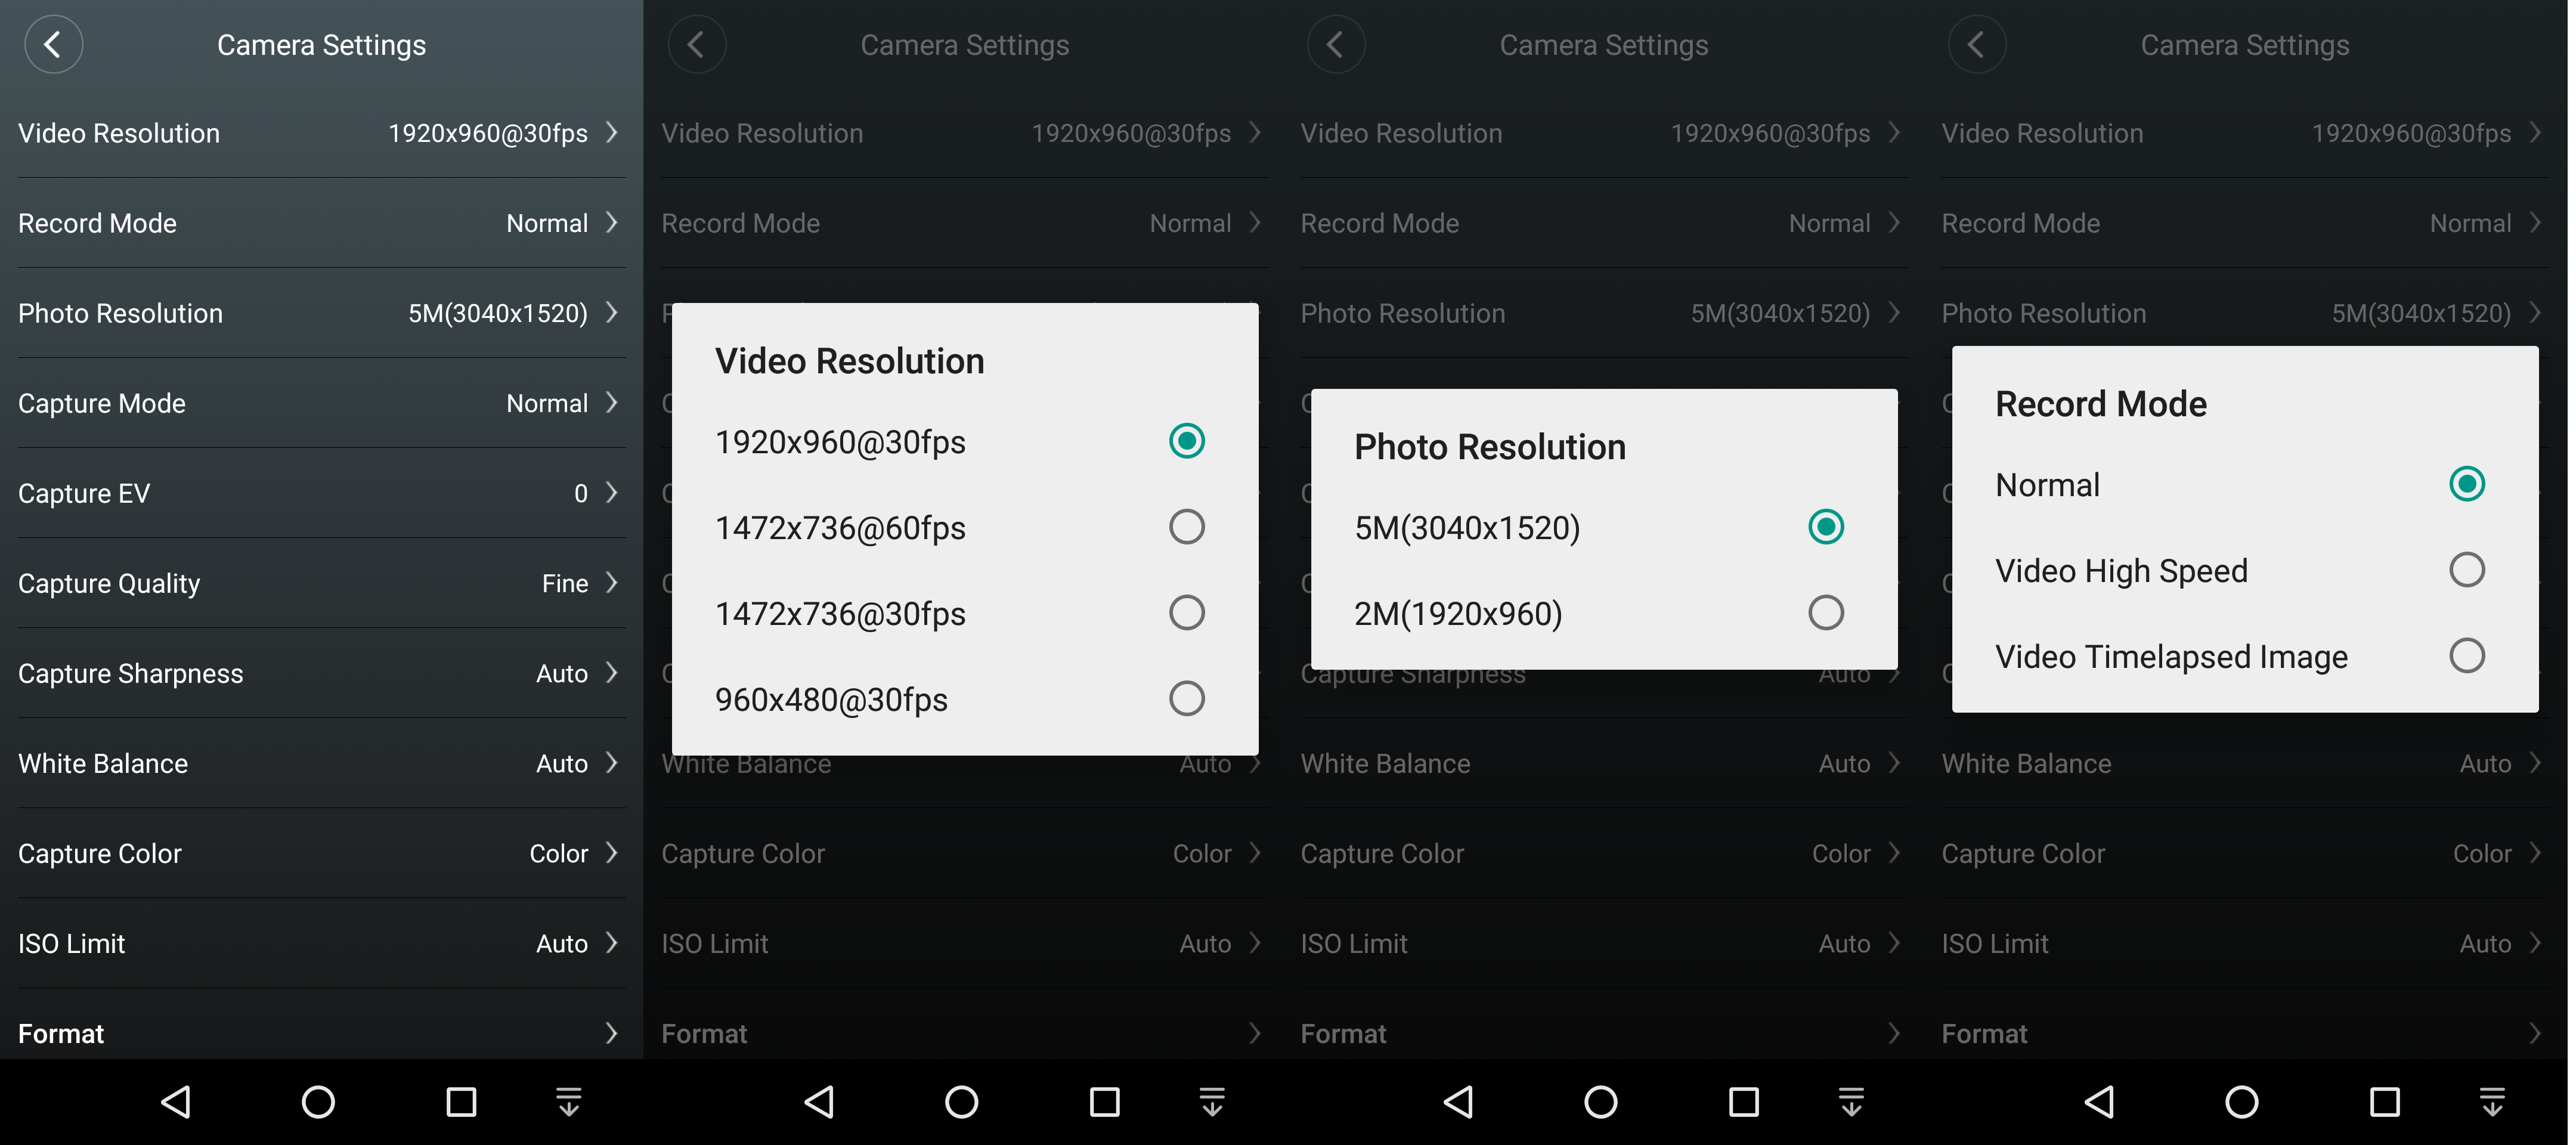
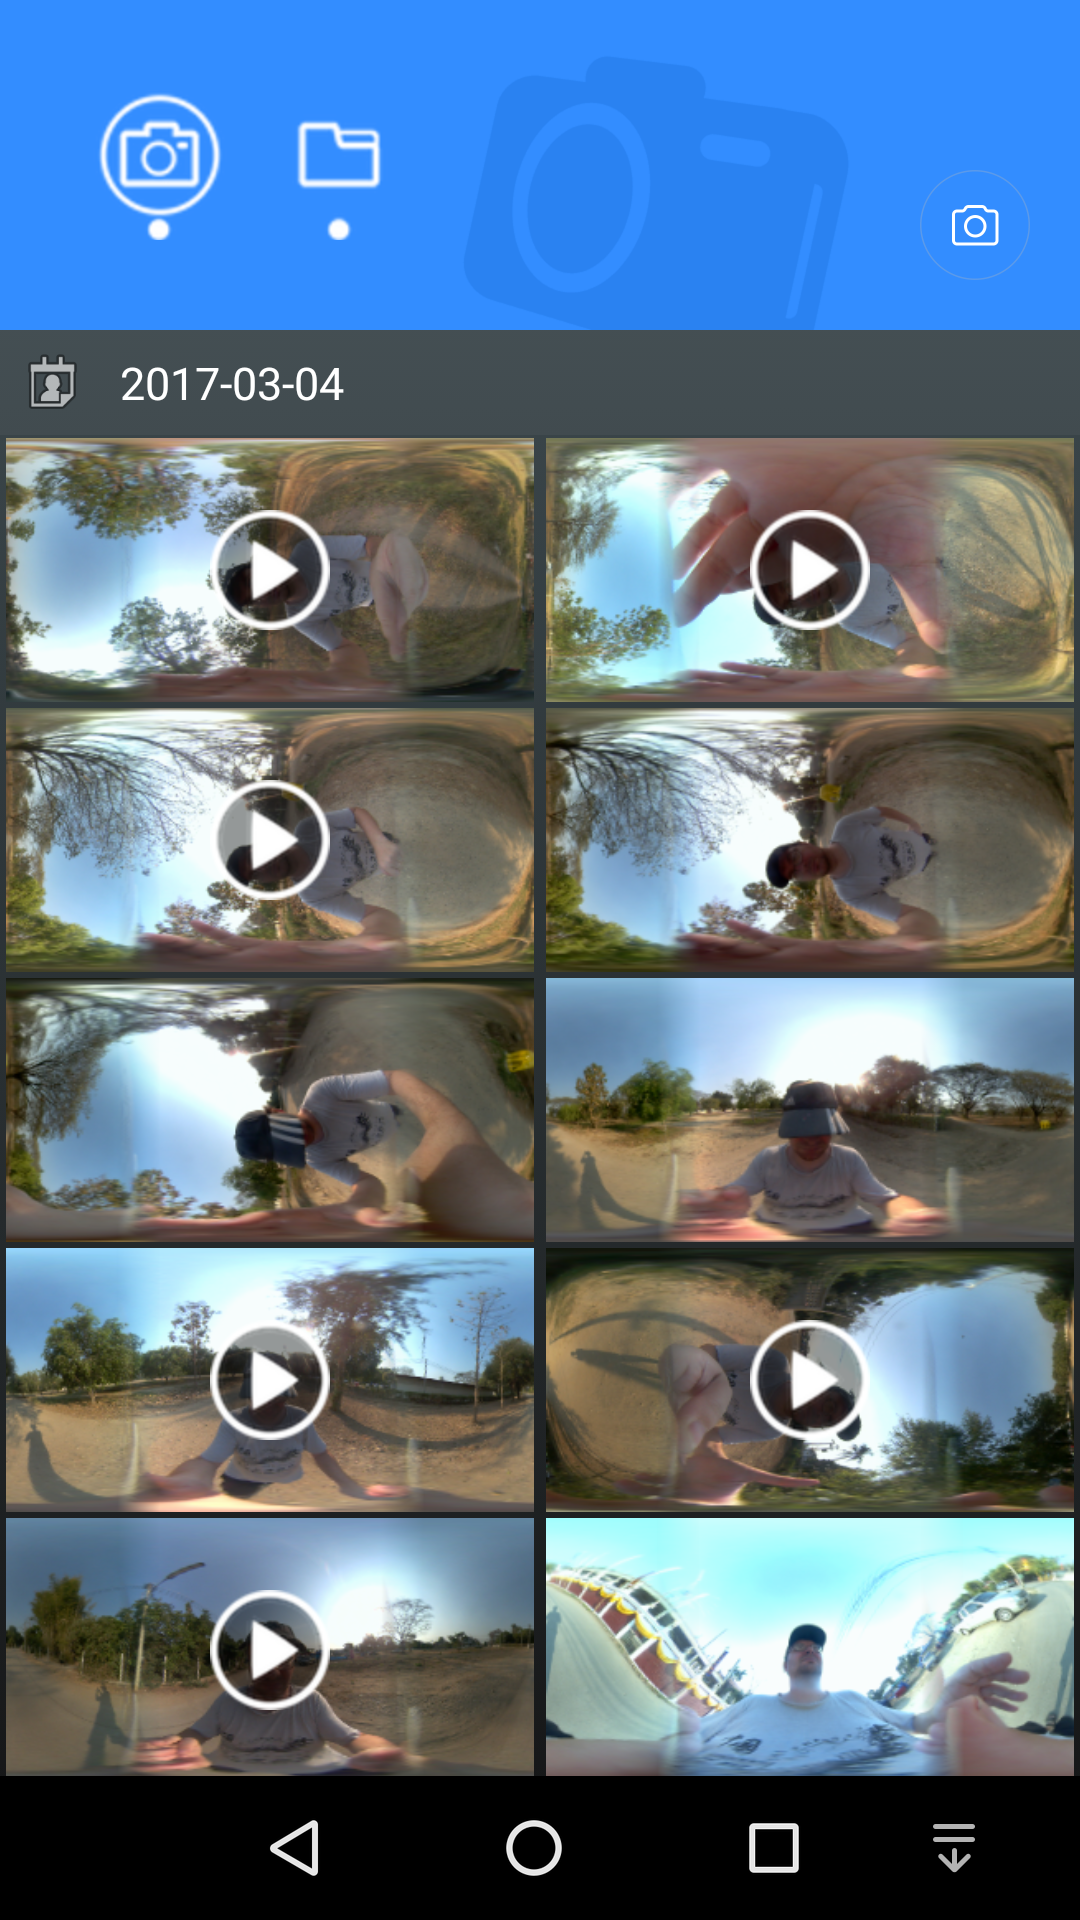
I did not change anything, and tested with the default options: 1920×960@30fps, 5MP, and normal recording. Once you’ve recorded a few video, you can access the file manager to watch your videos or check out your photo using the four modes: sphere, planet, flat or VR. There’s also a “download” icon to transfer the videos / photos to the internal storage of your phone.
I’ll include some raw samples if you want to check it out by yourself. You just need to install Gole 360 app to watch them on your Android phone, TV box, or VR headset.
- Photo sample 1 (landscape) – 2017_0304_175052_0000.jpg
- Photo sample 2 (portrait) – 2017_0304_175116_0000.jpg
- Video sample 1 – 2017_0304_174059_0017_F.mp4
- Video sample 2 with background audio – 2017_0304_174758_0022_F.mp4
You could also watch the short demo below to more clearly understand how some of the features.
Attempts at Playing GOLE 360 videos on Laptop / Desktop Computer
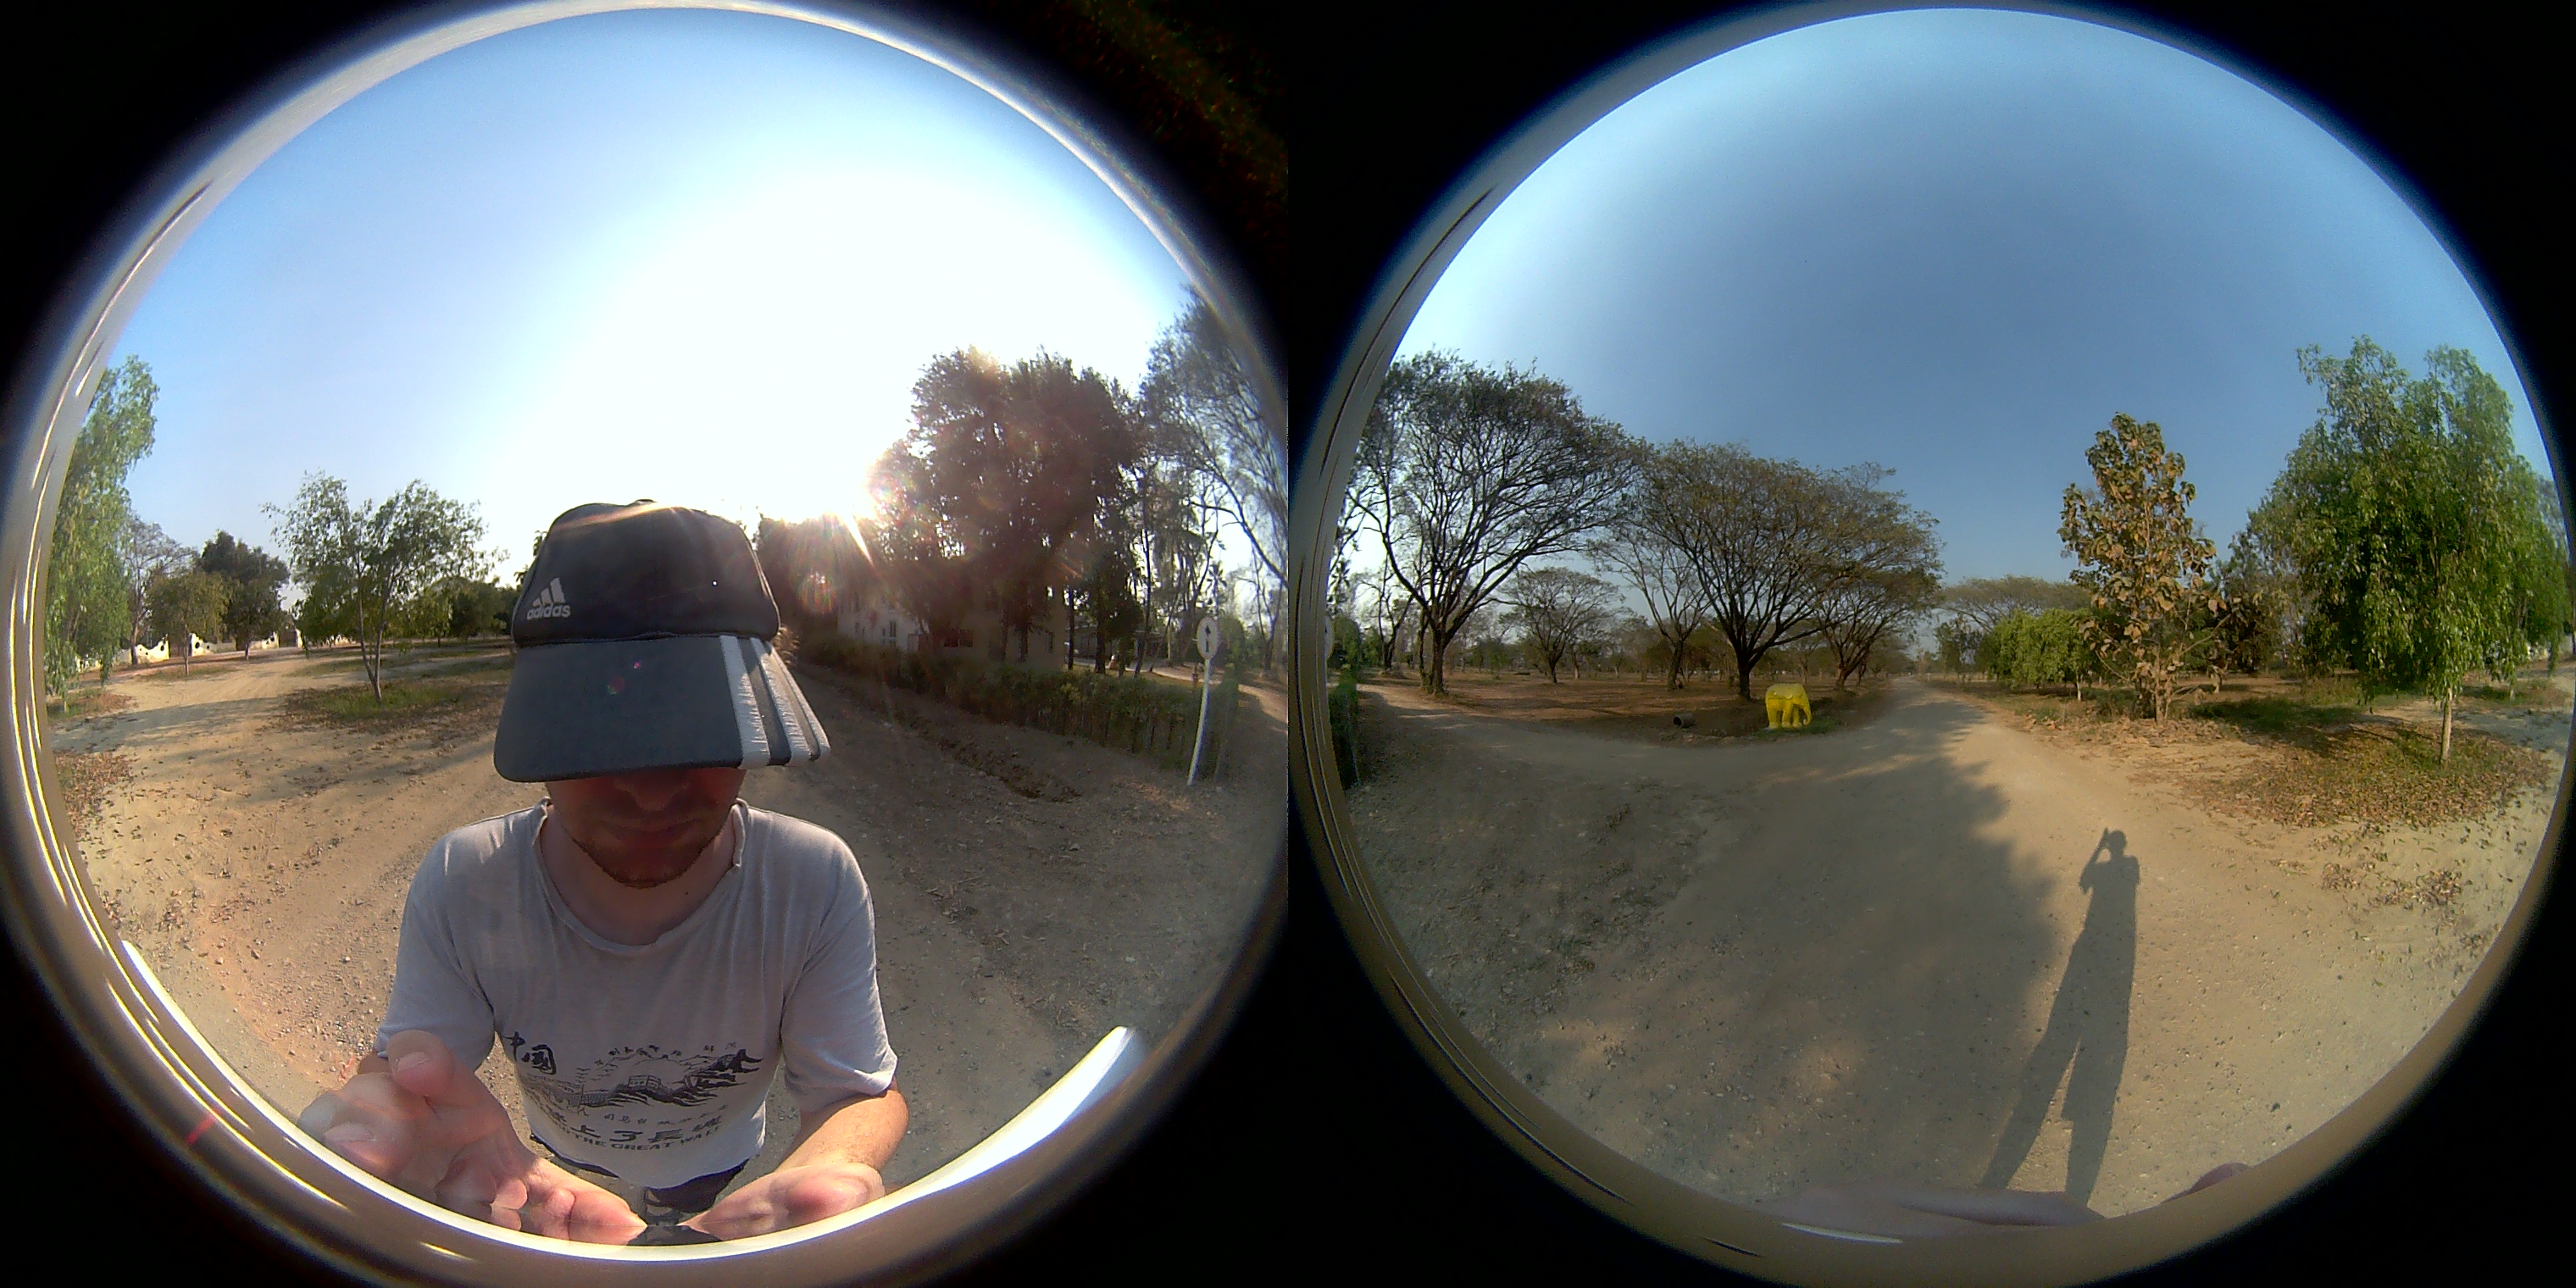
The easiest way to watch the 360° videos or photos recorded by the camera on a big screen is by using GOLE 360 app on a TV box, your phone with a VR headset, or a standalone Android VR headset. But I wanted to try to play the videos on my (Ubuntu 16.04) computer. So I took out the micro SD card, and browse to DCIM/100CVR directory with two more subdirectory for “Video” and “Photo”. I clicked on one of of the MP4 videos in the Video folder, and it started Totem video player with the video looking like the screenshot below.
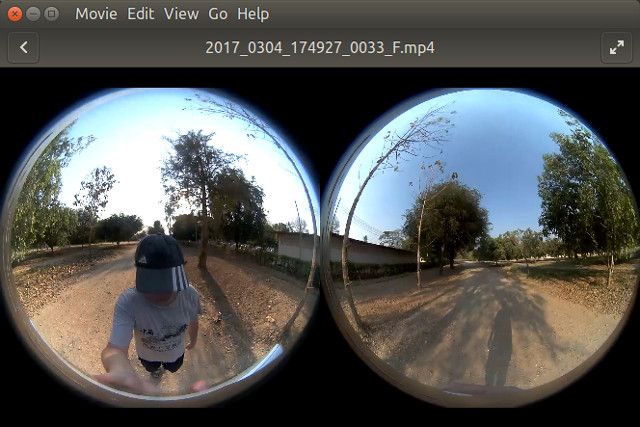
So obviously , we need a special 360° video player to play those files, and I found GoPro VR Player, that very easy to install on Linux as a Deb package is provided. If you prefer an open source program, VLC 360 (beta) can be used but the developers only release binaries for Windows or Mac in binary format. Source code is available for Linux, which means you’d have to built it from source, until your distribution packages it, or somebody offers a ppa or equivalent. Anyway for a quick test, I played the video in GoPro VR player, and it “worked” , well sort of, as the stichting job is awful.

So far my main experiebce with 360° videos is through YouTube, so I directly uploaded a video, and it looked like the first Totem screenshot. After further research I found the videos need to be processed before upload. YouTube also explains:
The following 360 cameras are compatible with YouTube and are available today or coming soon: Ricoh Theta, Kodak SP360, IC Real Tech Allie
…
YouTube currently supports 360° videos with 24, 25, 30, 48, 50, or 60 frames per second. We recommend uploading 360 videos (equirectangular format with a 2:1 aspect ratio) at a resolution of 7168×3584 or higher, up to 8192×4096.
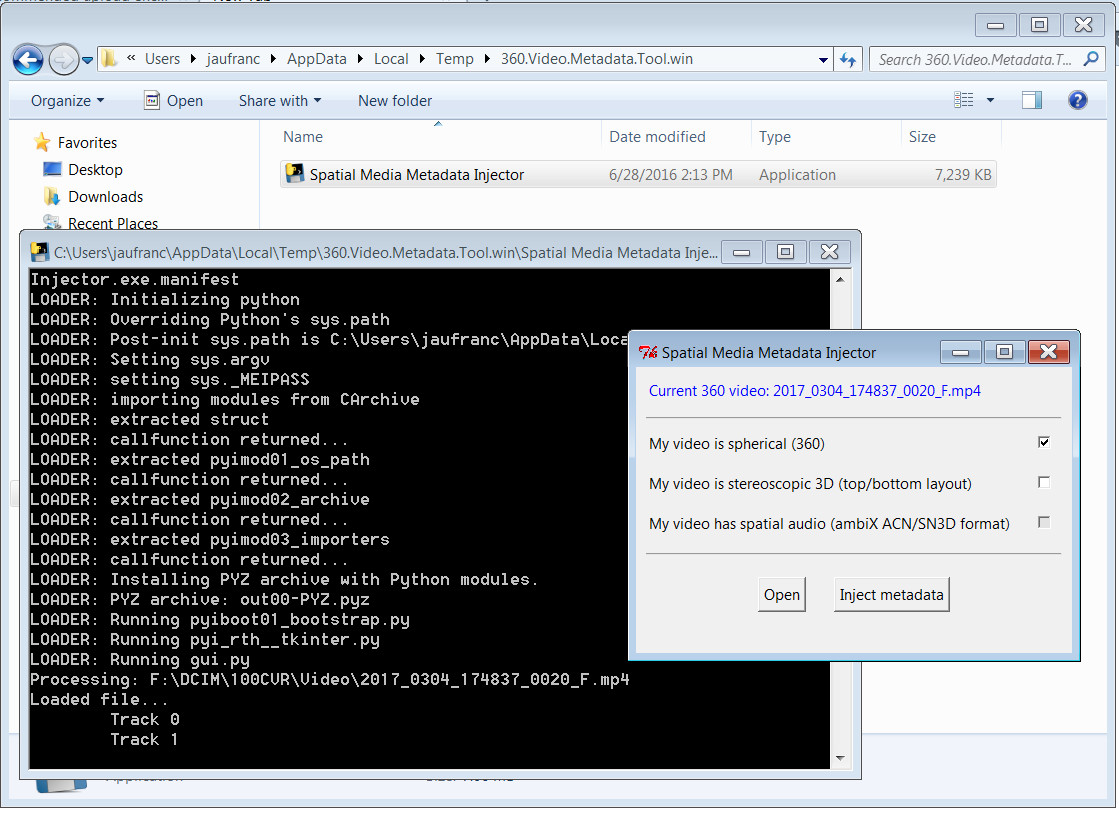
With our 1920×960 camera we are quite far from the recommend upload settings, but I tried anyway, and downloaded and installed Spatial Meta Data Injector for Windows. Selected one of the MP4 videos on the micro SD card, made sure “My video is spherical (360), and clicked on Inject Metadata, which will save the video with the suffix _injected.
I uploaded the videos on YouTube, and it “worked” but with the ugly stitching job.
So I have not found a proper way to play videos in my computer, or upload them to YouTube. There’s probably no standard for 360° videos so everybody is doing their own method, but it would probably be a good idea to make it compatible with YouTube…
If you don’t mind playing the videos with GOLE 360 Android app, and you can purchase GOLE 360 for $104.81 shipped and up on GearBest or Banggood.

Jean-Luc started CNX Software in 2010 as a part-time endeavor, before quitting his job as a software engineering manager, and starting to write daily news, and reviews full time later in 2011.
Support CNX Software! Donate via cryptocurrencies, become a Patron on Patreon, or purchase goods on Amazon or Aliexpress


It’s a bit costly in my opinion compared to its features.
I hope you are going to get an Insta360 Air for review soon. I especially interested how Linux supports it. (Support said they do not support, however it must be an UVC device…)
@mm
I don’t have direct contact with the company, so I’m not sure I can get a sample. Linux software may be a problem even if it is an UVC device, because of stitching, so you need software that support the video output from that particular camera.