Karl here. I have had the Tronxy X3S 3D printer for a while now. It prints well but as I mentioned in previous articles I had to level for every print. Actually near the end I would just overpower the stepper motors while the skirt was printing and level. Leveling front to back was not affected. Only the z height. So this worked but it was frustrating. Before that I tried several different things to mitigate. I thought maybe the endstop for Z homing was inconsistent and replaced it. I tried heating the bed for extended period of time thinking that maybe some thermal expansion. Didn’t help. I finally did a major change to the X carriage with success. I even moved the printer to our local library and the bed stayed leveled for a demo. I call this a success, and will show how I did it. Inspiration for this modification came from the CR-10. This is the biggest mod I have done for any review so far.
3D Printed Parts for Upgrade
My objective was to reuse as much as possible of the original kit. I designed the bracket in Fusion 360 and remixed the Z motor brackets in Windows 3D Builder. To do this upgrade you will need to print 2 Z motor mounts an 1 X/extruder mount. They are published on Thingiverse.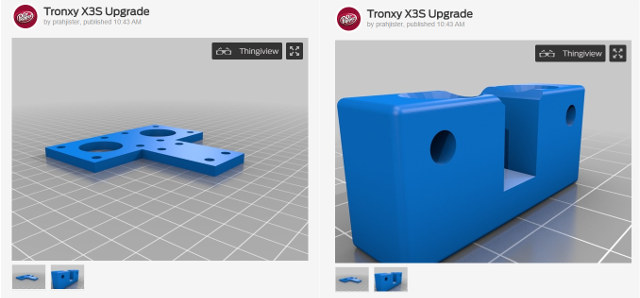
Bed
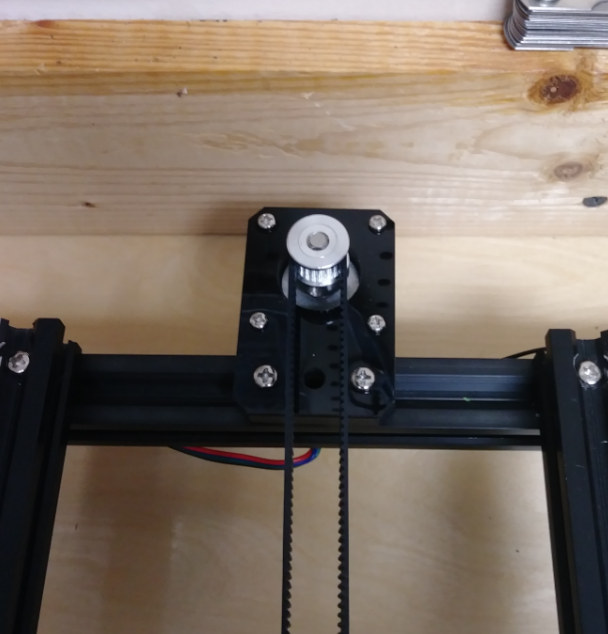
The easiest place to begin with is the bed. This mod alters the extruder position so the Y stepper motor needs to be relocated outside the frame so no build area is lost. I had some extra belt I think came with this kit that I used. The belt lengthens from the original position.
X Carriage
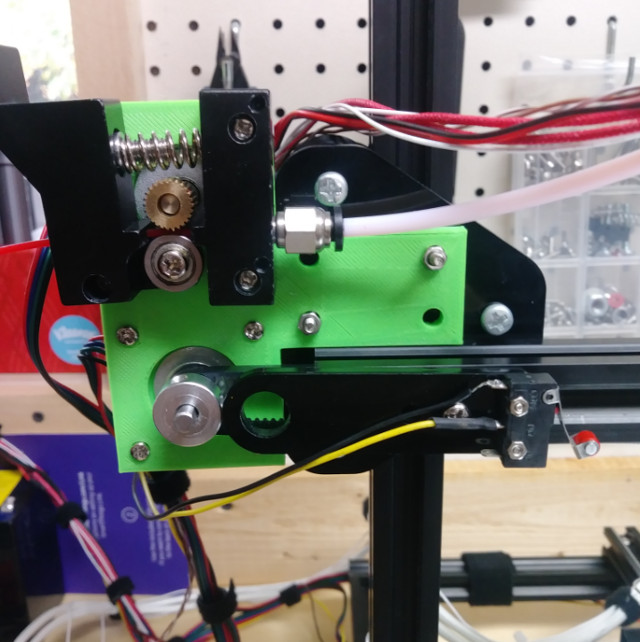
First remove the Z motors and metal brackets. We will not be reusing the metal brackets. Remove the Z rods. Take off the top 2020 extruded aluminum from the top of the printer and slide the whole X carriage off, and disassemble the left and right wheels, stepper motors, belt etc. The triangle wheel assembly does not need to be broken down. Both extruder and X stepper will be located on the left now. I slid only the triangle wheel assemblies on with the new orientation. I made a little mark on the left and right acrylic wheel assembly to get my positioning right for 2020 aluminum. Center the 2020. I ended up with about 9mm on each side. You will need to drill a hole in the acrylic so a second nut can be used on both sides.
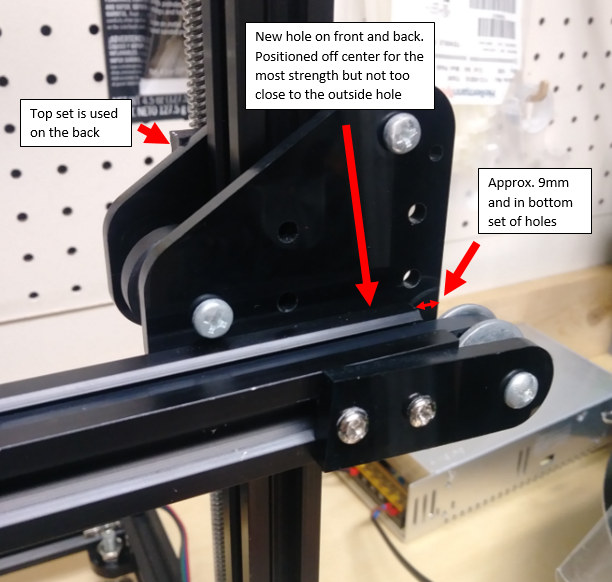 Drill hole through acrylic approx. where indicated by arrow on the bottom set of holes. Enlarge the bottom holes on the back piece so you can use a screwdriver and tighten. Take your time and drill slow. Do this on both sides.
Here is the left side. I mounted the steppers after installing.
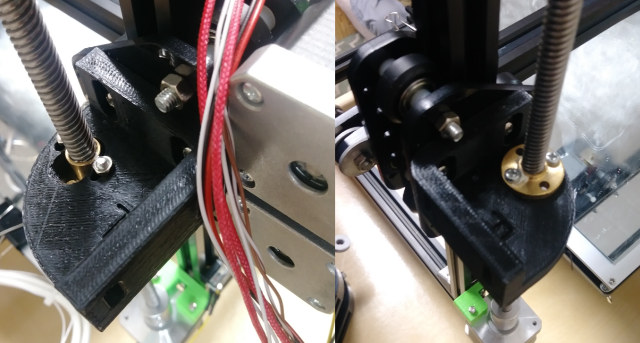
Mount the Z rod brackets upside down on the back in the top holes of the wheel assembly so that the Z rod lines up with the center of the 2020 below.
I tested the orientation of the Z rod nut upside down by changing one side. I really don’t think it matters.
Now mount the Z motors. I didn’t have the proper length nut so they look loose. No adverse effects. If it bothers you can install a washer or nut. The brackets are keeping it from bouncing.
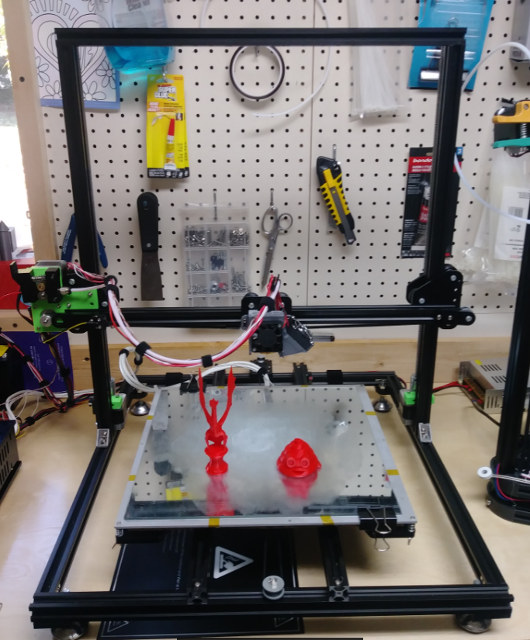
I have only done a couple test prints, but they turned out fantastic. I can’t say definitively, but I do think I see an improvement. I am running low on filament right now and will test more for final review. The goal was to fix the level issue but any improvement is good.
Final thoughts
The leveling was driving me crazy on this printer, so I had to find a solution. I started with a goal of changing the orientation of the wheels and just started taking the printer apart. With more than one printer this makes it an easier task. By chance I was able to reuse the existing Z rod brackets and saved quite a bit of time. It did take 2 iterations of the X/extruder bracket, but ultimately didn’t take very long. I had one setback. On the first iteration I had the stepper motors touching, and the steppers got very warm so I put a 5mm gap between them and seemed to resolve the issue.
If you noticed my X axis limit switch is off set it is because I am running stock marlin, and did not build in the offsets so I just moved the limit switch to accommodate. I will follow up with a how to upgrade the firmware, and get rid of some of the annoyances with stock firmware.
After this upgrade I can say it is very much on par with the CR-10 now with some savings. After this upgrade you can get 350 x 330 x 390 mm. I didn’t realize until testing just now that 10mm is lost in the Z. You can get 400mm wide but there is a clearance issue with extruder hitting the triangle brackets. You could probably just clip on a larger mirror with no issues and stick with the existing bed and let it overhang.
I would like to thank Gearbest for sending the printer for review. They sell it for $269.99 including shipping.
Karl is a technology enthusiast that contributes reviews of TV boxes, 3D printers, and other gadgets for makers.
Support CNX Software! Donate via cryptocurrencies, become a Patron on Patreon, or purchase goods on Amazon or Aliexpress


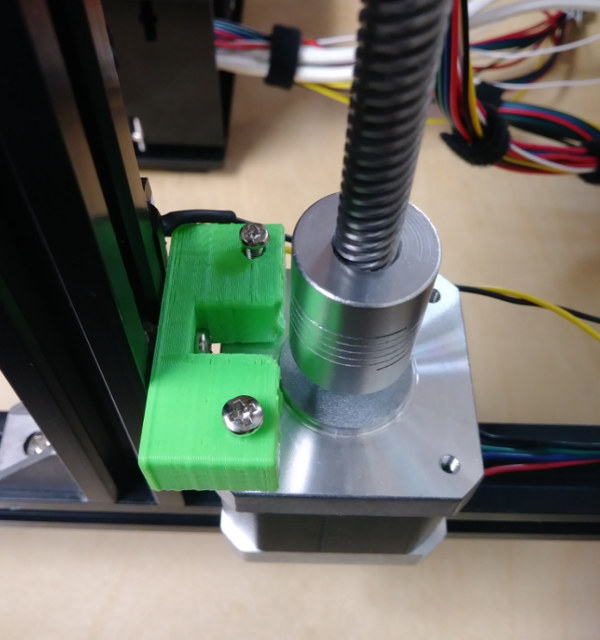


FYI I did end up adding a washer and nuts to z brackets. It became loose over time. I might adjust and update thingiverse stl.
Excellent review Karl. Do you have the upgrade tutorial? I want to change the firmware with the stock board and upgrade to marlin 1.1.6 but I can’t
@Peter Johnson
Yes i will be doing one for the firmware
Get a TH3D EZABL auto bed leveling kit… time wasting gone