
Regular readers will know that Firefly team sent me several of their Rockchip boards for evaluation, and I started with a review of ROC-RK3328-CC development board powered by Rockchip RK3328 processor. This time, I went with the high-end AIO-3399J board comprised of a features-packed baseboard and a Rockchip RK3399 system-on-module.
Just like with the previous review, I’ve decided to focus on Linux support, in this case Xunbuntu 16.04, and I’ll do an Android review on the company releases Android 8.1 for Firefly-RK3399 board.
First Boot with AIO-3399J Board
Before booting the board, I inserted the heatsink, and connected the provided WiFi antennas. I also connected some devices and cables, including a mouse, the male to male USB cable to the top USB 3.0 (OTG) port for firmware update, a HDMI cable to my TV, and Ethernet cable, as well as the serial debug board.
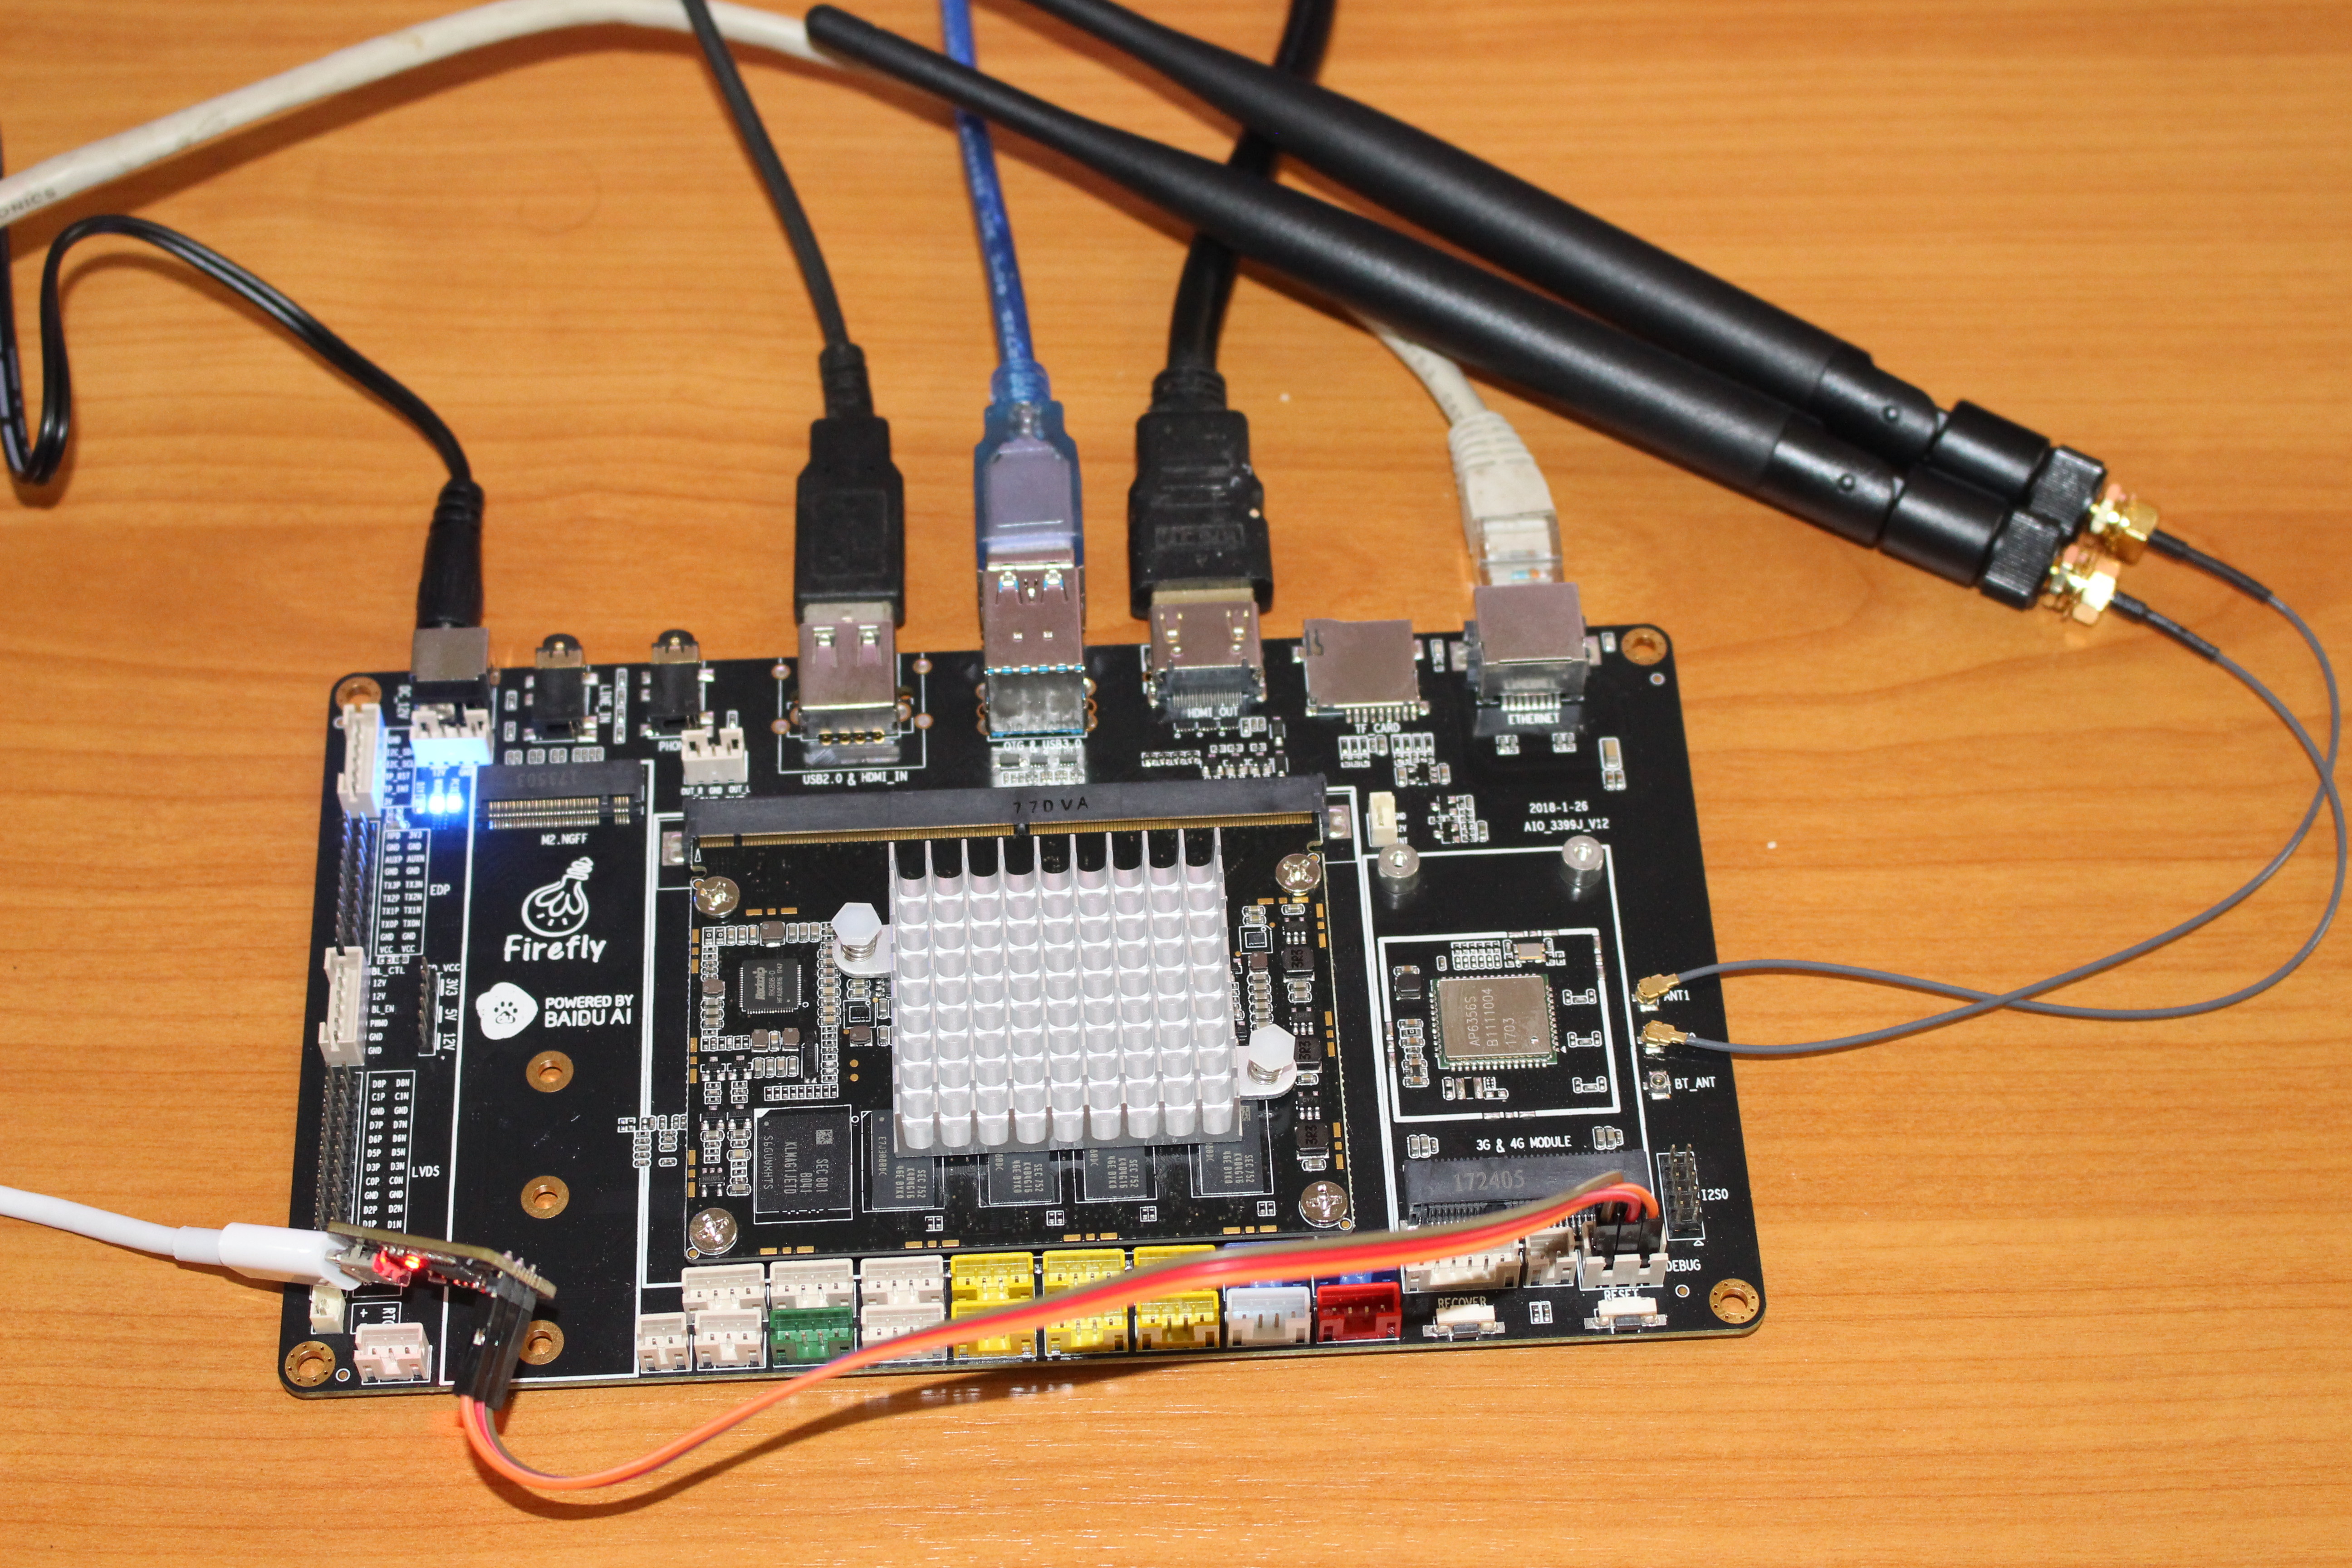
The final step was to connect the 12V power supply, and I immediately got output to the serial console (/dev/ttyUSB0 configured with 1,500,000 bps 8N1, no hardware flow control), and a few seconds later the Android 7.1 launcher showed up.

But I wanted to run a Linux distributions, so I went over the download page, and selected the latest Ubuntu 16.04 image (AIO-3399J_xubuntu1604_20180119.7z), which actually happens to be Xubuntu 16.04 (Ubuntu + Xfce desktop environment). Just make sure you select “Google Drive” instead of “Official” if you are outside of China, as the download speed should be much higher that way.
Now that we have out firmware file, we just need to follow the upgrade instructions for Linux or Windows with respectively Linux_Upgrade_Tool or AndroidTool.
My computer is running Ubuntu 18.04, so I went with the Linux method. First you need to make you’ve connected your male to male USB cable between your computer and the board with power connected.
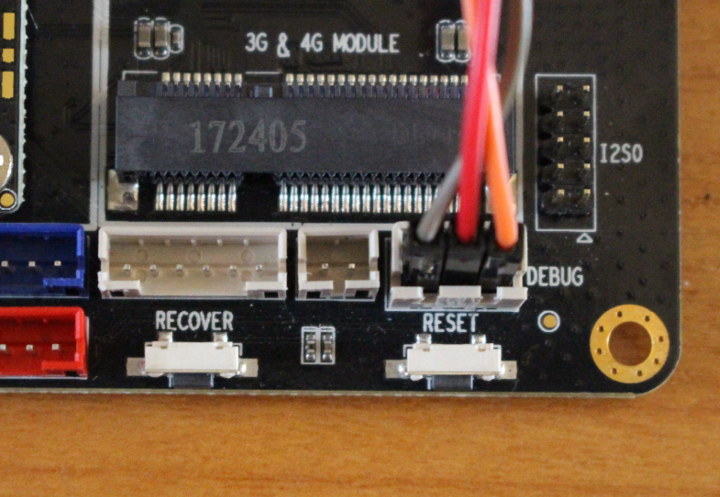 We need to enter “loader mode” as follows: keep pressing the recovery button, press and release the reset button, and about two seconds later, release the recovery button.
If everything is working as expected, the serial console output should look like:
|
1 2 3 4 5 6 7 8 9 10 11 12 13 14 15 16 17 18 19 20 21 22 23 24 25 26 27 28 29 30 31 32 33 34 35 36 37 38 39 40 41 42 43 44 45 46 47 48 49 50 51 52 53 54 55 56 57 58 59 60 61 62 63 64 65 66 67 68 69 70 71 72 73 74 75 76 77 78 79 80 81 82 83 84 85 86 87 88 89 90 91 92 93 94 95 96 97 98 99 100 |
DDR Version 1.08 20170320 In Channel 0: DDR3, 800MHz Bus Width=32 Col=10 Bank=8 Row=15 CS=1 Die Bus-Width=16 Size=1024MB Channel 1: DDR3, 800MHz Bus Width=32 Col=10 Bank=8 Row=15 CS=1 Die Bus-Width=16 Size=1024MB 256B stride ch 0 ddrconfig = 0x101, ddrsize = 0x20 ch 1 ddrconfig = 0x101, ddrsize = 0x20 pmugrf_os_reg[2] = 0x32817281, stride = 0x9 OUT Boot1: 2017-06-09, version: 1.09 CPUId = 0x0 ChipType = 0x10, 1836 SdmmcInit=2 0 BootCapSize=100000 UserCapSize=14910MB FwPartOffset=2000 , 100000 SdmmcInit=0 20 StorageInit ok = 66829 LoadTrustBL No find bl30.bin Load uboot, ReadLba = 2000 Load OK, addr=0x200000, size=0x77d6c RunBL31 0x10000 NOTICE: BL31: v1.3(debug):9f93abc NOTICE: BL31: Built : 10:18:20, Jul 27 2017 NOTICE: BL31: Rockchip release version: v1.1 INFO: GICv3 with legacy support detected. ARM GICV3 driver initialized in EL3 INFO: plat_rockchip_pmu_init(1089): pd status 3e INFO: BL31: Initializing runtime services INFO: BL31: Initializing BL32 INF [0x0] TEE-CORE:init_primary_helper:337: Initializing (1.1.0-96-g3fbe315-dev) INF [0x0] TEE-CORE:init_primary_helper:338: Release version: 1.1 INF [0x0] TEE-CORE:init_teecore:83: teecore inits done INFO: BL31: Preparing for EL3 exit to normal world INFO: Entry point address = 0x200000 INFO: SPSR = 0x3c9 U-Boot 2014.10-RK3399-06 (Mar 13 2018 - 09:22:52) CPU: rk3399 cpu version = 0 CPU's clock information: aplll = 816000000HZ apllb = 24000000HZ gpll = 800000000HZ aclk_periph_h = 133333333HZ, hclk_periph_h = 66666666HZ, pclk_peZ aclk_periph_l0 = 100000000HZ, hclk_periph_l0 = 100000000HZ, pclkZ hclk_periph_l1 = 100000000HZ, pclk_periph_l1 = 50000000HZ cpll = 800000000HZ dpll = 800000000HZ vpll = 24000000HZ npll = 24000000HZ ppll = 676000000HZ Board: Rockchip platform Board Uboot as second level loader DRAM: Found dram banks: 1 Adding bank:0000000000200000(000000007fe00000) Reserve memory for trust os. dram reserve bank: base = 0x08400000, size = 0x01000000 128 MiB SdmmcInit = 0 20 storage init OK! Using default environment GetParam remotectl v0.1 pwm freq=0xb8320 pwm_freq_nstime=0x52d Load FDT from resource image. power key: bank-0 pin-5 can't find dts node for fixed usb bc: can find node by path: /dwc-control-usb/usb_bc pmic:rk808 can't find dts node for pwm1 set pwm voltage ok,pwm_id =2 vol=1000000,pwm_value=66 CPU's clock information: aplll = 816000000HZ apllb = 24000000HZ gpll = 800000000HZ aclk_periph_h = 133333333HZ, hclk_periph_h = 66666666HZ, pclk_peZ aclk_periph_l0 = 100000000HZ, hclk_periph_l0 = 100000000HZ, pclkZ hclk_periph_l1 = 100000000HZ, pclk_periph_l1 = 50000000HZ cpll = 800000000HZ dpll = 800000000HZ vpll = 24000000HZ npll = 24000000HZ ppll = 676000000HZ SecureBootEn = 0, SecureBootLock = 0 #Boot ver: 2018-03-13#1.09 empty serial no. normal boot. checkKey vbus = 1 rockusb key pressed. |
If you have not setup the serial console, that should not be a problem, and after uncompressing the firmware, we can flash it as follows:
|
1 |
sudo upgrade_tool uf AIO-3399J_xubuntu1604_20170119.img |
This normally take about a minute or so, and that’s the output from the command upon success:
|
1 2 3 4 |
Loading firmware... Support Type:RK330C FW Ver:6.0.01 FW Time:2018-01-19 11:39:11 Loader ver:1.05 Loader Time:2017-04-25 15:10:44 Upgrade firmware ok. |
The board will be automatically reboot, and Xubuntu desktop should show on your HDMI TV/monitor after a few seconds.
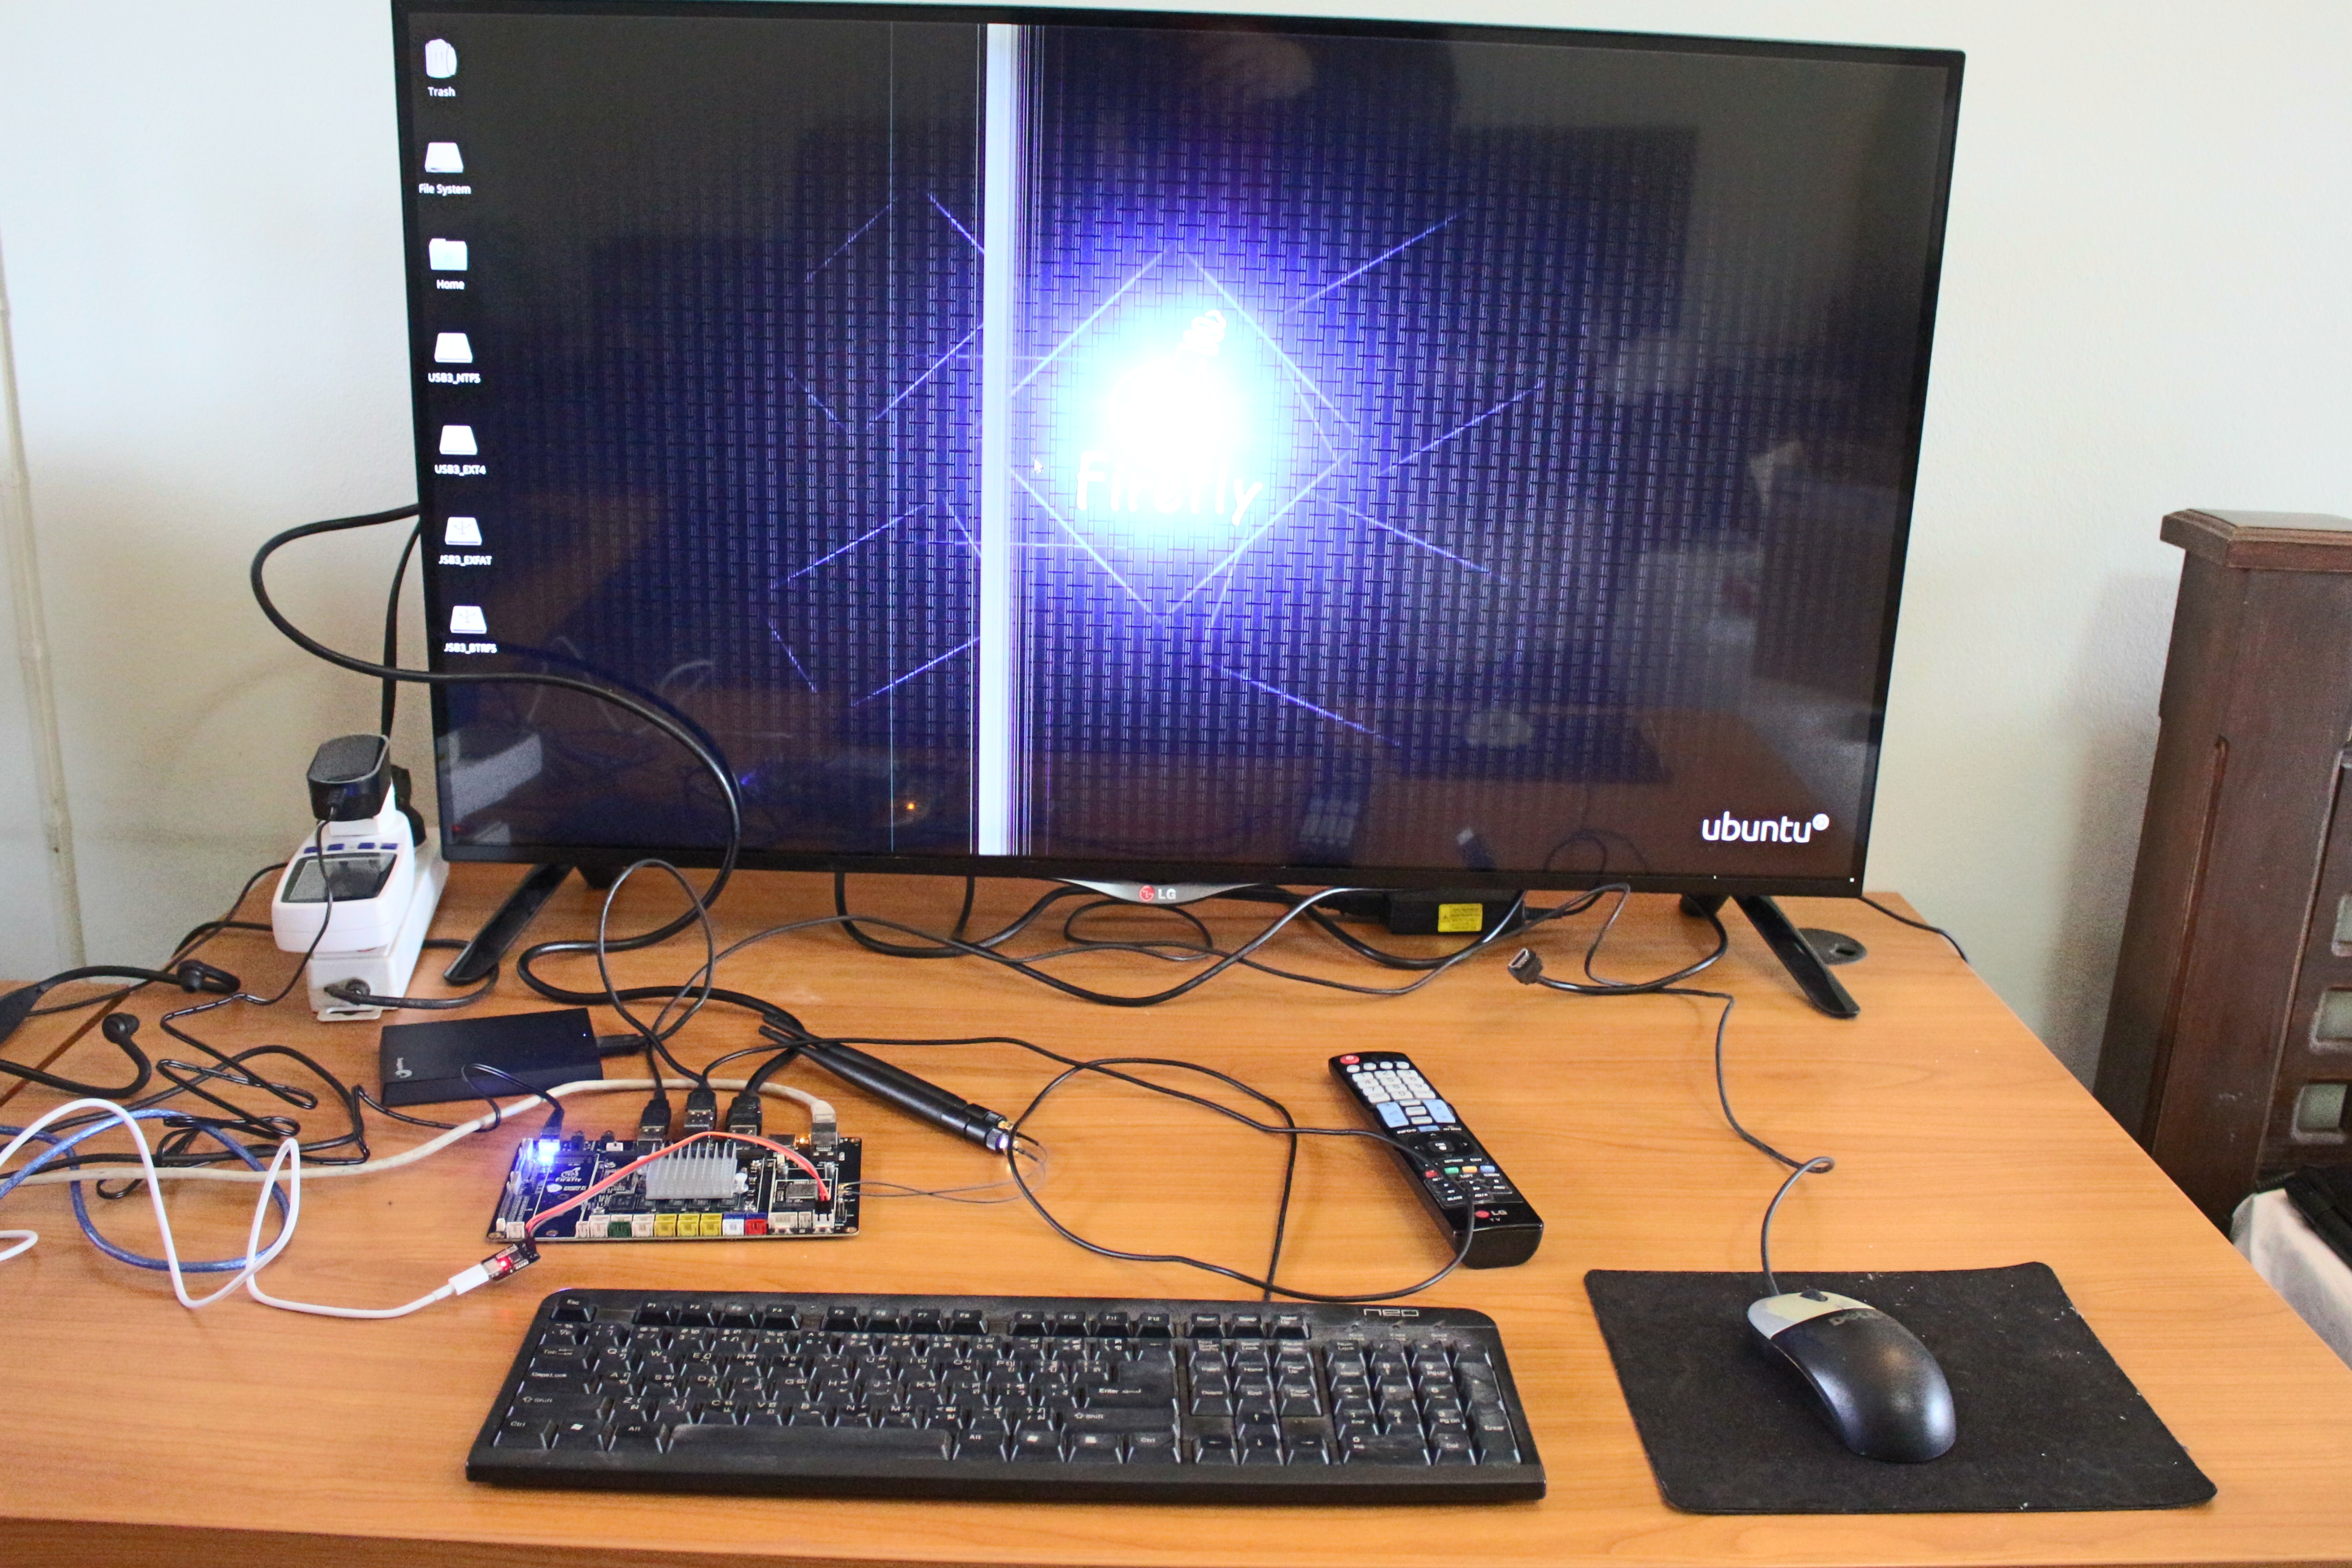
I then remove the male to male USB cable, and instead added a USB keyboard, and a USB 3.0 drive. You may notice I had some overscan issues (edges cut) in the photo above, but setting aspect ratio to “Just Scan” in my LG television fixed the issue.
Here’s the very first boot serial log for reference:
|
1 2 3 4 5 6 7 8 9 10 11 12 13 14 15 16 17 18 19 20 21 22 23 24 25 26 27 28 29 30 31 32 33 34 35 36 37 38 39 40 41 42 43 44 45 46 47 48 49 50 51 52 53 54 55 56 57 58 59 60 61 62 63 64 65 66 67 68 69 70 71 72 73 74 75 76 77 78 79 80 81 82 83 84 85 86 87 88 89 90 91 92 93 94 95 96 97 98 99 100 101 102 103 104 105 106 107 108 109 110 111 112 113 114 115 116 117 118 119 120 121 122 123 124 125 126 127 128 129 130 131 132 133 134 135 136 137 138 139 140 141 142 143 144 145 146 147 148 149 150 151 152 153 154 155 156 157 158 159 160 161 162 163 164 165 166 167 168 169 170 171 172 173 174 175 176 177 178 179 180 181 182 183 184 185 186 187 188 189 190 191 192 193 194 195 196 197 198 199 200 201 202 203 204 205 206 207 208 209 210 211 212 213 214 215 216 217 218 219 220 221 222 223 224 225 226 227 228 229 230 231 232 233 234 235 236 237 238 239 240 241 242 243 244 245 246 247 248 249 250 251 252 253 254 255 256 257 258 259 260 261 262 263 264 265 266 267 268 269 270 271 272 273 274 275 276 277 278 279 280 281 282 283 284 285 286 287 288 289 290 291 292 293 294 295 296 297 298 299 300 301 302 303 304 305 306 307 308 309 310 311 312 313 314 315 316 317 318 319 320 321 322 323 324 325 326 327 328 329 330 331 332 333 334 335 336 337 338 339 340 341 342 343 344 345 346 347 348 349 350 351 352 353 354 355 356 357 358 359 360 361 362 363 364 365 366 367 368 369 370 371 372 373 374 375 376 377 378 379 380 381 382 383 384 385 386 387 388 389 390 391 392 393 394 395 396 397 398 399 400 401 402 403 404 405 406 407 408 409 410 411 412 413 414 415 416 417 418 419 420 421 422 423 424 425 426 427 428 429 430 431 432 433 434 435 436 437 438 439 440 441 442 443 444 445 446 447 448 449 450 451 452 453 454 455 456 457 458 459 460 461 462 463 464 465 466 467 468 469 470 471 472 473 474 475 476 477 478 479 480 481 482 483 484 485 486 487 488 489 490 491 492 493 494 495 496 497 498 499 500 501 502 503 504 505 506 507 508 509 510 511 512 513 514 515 516 517 518 519 520 521 522 523 524 525 526 527 528 529 530 531 532 533 534 535 536 537 538 539 540 541 542 543 544 545 546 547 548 549 550 551 552 553 554 555 556 557 558 559 560 561 562 563 564 565 566 567 568 569 570 571 572 573 574 575 576 577 578 579 580 581 582 583 584 585 586 587 588 589 590 591 592 593 594 595 596 597 598 599 600 601 602 603 604 605 606 607 608 609 610 611 612 613 614 615 616 617 618 619 620 621 622 623 624 625 626 627 628 629 630 631 632 633 634 635 636 637 638 639 640 641 642 643 644 645 646 647 648 649 650 651 652 653 654 655 656 657 658 659 660 661 662 663 664 665 666 667 668 669 670 671 672 673 674 675 676 677 678 679 680 681 682 683 684 685 686 687 688 689 690 691 692 693 694 695 696 697 698 699 700 701 702 703 704 705 706 707 708 709 710 711 712 713 714 715 716 717 718 719 720 721 722 723 724 725 726 727 728 729 730 731 732 733 734 735 736 737 738 739 740 741 742 743 744 745 746 747 748 749 750 751 752 753 754 755 756 757 758 759 760 761 762 763 764 765 766 767 768 769 770 771 772 773 774 775 776 777 778 779 780 781 782 783 784 785 786 787 788 789 790 791 792 793 794 795 796 797 798 799 800 801 802 803 804 805 806 807 808 809 810 811 812 813 814 815 816 817 818 819 820 821 822 823 824 825 826 827 828 829 830 831 832 833 834 835 836 837 838 839 840 841 842 843 844 845 846 847 848 849 850 851 852 853 854 855 856 857 858 859 860 861 862 863 864 865 866 867 868 869 870 871 872 873 874 875 876 877 878 879 880 881 882 883 884 885 886 887 888 889 890 891 892 893 894 895 896 897 898 899 900 901 902 903 904 905 906 907 908 909 910 911 912 913 914 915 916 917 918 919 920 921 922 923 924 925 926 927 928 929 930 931 932 933 934 935 936 937 938 939 940 941 942 943 944 945 946 947 948 949 950 951 952 953 954 955 956 957 958 959 960 961 962 963 964 965 966 967 968 969 970 971 972 973 974 975 976 977 978 979 980 981 982 983 984 985 986 987 988 989 990 991 992 993 994 995 996 997 998 999 1000 1001 1002 1003 1004 1005 1006 1007 1008 1009 1010 1011 1012 1013 1014 1015 1016 1017 1018 1019 1020 1021 1022 1023 1024 1025 1026 1027 1028 1029 1030 1031 1032 1033 1034 1035 1036 1037 1038 1039 1040 1041 1042 1043 1044 1045 1046 1047 1048 1049 1050 1051 1052 1053 1054 1055 1056 1057 1058 1059 1060 1061 1062 1063 1064 1065 1066 1067 1068 1069 1070 1071 1072 1073 1074 1075 1076 1077 1078 1079 1080 1081 1082 1083 1084 1085 1086 1087 1088 1089 1090 1091 1092 1093 1094 1095 1096 1097 1098 1099 1100 1101 1102 1103 1104 1105 1106 1107 1108 1109 1110 1111 1112 1113 1114 1115 1116 1117 1118 1119 1120 1121 1122 1123 1124 1125 1126 1127 |
DDR Version 1.07 20161103 In soft reset SRX Channel 0: DDR3, 666MHz Bus Width=32 Col=10 Bank=8 Row=15 CS=1 Die Bus-Width=16 Size=1024MB Channel 1: DDR3, 666MHz Bus Width=32 Col=10 Bank=8 Row=15 CS=1 Die Bus-Width=16 Size=1024MB 256B stride ch 0 ddrconfig = 0x101, ddrsize = 0x20 ch 1 ddrconfig = 0x101, ddrsize = 0x20 pmugrf_os_reg[2] = 0x32817281, stride = 0x9 OUT Boot1: 2016-07-29, version: 1.05 CPUId = 0x0 ChipType = 10 1905 SdmmcInit=2 0 BootCapSize=100000 UserCapSize=14910MB FwPartOffset=2000 , 100000 SdmmcInit=0 20 StorageInit ok = 63830 powerOn 476167 DDR Version 1.07 20161103 In soft reset SRX Channel 0: DDR3, 666MHz Bus Width=32 Col=10 Bank=8 Row=15 CS=1 Die Bus-Width=16 Size=1024MB Channel 1: DDR3, 666MHz Bus Width=32 Col=10 Bank=8 Row=15 CS=1 Die Bus-Width=16 Size=1024MB 256B stride ch 0 ddrconfig = 0x101, ddrsize = 0x20 ch 1 ddrconfig = 0x101, ddrsize = 0x20 pmugrf_os_reg[2] = 0x32817281, stride = 0x9 OUT Boot1: 2016-07-29, version: 1.05 CPUId = 0x0 ChipType = 10 1914 SdmmcInit=2 0 BootCapSize=100000 UserCapSize=14910MB FwPartOffset=2000 , 100000 SdmmcInit=0 20 StorageInit ok = 63871 LoadTrustBL No find bl30.bin No find bl32.bin theLoader 200000 79565 LoaderFlag2: 0x5242c300 WARNING: plat_rockchip_comm_sram_init:code:ff8d9000, 67000, ef0 NOTICE: BL31: v1.2(debug):b995f80 NOTICE: BL31: Built : 16:53:56, Nov 7 2016 INFO: GICv3 with legacy support detected. ARM GICV3 driver initialized in EL3 INFO: boot cpu mask: 0 INFO: Vesion: 2016.0.01 INFO: plat_rockchip_pmu_init(1211): pd status 3e INFO: BL31: Initializing runtime services INFO: BL31: Preparing for EL3 exit to normal world INFO: Entry point address = 0x200000 INFO: SPSR = 0x3c9 U-Boot 2017.02-RK3399-06-ga7c7ca8 (Apr 25 2017 - 15:10:21) CPU: rk3399 cpu version = 0 CPU's clock information: aplll = 816000000HZ apllb = 24000000HZ gpll = 594000000HZ aclk_periph_h = 148500000HZ, hclk_periph_h = 74250000HZ, pclk_peZ aclk_periph_l0 = 99000000HZ, hclk_periph_l0 = 99000000HZ, pclk_pZ hclk_periph_l1 = 99000000HZ, pclk_periph_l1 = 49500000HZ cpll = 800000000HZ dpll = 660000000HZ vpll = 24000000HZ npll = 24000000HZ ppll = 676000000HZ Board: Rockchip platform Board Uboot as second level loader DRAM: Found dram banks: 1 Adding bank:0000000000200000(000000007fe00000) Reserve memory for trust os. dram reserve bank: base = 0x08400000, size = 0x01000000 128 MiB SdmmcInit = 0 20 storage init OK! Using default environment GetParam Load FDT from resource image. no key node usb bc: can find node by path: /dwc-control-usb/usb_bc pmic:rk808 can't find dts node for pwm1 set pwm voltage ok,pwm_id =2 vol=1000000,pwm_value=33 CPU's clock information: aplll = 816000000HZ apllb = 24000000HZ gpll = 594000000HZ aclk_periph_h = 148500000HZ, hclk_periph_h = 74250000HZ, pclk_peZ aclk_periph_l0 = 99000000HZ, hclk_periph_l0 = 99000000HZ, pclk_pZ hclk_periph_l1 = 99000000HZ, pclk_periph_l1 = 49500000HZ cpll = 800000000HZ dpll = 660000000HZ vpll = 24000000HZ npll = 24000000HZ ppll = 676000000HZ Can't find dts node for fuel guage cw201x can't find dts node for ec-battery Can't find dts node for charger bq25700 SecureBootEn = 0, SecureBootLock = 0 #Boot ver: 2017-04-25#1.05 empty serial no. reboot normal. checkKey vbus = 1 no fuel gauge found no fuel gauge found read logo on state from dts [1] no fuel gauge found misc partition not found! Hit any key to stop autoboot: 0 load fdt from resouce. Secure Boot state: 0 kernel @ 0x00280000 (0x01317008) ramdisk @ 0x05bf0000 (0x00000000) bootrk: do_bootm_linux... Loading Device Tree to 0000000005600000, end 0000000005614fcf ... OK Add bank:0000000000200000, 0000000008200000 Add bank:0000000009400000, 0000000076c00000 WARNING: could not set reg FDT_ERR_BADOFFSET. Starting kernel ... [ 0.000000] Booting Linux on physical CPU 0x0 [ 0.000000] Initializing cgroup subsys cpuset [ 0.000000] Initializing cgroup subsys cpu [ 0.000000] Initializing cgroup subsys cpuacct [ 0.000000] Linux version 4.4.77 (huangzq@esky14) (gcc version 4.9.x-google 8 [ 0.000000] Boot CPU: AArch64 Processor [410fd034] [ 0.000000] Reserved memory: failed to reserve memory for node 'drm-logo@000B [ 0.000000] psci: probing for conduit method from DT. [ 0.000000] psci: PSCIv1.0 detected in firmware. [ 0.000000] psci: Using standard PSCI v0.2 function IDs [ 0.000000] psci: MIGRATE_INFO_TYPE not supported. [ 0.000000] PERCPU: Embedded 21 pages/cpu @ffffffc07fef9000 s46336 r8192 d316 [ 0.000000] Detected VIPT I-cache on CPU0 [ 0.000000] CPU features: enabling workaround for ARM erratum 845719 [ 0.000000] Built 1 zonelists in Zone order, mobility grouping on. Total pa6 [ 0.000000] Kernel command line: console=ttyFIQ0 root=/dev/mmcblk1p6 rw root1 [ 0.000000] PID hash table entries: 4096 (order: 3, 32768 bytes) [ 0.000000] Dentry cache hash table entries: 262144 (order: 9, 2097152 bytes) [ 0.000000] Inode-cache hash table entries: 131072 (order: 8, 1048576 bytes) [ 0.000000] software IO TLB [mem 0x79a00000-0x7da00000] (64MB) mapped at [ff] [ 0.000000] Memory: 1955424K/2078720K available (12222K kernel code, 1692K r) [ 0.000000] Virtual kernel memory layout: [ 0.000000] modules : 0xffffff8000000000 - 0xffffff8008000000 ( 128 ) [ 0.000000] vmalloc : 0xffffff8008000000 - 0xffffffbdbfff0000 ( 246 ) [ 0.000000] .init : 0xffffff80090d0000 - 0xffffff80091f0000 ( 1152 ) [ 0.000000] .text : 0xffffff8008080000 - 0xffffff8008c70000 ( 12224 ) [ 0.000000] .rodata : 0xffffff8008c70000 - 0xffffff80090d0000 ( 4480 ) [ 0.000000] .data : 0xffffff80091f0000 - 0xffffff8009397008 ( 1693 ) [ 0.000000] vmemmap : 0xffffffbdc0000000 - 0xffffffbfc0000000 ( 8 ) [ 0.000000] 0xffffffbdc0008000 - 0xffffffbdc2000000 ( 31 ) [ 0.000000] fixed : 0xffffffbffe7fd000 - 0xffffffbffec00000 ( 4108 ) [ 0.000000] PCI I/O : 0xffffffbffee00000 - 0xffffffbfffe00000 ( 16 ) [ 0.000000] memory : 0xffffffc000200000 - 0xffffffc080000000 ( 2046 ) [ 0.000000] SLUB: HWalign=64, Order=0-3, MinObjects=0, CPUs=6, Nodes=1 [ 0.000000] Hierarchical RCU implementation. [ 0.000000] Build-time adjustment of leaf fanout to 64. [ 0.000000] RCU restricting CPUs from NR_CPUS=8 to nr_cpu_ids=6. [ 0.000000] RCU: Adjusting geometry for rcu_fanout_leaf=64, nr_cpu_ids=6 [ 0.000000] NR_IRQS:64 nr_irqs:64 0 [ 0.000000] GIC: Using split EOI/Deactivate mode [ 0.000000] ITS: /interrupt-controller@fee00000/interrupt-controller@fee20000 [ 0.000000] ITS: allocated 65536 Devices @79480000 (psz 64K, shr 0) [ 0.000000] ITS: using cache flushing for cmd queue [ 0.000000] GIC: using LPI property table @0x0000000079410000 [ 0.000000] ITS: Allocated 1792 chunks for LPIs [ 0.000000] CPU0: found redistributor 0 region 0:0x00000000fef00000 [ 0.000000] CPU0: using LPI pending table @0x0000000079420000 [ 0.000000] GIC: using cache flushing for LPI property table [ 0.000000] GIC: PPI partition interrupt-partition-0[0] { /cpus/cpu@0[0] /cp} [ 0.000000] GIC: PPI partition interrupt-partition-1[1] { /cpus/cpu@100[4] /} [ 0.000000] rockchip_clk_register_frac_branch: could not find dclk_vop0_frack [ 0.000000] rockchip_clk_register_frac_branch: could not find dclk_vop1_frack [ 0.000000] Architected cp15 timer(s) running at 24.00MHz (phys). [ 0.000000] clocksource: arch_sys_counter: mask: 0xffffffffffffff max_cycless [ 0.000005] sched_clock: 56 bits at 24MHz, resolution 41ns, wraps every 4398s [ 0.001249] Console: colour dummy device 80x25 [ 0.001274] Calibrating delay loop (skipped), value calculated using timer f) [ 0.001288] pid_max: default: 32768 minimum: 301 [ 0.001383] Security Framework initialized [ 0.001393] Yama: becoming mindful. [ 0.001478] Mount-cache hash table entries: 4096 (order: 3, 32768 bytes) [ 0.001489] Mountpoint-cache hash table entries: 4096 (order: 3, 32768 bytes) [ 0.002257] Initializing cgroup subsys devices [ 0.002276] Initializing cgroup subsys freezer [ 0.002304] ftrace: allocating 44231 entries in 173 pages [ 0.128178] sched-energy: Sched-energy-costs installed from DT [ 0.128197] CPU0: update cpu_capacity 401 [ 0.128260] ASID allocator initialised with 65536 entries [ 0.131524] PCI/MSI: /interrupt-controller@fee00000/interrupt-controller@feed [ 0.132000] Platform MSI: /interrupt-controller@fee00000/interrupt-controlled [ 0.133287] Detected VIPT I-cache on CPU1 [ 0.133321] CPU1: found redistributor 1 region 0:0x00000000fef20000 [ 0.133356] CPU1: using LPI pending table @0x0000000079690000 [ 0.133401] CPU1: update cpu_capacity 401 [ 0.133405] CPU1: Booted secondary processor [410fd034] [ 0.133956] Detected VIPT I-cache on CPU2 [ 0.133977] CPU2: found redistributor 2 region 0:0x00000000fef40000 [ 0.134010] CPU2: using LPI pending table @0x00000000796d0000 [ 0.134040] CPU2: update cpu_capacity 401 [ 0.134044] CPU2: Booted secondary processor [410fd034] [ 0.134578] Detected VIPT I-cache on CPU3 [ 0.134598] CPU3: found redistributor 3 region 0:0x00000000fef60000 [ 0.134631] CPU3: using LPI pending table @0x0000000079710000 [ 0.134658] CPU3: update cpu_capacity 401 [ 0.134661] CPU3: Booted secondary processor [410fd034] [ 0.135188] Detected PIPT I-cache on CPU4 [ 0.135217] CPU4: found redistributor 100 region 0:0x00000000fef80000 [ 0.135254] CPU4: using LPI pending table @0x0000000079750000 [ 0.135296] CPU4: update cpu_capacity 1024 [ 0.135299] CPU4: Booted secondary processor [410fd082] [ 0.135848] Detected PIPT I-cache on CPU5 [ 0.135867] CPU5: found redistributor 101 region 0:0x00000000fefa0000 [ 0.135901] CPU5: using LPI pending table @0x0000000079780000 [ 0.135928] CPU5: update cpu_capacity 1024 [ 0.135931] CPU5: Booted secondary processor [410fd082] [ 0.136021] Brought up 6 CPUs [ 0.136102] SMP: Total of 6 processors activated. [ 0.136111] CPU features: detected feature: GIC system register CPU interface [ 0.136124] CPU: All CPU(s) started at EL2 [ 0.136172] alternatives: patching kernel code [ 0.137597] devtmpfs: initialized [ 0.152201] clocksource: jiffies: mask: 0xffffffff max_cycles: 0xffffffff, ms [ 0.152228] futex hash table entries: 2048 (order: 5, 131072 bytes) [ 0.152717] pinctrl core: initialized pinctrl subsystem [ 0.153475] NET: Registered protocol family 16 [ 0.157448] cpuidle: using governor ladder [ 0.161457] cpuidle: using governor menu [ 0.161479] Registered FIQ tty driver [ 0.161723] vdso: 2 pages (1 code @ ffffff8008c76000, 1 data @ ffffff80091f4) [ 0.161752] hw-breakpoint: found 6 breakpoint and 4 watchpoint registers. [ 0.161914] DMA: preallocated 256 KiB pool for atomic allocations [ 0.246027] console [ttyFIQ0] enabled [ 0.246559] Registered fiq debugger ttyFIQ0 [ 0.274272] iommu: Adding device ff650000.vpu_service to group 0 [ 0.274874] iommu: Adding device ff660000.rkvdec to group 1 [ 0.275474] iommu: Adding device ff8f0000.vop to group 2 [ 0.276020] iommu: Adding device ff900000.vop to group 3 [ 0.277780] SCSI subsystem initialized [ 0.278451] usbcore: registered new interface driver usbfs [ 0.278986] usbcore: registered new interface driver hub [ 0.279539] usbcore: registered new device driver usb [ 0.280097] media: Linux media interface: v0.10 [ 0.280530] Linux video capture interface: v2.00 [ 0.280973] pps_core: LinuxPPS API ver. 1 registered [ 0.281421] pps_core: Software ver. 5.3.6 - Copyright 2005-2007 Rodolfo Giom> [ 0.282230] PTP clock support registered [ 0.283606] Advanced Linux Sound Architecture Driver Initialized. [ 0.284651] Bluetooth: Core ver 2.21 [ 0.284997] NET: Registered protocol family 31 [ 0.285390] Bluetooth: HCI device and connection manager initialized [ 0.285961] Bluetooth: HCI socket layer initialized [ 0.286394] Bluetooth: L2CAP socket layer initialized [ 0.286874] Bluetooth: SCO socket layer initialized [ 0.287911] rockchip-cpuinfo cpuinfo: Serial : 8a52045a291f8194 [ 0.288971] clocksource: Switched to clocksource arch_sys_counter [ 0.338590] thermal thermal_zone1: power_allocator: sustainable_power will bd [ 0.339511] NET: Registered protocol family 2 [ 0.340334] TCP established hash table entries: 16384 (order: 5, 131072 byte) [ 0.341081] TCP bind hash table entries: 16384 (order: 7, 524288 bytes) [ 0.341929] TCP: Hash tables configured (established 16384 bind 16384) [ 0.342583] UDP hash table entries: 1024 (order: 4, 98304 bytes) [ 0.343186] UDP-Lite hash table entries: 1024 (order: 4, 98304 bytes) [ 0.344048] NET: Registered protocol family 1 [ 0.344725] RPC: Registered named UNIX socket transport module. [ 0.345263] RPC: Registered udp transport module. [ 0.345679] RPC: Registered tcp transport module. [ 0.346104] RPC: Registered tcp NFSv4.1 backchannel transport module. [ 0.347310] hw perfevents: enabled with armv8_cortex_a53 PMU driver, 7 counte [ 0.348122] hw perfevents: enabled with armv8_cortex_a72 PMU driver, 7 counte [ 0.351920] Initialise system trusted keyring [ 0.360327] squashfs: version 4.0 (2009/01/31) Phillip Lougher [ 0.362595] NFS: Registering the id_resolver key type [ 0.363090] Key type id_resolver registered [ 0.363461] Key type id_legacy registered [ 0.363833] Installing knfsd (copyright (C) 1996 okir@monad.swb.de). [ 0.365137] fuse init (API version 7.23) [ 0.365996] SGI XFS with security attributes, no debug enabled [ 0.371831] NET: Registered protocol family 38 [ 0.372258] Key type asymmetric registered [ 0.372632] Asymmetric key parser 'x509' registered [ 0.373229] Block layer SCSI generic (bsg) driver version 0.4 loaded (major ) [ 0.373887] io scheduler noop registered [ 0.374248] io scheduler deadline registered [ 0.374748] io scheduler cfq registered (default) [ 0.376498] rockchip-usb2phy ff770000.syscon:usb2-phy@e450: vbus_drv is not d [ 0.378297] rockchip-usb2phy ff770000.syscon:usb2-phy@e460: vbus_drv is not d [ 0.384028] rockchip-pcie f8000000.pcie: no vpcie3v3 regulator found [ 0.384608] rockchip-pcie f8000000.pcie: no vpcie1v8 regulator found [ 0.385198] rockchip-pcie f8000000.pcie: no vpcie0v9 regulator found [ 0.927003] rockchip-pcie f8000000.pcie: PCIe link training gen1 timeout! [ 0.927653] rockchip-pcie: probe of f8000000.pcie failed with error -110 [ 0.929275] rk-vcodec ff650000.vpu_service: probe device [ 0.929856] rk-vcodec ff650000.vpu_service: vpu mmu dec ffffffc078dc7010 [ 0.930786] rk-vcodec ff650000.vpu_service: allocator is drm [ 0.931374] rk-vcodec ff650000.vpu_service: checking hw id 0 [ 0.932488] rk-vcodec ff650000.vpu_service: init success [ 0.933819] rk-vcodec ff660000.rkvdec: probe device [ 0.934334] rk-vcodec ff660000.rkvdec: vpu mmu dec ffffffc078dc7810 [ 0.935125] rk-vcodec ff660000.rkvdec: allocator is drm [ 0.935649] rk-vcodec ff660000.rkvdec: checking hw id 6876 [ 0.936536] rk-vcodec ff660000.rkvdec: init success [ 0.939134] dma-pl330 ff6d0000.dma-controller: Loaded driver for PL330 DMAC-0 [ 0.939804] dma-pl330 ff6d0000.dma-controller: DBUFF-32x8bytes Num_Cha2 [ 0.942755] dma-pl330 ff6e0000.dma-controller: Loaded driver for PL330 DMAC-0 [ 0.943439] dma-pl330 ff6e0000.dma-controller: DBUFF-128x8bytes Num_Ch6 [ 0.945717] Serial: 8250/16550 driver, 4 ports, IRQ sharing disabled [ 0.948458] ff180000.serial: ttyS0 at MMIO 0xff180000 (irq = 36, base_baud =A [ 0.950025] ff1a0000.serial: ttyS2 at MMIO 0xff1a0000 (irq = 37, base_baud =A [ 0.951838] [drm:drm_core_init] Initialized drm 1.1.0 20060810 [ 0.955582] rockchip-drm display-subsystem: bound ff900000.vop (ops 0xffffff) [ 0.956510] rockchip-drm display-subsystem: bound ff8f0000.vop (ops 0xffffff) [ 0.957464] i2c i2c-9: of_i2c: modalias failure on /hdmi@ff940000/ports [ 0.958089] dwhdmi-rockchip ff940000.hdmi: registered DesignWare HDMI I2C bur [ 0.958827] dwhdmi-rockchip ff940000.hdmi: Detected HDMI TX controller v2.11) [ 0.960350] rockchip-drm display-subsystem: bound ff940000.hdmi (ops 0xfffff) [ 0.961085] [drm:drm_vblank_init] Supports vblank timestamp caching Rev 2 (2. [ 0.961787] [drm:drm_vblank_init] No driver support for vblank timestamp que. [ 0.962516] rockchip-drm display-subsystem: failed to parse loader memory [ 1.470481] Console: switching to colour frame buffer device 240x67 [ 1.519499] rockchip-drm display-subsystem: fb0: frame buffer device [ 1.527602] mali ff9a0000.gpu: Failed to get regulator [ 1.528074] mali ff9a0000.gpu: Power control initialization failed [ 1.528698] platform ff9a0000.gpu: Driver mali requests probe deferral [ 1.529566] Unable to detect cache hierarchy from DT for CPU 0 [ 1.530871] brd: module loaded [ 1.536561] loop: module loaded [ 1.537439] zram: Added device: zram0 [ 1.538053] lkdtm: No crash points registered, enable through debugfs [ 1.539548] rockchip-spi ff1d0000.spi: Failed to request TX DMA channel [ 1.540150] rockchip-spi ff1d0000.spi: Failed to request RX DMA channel [ 1.541495] 11wk2xxx_probe: setup mode 0, 8 bits/w, 10000000 Hz max [ 1.712381] wk2xxx_serial_init() [ 1.712670] wk2xxx_request_port [ 1.712973] ttysWK0 at I/O 0x1 (irq = 101, base_baud = 460800) is a wk2xxx [ 1.713783] uart_add_one_port success for line i:= 0 with right 0 [ 1.714330] wk2xxx_request_port [ 1.714619] ttysWK1 at I/O 0x2 (irq = 101, base_baud = 460800) is a wk2xxx [ 1.715407] uart_add_one_port success for line i:= 1 with right 0 [ 1.715941] wk2xxx_request_port [ 1.716243] ttysWK2 at I/O 0x3 (irq = 101, base_baud = 460800) is a wk2xxx [ 1.717031] uart_add_one_port success for line i:= 2 with right 0 [ 1.717564] wk2xxx_request_port [ 1.717852] ttysWK3 at I/O 0x4 (irq = 101, base_baud = 460800) is a wk2xxx [ 1.718634] uart_add_one_port success for line i:= 3 with right 0 [ 1.719180] uart_add_one_port = 0x0 [ 1.719509] register spi return v = :0 [ 1.719863] tun: Universal TUN/TAP device driver, 1.6 [ 1.720324] tun: (C) 1999-2004 Max Krasnyansky <maxk@qualcomm.com> [ 1.722138] rk_gmac-dwmac fe300000.ethernet: clock input or output? (input). [ 1.722761] rk_gmac-dwmac fe300000.ethernet: TX delay(0x28). [ 1.723272] rk_gmac-dwmac fe300000.ethernet: RX delay(0x1b). [ 1.723953] rk_gmac-dwmac fe300000.ethernet: clock input from PHY [ 1.724507] rk_gmac-dwmac fe300000.ethernet: init for RGMII [ 1.730129] stmmac - user ID: 0x10, Synopsys ID: 0x35 [ 1.730580] Ring mode enabled [ 1.730855] DMA HW capability register supported [ 1.731269] Normal descriptors [ 1.731579] RX Checksum Offload Engine supported (type 2) [ 1.732072] TX Checksum insertion supported [ 1.732452] Wake-Up On Lan supported [ 1.732804] Enable RX Mitigation via HW Watchdog Timer [ 1.803037] libphy: stmmac: probed [ 1.803355] eth%d: PHY ID 001cc915 at 0 IRQ POLL (stmmac-0:00) active [ 1.803926] eth%d: PHY ID 001cc915 at 1 IRQ POLL (stmmac-0:01) [ 1.804450] eth%d: PHY ID 0000ffff at 2 IRQ POLL (stmmac-0:02) [ 1.804970] eth%d: PHY ID 0000ffff at 3 IRQ POLL (stmmac-0:03) [ 1.805481] eth%d: PHY ID 0000ffff at 4 IRQ POLL (stmmac-0:04) [ 1.806001] eth%d: PHY ID 0000ffff at 5 IRQ POLL (stmmac-0:05) [ 1.806511] eth%d: PHY ID 0000ffff at 6 IRQ POLL (stmmac-0:06) [ 1.807030] eth%d: PHY ID 0000ffff at 7 IRQ POLL (stmmac-0:07) [ 1.807541] eth%d: PHY ID 0000ffff at 8 IRQ POLL (stmmac-0:08) [ 1.808059] eth%d: PHY ID 0000ffff at 9 IRQ POLL (stmmac-0:09) [ 1.808570] eth%d: PHY ID 0000ffff at 10 IRQ POLL (stmmac-0:0a) [ 1.809100] eth%d: PHY ID 0000ffff at 11 IRQ POLL (stmmac-0:0b) [ 1.809622] eth%d: PHY ID 0000ffff at 12 IRQ POLL (stmmac-0:0c) [ 1.810152] eth%d: PHY ID 0000ffff at 13 IRQ POLL (stmmac-0:0d) [ 1.810674] eth%d: PHY ID 0000ffff at 14 IRQ POLL (stmmac-0:0e) [ 1.811204] eth%d: PHY ID 0000ffff at 15 IRQ POLL (stmmac-0:0f) [ 1.811725] eth%d: PHY ID 0000ffff at 16 IRQ POLL (stmmac-0:10) [ 1.812255] eth%d: PHY ID 0000ffff at 17 IRQ POLL (stmmac-0:11) [ 1.812777] eth%d: PHY ID 0000ffff at 18 IRQ POLL (stmmac-0:12) [ 1.813306] eth%d: PHY ID 0000ffff at 19 IRQ POLL (stmmac-0:13) [ 1.813829] eth%d: PHY ID 0000ffff at 20 IRQ POLL (stmmac-0:14) [ 1.814358] eth%d: PHY ID 0000ffff at 21 IRQ POLL (stmmac-0:15) [ 1.814880] eth%d: PHY ID 0000ffff at 22 IRQ POLL (stmmac-0:16) [ 1.815410] eth%d: PHY ID 0000ffff at 23 IRQ POLL (stmmac-0:17) [ 1.815932] eth%d: PHY ID 0000ffff at 24 IRQ POLL (stmmac-0:18) [ 1.816462] eth%d: PHY ID 0000ffff at 25 IRQ POLL (stmmac-0:19) [ 1.816991] eth%d: PHY ID 0000ffff at 26 IRQ POLL (stmmac-0:1a) [ 1.817513] eth%d: PHY ID 0000ffff at 27 IRQ POLL (stmmac-0:1b) [ 1.818042] eth%d: PHY ID 0000ffff at 28 IRQ POLL (stmmac-0:1c) [ 1.818563] eth%d: PHY ID 0000ffff at 29 IRQ POLL (stmmac-0:1d) [ 1.819093] eth%d: PHY ID 0000ffff at 30 IRQ POLL (stmmac-0:1e) [ 1.819615] eth%d: PHY ID 0000ffff at 31 IRQ POLL (stmmac-0:1f) [ 1.821193] PPP generic driver version 2.4.2 [ 1.821813] usbcore: registered new interface driver rndis_wlan [ 1.822592] Rockchip WiFi SYS interface (V1.00) ... [ 1.823081] pegasus: v0.9.3 (2013/04/25), Pegasus/Pegasus II USB Ethernet drr [ 1.823767] usbcore: registered new interface driver pegasus [ 1.824314] usbcore: registered new interface driver rtl8150 [ 1.824844] usbcore: registered new interface driver r8152 [ 1.825432] usbcore: registered new interface driver asix [ 1.825939] usbcore: registered new interface driver ax88179_178a [ 1.826518] usbcore: registered new interface driver cdc_ether [ 1.827073] usbcore: registered new interface driver dm9601 [ 1.827617] usbcore: registered new interface driver smsc75xx [ 1.828184] usbcore: registered new interface driver smsc95xx [ 1.828724] usbcore: registered new interface driver net1080 [ 1.829268] usbcore: registered new interface driver rndis_host [ 1.829823] usbcore: registered new interface driver MOSCHIP usb-ethernet drr [ 1.830551] usbcore: registered new interface driver cdc_ncm [ 1.831095] usbcore: registered new interface driver qmi_wwan [ 1.831638] usbcore: registered new interface driver cdc_mbim [ 1.838352] rockchip-dwc3 usb@fe800000: fail to get drvdata hcd [ 1.839192] platform usb@fe800000: Driver rockchip-dwc3 requests probe deferl [ 1.845341] rockchip-dwc3 usb@fe900000: fail to get drvdata hcd [ 1.846147] platform usb@fe900000: Driver rockchip-dwc3 requests probe deferl [ 1.847580] ehci_hcd: USB 2.0 'Enhanced' Host Controller (EHCI) Driver [ 1.848190] ehci-pci: EHCI PCI platform driver [ 1.848636] ehci-platform: EHCI generic platform driver [ 1.852746] ehci-platform fe380000.usb: EHCI Host Controller [ 1.853416] ehci-platform fe380000.usb: new USB bus registered, assigned bus1 [ 1.854224] ehci-platform fe380000.usb: irq 28, io mem 0xfe380000 [ 1.859988] ehci-platform fe380000.usb: USB 2.0 started, EHCI 1.00 [ 1.860685] usb usb1: New USB device found, idVendor=1d6b, idProduct=0002 [ 1.861296] usb usb1: New USB device strings: Mfr=3, Product=2, SerialNumber1 [ 1.861938] usb usb1: Product: EHCI Host Controller [ 1.862379] usb usb1: Manufacturer: Linux 4.4.77 ehci_hcd [ 1.862855] usb usb1: SerialNumber: fe380000.usb [ 1.863710] hub 1-0:1.0: USB hub found [ 1.864085] hub 1-0:1.0: 1 port detected [ 1.868329] ehci-platform fe3c0000.usb: EHCI Host Controller [ 1.868997] ehci-platform fe3c0000.usb: new USB bus registered, assigned bus2 [ 1.869770] ehci-platform fe3c0000.usb: irq 30, io mem 0xfe3c0000 [ 1.875990] ehci-platform fe3c0000.usb: USB 2.0 started, EHCI 1.00 [ 1.876675] usb usb2: New USB device found, idVendor=1d6b, idProduct=0002 [ 1.877285] usb usb2: New USB device strings: Mfr=3, Product=2, SerialNumber1 [ 1.877926] usb usb2: Product: EHCI Host Controller [ 1.878366] usb usb2: Manufacturer: Linux 4.4.77 ehci_hcd [ 1.878842] usb usb2: SerialNumber: fe3c0000.usb [ 1.879668] hub 2-0:1.0: USB hub found [ 1.880038] hub 2-0:1.0: 1 port detected [ 1.880900] ohci_hcd: USB 1.1 'Open' Host Controller (OHCI) Driver [ 1.881473] ohci-platform: OHCI generic platform driver [ 1.882245] ohci-platform fe3a0000.usb: Generic Platform OHCI controller [ 1.883008] ohci-platform fe3a0000.usb: new USB bus registered, assigned bus3 [ 1.883787] ohci-platform fe3a0000.usb: irq 29, io mem 0xfe3a0000 [ 1.939120] usb usb3: New USB device found, idVendor=1d6b, idProduct=0001 [ 1.939716] usb usb3: New USB device strings: Mfr=3, Product=2, SerialNumber1 [ 1.940369] usb usb3: Product: Generic Platform OHCI controller [ 1.940893] usb usb3: Manufacturer: Linux 4.4.77 ohci_hcd [ 1.941377] usb usb3: SerialNumber: fe3a0000.usb [ 1.942193] hub 3-0:1.0: USB hub found [ 1.942550] hub 3-0:1.0: 1 port detected [ 1.943424] ohci-platform fe3e0000.usb: Generic Platform OHCI controller [ 1.944180] ohci-platform fe3e0000.usb: new USB bus registered, assigned bus4 [ 1.944939] ohci-platform fe3e0000.usb: irq 31, io mem 0xfe3e0000 [ 2.000118] usb usb4: New USB device found, idVendor=1d6b, idProduct=0001 [ 2.000716] usb usb4: New USB device strings: Mfr=3, Product=2, SerialNumber1 [ 2.001368] usb usb4: Product: Generic Platform OHCI controller [ 2.001892] usb usb4: Manufacturer: Linux 4.4.77 ohci_hcd [ 2.002375] usb usb4: SerialNumber: fe3e0000.usb [ 2.003219] hub 4-0:1.0: USB hub found [ 2.003576] hub 4-0:1.0: 1 port detected [ 2.004788] usbcore: registered new interface driver cdc_acm [ 2.005303] cdc_acm: USB Abstract Control Model driver for USB modems and ISs [ 2.006053] usbcore: registered new interface driver cdc_wdm [ 2.006594] usbcore: registered new interface driver uas [ 2.007174] usbcore: registered new interface driver usb-storage [ 2.007783] usbcore: registered new interface driver usbserial [ 2.008335] usbcore: registered new interface driver usbserial_generic [ 2.008936] usbserial: USB Serial support registered for generic [ 2.009519] usbcore: registered new interface driver cp210x [ 2.010049] usbserial: USB Serial support registered for cp210x [ 2.010633] usbcore: registered new interface driver ftdi_sio [ 2.011179] usbserial: USB Serial support registered for FTDI USB Serial Deve [ 2.011945] usbcore: registered new interface driver keyspan [ 2.012477] usbserial: USB Serial support registered for Keyspan - (without ) [ 2.013196] usbserial: USB Serial support registered for Keyspan 1 port adapr [ 2.013856] usbserial: USB Serial support registered for Keyspan 2 port adapr [ 2.014528] usbserial: USB Serial support registered for Keyspan 4 port adapr [ 2.015220] usbcore: registered new interface driver option [ 2.015737] usbserial: USB Serial support registered for GSM modem (1-port) [ 2.016532] usbcore: registered new interface driver oti6858 [ 2.017063] usbserial: USB Serial support registered for oti6858 [ 2.017633] usbcore: registered new interface driver pl2303 [ 2.018163] usbserial: USB Serial support registered for pl2303 [ 2.018729] usbcore: registered new interface driver qcserial [ 2.019272] usbserial: USB Serial support registered for Qualcomm USB modem [ 2.019941] usbcore: registered new interface driver sierra [ 2.020475] usbserial: USB Serial support registered for Sierra USB modem [ 2.021860] usbcore: registered new interface driver iforce [ 2.022441] usbcore: registered new interface driver xpad [ 2.022994] ==gsl_ts_init== [ 2.023265] ret=0 [ 2.023695] usbcore: registered new interface driver usbtouchscreen [ 2.024510] .. rk pwm remotectl v1.1 init [ 2.025122] input: ff420030.pwm as /devices/platform/ff420030.pwm/input/inpu0 [ 2.026470] i2c /dev entries driver [ 2.028034] fan53555-regulator 0-0040: FAN53555 Option[8] Rev[1] Detected! [ 2.028717] fan53555-reg: supplied by vcc5v0_sys [ 2.031739] fan53555-regulator 0-0041: FAN53555 Option[8] Rev[1] Detected! [ 2.032405] fan53555-reg: supplied by vcc5v0_sys [ 2.035193] rk808 0-001b: Pmic Chip id: 0x0 [ 2.038593] rk808-regulator rk808-regulator: there is no dvs0 gpio [ 2.039200] rk808-regulator rk808-regulator: there is no dvs1 gpio [ 2.039824] DCDC_REG1: supplied by vcc3v3_sys [ 2.040937] DCDC_REG2: supplied by vcc3v3_sys [ 2.041889] DCDC_REG3: supplied by vcc3v3_sys [ 2.042540] DCDC_REG4: supplied by vcc3v3_sys [ 2.043392] LDO_REG1: supplied by vcc3v3_sys [ 2.044876] LDO_REG2: supplied by vcc3v3_sys [ 2.046239] LDO_REG3: supplied by vcc3v3_sys [ 2.047564] LDO_REG4: supplied by vcc3v3_sys [ 2.048917] LDO_REG5: supplied by vcc3v3_sys [ 2.050257] LDO_REG6: supplied by vcc3v3_sys [ 2.051582] LDO_REG7: supplied by vcc3v3_sys [ 2.052938] LDO_REG8: supplied by vcc3v3_sys [ 2.054286] SWITCH_REG1: supplied by vcc3v3_sys [ 2.054935] SWITCH_REG2: supplied by vcc3v3_sys [ 2.058916] rk808-rtc rk808-rtc: rtc core: registered rk808-rtc as rtc0 [ 2.060073] rk3x-i2c ff3c0000.i2c: Initialized RK3xxx I2C bus at ffffff800960 [ 2.061350] rk3x-i2c ff110000.i2c: Initialized RK3xxx I2C bus at ffffff800960 [ 2.062092] rockchip-pinctrl pinctrl: pin gpio4-17 already requested by ff94c [ 2.063020] rockchip-pinctrl pinctrl: pin-145 (ff130000.i2c) status -22 [ 2.063605] rockchip-pinctrl pinctrl: could not request pin 145 (gpio4-17) fl [ 2.064588] rk3x-i2c ff130000.i2c: Error applying setting, reverse things bak [ 2.065589] rk3x-i2c ff130000.i2c: Initialized RK3xxx I2C bus at ffffff800960 [ 2.066760] rk3x-i2c ff3d0000.i2c: Initialized RK3xxx I2C bus at ffffff800960 [ 2.068470] IR NEC protocol handler initialized [ 2.068879] IR RC5(x/sz) protocol handler initialized [ 2.069344] IR RC6 protocol handler initialized [ 2.069751] IR JVC protocol handler initialized [ 2.070167] IR Sony protocol handler initialized [ 2.070576] IR SANYO protocol handler initialized [ 2.071003] IR Sharp protocol handler initialized [ 2.071423] IR MCE Keyboard/mouse protocol handler initialized [ 2.071937] IR XMP protocol handler initialized [ 2.072795] rockchip-rga ff680000.rga: HW Version: 0x03.02 [ 2.073573] rockchip-rga ff680000.rga: Registered rockchip-rga as /dev/video0 [ 2.074425] usbcore: registered new interface driver uvcvideo [ 2.074935] USB Video Class driver (1.1.1) [ 2.077680] rk_tsadcv2_temp_to_code: Invalid conversion table: code=1023, te7 [ 2.079584] device-mapper: ioctl: 4.34.0-ioctl (2015-10-28) initialised: dm-m [ 2.080515] Bluetooth: Virtual HCI driver ver 1.5 [ 2.081066] Bluetooth: HCI UART driver ver 2.3 [ 2.081461] Bluetooth: HCI UART protocol H4 registered [ 2.081913] Bluetooth: HCI UART protocol LL registered [ 2.082375] Bluetooth: HCI UART protocol ATH3K registered [ 2.082917] usbcore: registered new interface driver bfusb [ 2.083475] usbcore: registered new interface driver btusb [ 2.084375] cpu cpu0: leakage=21 [ 2.084853] cpu cpu4: leakage=35 [ 2.088918] sdhci: Secure Digital Host Controller Interface driver [ 2.089481] sdhci: Copyright(c) Pierre Ossman [ 2.089878] Synopsys Designware Multimedia Card Interface Driver [ 2.091266] dwmmc_rockchip fe310000.dwmmc: IDMAC supports 32-bit address mod. [ 2.091937] dwmmc_rockchip fe310000.dwmmc: Using internal DMA controller. [ 2.092555] dwmmc_rockchip fe310000.dwmmc: Version ID is 270a [ 2.093112] dwmmc_rockchip fe310000.dwmmc: DW MMC controller at irq 25,32 bio [ 2.093989] dwmmc_rockchip fe310000.dwmmc: 'clock-freq-min-max' property was. [ 2.094770] dwmmc_rockchip fe310000.dwmmc: No vmmc regulator found [ 2.095326] dwmmc_rockchip fe310000.dwmmc: No vqmmc regulator found [ 2.096179] platform fe310000.dwmmc: Driver dwmmc_rockchip requests probe del [ 2.097362] dwmmc_rockchip fe320000.dwmmc: IDMAC supports 32-bit address mod. [ 2.098033] dwmmc_rockchip fe320000.dwmmc: Using internal DMA controller. [ 2.098634] dwmmc_rockchip fe320000.dwmmc: Version ID is 270a [ 2.099185] dwmmc_rockchip fe320000.dwmmc: DW MMC controller at irq 26,32 bio [ 2.100057] dwmmc_rockchip fe320000.dwmmc: 'clock-freq-min-max' property was. [ 2.100865] dwmmc_rockchip fe320000.dwmmc: No vmmc regulator found [ 2.101712] rockchip-iodomain ff770000.syscon:io-domains: Setting to 3300000e [ 2.102382] rockchip-iodomain ff770000.syscon:io-domains: Setting to 3300000e [ 2.114021] mmc_host mmc0: Bus speed (slot 0) = 400000Hz (slot req 400000Hz,) [ 2.125054] dwmmc_rockchip fe320000.dwmmc: 1 slots initialized [ 2.125856] sdhci-pltfm: SDHCI platform and OF driver helper [ 2.128129] sdhci-arasan fe330000.sdhci: No vmmc regulator found [ 2.128663] sdhci-arasan fe330000.sdhci: No vqmmc regulator found [ 2.154991] mmc1: SDHCI controller on fe330000.sdhci [fe330000.sdhci] using A [ 2.156537] hidraw: raw HID events driver (C) Jiri Kosina [ 2.157831] usbcore: registered new interface driver usbhid [ 2.158343] usbhid: USB HID core driver [ 2.160607] usbcore: registered new interface driver snd-usb-audio [ 2.172888] platform rt5640-sound: Driver asoc-simple-card requests probe del [ 2.173663] platform hdmi-codec: Driver asoc-simple-card requests probe defel [ 2.174436] platform spdif-sound: Driver asoc-simple-card requests probe defl [ 2.178004] u32 classifier [ 2.178255] Netfilter messages via NETLINK v0.30. [ 2.178734] nf_conntrack version 0.5.0 (16384 buckets, 65536 max) [ 2.179588] ctnetlink v0.93: registering with nfnetlink. [ 2.180223] ip_set: protocol 6 [ 2.180508] IPVS: Registered protocols () [ 2.181045] IPVS: Connection hash table configured (size=4096, memory=64Kbyt) [ 2.181773] IPVS: Creating netns size=1592 id=0 [ 2.182004] usb 2-1: new high-speed USB device number 2 using ehci-platform [ 2.182992] IPVS: ipvs loaded. [ 2.183833] ip_tables: (C) 2000-2006 Netfilter Core Team [ 2.184622] Initializing XFRM netlink socket [ 2.185898] NET: Registered protocol family 10 [ 2.187799] ip6_tables: (C) 2000-2006 Netfilter Core Team [ 2.188530] sit: IPv6 over IPv4 tunneling driver [ 2.189677] NET: Registered protocol family 17 [ 2.190163] NET: Registered protocol family 15 [ 2.190601] bridge: automatic filtering via arp/ip/ip6tables has been deprec. [ 2.191757] Bridge firewalling registered [ 2.192296] Bluetooth: RFCOMM socket layer initialized [ 2.192769] Bluetooth: RFCOMM ver 1.11 [ 2.193143] Bluetooth: HIDP (Human Interface Emulation) ver 1.2 [ 2.193675] Bluetooth: HIDP socket layer initialized [ 2.194191] 8021q: 802.1Q VLAN Support v1.8 [ 2.194596] lib80211: common routines for IEEE802.11 drivers [ 2.195174] [WLAN_RFKILL]: Enter rfkill_wlan_init [ 2.195931] [WLAN_RFKILL]: Enter rfkill_wlan_probe [ 2.196431] [WLAN_RFKILL]: wlan_platdata_parse_dt: wifi_chip_type = ap6354 [ 2.197051] [WLAN_RFKILL]: wlan_platdata_parse_dt: enable wifi power control. [ 2.197684] [WLAN_RFKILL]: wlan_platdata_parse_dt: wifi power controled by g. [ 2.198420] [WLAN_RFKILL]: wlan_platdata_parse_dt: get property: WIFI,host_w. [ 2.199231] [WLAN_RFKILL]: rfkill_wlan_probe: init gpio [ 2.199698] [WLAN_RFKILL]: Exit rfkill_wlan_probe [ 2.200190] [BT_RFKILL]: Enter rfkill_rk_init [ 2.200825] mmc1: MAN_BKOPS_EN bit is not set [ 2.201475] [BT_RFKILL]: bluetooth_platdata_parse_dt: get property: uart_rts. [ 2.202376] [BT_RFKILL]: bluetooth_platdata_parse_dt: get property: BT,reset. [ 2.203139] [BT_RFKILL]: bluetooth_platdata_parse_dt: get property: BT,wake_. [ 2.203861] [BT_RFKILL]: bluetooth_platdata_parse_dt: get property: BT,wake_. [ 2.205586] [BT_RFKILL]: Request irq for bt wakeup host [ 2.206104] [BT_RFKILL]: BT_WAKE_HOST IRQ fired [ 2.206119] [BT_RFKILL]: ** disable irq [ 2.207062] [BT_RFKILL]: bt_default device registered. [ 2.207582] Key type dns_resolver registered [ 2.208354] Registered cp15_barrier emulation handler [ 2.208845] Registered setend emulation handler [ 2.209905] Loading compiled-in X.509 certificates [ 2.211733] mali ff9a0000.gpu: GPU identified as 0x0860 r2p0 status 0 [ 2.212956] I : [File] : drivers/gpu/arm/midgard_for_linux/backend/gpu/mali_. [ 2.214910] mali ff9a0000.gpu: Probed as mali0 [ 2.218320] mmc1: new HS400 Enhanced strobe MMC card at address 0001 [ 2.219375] mmcblk1: mmc1:0001 AJTD4R 14.6 GiB [ 2.219997] mmcblk1boot0: mmc1:0001 AJTD4R partition 1 4.00 MiB [ 2.220724] mmcblk1boot1: mmc1:0001 AJTD4R partition 2 4.00 MiB [ 2.221470] mmcblk1rpmb: mmc1:0001 AJTD4R partition 3 4.00 MiB [ 2.222449] xhci-hcd xhci-hcd.6.auto: xHCI Host Controller [ 2.223194] uboot: 0x000400000 -- 0x000800000 (4 MB) [ 2.223673] trust: 0x000800000 -- 0x000c00000 (4 MB) [ 2.224164] resource: 0x000c00000 -- 0x001c00000 (16 MB) [ 2.224652] kernel: 0x001c00000 -- 0x003000000 (20 MB) [ 2.225148] backup: 0x003000000 -- 0x003400000 (4 MB) [ 2.225624] boot: 0x003400000 -- 0x3a3a00000 (14854 MB) [ 2.226159] mmcblk1: p1 p2 p3 p4 p5 p6 [ 2.226631] xhci-hcd xhci-hcd.6.auto: new USB bus registered, assigned bus n5 [ 2.227503] xhci-hcd xhci-hcd.6.auto: hcc params 0x0220fe64 hci version 0x110 [ 2.228319] xhci-hcd xhci-hcd.6.auto: irq 231, io mem 0xfe800000 [ 2.229004] usb usb5: New USB device found, idVendor=1d6b, idProduct=0002 [ 2.229601] usb usb5: New USB device strings: Mfr=3, Product=2, SerialNumber1 [ 2.230255] usb usb5: Product: xHCI Host Controller [ 2.230686] usb usb5: Manufacturer: Linux 4.4.77 xhci-hcd [ 2.231172] usb usb5: SerialNumber: xhci-hcd.6.auto [ 2.232320] hub 5-0:1.0: USB hub found [ 2.232796] hub 5-0:1.0: 1 port detected [ 2.233678] xhci-hcd xhci-hcd.6.auto: xHCI Host Controller [ 2.234711] xhci-hcd xhci-hcd.6.auto: new USB bus registered, assigned bus n6 [ 2.236145] usb usb6: We don't know the algorithms for LPM for this host, di. [ 2.237158] usb usb6: New USB device found, idVendor=1d6b, idProduct=0003 [ 2.237756] usb usb6: New USB device strings: Mfr=3, Product=2, SerialNumber1 [ 2.238412] usb usb6: Product: xHCI Host Controller [ 2.238842] usb usb6: Manufacturer: Linux 4.4.77 xhci-hcd [ 2.239328] usb usb6: SerialNumber: xhci-hcd.6.auto [ 2.240330] hub 6-0:1.0: USB hub found [ 2.240686] hub 6-0:1.0: 1 port detected [ 2.247279] xhci-hcd xhci-hcd.7.auto: xHCI Host Controller [ 2.247955] xhci-hcd xhci-hcd.7.auto: new USB bus registered, assigned bus n7 [ 2.248775] xhci-hcd xhci-hcd.7.auto: hcc params 0x0220fe64 hci version 0x110 [ 2.249582] xhci-hcd xhci-hcd.7.auto: irq 232, io mem 0xfe900000 [ 2.250230] usb usb7: New USB device found, idVendor=1d6b, idProduct=0002 [ 2.250832] usb usb7: New USB device strings: Mfr=3, Product=2, SerialNumber1 [ 2.251482] usb usb7: Product: xHCI Host Controller [ 2.251919] usb usb7: Manufacturer: Linux 4.4.77 xhci-hcd [ 2.252399] usb usb7: SerialNumber: xhci-hcd.7.auto [ 2.253308] hub 7-0:1.0: USB hub found [ 2.253659] hub 7-0:1.0: 1 port detected [ 2.254240] xhci-hcd xhci-hcd.7.auto: xHCI Host Controller [ 2.254887] xhci-hcd xhci-hcd.7.auto: new USB bus registered, assigned bus n8 [ 2.255613] usb usb8: We don't know the algorithms for LPM for this host, di. [ 2.256398] usb usb8: New USB device found, idVendor=1d6b, idProduct=0003 [ 2.257008] usb usb8: New USB device strings: Mfr=3, Product=2, SerialNumber1 [ 2.257643] usb usb8: Product: xHCI Host Controller [ 2.258085] usb usb8: Manufacturer: Linux 4.4.77 xhci-hcd [ 2.258558] usb usb8: SerialNumber: xhci-hcd.7.auto [ 2.259479] hub 8-0:1.0: USB hub found [ 2.259833] hub 8-0:1.0: 1 port detected [ 2.261165] dwmmc_rockchip fe310000.dwmmc: IDMAC supports 32-bit address mod. [ 2.261830] dwmmc_rockchip fe310000.dwmmc: Using internal DMA controller. [ 2.262454] dwmmc_rockchip fe310000.dwmmc: Version ID is 270a [ 2.262985] dwmmc_rockchip fe310000.dwmmc: DW MMC controller at irq 25,32 bio [ 2.263855] dwmmc_rockchip fe310000.dwmmc: 'clock-freq-min-max' property was. [ 2.264629] dwmmc_rockchip fe310000.dwmmc: No vmmc regulator found [ 2.265179] dwmmc_rockchip fe310000.dwmmc: No vqmmc regulator found [ 2.265972] dwmmc_rockchip fe310000.dwmmc: allocated mmc-pwrseq [ 2.277015] mmc_host mmc2: Bus speed (slot 0) = 400000Hz (slot req 400000Hz,) [ 2.288043] dwmmc_rockchip fe310000.dwmmc: 1 slots initialized [ 2.296443] asoc-simple-card rt5640-sound: rt5640-aif1 <-> ff890000.i2s mappk [ 2.297615] usb 2-1: New USB device found, idVendor=1a40, idProduct=0201 [ 2.298217] usb 2-1: New USB device strings: Mfr=0, Product=1, SerialNumber=0 [ 2.298843] usb 2-1: Product: USB 2.0 Hub [MTT] [ 2.299556] input: rockchip,rt5640-codec Headphone Jack as /devices/platform1 [ 2.299846] hub 2-1:1.0: USB hub found [ 2.299988] hub 2-1:1.0: 7 ports detected [ 2.302290] asoc-simple-card hdmi-codec: i2s-hifi <-> ff8a0000.i2s mapping ok [ 2.304025] rockchip-spdif ff870000.spdif: Missing dma channel for stream: 0 [ 2.304650] rockchip-spdif ff870000.spdif: ASoC: pcm constructor failed: -22 [ 2.305294] asoc-simple-card spdif-sound: ASoC: can't create pcm ff870000.sp2 [ 2.306056] asoc-simple-card spdif-sound: ASoC: failed to instantiate card -2 [ 2.306825] asoc-simple-card: probe of spdif-sound failed with error -22 [ 2.307671] dhd_module_init: in [ 2.307676] [ 2.307678] ======================================================= [ 2.307680] ==== Launching Wi-Fi driver! (Powered by Rockchip) ==== [ 2.307681] ======================================================= [ 2.307684] Realtek 8188EU USB WiFi driver (Powered by Rockchip,Ver 2.20.WFD. [ 2.307687] [WLAN_RFKILL]: rockchip_wifi_power: 1 [ 2.307690] [WLAN_RFKILL]: wifi turn on power. -1 [ 2.307691] RTL871X: module init start [ 2.307693] RTL871X: rtl8188eu v4.3.24_16705.20160509 [ 2.307800] usbcore: registered new interface driver rtl8188eu [ 2.307802] RTL871X: module init ret=0 [ 2.308704] input: gpio-keys as /devices/platform/gpio-keys/input/input2 [ 2.309791] rk808-rtc rk808-rtc: setting system clock to 2018-08-04 10:12:58) [ 2.314318] ======== dhd_wlan_init_plat_data ======== [ 2.314771] dhd_wlan_init_gpio: GPIO(WL_REG_ON) = -1 [ 2.315225] dhd_wlan_init_gpio: GPIO(WL_HOST_WAKE) = -1 [ 2.315691] [WLAN_RFKILL]: rockchip_wifi_get_oob_irq: Enter [ 2.316188] dhd_wlan_init_gpio: host_oob_irq: 70 [ 2.316594] dhd_wlan_init_gpio: host_oob_irq_flags=0x414 [ 2.317081] dhd_wifi_platform_load: Enter [ 2.317477] Power-up adapter 'DHD generic adapter' [ 2.317971] wifi_platform_set_power = 1 [ 2.318318] ======== PULL WL_REG_ON(-1) HIGH! ======== [ 2.318772] [WLAN_RFKILL]: rockchip_wifi_power: 1 [ 2.319197] [WLAN_RFKILL]: wifi turn on power. -1 [ 2.319976] dwmmc_rockchip fe310000.dwmmc: Unexpected command timeout, state7 [ 2.326580] ret 1024 [ 2.327883] ALSA device list: [ 2.328182] #0: rockchip,rt5640-codec [ 2.328527] #1: HDMI-CODEC [ 2.329750] EXT4-fs (mmcblk1p6): couldn't mount as ext3 due to feature incoms [ 2.330758] EXT4-fs (mmcblk1p6): couldn't mount as ext2 due to feature incoms [ 2.334267] EXT4-fs (mmcblk1p6): mounted filesystem with ordered data mode. ) [ 2.335030] VFS: Mounted root (ext4 filesystem) on device 179:6. [ 2.335929] devtmpfs: mounted [ 2.336791] Freeing unused kernel memory: 1152K (ffffff80090d0000 - ffffff80) [ 2.343725] mmc2: queuing unknown CIS tuple 0x80 (2 bytes) [ 2.345882] mmc2: queuing unknown CIS tuple 0x80 (3 bytes) [ 2.348046] mmc2: queuing unknown CIS tuple 0x80 (3 bytes) [ 2.351514] mmc2: queuing unknown CIS tuple 0x80 (7 bytes) [ 2.392884] systemd[1]: Failed to insert module 'autofs4': No such file or dy [ 2.404118] random: systemd: uninitialized urandom read (16 bytes read, 22 b) [ 2.406514] random: systemd: uninitialized urandom read (16 bytes read, 22 b) [ 2.408818] systemd[1]: systemd 229 running in system mode. (+PAM +AUDIT +SE) [ 2.411355] systemd[1]: Detected architecture arm64. Welcome to Ubuntu 16.04.2 LTS! [ 2.414088] systemd[1]: Set hostname to . [ 2.416307] mmc_host mmc2: Bus speed (slot 0) = 100000000Hz (slot req 100000) [ 2.442707] random: systemd: uninitialized urandom read (16 bytes read, 28 b) [ 2.447737] random: systemd-cryptse: uninitialized urandom read (16 bytes re) [ 2.449325] random: systemd-gpt-aut: uninitialized urandom read (16 bytes re) [ 2.449338] random: systemd-sysv-ge: uninitialized urandom read (16 bytes re) [ 2.451599] random: systemd-gpt-aut: uninitialized urandom read (16 bytes re) [ 2.452642] random: systemd-gpt-aut: uninitialized urandom read (16 bytes re) [ 2.455454] random: systemd-gpt-aut: uninitialized urandom read (16 bytes re) [ 2.458440] random: systemd-sysv-ge: uninitialized urandom read (16 bytes re) [ 2.519989] wifi_platform_bus_enumerate device present 1 [ 2.520472] ======== Card detection to detect SDIO card! ======== [ 2.521018] mmc2:mmc host rescan start! [ 2.558674] systemd[1]: Reached target User and Group Name Lookups. [ OK ] Reached target User and Group Name Lookups. [ 2.559811] systemd[1]: Listening on /dev/initctl Compatibility Named Pipe. [ OK ] Listening on /dev/initctl Compatibility Named Pipe. [ 2.560948] systemd[1]: Listening on Journal Socket. [ OK ] Listening on Journal Socket. [ 2.561956] systemd[1]: Started Forward Password Requests to Wall Directory . [ OK ] Started Forward Password Requests to Wall Directory Watch. [ 2.563036] systemd[1]: Reached target Remote File Systems (Pre). [ OK ] Reached target Remote File Systems (Pre). [ 2.564174] systemd[1]: Listening on Journal Socket (/dev/log). [ OK ] Listening on Journal Socket (/dev/log). [ 2.569803] systemd[1]: Reached target Encrypted Volumes. [ OK ] Reached target Encrypted Volumes. [ 2.570546] systemd[1]: Reached target Remote File Systems. [ OK ] Reached target Remote File Systems. [ 2.571577] systemd[1]: Listening on Syslog Socket. [ OK ] Listening on Syslog Socket. [ 2.572701] systemd[1]: Created slice User and Session Slice. [ OK ] Created slice User and Session Slice. [ 2.573467] systemd[1]: Reached target Swap. [ OK ] Reached target Swap. [ 2.574358] systemd[1]: Listening on udev Control Socket. [ 2.574997] usb 2-1.7: new low-speed USB device number 3 using ehci-platform [ OK ] Listening on udev Control Socket. [ 2.575866] systemd[1]: Listening on udev Kernel Socket. [ OK ] Listening on udev Kernel Socket. [ 2.577062] systemd[1]: Created slice System Slice. [ OK ] Created slice System Slice. [ 2.579431] systemd[1]: Starting Journal Service... Starting Journal Service... [ 2.580444] systemd[1]: Created slice system-serial\x2dgetty.slice. [ OK ] Created slice system-serial\x2dgetty.slice. [ 2.582696] systemd[1]: Starting Remount Root and Kernel File Systems... Starting Remount Root and Kernel File Systems... [ 2.585795] systemd[1]: Mounting POSIX Message Queue File System... Mounting POSIX Message Queue File System... [ 2.589055] systemd[1]: Starting Set console keymap... Starting Set console keymap... [ 2.592841] systemd[1]: Starting Create Static Device Nodes in /dev... Starting Create Static Device Nodes in /dev... [ 2.600500] systemd[1]: Starting Load Kernel Modules... Starting Load Kernel Modules... [ 2.604024] systemd[1]: Mounting Debug File System... Mounting Debug File System... [ 2.605593] systemd[1]: Reached target Slices. [ OK ] Reached target Slices. [ 2.612433] dwmmc_rockchip fe310000.dwmmc: Successfully tuned phase to 112 [ 2.618610] systemd[1]: Started Remount Root and Kernel File Systems. [ OK ] Started Remount Root and Kernel File Systems. [ 2.622940] mmc2: queuing unknown CIS tuple 0x91 (3 bytes) [ 2.623508] mmc2: new ultra high speed SDR104 SDIO card at address 0001 [ 2.625619] systemd[1]: Mounted POSIX Message Queue File System. [ OK ] Mounted POSIX Message Queue File System. [ 2.626942] systemd[1]: systemd-modules-load.service: Main process exited, cE [ 2.628435] systemd[1]: Failed to start Load Kernel Modules. [FAILED] Failed to start Load Kernel Modules. See 'systemctl status systemd-modules-load.service' for details. [ 2.629799] systemd[1]: systemd-modules-load.service: Unit entered failed st. [ 2.631278] systemd[1]: systemd-modules-load.service: Failed with result 'ex. [ 2.632546] systemd[1]: Mounted Debug File System. [ OK ] Mounted Debug File System. [ 2.636648] systemd[1]: Started Create Static Device Nodes in /dev. [ OK ] Started Create Static Device Nodes in /dev. [ 2.641063] bcmsdh_register: register client driver [ 2.641720] bcmsdh_sdmmc: bcmsdh_sdmmc_probe Enter [ 2.642254] bcmsdh_sdmmc: bcmsdh_sdmmc_probe Enter [ 2.642681] bus num (host idx)=2, slot num (rca)=1 [ 2.643120] found adapter info 'DHD generic adapter' [ 2.643670] sdioh_attach: set sd_f2_blocksize 256 [ 2.644972] F1 signature read @0x18000000=0x17224356 [ 2.651845] F1 signature OK, socitype:0x1 chip:0x4354 rev:0x2 pkg:0x2 [ 2.653250] DHD: dongle ram size is set to 786432(orig 786432) at 0x180000 [ 2.653952] dhd_conf_set_chiprev: chip=0x4354, chiprev=2 [ 2.654473] dhd_conf_set_conf_path_by_nv_path: config_path=/system/etc/firmwt [ 2.664603] usb 2-1.7: New USB device found, idVendor=0461, idProduct=4d15 [ 2.664988] wl_create_event_handler(): thread:wl_event_handler:e7 started [ 2.665129] wl_escan_attach: Enter [ 2.665151] wl_escan_init: Enter [ 2.665207] tsk Enter, tsk = 0xffffffc076a01be8 [ 2.666838] usb 2-1.7: New USB device strings: Mfr=0, Product=2, SerialNumbe0 [ 2.667495] usb 2-1.7: Product: USB Optical Mouse [ 2.667948] wl_create_event_handler(): thread:wl_escan_handler:e8 started [ 2.667950] tsk Enter, tsk = 0xffffffc076a301b0 [ 2.669898] dhd_attach(): thread:dhd_watchdog_thread:e9 started [ 2.670803] dhd_attach(): thread:dhd_dpc:ea started [ 2.671359] dhd_attach(): thread:dhd_rxf:eb started [ 2.671816] dhd_deferred_work_init: work queue initialized [ 2.673058] input: USB Optical Mouse as /devices/platform/fe3c0000.usb/usb2/3 [ 2.685389] Dongle Host Driver, version 1.363.59.144.7 (r) [ 2.686616] Register interface [wlan0] MAC: ac:83:f3:9f:12:84 [ 2.686616] [ 2.687300] wl_event_handler: was terminated [ 2.687702] wl_destroy_event_handler(): thread:wl_event_handler:e7 terminateK [ 2.688366] dhd_wl_ioctl: returning as busstate=0 [ 2.688856] bcmsdh_oob_intr_unregister: Enter [ 2.689256] bcmsdh_oob_intr_unregister: irq is not registered [ 2.689773] dhd_txglom_enable: enable 0 [ 2.690125] dhd_conf_set_txglom_params: swtxglom=0, txglom_ext=0, txglom_buc0 [ 2.690816] dhd_conf_set_txglom_params: txglomsize=0, deferred_tx_len=0, bus1 [ 2.691514] dhd_conf_set_txglom_params: tx_in_rx=1, txinrx_thres=128, dhd_tx1 [ 2.692213] dhd_conf_set_txglom_params: tx_max_offset=0, txctl_tmo_fix=0 [ 2.692800] sdioh_set_mode: set txglom_mode to copy [ 2.693242] dhd_bus_devreset: WLAN OFF DONE [ 2.693706] wifi_platform_set_power = 0 [ 2.694064] ======== PULL WL_REG_ON(-1) LOW! ======== [ 2.694514] [WLAN_RFKILL]: rockchip_wifi_power: 0 [ 2.694941] [WLAN_RFKILL]: wifi shut off power. [ 2.695468] dhd_module_init: Exit err=0 [ 2.698394] systemd[1]: Started Set console keymap. [ OK ] Started Set console keymap. [ 2.712280] systemd[1]: Starting udev Kernel Device Manager... Starting udev Kernel Device Manager... [ 2.714915] systemd[1]: Starting Apply Kernel Variables... Starting Apply Kernel Variables... [ 2.717279] systemd[1]: Mounting FUSE Control File System... Mounting FUSE Control File System... [ 2.720092] systemd[1]: Mounting Configuration File System... Mounting Configuration File System... [ 2.721111] systemd[1]: Reached target Local File Systems (Pre). [ OK ] Reached target Local File Systems (Pre). [ 2.722199] systemd[1]: Reached target Local File Systems. [ OK ] Reached target Local File Systems. [ 2.724674] systemd[1]: Starting Set console font and keymap... [ 2.724849] vendor storage:20160801 ret = 0 [ 2.725122] hid-generic 0003:0461:4D15.0001: input,hidraw0: USB HID v1.11 Mo0 Starting Set console font and keymap... [ 2.728720] systemd[1]: Starting Tell Plymouth To Write Out Runtime Data... Starting Tell Plymouth To Write Out Runtime Data... [ 2.732023] systemd[1]: Starting LSB: AppArmor initialization... Starting LSB: AppArmor initialization... [ 2.737194] systemd[1]: Starting udev Coldplug all Devices... Starting udev Coldplug all Devices... [ 2.740802] systemd[1]: Starting Load/Save Random Seed... Starting Load/Save Random Seed... [ OK ] Mounted Configuration File System. [ OK ] Mounted FUSE Control File System. [ OK ] Started Journal Service. [ OK ] Started Apply Kernel Variables. [ OK ] Started Tell Plymouth To Write Out Runtime Data. [ OK ] Started Load/Save Random Seed. [ OK ] Started udev Kernel Device Manager. [ OK ] Started LSB: AppArmor initialization. Starting Raise network interfaces... Starting Flush Journal to Persistent Storage... [ OK ] Started Flush Journal to Persistent Storage. Starting Create Volatile Files and Directories... [ OK ] Started Create Volatile Files and Directories. Starting Network Time Synchronization... Starting Update UTMP about System Boot/Shutdown... [ OK ] Started udev Coldplug all Devices. [ OK ] Started Set console font and keymap. [ OK ] Started Network Time Synchronization. [ OK ] Started Update UTMP about System Boot/Shutdown. [ OK ] Reached target System Time Synchronized. [ OK ] Created slice system-getty.slice. [ OK ] Reached target System Initialization. [ OK ] Listening on Avahi mDNS/DNS-SD Stack Activation Socket. [ OK ] Started Daily Cleanup of Temporary Directories. [ OK ] Listening on D-Bus System Message Bus Socket. [ OK ] Started Timer to automatically refresh installed snaps. Starting Socket activation for snappy daemon. [ OK ] Started Daily apt activities. [ OK ] Reached target Timers. [ OK ] Started Dispatch Password Requests to Console Directory Watch. [ OK ] Reached target Paths. [ OK ] Listening on Socket activation for snappy daemon. [ OK ] Reached target Sockets. [ OK ] Reached target Basic System. [ OK ] Started CUPS Scheduler. Starting Restore /etc/resolv.conf i...re the ppp link was shut down... [ OK ] Started Run anacron jobs. [ OK ] Started Regular background program processing daemon. Starting LSB: automatic crash report generation... Starting Avahi mDNS/DNS-SD Stack... Starting Accounts Service... Starting LSB: Set the CPU Frequency Scaling governor to "ondemand"... [ OK ] Started D-Bus System Message Bus. [ OK ] Started Avahi mDNS/DNS-SD Stack. [ OK ] Started Make remote CUPS printers available locally. Starting Network Manager... Starting Save/Restore Sound Card State... Starting Resize root filesystem to fit available disk space... Starting System Logging Service... Starting Modem Manager... Starting Login Service... Starting Permit User Sessions... [ OK ] Started Snappy daemon. Starting Auto import assertions from block devices... [ OK ] Started System Logging Service. [ OK ] Started Restore /etc/resolv.conf if...fore the ppp link was shut down. [ OK ] Started Permit User Sessions. [ OK ] Started Auto import assertions from block devices. [ OK ] Started Save/Restore Sound Card State. [ OK ] Found device /dev/ttyFIQ0. [ OK ] Started LSB: Set the CPU Frequency Scaling governor to "ondemand". [ OK ] Started LSB: automatic crash report generation. [ OK ] Started Raise network interfaces. [ OK ] Started Resize root filesystem to fit available disk space. [ OK ] Started Login Service. Starting Network Manager Script Dispatcher Service... [ OK ] Reached target Sound Card. [ OK ] Listening on Load/Save RF Kill Switch Status /dev/rfkill Watch. Starting Authenticate and Authorize Users to Run Privileged Tasks... Starting Setup rockchip platform environment... [ OK ] Started Network Manager Script Dispatcher Service. Starting Load/Save RF Kill Switch Status... [ OK ] Started Load/Save RF Kill Switch Status. [ OK ] Started Authenticate and Authorize Users to Run Privileged Tasks. [ OK ] Started Accounts Service. [ OK ] Started Modem Manager. [ OK ] Started Setup rockchip platform environment. Starting Light Display Manager... Starting Hostname Service... [ OK ] Started Hostname Service. [ OK ] Started Light Display Manager. [ 5.186791] CONFIG-ERROR) dhd_conf_set_bufiovar: country setting failed -2 Starting WPA supplicant... [ OK ] Started WPA supplicant. [ OK ] Started Network Manager. [ OK ] Reached target Network. [ OK ] Started Unattended Upgrades Shutdown. Starting /etc/rc.local Compatibility... [ OK ] Closed OpenBSD Secure Shell server socket. [ 5.510199] rc.local[823]: Setting up ssl-cert (1.0.37) ... [ OK ] Created slice User Slice of firefly. Starting User Manager for UID 1000... [ OK ] Started Session c1 of user firefly. [ OK ] Started User Manager for UID 1000. [ 5.908728] rc.local[823]: debconf: unable to initialize frontend: Dialog [ 5.909292] rc.local[823]: debconf: (TERM is not set, so the dialog frontend) [ 5.909989] rc.local[823]: debconf: falling back to frontend: Readline [ 5.942467] rc.local[823]: debconf: unable to initialize frontend: Readline [ 5.943058] rc.local[823]: debconf: (This frontend requires a controlling tt) [ 5.943619] rc.local[823]: debconf: falling back to frontend: Teletype [ 6.496532] rc.local[823]: Setting up cups-daemon (2.1.3-4) ... Starting RealtimeKit Scheduling Policy Service... Starting Daemon for power management... [ OK ] Started RealtimeKit Scheduling Policy Service. [ OK ] Started Daemon for power management. Starting Bluetooth service... [ OK ] Started Bluetooth service. [ OK ] Started CUPS Scheduler. Starting Load/Save RF Kill Switch Status... [ OK ] Started Load/Save RF Kill Switch Status. Starting Disk Manager... [ OK ] Started Disk Manager. [ OK ] Started CUPS Scheduler. [ OK ] Started CUPS Scheduler. [ 11.418093] rc.local[823]: Setting up cups-core-drivers (2.1.3-4) ... [ 11.435193] rc.local[823]: Setting up openssh-server (1:7.2p2-4ubuntu2.2) ... [ 11.783709] rc.local[823]: debconf: unable to initialize frontend: Dialog [ 11.784319] rc.local[823]: debconf: (TERM is not set, so the dialog frontend) [ 11.784933] rc.local[823]: debconf: falling back to frontend: Readline [ 11.810307] rc.local[823]: debconf: unable to initialize frontend: Readline [ 11.810912] rc.local[823]: debconf: (This frontend requires a controlling tt) [ 11.811400] rc.local[823]: debconf: falling back to frontend: Teletype [ 12.221323] rc.local[823]: Creating SSH2 RSA key; this may take some time ... [ 12.235909] rc.local[823]: 2048 SHA256:ecrg+yEcawHARFqOk2/LdMK/H2Zb375jRH1jf) [ 12.454415] rc.local[823]: Creating SSH2 DSA key; this may take some time ... [ 12.468530] rc.local[823]: 1024 SHA256:ApyU5QXR57+uaQyd3C1UsfZMx9FQZsUlxq6lh) [ 12.481642] rc.local[823]: Creating SSH2 ECDSA key; this may take some time . [ 12.491025] rc.local[823]: 256 SHA256:hTxMPLn3RtVVCL5P//jK5D27/hH6gfWY5Om+d9) [ 12.507619] rc.local[823]: Creating SSH2 ED25519 key; this may take some tim. [ 12.517203] rc.local[823]: 256 SHA256:nzvYXNPHhlBfuG2MUYYDXyq2IKkuo4dTCwnN78) [ OK ] Started CUPS Scheduler. [ OK ] Started CUPS Scheduler. [ OK ] Started CUPS Scheduler. Starting OpenBSD Secure Shell server... [ OK ] Started OpenBSD Secure Shell server. [ 14.382297] rc.local[823]: Setting up cups (2.1.3-4) ... [ 14.672214] rc.local[823]: debconf: unable to initialize frontend: Dialog [ 14.672795] rc.local[823]: debconf: (TERM is not set, so the dialog frontend) [ 14.673404] rc.local[823]: debconf: falling back to frontend: Readline [ 14.688474] rc.local[823]: debconf: unable to initialize frontend: Readline [ 14.689076] rc.local[823]: debconf: (This frontend requires a controlling tt) [ 14.689649] rc.local[823]: debconf: falling back to frontend: Teletype [ 18.833368] rc.local[823]: Updating PPD files for cups ... [ 18.910359] rc.local[823]: Updating PPD files for cups-filters ... [ 18.986752] rc.local[823]: Updating PPD files for foomatic-db-compressed-ppd. [ 19.057844] rc.local[823]: Updating PPD files for openprinting-ppds ... [ 19.114253] rc.local[823]: Updating PPD files for brlaser ... [ 19.162410] rc.local[823]: Updating PPD files for c2esp ... [ 19.219103] rc.local[823]: Updating PPD files for foo2zjs-common ... [ 19.290103] rc.local[823]: Updating PPD files for gutenprint ... [ 19.347303] rc.local[823]: Updating PPD files for hpcups ... [ 19.401331] rc.local[823]: Updating PPD files for postscript-hp ... [ 19.451548] rc.local[823]: Updating PPD files for ptouch ... [ 19.512614] rc.local[823]: Updating PPD files for pxljr ... [ 19.569452] rc.local[823]: Updating PPD files for sag-gdi ... [ 19.646657] rc.local[823]: Updating PPD files for splix ... [ 19.870760] rc.local[823]: Setting up printer-driver-splix (2.0.0+svn315-4fa. [ 19.887131] rc.local[823]: Setting up printer-driver-gutenprint (5.2.11-1) .. [ 19.920779] rc.local[823]: Setting up printer-driver-hpcups (3.16.3+repack0-. [ 19.936490] rc.local[823]: Setting up bluez-cups (5.37-0ubuntu5) ... [ 19.950865] rc.local[823]: Setting up hplip (3.16.3+repack0-1) ... [ 19.983854] rc.local[823]: Creating/updating hplip user account... [ OK ] Started CUPS Scheduler. [ 20.807073] rc.local[823]: Setting up printer-driver-postscript-hp (3.16.3+r. [ 20.828127] rc.local[823]: Processing triggers for systemd (229-4ubuntu17) .. [ OK ] Started CUPS Scheduler. [ 21.260158] rc.local[823]: Processing triggers for dbus (1.10.6-1ubuntu3.3) . [ OK ] Started /etc/rc.local Compatibility. Starting Hold until boot process finishes up... [ OK ] Started Hold until boot process finishes up. [ OK ] Started Serial Getty on ttyFIQ0. [ OK ] Started Getty on tty1. [ OK ] Reached target Login Prompts. [ OK ] Reached target Multi-User System. [ OK ] Reached target Graphical Interface. Starting Update UTMP about System Runlevel Changes... Starting Set console scheme... [ OK ] Started Set console scheme. [ OK ] Started Update UTMP about System Runlevel Changes. Starting Load/Save RF Kill Switch Status... [ OK ] Started Load/Save RF Kill Switch Status. Ubuntu 16.04.2 LTS firefly ttyFIQ0 firefly login: root (automatic login) Welcome to Ubuntu 16.04.2 LTS (GNU/Linux 4.4.77 aarch64) * Documentation: https://help.ubuntu.com * Management: https://landscape.canonical.com * Support: https://ubuntu.com/advantage The programs included with the Ubuntu system are free software; the exact distribution terms for each program are described in the individual files in /usr/share/doc/*/copyright. Ubuntu comes with ABSOLUTELY NO WARRANTY, to the extent permitted by applicable law. root@firefly:~# |
The kernel booted in about 20 seconds.
Some system info with the usual commands:
|
1 2 3 4 5 6 7 8 9 10 11 12 13 14 15 16 17 18 19 20 21 22 23 |
root@firefly:~# cat /etc/lsb-release DISTRIB_ID=Ubuntu DISTRIB_RELEASE=16.04 DISTRIB_CODENAME=xenial DISTRIB_DESCRIPTION="Ubuntu 16.04.2 LTS" root@firefly:~# uname -a Linux firefly 4.4.77 #836 SMP Fri Jan 19 10:37:54 HKT 2018 aarch64 aarch64 aarcx root@firefly:~# df -h Filesystem Size Used Avail Use% Mounted on /dev/root 15G 2.1G 12G 15% / devtmpfs 955M 0 955M 0% /dev tmpfs 956M 172K 956M 1% /dev/shm tmpfs 956M 9.1M 947M 1% /run tmpfs 5.0M 4.0K 5.0M 1% /run/lock tmpfs 956M 0 956M 0% /sys/fs/cgroup tmpfs 192M 44K 192M 1% /run/user/1000 tmpfs 192M 0 192M 0% /run/user/0 /dev/sda1 245G 182G 63G 75% /media/firefly/USB3_NTFS /dev/sda2 241G 181G 48G 80% /media/firefly/USB3_EXT4 root@firefly:~# free -mh total used free shared buff/cache available Mem: 1.9G 577M 894M 27M 438M 1.2G Swap: 0B 0B 0B |
It’s not exactly the most recent Ubuntu version, but everything else is as expected with a 15GB rootfs, and around 1.9GB total RAM. I won’t update Ubuntu at first, in case this breaks a few things, but I’ll do it later in this review. The board detect all four partitions on my drives, but can only mount NTFS and EXT4 partition, since exFAT and BTRFS are not enabled in the kernel.
No modules are loaded since they are built-in the kernel like with ROC-RK3328-C, and gpios appears to be enable:
|
1 2 3 4 |
root@firefly:~# lsmod Module Size Used by root@firefly:~# ls /sys/class/gpio/ export gpiochip0 gpiochip128 gpiochip32 gpiochip64 gpiochip96 unexport |
Firefly has one of the best documentation for drivers and I/Os I’ve seen so far, and they explain how to define the behavior in device tree files, program the drivers in C language, and debug with sysfs.
For example, we can see more details about the pins with the following commands:
|
1 2 3 4 5 6 7 8 9 10 11 12 13 14 15 16 17 18 19 20 21 22 23 24 25 26 27 28 29 30 31 32 33 |
cat /sys/kernel/debug/gpio GPIOs 0-31, platform/pinctrl, gpio0: gpio-4 ( |bt_default_wake_host) in hi gpio-5 ( |GPIO Key Power ) in hi gpio-9 ( |bt_default_reset ) out hi gpio-10 ( |reset ) out hi gpio-13 ( |vcc3v3_pcie ) out hi GPIOs 32-63, platform/pinctrl, gpio1: gpio-32 ( |vcc5v0_host ) out hi gpio-33 ( |vcc_lcd ) out hi gpio-34 ( |irq-gpio ) in hi gpio-35 ( |vbus_5v ) out hi gpio-42 ( |cs-gpio ) out hi gpio-45 ( |pmic-hold-gpio ) out hi gpio-46 ( |vsel ) out lo gpio-49 ( |reset-gpio ) out hi gpio-52 ( |sdpwr-gpio ) out hi gpio-56 ( |pmic-stby-gpio ) out hi GPIOs 64-95, platform/pinctrl, gpio2: gpio-66 ( |? ) out lo gpio-68 ( |power-gpio ) out hi gpio-70 ( |vcc3v3_3g ) out hi gpio-71 ( |? ) out hi gpio-83 ( |bt_default_rts ) out lo gpio-90 ( |bt_default_wake ) out hi GPIOs 96-127, platform/pinctrl, gpio3: gpio-111 ( |mdio-reset ) out hi GPIOs 128-159, platform/pinctrl, gpio4: gpio-149 ( |hp-con-gpio ) out lo |
Commands to turn off and on again one of the Blue LED close to the DC jack:
|
1 2 |
echo 0 >/sys/class/leds/firefly:blue:power/brightness echo 1 >/sys/class/leds/firefly:blue:power/brightness |
Command to read ADC values using sysfs:
|
1 2 3 4 5 6 7 |
cat /sys/bus/iio/devices/iio\:device0/in_voltage*_raw 1023 1022 3 808 6 717 |
and some PWM info:
|
1 2 3 4 5 6 7 8 9 |
cat /sys/kernel/debug/pwm platform/ff420020.pwm, 1 PWM device pwm-0 (vdd-log ): requested enabled period: 24997 ns duty: 16754 ns pe platform/ff420010.pwm, 1 PWM device pwm-0 ((null) ): period: 0 ns duty: 0 ns polarity: normal platform/ff420000.pwm, 1 PWM device pwm-0 ((null) ): period: 0 ns duty: 0 ns polarity: normal |
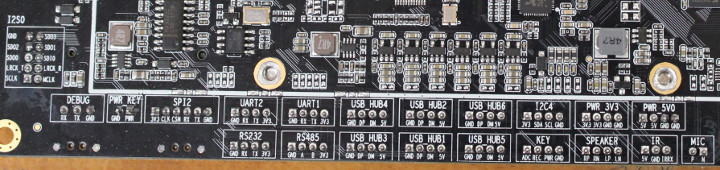
AIo-3399J has many I/O headers, and all marked on the other side of the board.
3D Graphics (OpenGL ES) on AIO3399-J with Ubuntu 16.04
Let’s move to test whether 3D graphics acceleration is enabled by installating the usual tools:
|
1 |
apt install mesa-utils-extra glmark2-es2 |
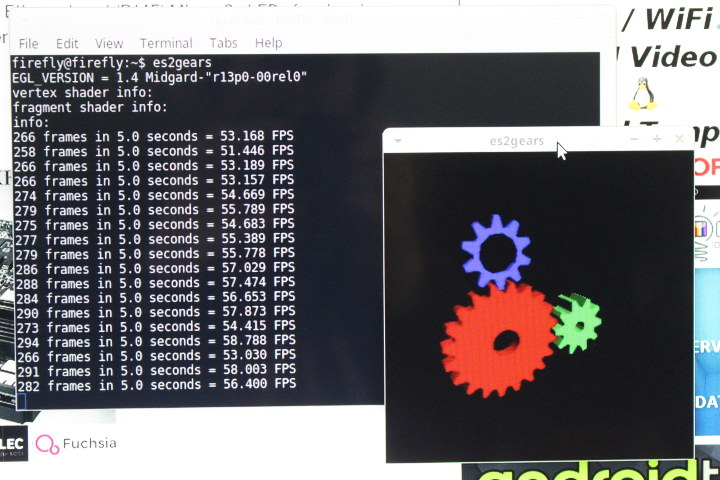
es2_info reports Arm Midgard r13p0 GPU driver is indeed loaded:
|
1 2 3 4 5 6 7 8 9 10 11 12 13 14 15 16 17 18 19 20 21 22 23 24 25 26 27 28 29 30 31 32 33 34 35 36 37 38 39 40 41 42 43 44 45 46 47 48 49 50 51 52 53 54 55 56 |
es2_info EGL_VERSION: 1.4 Midgard-"r13p0-00rel0" EGL_VENDOR: ARM EGL_EXTENSIONS: EGL_KHR_image_pixmap, EGL_KHR_partial_update, EGL_KHR_config_attribs, EGL_KHR_image, EGL_KHR_image_base, EGL_KHR_fence_sync, EGL_KHR_wait_sync, EGL_KHR_gl_colorspace, EGL_KHR_get_all_proc_addresses, EGL_IMG_context_priority, EGL_ARM_pixmap_multisample_discard, EGL_KHR_gl_texture_2D_image, EGL_KHR_gl_renderbuffer_image, EGL_KHR_create_context, EGL_KHR_surfaceless_context, EGL_KHR_gl_texture_cubemap_image, EGL_EXT_create_context_robustness, EGL_KHR_cl_event2 EGL_CLIENT_APIS: OpenGL_ES GL_VERSION: OpenGL ES 3.2 v1.r13p0-00rel0-git(a4271c9).31ba04af2d3c01618138bef3aed66c2c GL_RENDERER: Mali-T860 GL_EXTENSIONS: GL_ARM_rgba8, GL_ARM_mali_shader_binary, GL_OES_depth24, GL_OES_depth_texture, GL_OES_depth_texture_cube_map, GL_OES_packed_depth_stencil, GL_OES_rgb8_rgba8, GL_EXT_read_format_bgra, GL_OES_compressed_paletted_texture, GL_OES_compressed_ETC1_RGB8_texture, GL_OES_standard_derivatives, GL_OES_EGL_image, GL_OES_EGL_image_external, GL_OES_EGL_image_external_essl3, GL_OES_EGL_sync, GL_OES_texture_npot, GL_OES_vertex_half_float, GL_OES_required_internalformat, GL_OES_vertex_array_object, GL_OES_mapbuffer, GL_EXT_texture_format_BGRA8888, GL_EXT_texture_rg, GL_EXT_texture_type_2_10_10_10_REV, GL_OES_fbo_render_mipmap, GL_OES_element_index_uint, GL_EXT_shadow_samplers, GL_OES_texture_compression_astc, GL_KHR_texture_compression_astc_ldr, GL_KHR_texture_compression_astc_hdr, GL_KHR_texture_compression_astc_sliced_3d, GL_KHR_debug, GL_EXT_occlusion_query_boolean, GL_EXT_disjoint_timer_query, GL_EXT_blend_minmax, GL_EXT_discard_framebuffer, GL_OES_get_program_binary, GL_OES_texture_3D, GL_EXT_texture_storage, GL_EXT_multisampled_render_to_texture, GL_OES_surfaceless_context, GL_OES_texture_stencil8, GL_EXT_shader_pixel_local_storage, GL_ARM_shader_framebuffer_fetch, GL_ARM_shader_framebuffer_fetch_depth_stencil, GL_ARM_mali_program_binary, GL_EXT_sRGB, GL_EXT_sRGB_write_control, GL_EXT_texture_sRGB_decode, GL_KHR_blend_equation_advanced, GL_KHR_blend_equation_advanced_coherent, GL_OES_texture_storage_multisample_2d_array, GL_OES_shader_image_atomic, GL_EXT_robustness, GL_EXT_draw_buffers_indexed, GL_OES_draw_buffers_indexed, GL_EXT_texture_border_clamp, GL_OES_texture_border_clamp, GL_EXT_texture_cube_map_array, GL_OES_texture_cube_map_array, GL_OES_sample_variables, GL_OES_sample_shading, GL_OES_shader_multisample_interpolation, GL_EXT_shader_io_blocks, GL_OES_shader_io_blocks, GL_EXT_tessellation_shader, GL_OES_tessellation_shader, GL_EXT_primitive_bounding_box, GL_OES_primitive_bounding_box, GL_EXT_geometry_shader, GL_OES_geometry_shader, GL_ANDROID_extension_pack_es31a, GL_EXT_gpu_shader5, GL_OES_gpu_shader5, GL_EXT_texture_buffer, GL_OES_texture_buffer, GL_EXT_copy_image, GL_OES_copy_image, GL_EXT_color_buffer_half_float, GL_EXT_color_buffer_float, GL_EXT_YUV_target, GL_OVR_multiview, GL_OVR_multiview2, GL_OVR_multiview_multisampled_render_to_texture, GL_KHR_robustness, GL_KHR_robust_buffer_access_behavior, GL_EXT_draw_elements_base_vertex, GL_OES_draw_elements_base_vertex |
es2gears works OK with Midgard driver at around 55 fps.
 glmark2-es2 could also run just fine, and with more sample than on ROC-RK3328-CC since OpenGL ES 3.2 is supported (and not just version 2.0),
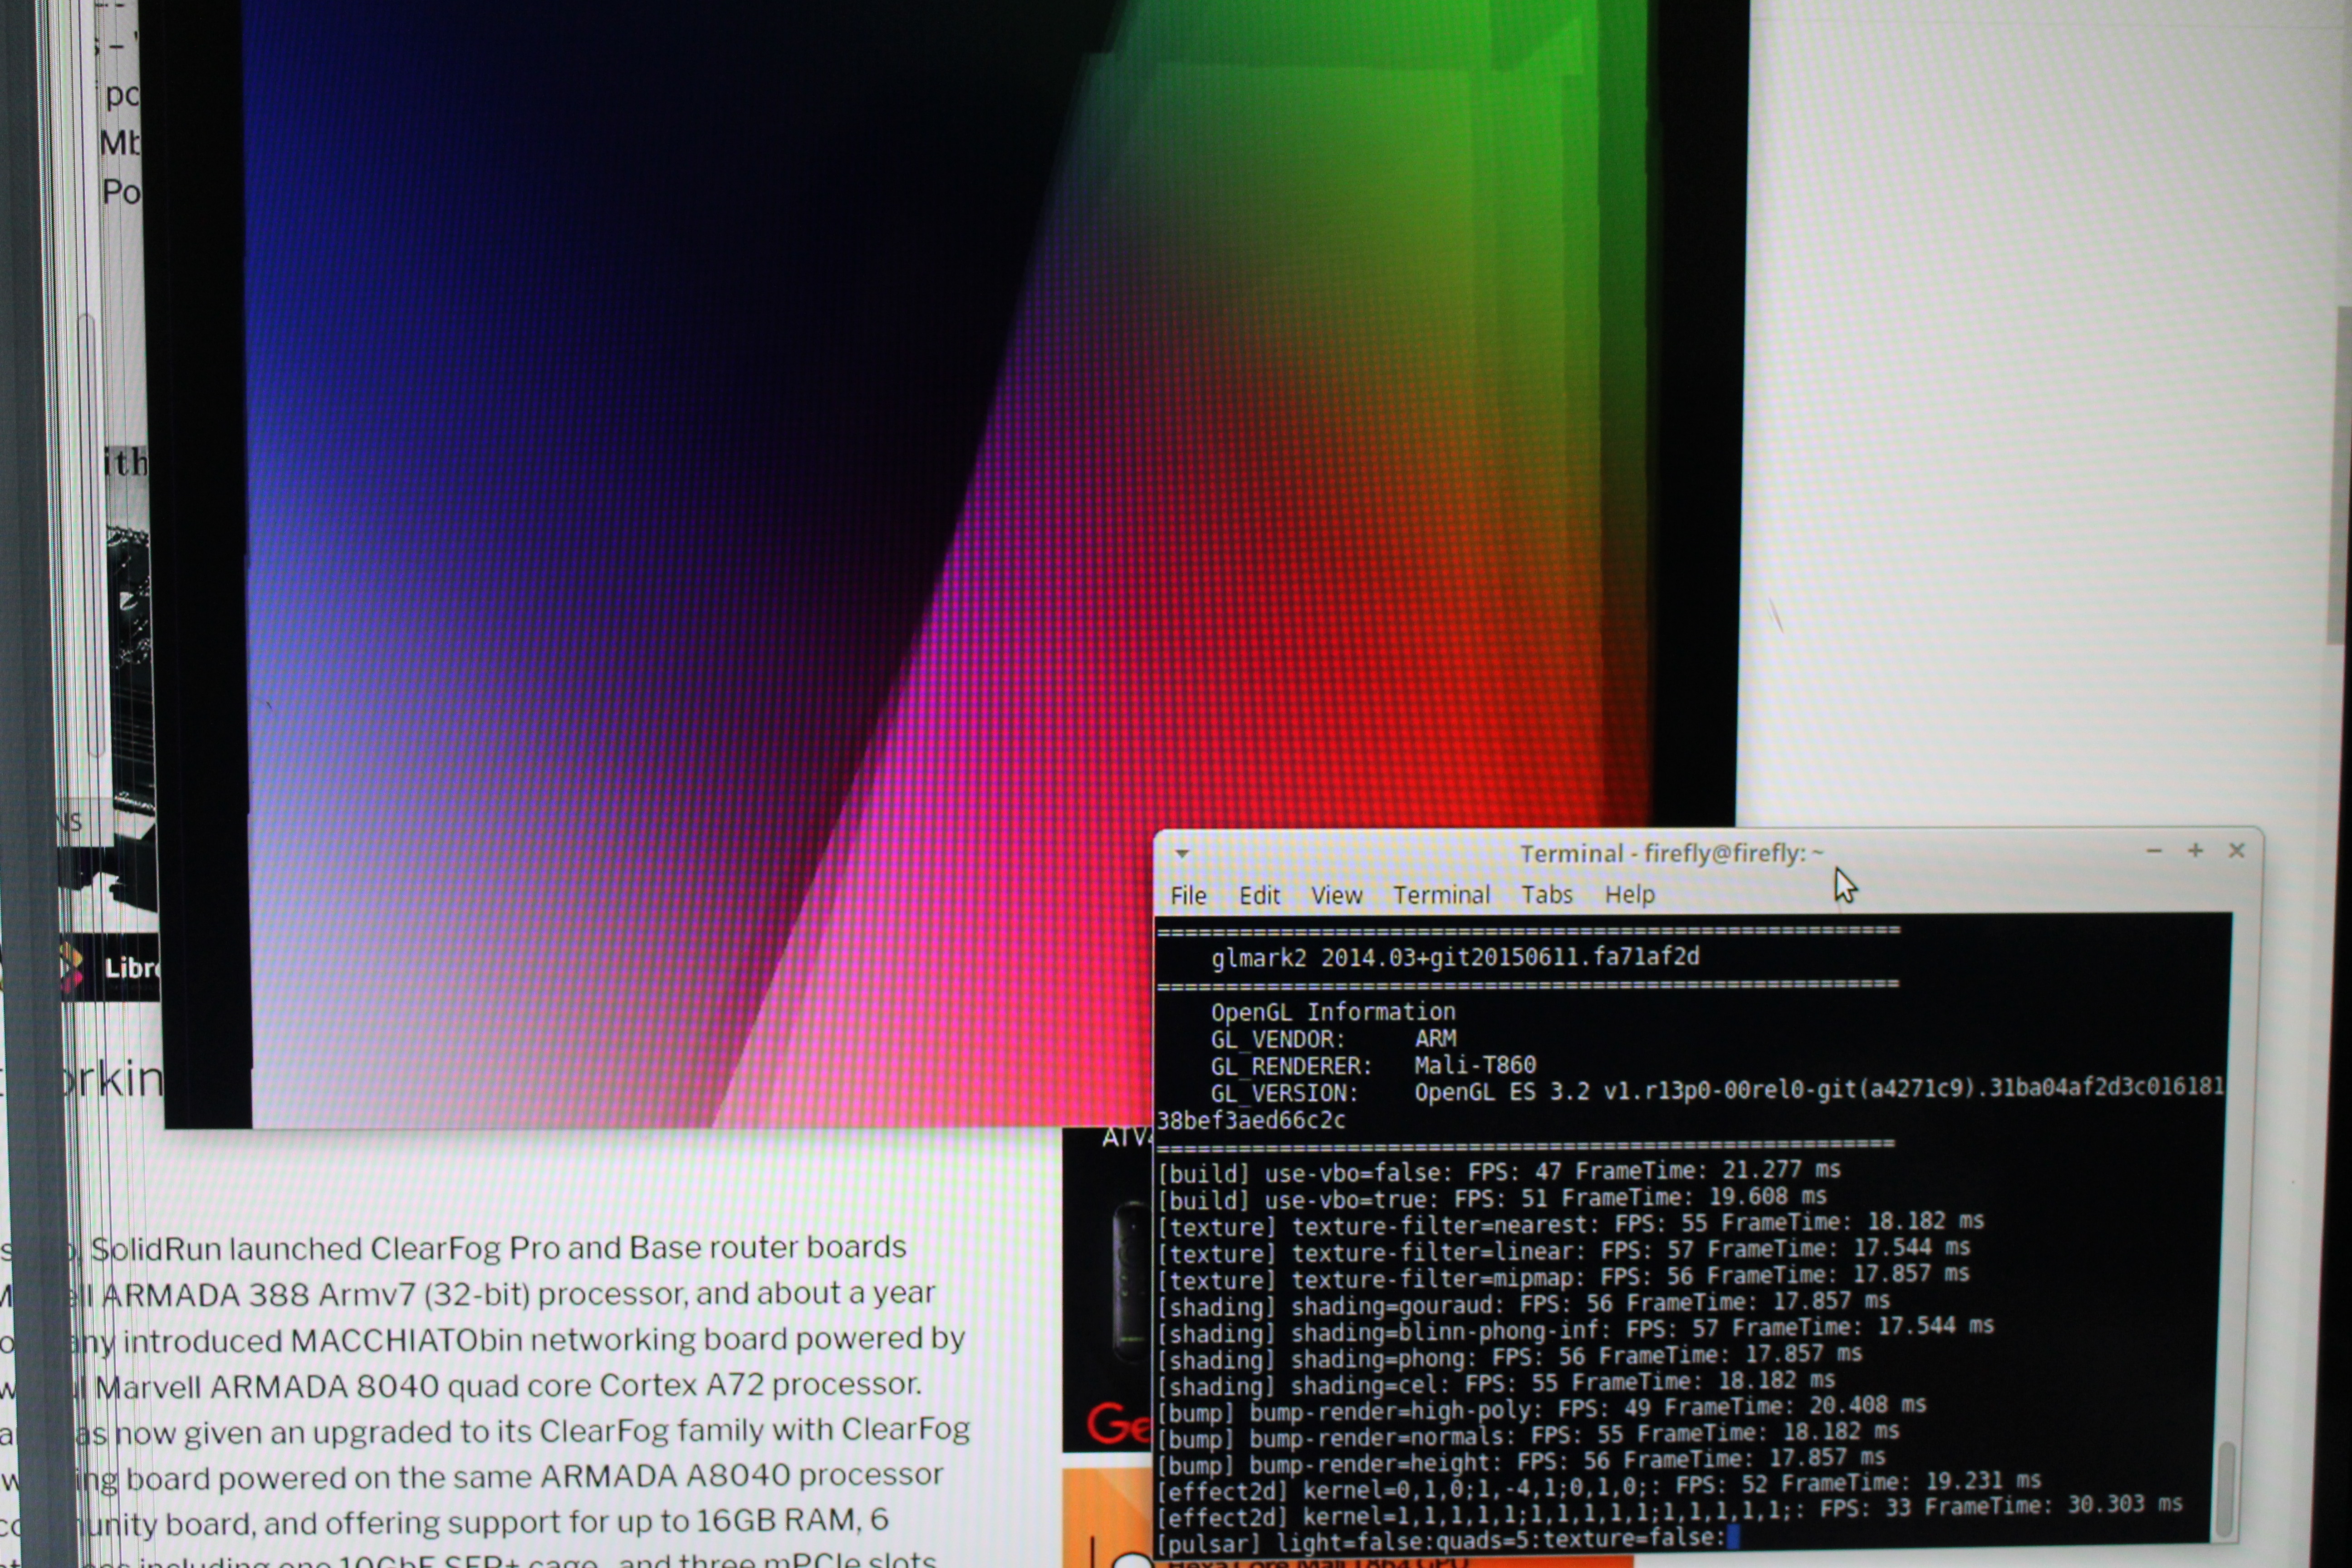
glmark2-es2 output:
|
1 2 3 4 5 6 7 8 9 10 11 12 13 14 15 16 17 18 19 20 21 22 23 24 25 26 27 28 29 30 31 32 33 34 35 36 37 38 39 40 41 42 43 44 45 |
glmark2-es2 ======================================================= glmark2 2014.03+git20150611.fa71af2d ======================================================= OpenGL Information GL_VENDOR: ARM GL_RENDERER: Mali-T860 GL_VERSION: OpenGL ES 3.2 v1.r13p0-00rel0-git(a4271c9).31ba04af2d3c01618138bef3aed66c2c ======================================================= [build] use-vbo=false: FPS: 47 FrameTime: 21.277 ms [build] use-vbo=true: FPS: 51 FrameTime: 19.608 ms [texture] texture-filter=nearest: FPS: 55 FrameTime: 18.182 ms [texture] texture-filter=linear: FPS: 57 FrameTime: 17.544 ms [texture] texture-filter=mipmap: FPS: 56 FrameTime: 17.857 ms [shading] shading=gouraud: FPS: 56 FrameTime: 17.857 ms [shading] shading=blinn-phong-inf: FPS: 57 FrameTime: 17.544 ms [shading] shading=phong: FPS: 56 FrameTime: 17.857 ms [shading] shading=cel: FPS: 55 FrameTime: 18.182 ms [bump] bump-render=high-poly: FPS: 49 FrameTime: 20.408 ms [bump] bump-render=normals: FPS: 55 FrameTime: 18.182 ms [bump] bump-render=height: FPS: 56 FrameTime: 17.857 ms [effect2d] kernel=0,1,0;1,-4,1;0,1,0;: FPS: 52 FrameTime: 19.231 ms [effect2d] kernel=1,1,1,1,1;1,1,1,1,1;1,1,1,1,1;: FPS: 33 FrameTime: 30.303 ms [pulsar] light=false:quads=5:texture=false: FPS: 57 FrameTime: 17.544 ms [desktop] blur-radius=5:effect=blur:passes=1:separable=true:windows=4: FPS: 34 FrameTime: 29.412 ms [desktop] effect=shadow:windows=4: FPS: 57 FrameTime: 17.544 ms [buffer] columns=200:interleave=false:update-dispersion=0.9:update-fraction=0.5:update-method=map: FPS: 29 FrameTime: 34.483 ms [buffer] columns=200:interleave=false:update-dispersion=0.9:update-fraction=0.5:update-method=subdata: FPS: 30 FrameTime: 33.333 ms [buffer] columns=200:interleave=true:update-dispersion=0.9:update-fraction=0.5:update-method=map: FPS: 33 FrameTime: 30.303 ms [ideas] speed=duration: FPS: 44 FrameTime: 22.727 ms [jellyfish] <default>: FPS: 48 FrameTime: 20.833 ms [terrain] <default>: FPS: 18 FrameTime: 55.556 ms [shadow] <default>: FPS: 43 FrameTime: 23.256 ms [refract] <default>: FPS: 32 FrameTime: 31.250 ms [conditionals] fragment-steps=0:vertex-steps=0: FPS: 57 FrameTime: 17.544 ms [conditionals] fragment-steps=5:vertex-steps=0: FPS: 55 FrameTime: 18.182 ms [conditionals] fragment-steps=0:vertex-steps=5: FPS: 55 FrameTime: 18.182 ms [function] fragment-complexity=low:fragment-steps=5: FPS: 56 FrameTime: 17.857 ms [function] fragment-complexity=medium:fragment-steps=5: FPS: 52 FrameTime: 19.231 ms [loop] fragment-loop=false:fragment-steps=5:vertex-steps=5: FPS: 55 FrameTime: 18.182 ms [loop] fragment-steps=5:fragment-uniform=false:vertex-steps=5: FPS: 55 FrameTime: 18.182 ms [loop] fragment-steps=5:fragment-uniform=true:vertex-steps=5: FPS: 53 FrameTime: 18.868 ms ======================================================= glmark2 Score: 48 ======================================================= |
The score is 48, which is higher than Mali-450MP platform, but still not very high. But as on other Arm platfoms, performance is greatly limited by X11 calls, and if you run the sample offscreen, the score is much higher:
|
1 2 3 4 5 6 7 8 9 10 11 12 13 14 15 16 17 18 19 20 21 22 23 24 25 26 27 28 29 30 31 32 33 34 35 36 37 38 39 40 41 42 43 44 45 |
glmark2-es2 --off-screen ======================================================= glmark2 2014.03+git20150611.fa71af2d ======================================================= OpenGL Information GL_VENDOR: ARM GL_RENDERER: Mali-T860 GL_VERSION: OpenGL ES 3.2 v1.r13p0-00rel0-git(a4271c9).31ba04af2d3c01618c ======================================================= [build] use-vbo=false: FPS: 229 FrameTime: 4.367 ms [build] use-vbo=true: FPS: 306 FrameTime: 3.268 ms [texture] texture-filter=nearest: FPS: 366 FrameTime: 2.732 ms [texture] texture-filter=linear: FPS: 349 FrameTime: 2.865 ms [texture] texture-filter=mipmap: FPS: 335 FrameTime: 2.985 ms [shading] shading=gouraud: FPS: 253 FrameTime: 3.953 ms [shading] shading=blinn-phong-inf: FPS: 247 FrameTime: 4.049 ms [shading] shading=phong: FPS: 229 FrameTime: 4.367 ms [shading] shading=cel: FPS: 287 FrameTime: 3.484 ms [bump] bump-render=high-poly: FPS: 145 FrameTime: 6.897 ms [bump] bump-render=normals: FPS: 323 FrameTime: 3.096 ms [bump] bump-render=height: FPS: 315 FrameTime: 3.175 ms [effect2d] kernel=0,1,0;1,-4,1;0,1,0;: FPS: 197 FrameTime: 5.076 ms [effect2d] kernel=1,1,1,1,1;1,1,1,1,1;1,1,1,1,1;: FPS: 260 FrameTime: 3.846 ms [pulsar] light=false:quads=5:texture=false: FPS: 320 FrameTime: 3.125 ms [desktop] blur-radius=5:effect=blur:passes=1:separable=true:windows=4: FPS: 206s [desktop] effect=shadow:windows=4: FPS: 208 FrameTime: 4.808 ms [buffer] columns=200:interleave=false:update-dispersion=0.9:update-fraction=0.5s [buffer] columns=200:interleave=false:update-dispersion=0.9:update-fraction=0.5s [buffer] columns=200:interleave=true:update-dispersion=0.9:update-fraction=0.5:s [ideas] speed=duration: FPS: 80 FrameTime: 12.500 ms [jellyfish] <default>: FPS: 171 FrameTime: 5.848 ms [terrain] <default>: FPS: 45 FrameTime: 22.222 ms [shadow] <default>: FPS: 256 FrameTime: 3.906 ms [refract] <default>: FPS: 85 FrameTime: 11.765 ms [conditionals] fragment-steps=0:vertex-steps=0: FPS: 327 FrameTime: 3.058 ms [conditionals] fragment-steps=5:vertex-steps=0: FPS: 204 FrameTime: 4.902 ms [conditionals] fragment-steps=0:vertex-steps=5: FPS: 320 FrameTime: 3.125 ms [function] fragment-complexity=low:fragment-steps=5: FPS: 257 FrameTime: 3.891 s [function] fragment-complexity=medium:fragment-steps=5: FPS: 184 FrameTime: 5.4s [loop] fragment-loop=false:fragment-steps=5:vertex-steps=5: FPS: 253 FrameTime:s [loop] fragment-steps=5:fragment-uniform=false:vertex-steps=5: FPS: 254 FrameTis [loop] fragment-steps=5:fragment-uniform=true:vertex-steps=5: FPS: 200 FrameTims ======================================================= glmark2 Score: 222 ======================================================= |
Anyway, there used to be a time where most boards did not support 3D graphics acceleration, but in recent times, it appears most now do.
In the past, I’ve also found out that upgrading the OS might overwrite some files and break support for 3D graphics, so I upgraded the system to Ubuntu 16.04.5:
|
1 2 |
sudo apt update sudo apt dist-upgrade |
and both samples could still work. So all good.
I also tried WebGL, and the WebGL Quake demo worked at about 50 fps, but some other would failed complaining about missing extension.
Video Playback on AIO3399-J with Ubuntu 16.04
Hardware video decoding support is a given in Android, but not so in Linux distributions. I could not find any pre-installed video player, so I installed ffmpeg, and tried to play some 1080p videos with ffplay and it does work.
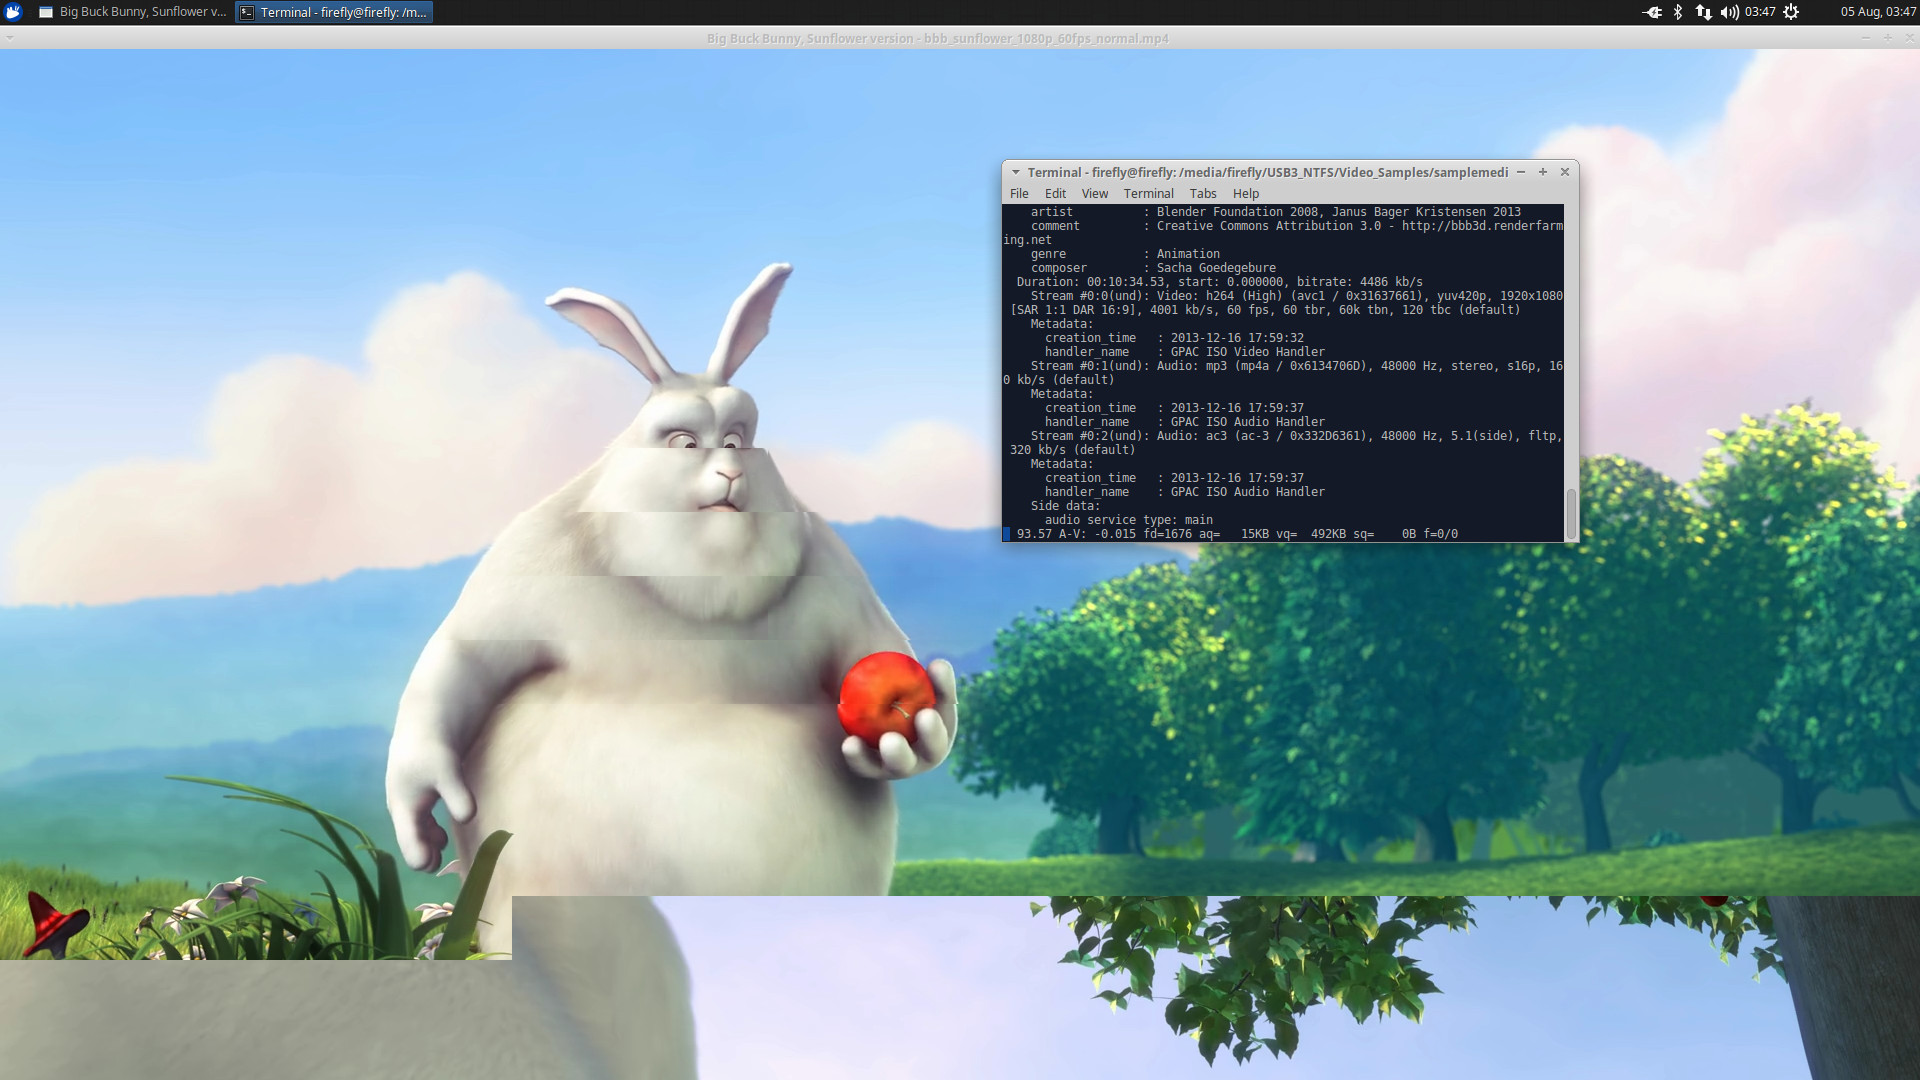
Ignore the tearing in the screenshot above, as it’s just an effect of taking a screenshot. Sadly that also means hardware video decoding is not enabled, since it would normally rely on a separate hardware buffer that does not show in screenshot (a black area is normally shown). I could play H.264, H.265, and MPEG2 1080p videos reasonably smoothly with software video decoding, except in some scenes, especially when panning when the video is not as smooth as it could be.
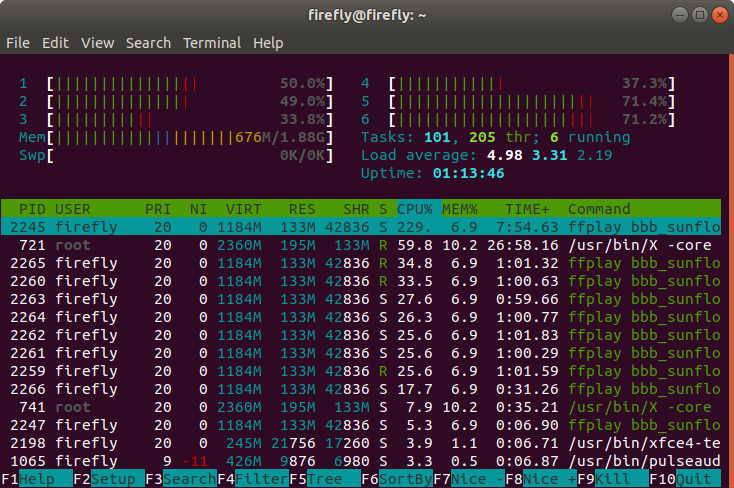 Since the video play relies on software video decoding it takes a fair amount of resources. I’ve also tried to play 4K H.264 / H.265 videos but unsurprinslgy the processor is not fast enough for this tasks, and the videos just play in slow motion with many audio cuts. We’ll need to wait for hardware video decoding support, or switch to Android OS.
Browsing the Web with Chromium
Browsing the web works well, pages load fast, and scrolling is about as smooth as on my main PC. However, you still have to take into account the amount of RAM, especially if you have the 2GB RAM version like I do.
For example, when I tried to play Candy Crush Saga (Facebook) in Chromium would end up with “Aw, Snap!” page meaning the current tab crashed. The kernel log explains why:
|
1 2 |
[ 6227.723347] Out of memory: Kill process 3370 (chromium-browse) score 547 or sacrifice child [ 6227.724084] Killed process 3370 (chromium-browse) total-vm:2212980kB, anon-rss:1028564kB, file-rss:47172kB |
So not enough memory even if a single tab, and no other program launched. That means it’s time to enable ZRAM:
|
1 2 3 4 |
sudo apt install zram-config zramctl /dev/zram0 -s 512M mkwap /dev/zram0 mkwap /dev/zram0 |
Let’s double check we now have ZRAM (swap):
|
1 2 3 4 |
free -h total used free shared buff/cache available Mem: 1.9G 586M 1.0G 44M 280M 1.2G Swap: 511M 0B 511M |
and try again.

Yes! Success. The RAM is still on the limit with 512MB ZRAM, but at least I could play, and performance was very good. I could not see any difference against playing on my main PC (FX8350 program + NVIDIA GTX750 graphics card).
I would also play YouTube videos smoothly up to 720p, but 1080p video may have problems playing smoothly like in ODROID-XU4Q board.
Testing eMMC and USB 3.0 Storage Performance
I normally test storage performance with iozone (3), and installation is just one line.
|
1 2 3 4 5 |
sudo apt install iozone3 Reading package lists... Done Building dependency tree Reading state information... Done E: Unable to locate package iozone3 |
The only problem is that installation would not work here. Iozone is part of multiverse repo, and it’s missing in /etc/apt/sources.list. So edit the files and add four following lines:
|
1 2 3 4 |
deb http://ports.ubuntu.com/ubuntu-ports/ xenial multiverse deb-src http://ports.ubuntu.com/ubuntu-ports/ xenial multiverse deb http://ports.ubuntu.com/ubuntu-ports/ xenial-updates multiverse deb-src http://ports.ubuntu.com/ubuntu-ports/ xenial-updates multiverse |
Now installation can be completed:
|
1 2 |
sudo apt update sudo apt install iozone3 |
Another workaround would have been to use snaps, but there’s configuration problem with snaps in the provided Ubuntu image:
|
1 2 |
sudo snap install iozone3 error: cannot communicate with server: Post http://localhost/v2/snaps/iozone3: dial unix /run/snapd.socket: connect: connection refused |
Anyway, we can start by testing the eMMC flash performance:
|
1 2 3 4 5 6 7 8 9 10 11 12 13 14 15 16 17 18 19 20 |
sudo iozone -e -I -a -s 1000M -r 4k -r 16k -r 512k -r 1024k -r 16384k -i 0 -i 1 -i 2 Iozone: Performance Test of File I/O Version $Revision: 3.429 $ Compiled for 64 bit mode. Build: linux Output is in kBytes/sec Time Resolution = 0.000001 seconds. Processor cache size set to 1024 kBytes. Processor cache line size set to 32 bytes. File stride size set to 17 * record size. random random bkwd record stride kB reclen write rewrite read reread read write read rewrite read fwrite frewrite fread freread 1024000 4 27137 32018 26651 27368 21334 26919 1024000 16 53037 53023 75339 75604 61510 49689 1024000 512 54460 55266 240715 238180 228771 54066 1024000 1024 55115 54838 263255 251719 245114 53762 1024000 16384 54634 55292 296379 295641 292336 54952 iozone test complete. |
The write numbers looks normal and fairly good, but at first, I thought getting around 296MB/s read speeds on a 16GB eMMC flash is way too high. But actually the chip is a Samsung KLMAG1JETD-B041 eMMC flash 5.1 capable of HS400 speeds, and based on data for older Samsung chips it is indeed possible to get close to 300 MB/s with a 16GB flash, at least in theory.
I switched to USB3 NTFS performance:
|
1 2 3 4 5 6 7 8 9 |
cd /media/firefly/USB3_NTFS/ sudo iozone -e -I -a -s 1000M -r 4k -r 16k -r 512k -r 1024k -r 16384k -i 0 -i 1 random random bkwd record stride kB reclen write rewrite read reread read write read rewrite read fwrite frewrite fread freread 1024000 4 16468 30254 72420 72888 1024000 16 56010 58684 381819 207400 1024000 512 70702 53748 310350 425884 1024000 1024 73372 63357 632738 367912 1024000 16384 85725 88068 678924 328447 |
Write numbers look normal considering I’m using mechanical drives, and even a little low since I can normally get around 100MB/s write on that drive. However,read speed are 6 times faster than the typical performance from the drive, so let’s ignore them.
With that in mind, I’ve re-run the test on the EXT-4 partition of my drive, but this time with a 4GB file (twice the RAM):
|
1 2 3 4 5 6 7 8 9 10 11 |
cd ../USB3_EXT4/ sudo iozone -e -I -a -s 4000M -r 4k -r 16k -r 512k -r 1024k -r 16384k -i 0 -i 1 random random bkwd record stride kB reclen write rewrite read reread read write read rewrite read fwrite frewrite fread freread 4096000 4 17374 21294 22436 29755 4096000 16 74487 79492 77171 77137 4096000 512 89448 93158 96351 96484 4096000 1024 72869 89283 94067 94233 4096000 16384 86170 91713 93765 93863 iozone test complete. |
It took fairly long time, but at least all numbers are believable, and performance is roughly as expected, i.e. close to 100MB/s for sequential read and write operation.
This got me curious, so I repeated the eMMC flash test with a 4GB file:
|
1 2 3 4 5 6 7 8 9 10 |
Command line used: iozone -e -I -a -s 4000M -r 4k -r 16k -r 512k -r 1024k -r 16384k -i 0 -i 1 -i 2 random random bkwd record stride kB reclen write rewrite read reread read write read rewrite read fwrite frewrite fread freread 4096000 4 22712 31390 19925 22540 15893 8822 4096000 16 33129 50269 63731 66480 56315 14149 4096000 512 21231 48961 242603 238690 226344 14997 4096000 1024 19047 49522 257641 260358 247429 15565 4096000 16384 24047 50874 281959 279561 278128 26270 iozone test complete. |
But the results still look the same, so Firefly must have combined a high-end 16GB eMMC flash in their module together with proper implementation to achived those amazing read speeds. Random read values still appear to be too high though.
AIO-3399J also comes with M.2 NVMe SSD socket, which would have been interesting to test, but unfortunately I have no such SSD lying around.
Network performance – Gigabit Ethernet and 802.11ac WiFi
Gigabit Ethernet full duplex using iperf:
|
1 2 3 4 5 6 7 8 9 10 11 12 13 14 |
iperf -s ------------------------------------------------------------ Server listening on TCP port 5001 TCP window size: 85.3 KByte (default) ------------------------------------------------------------ [ 4] local 192.168.1.16 port 5001 connected with 192.168.1.21 port 58628 ------------------------------------------------------------ Client connecting to 192.168.1.21, TCP port 5001 TCP window size: 170 KByte (default) ------------------------------------------------------------ [ 6] local 192.168.1.16 port 36282 connected with 192.168.1.21 port 5001 [ ID] Interval Transfer Bandwidth [ 6] 0.0-60.0 sec 2.77 GBytes 396 Mbits/sec [ 4] 0.0-60.0 sec 5.84 GBytes 835 Mbits/sec |
835 Mbps and 396 Mbps, so there’s an asymmetry while doing transfers in both direction at the same time.
But the number look better testing one direction at a time
- Upload only:
|
1 |
[ 3] 0.0-60.0 sec 6.40 GBytes 917 Mbits/sec |
- Download only:
|
1 |
[ 3] 0.0-60.0 sec 6.57 GBytes 940 Mbits/sec |
Gigabit Ethernet is almost maxed out in either direction.
I repeated the test for 802.11ac WiFi performance
- upload only:
|
1 |
[ 4] 0.0-60.1 sec 714 MBytes 99.6 Mbits/sec |
- download only:
|
1 |
[ 3] 0.0-60.0 sec 1.60 GBytes 229 Mbits/sec |
Download performance is good, but for some reasons upload could be better.
Final words
The provided Xubuntu 16.04 image works relatively well on AIO-3399J, and I’m pleased with overall performance, 3D graphics support, and good documentation for I/Os. However, hardware video decoding is not implemented, and there are few minor issues with the image such as problems with snap support, and some common apt repositories are not enabled by default. Android is probably a better option if you need 1080p or 4K video decoding.
AIO-3399J board is ideal if you need a development platform with many I/Os, and plan to use the company’s RK3399 Core-3399J system-on-module with your own custom carrier board.
AIO-3399J is sold for $165 on Firefly store with a power supply, the male to male USB cable, and two WiFi antennas. You should howevr consideing adding the heatsink to your order as well, and/or if your project requires it go with the 4GB RAM/16GB version for $235 instead. Sample price for Core-3399J SoM is respectively $95 and $119 for the 2GB and 4GB version.

Jean-Luc started CNX Software in 2010 as a part-time endeavor, before quitting his job as a software engineering manager, and starting to write daily news, and reviews full time later in 2011.
Support CNX Software! Donate via cryptocurrencies, become a Patron on Patreon, or purchase goods on Amazon or Aliexpress


According to your own post, the eMMC speeds are not really too fast if they use eMMC 5.1, although they are slightly better than the best performance in this list https://www.cnx-software.com/2017/06/13/micro-sd-cards-for-development-boards-classes-tools-benchmarks-reliability-and-tips-tricks/
That’s a one year old post though and things seem to have improved.
Unfortunately I can’t seem to find any performance numbers for the KLMAG1JETD-B041 chip on the board, but it would appear to be a higher performance eMMC chip.
Good point. I had never received hardware with a 16GB flash capable of 250+ MB/s before, but those do exist.
The flash is Samsung KLMAG1JETD-B041. I can’t find performance data but that’s an eMMC 5.1 chip with HS400 support.
When I tested 2 other RK3399 devices also with 16GB Samsung eMMC 5.1 read speeds were also as high as 300 MB/s: https://forum.armbian.com/topic/7498-nanopc-t4/
Wrt NTFS: FUSE filesystems ignore ‘direct IO’ parameter so iozone is useless here. Data comes from buffers and not disk.
Also I would always run htop in parallel to get a clue about CPU affinity. iperf3 in dual direction mode running on a little core might simply be bottelenecked by CPU. The vast majority of ‘vendor OS images’ doesn’t care about CPU and IRQ affinity at all and if HMP scheduling is broken too cpu0 (a little core) becomes a nice bottleneck.
Theguyuk found the datasheet with some theoretical values: http://www.szyuda88.com/forum/filesystemdownload?token=b55aevTqcnAGPGceYOglNY26LA%2F9tV7w%2Bw7jRZUT5Ala0fzmwPJ8p%2FE
Sequential read: 330MB/s; sequential write: 50 MB/s
Write goes to 100MB/s for the 32GB version, and 200 MB/s for the 64GB version.
Hardkernel provided iozone numbers for all these Samsung 5.1 eMMCs they also sell for their ODROIDs. Seems with RK3399 there is a write limitation at around 150 MB/s while the 32GB is faster than specs: https://pastebin.com/ePUCXyg6 (all tests done on ODROID-N1)
Great carrier board, but according to the store page that $165 -> $235 difference comes only form the extra 2GB RAM — that cant be right, can it?
Yes, that’s odd, especially the module price is just $95 vs $119.
What could have been …
https://forum.odroid.com/viewtopic.php?f=150&t=30129#p215221
sudo cpufreq-set -c 0-5 -g performance
taskset -c 4-5 glmark2-es2
=======================================================
glmark2 2017.07
=======================================================
OpenGL Information
GL_VENDOR: ARM
GL_RENDERER: Mali-T860
GL_VERSION: OpenGL ES 3.2 v1.r14p0-01rel0-git(966ed26).f44c85cb3d2ceb87e8be88e7592755c3
=======================================================
[build] use-vbo=false: FPS: 299 FrameTime: 3.344 ms
[build] use-vbo=true: FPS: 340 FrameTime: 2.941 ms
[texture] texture-filter=nearest: FPS: 349 FrameTime: 2.865 ms
[texture] texture-filter=linear: FPS: 345 FrameTime: 2.899 ms
[texture] texture-filter=mipmap: FPS: 352 FrameTime: 2.841 ms
[shading] shading=gouraud: FPS: 296 FrameTime: 3.378 ms
[shading] shading=blinn-phong-inf: FPS: 301 FrameTime: 3.322 ms
[shading] shading=phong: FPS: 288 FrameTime: 3.472 ms
[shading] shading=cel: FPS: 285 FrameTime: 3.509 ms
[bump] bump-render=high-poly: FPS: 229 FrameTime: 4.367 ms
[bump] bump-render=normals: FPS: 349 FrameTime: 2.865 ms
[bump] bump-render=height: FPS: 356 FrameTime: 2.809 ms
[effect2d] kernel=0,1,0;1,-4,1;0,1,0;: FPS: 314 FrameTime: 3.185 ms
[effect2d] kernel=1,1,1,1,1;1,1,1,1,1;1,1,1,1,1;: FPS: 195 FrameTime: 5.128 ms
[pulsar] light=false:quads=5:texture=false: FPS: 364 FrameTime: 2.747 ms
[desktop] blur-radius=5:effect=blur:passes=1:separable=true:windows=4: FPS: 181 FrameTime: 5.525 ms
[desktop] effect=shadow:windows=4: FPS: 265 FrameTime: 3.774 ms
[buffer] columns=200:interleave=false:update-dispersion=0.9:update-fraction=0.5:update-method=map: FPS: 112 FrameTime: 8.929 ms
[buffer] columns=200:interleave=false:update-dispersion=0.9:update-fraction=0.5:update-method=subdata: FPS: 111 FrameTime: 9.009 ms
[buffer] columns=200:interleave=true:update-dispersion=0.9:update-fraction=0.5:update-method=map: FPS: 130 FrameTime: 7.692 ms
[ideas] speed=duration: FPS: 148 FrameTime: 6.757 ms
[jellyfish] : FPS: 255 FrameTime: 3.922 ms
[terrain] : FPS: 46 FrameTime: 21.739 ms
[shadow] : FPS: 228 FrameTime: 4.386 ms
[refract] : FPS: 88 FrameTime: 11.364 ms
[conditionals] fragment-steps=0:vertex-steps=0: FPS: 360 FrameTime: 2.778 ms
[conditionals] fragment-steps=5:vertex-steps=0: FPS: 317 FrameTime: 3.155 ms
[conditionals] fragment-steps=0:vertex-steps=5: FPS: 348 FrameTime: 2.874 ms
[function] fragment-complexity=low:fragment-steps=5: FPS: 349 FrameTime: 2.865 ms
[function] fragment-complexity=medium:fragment-steps=5: FPS: 298 FrameTime: 3.356 ms
[loop] fragment-loop=false:fragment-steps=5:vertex-steps=5: FPS: 326 FrameTime: 3.067 ms
[loop] fragment-steps=5:fragment-uniform=false:vertex-steps=5: FPS: 322 FrameTime: 3.106 ms
[loop] fragment-steps=5:fragment-uniform=true:vertex-steps=5: FPS: 286 FrameTime: 3.497 ms
=======================================================
glmark2 Score: 267
=======================================================
Note the ON SCREEN (X11) performance is better than the OFFSCREEN numbers in the post. 😉
The long-forgotten art of EXA drivers where the CPU does not blit the GPU-produced frame in thrice the time it took the GPU to render the frame? ; ) Is that with your customisations?
If I repeat those test on AIO-3399J (note the different versions of glmark2-es2 and the driver):
My framerate never goes above 60 fps (my display is set to 60Hz). Is that normal to get crazy fps with on-screen test? 🙂
Depends on the drivers I guess – in his case, different X11 server.
Just to add to the numbers, here’s mine (also on RK3399) with vsync on (limited to 60fps):
$ taskset -c 4-5 glmark2-es2-wayland
=======================================================
glmark2 2014.03+git20150611.fa71af2d
=======================================================
OpenGL Information
GL_VENDOR: ARM
GL_RENDERER: Mali-T860
GL_VERSION: OpenGL ES 3.2 v1.r14p0-01rel0-git(966ed26).31c289ec747d618d519d62e13e34cef1
=======================================================
[build] use-vbo=false: FPS: 60 FrameTime: 16.667 ms
[build] use-vbo=true: FPS: 60 FrameTime: 16.667 ms
[texture] texture-filter=nearest: FPS: 59 FrameTime: 16.949 ms
[texture] texture-filter=linear: FPS: 60 FrameTime: 16.667 ms
[texture] texture-filter=mipmap: FPS: 60 FrameTime: 16.667 ms
[shading] shading=gouraud: FPS: 60 FrameTime: 16.667 ms
[shading] shading=blinn-phong-inf: FPS: 60 FrameTime: 16.667 ms
[shading] shading=phong: FPS: 60 FrameTime: 16.667 ms
[shading] shading=cel: FPS: 59 FrameTime: 16.949 ms
[bump] bump-render=high-poly: FPS: 59 FrameTime: 16.949 ms
[bump] bump-render=normals: FPS: 60 FrameTime: 16.667 ms
[bump] bump-render=height: FPS: 60 FrameTime: 16.667 ms
[effect2d] kernel=0,1,0;1,-4,1;0,1,0;: FPS: 60 FrameTime: 16.667 ms
[effect2d] kernel=1,1,1,1,1;1,1,1,1,1;1,1,1,1,1;: FPS: 60 FrameTime: 16.667 ms
[pulsar] light=false:quads=5:texture=false: FPS: 60 FrameTime: 16.667 ms
[desktop] blur-radius=5:effect=blur:passes=1:separable=true:windows=4: FPS: 60 FrameTime: 16.667 ms
[desktop] effect=shadow:windows=4: FPS: 60 FrameTime: 16.667 ms
[buffer] columns=200:interleave=false:update-dispersion=0.9:update-fraction=0.5:update-method=map: FPS: 60 FrameTime: 16.667 ms
[buffer] columns=200:interleave=false:update-dispersion=0.9:update-fraction=0.5:update-method=subdata: FPS: 60 FrameTime: 16.667 ms
[buffer] columns=200:interleave=true:update-dispersion=0.9:update-fraction=0.5:update-method=map: FPS: 60 FrameTime: 16.667 ms
[ideas] speed=duration: FPS: 60 FrameTime: 16.667 ms
[jellyfish] : FPS: 60 FrameTime: 16.667 ms
[terrain] : FPS: 40 FrameTime: 25.000 ms
[shadow] : FPS: 60 FrameTime: 16.667 ms
[refract] : FPS: 59 FrameTime: 16.949 ms
[conditionals] fragment-steps=0:vertex-steps=0: FPS: 60 FrameTime: 16.667 ms
[conditionals] fragment-steps=5:vertex-steps=0: FPS: 60 FrameTime: 16.667 ms
[conditionals] fragment-steps=0:vertex-steps=5: FPS: 59 FrameTime: 16.949 ms
[function] fragment-complexity=low:fragment-steps=5: FPS: 60 FrameTime: 16.667 ms
[function] fragment-complexity=medium:fragment-steps=5: FPS: 60 FrameTime: 16.667 ms
[loop] fragment-loop=false:fragment-steps=5:vertex-steps=5: FPS: 60 FrameTime: 16.667 ms
[loop] fragment-steps=5:fragment-uniform=false:vertex-steps=5: FPS: 60 FrameTime: 16.667 ms
[loop] fragment-steps=5:fragment-uniform=true:vertex-steps=5: FPS: 60 FrameTime: 16.667 ms
=======================================================
glmark2 Score: 59
=======================================================
And off-screen score:
$ taskset -c 4-5 glmark2-es2-wayland –off-screen
=======================================================
glmark2 2014.03+git20150611.fa71af2d
=======================================================
OpenGL Information
GL_VENDOR: ARM
GL_RENDERER: Mali-T860
GL_VERSION: OpenGL ES 3.2 v1.r14p0-01rel0-git(966ed26).31c289ec747d618d519d62e13e34cef1
=======================================================
[build] use-vbo=false: FPS: 118 FrameTime: 8.475 ms
[build] use-vbo=true: FPS: 1237 FrameTime: 0.808 ms
[texture] texture-filter=nearest: FPS: 1365 FrameTime: 0.733 ms
[texture] texture-filter=linear: FPS: 771 FrameTime: 1.297 ms
[texture] texture-filter=mipmap: FPS: 1528 FrameTime: 0.654 ms
[shading] shading=gouraud: FPS: 851 FrameTime: 1.175 ms
[shading] shading=blinn-phong-inf: FPS: 996 FrameTime: 1.004 ms
[shading] shading=phong: FPS: 872 FrameTime: 1.147 ms
[shading] shading=cel: FPS: 830 FrameTime: 1.205 ms
[bump] bump-render=high-poly: FPS: 482 FrameTime: 2.075 ms
[bump] bump-render=normals: FPS: 1345 FrameTime: 0.743 ms
[bump] bump-render=height: FPS: 1490 FrameTime: 0.671 ms
[effect2d] kernel=0,1,0;1,-4,1;0,1,0;: FPS: 851 FrameTime: 1.175 ms
[effect2d] kernel=1,1,1,1,1;1,1,1,1,1;1,1,1,1,1;: FPS: 338 FrameTime: 2.959 ms
[pulsar] light=false:quads=5:texture=false: FPS: 1062 FrameTime: 0.942 ms
[desktop] blur-radius=5:effect=blur:passes=1:separable=true:windows=4: FPS: 303 FrameTime: 3.300 ms
[desktop] effect=shadow:windows=4: FPS: 538 FrameTime: 1.859 ms
[buffer] columns=200:interleave=false:update-dispersion=0.9:update-fraction=0.5:update-method=map: FPS: 89 FrameTime: 11.236 ms
[buffer] columns=200:interleave=false:update-dispersion=0.9:update-fraction=0.5:update-method=subdata: FPS: 92 FrameTime: 10.870 ms
[buffer] columns=200:interleave=true:update-dispersion=0.9:update-fraction=0.5:update-method=map: FPS: 96 FrameTime: 10.417 ms
[ideas] speed=duration: FPS: 182 FrameTime: 5.495 ms
[jellyfish] : FPS: 726 FrameTime: 1.377 ms
[terrain] : FPS: 49 FrameTime: 20.408 ms
[shadow] : FPS: 451 FrameTime: 2.217 ms
[refract] : FPS: 109 FrameTime: 9.174 ms
[conditionals] fragment-steps=0:vertex-steps=0: FPS: 774 FrameTime: 1.292 ms
[conditionals] fragment-steps=5:vertex-steps=0: FPS: 819 FrameTime: 1.221 ms
[conditionals] fragment-steps=0:vertex-steps=5: FPS: 1429 FrameTime: 0.700 ms
[function] fragment-complexity=low:fragment-steps=5: FPS: 1126 FrameTime: 0.888 ms
[function] fragment-complexity=medium:fragment-steps=5: FPS: 780 FrameTime: 1.282 ms
[loop] fragment-loop=false:fragment-steps=5:vertex-steps=5: FPS: 1124 FrameTime: 0.890 ms
[loop] fragment-steps=5:fragment-uniform=false:vertex-steps=5: FPS: 1103 FrameTime: 0.907 ms
[loop] fragment-steps=5:fragment-uniform=true:vertex-steps=5: FPS: 843 FrameTime: 1.186 ms
=======================================================
glmark2 Score: 750
=======================================================
Quake WebGL demo fps ranged between 40-60 in chromium.
Can you please run https://github.com/ThomasKaiser/sbc-bench
Should take 40 min max (unattended) and the ‘neon’ test serves as a task that shows whether heat dissipation is sufficient or not. Curious how much throttling will occur and if numbers are comparable to other RK3399 devices.
It does not seem to like Ubuntu 16.04:
and I’ve got plenty of errors if I continue. Is that expected?
Oh, you’re running Xenial. Then better stop (I would need to test with 16.04 myself first)
Yes… The test just finished…
The data is probably not useful, but here it is anyway
Nothing for 7-zip because “command not found”.
Nice. When comparing with RockPro64 (or NanoPC T4) then it’s obvious that Firefly uses a different BLOB for DRAM initialization and setting clockspeeds. All cpufreq OPP are slightly clocked lower compared to e.g. RockPro64 with the BLOBs we use there: http://ix.io/1iFp
Also interesting how low memory bandwidth is but this is most probably related to HDMI being active.
And as expected the little heatsink is not sufficient. Throttling even occurred with single threaded stuff and even with tinymembench already.
Maybe I should have mentioned a fancy screensaver ran basically during the whole test.
Yes, can be spotted in monitoring output:
With this single threaded test on a hexa-core SoC CPU utilization must remain at 16% or there’s too much background activity to generate real numbers. 🙂
165$ for a board that is unable to play 4k video while the GPU can, it is for me a good thing. I have the same issue with the Orange Pi Lite2 (same {C|G}PU) and I’m clearly not happy with it while it cost less than 30$ …
Playing video is something mandatory for SoC boards, the difficulties with Mali GPU is very annoying …
The Rockchip RK3399 on this board here and the Allwinner H6 on the board you own are ‘a bit’ different. Different CPU (RK3399 also has 2xA72), different Mali GPUs (T860MP4 vs. Mali-T720MP2) and totally different video engines (some call VPU).
The GPU (just 3D and some 2D acceleration) is not relevant when it’s about HW accelerated video encoding/decoding and of course these SoCs can play video as advertised when used as advertised (with the vendor’s BSP running Android)
You’re totally right, but finally those boards are only usable on android for mediacenter purpose
Hi,
I’ve just received a similar board and no serial interface shows up when I connect it to my Ubuntu Laptop. Any insight into what can be the problem? Should I install specific drivers for it to be detected?
Just to make sure. Are you using a USB to TTL debug board as I do in the review? If so it should show up as /dev/ttyUSB0 or similar in your host machine’s kernel log when you connect it, even if the Rockchip board is not present.
There is a problem with my USB to TTL board apparently. I did install linux on it however and already facing another probllem.
I have a Quectel modem EC20 implemented on the board but I cannot activate the mobile broadband connection. The network manager detects the interface, I enter my APN configuration but then I’m still asked for a network password… I tried to give the password that is included in the apn configuration but it doesnt work.
Could you please help me with this?