
ANAVI Gas Detector is an ESP8266 based board designed for MQ gas sensors supported by Arduino. This allows you to easily monitor air quality, or more accurately air conductivity using MQ-135 sensor as part of the starter kit either visually on the OLED display, or through your smartphone or computer using MQTT via automation platform such as Home Assistant.
Leon Anavi sent me an ANAVI Gas Detector Starter Kit to have a look, and I’ll report my experience with the kit using it standalone, and through Home Assistant.
Starter Kit Unboxing
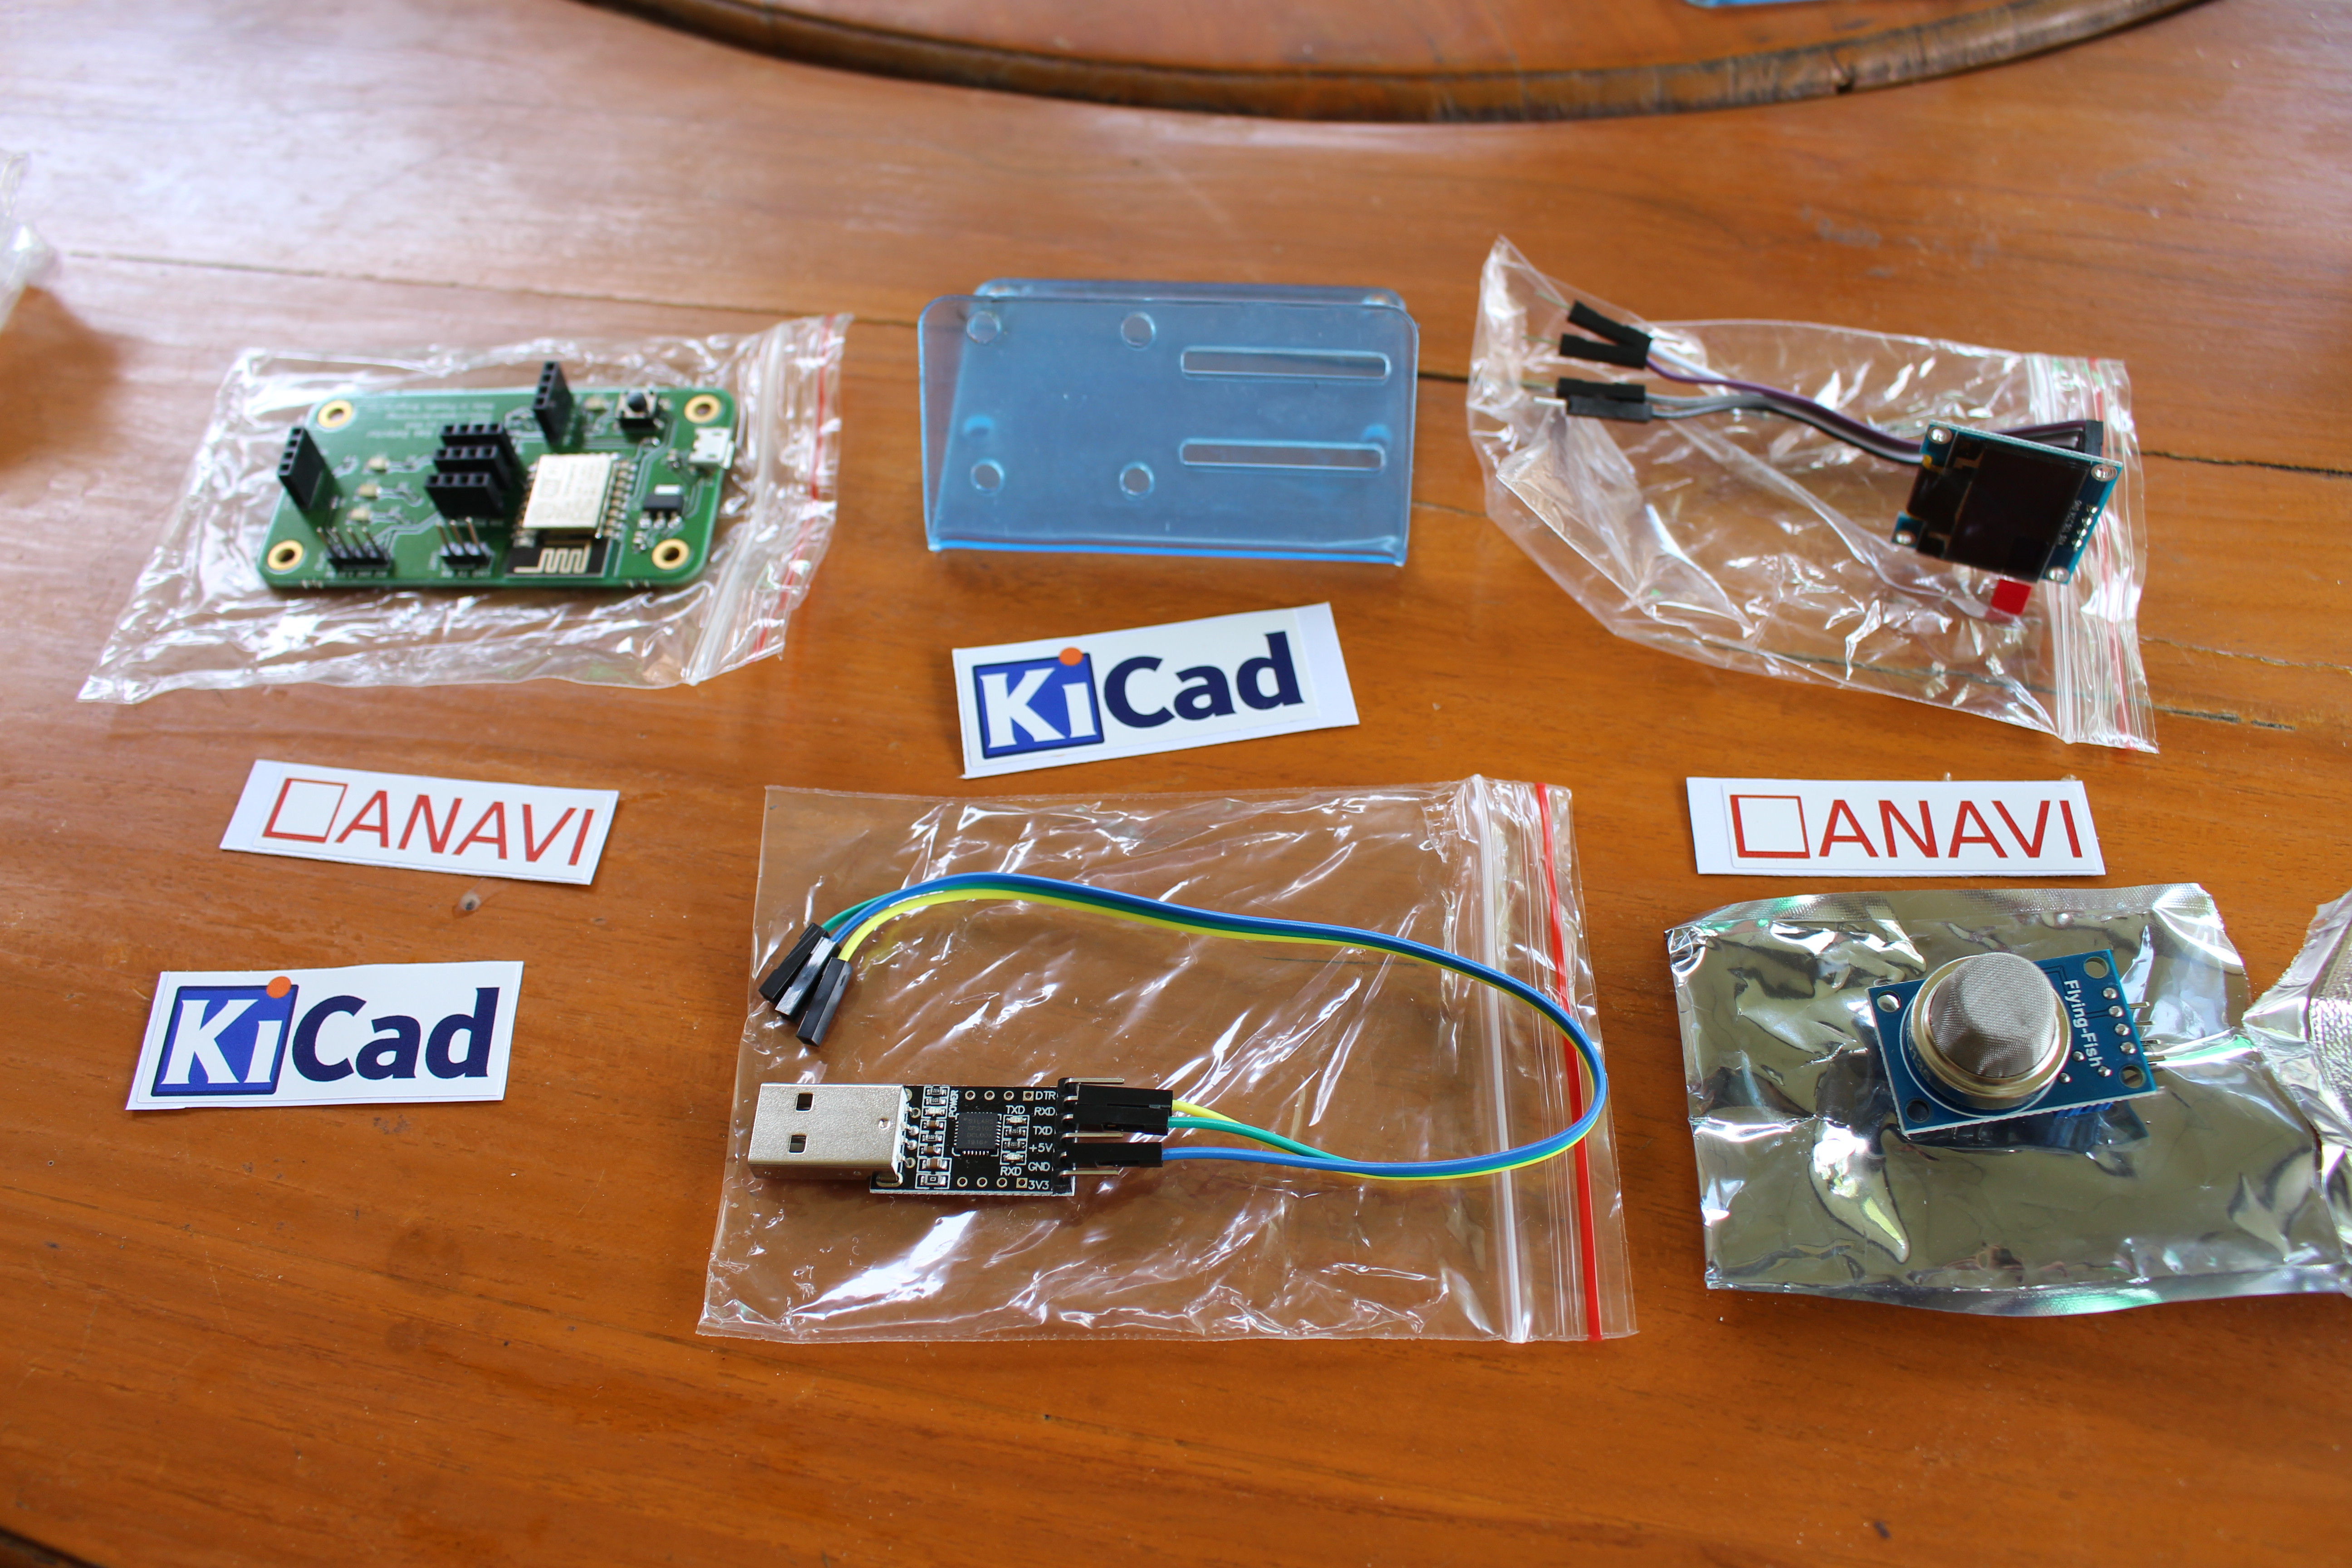
The kit contains the open-source hardware, ESP8266 based ANAVI Gas Detector board, a plastic stand, an OLED display, a USB to serial adapter, a gas sensor, and a few KiCad and ANAVI stickers.
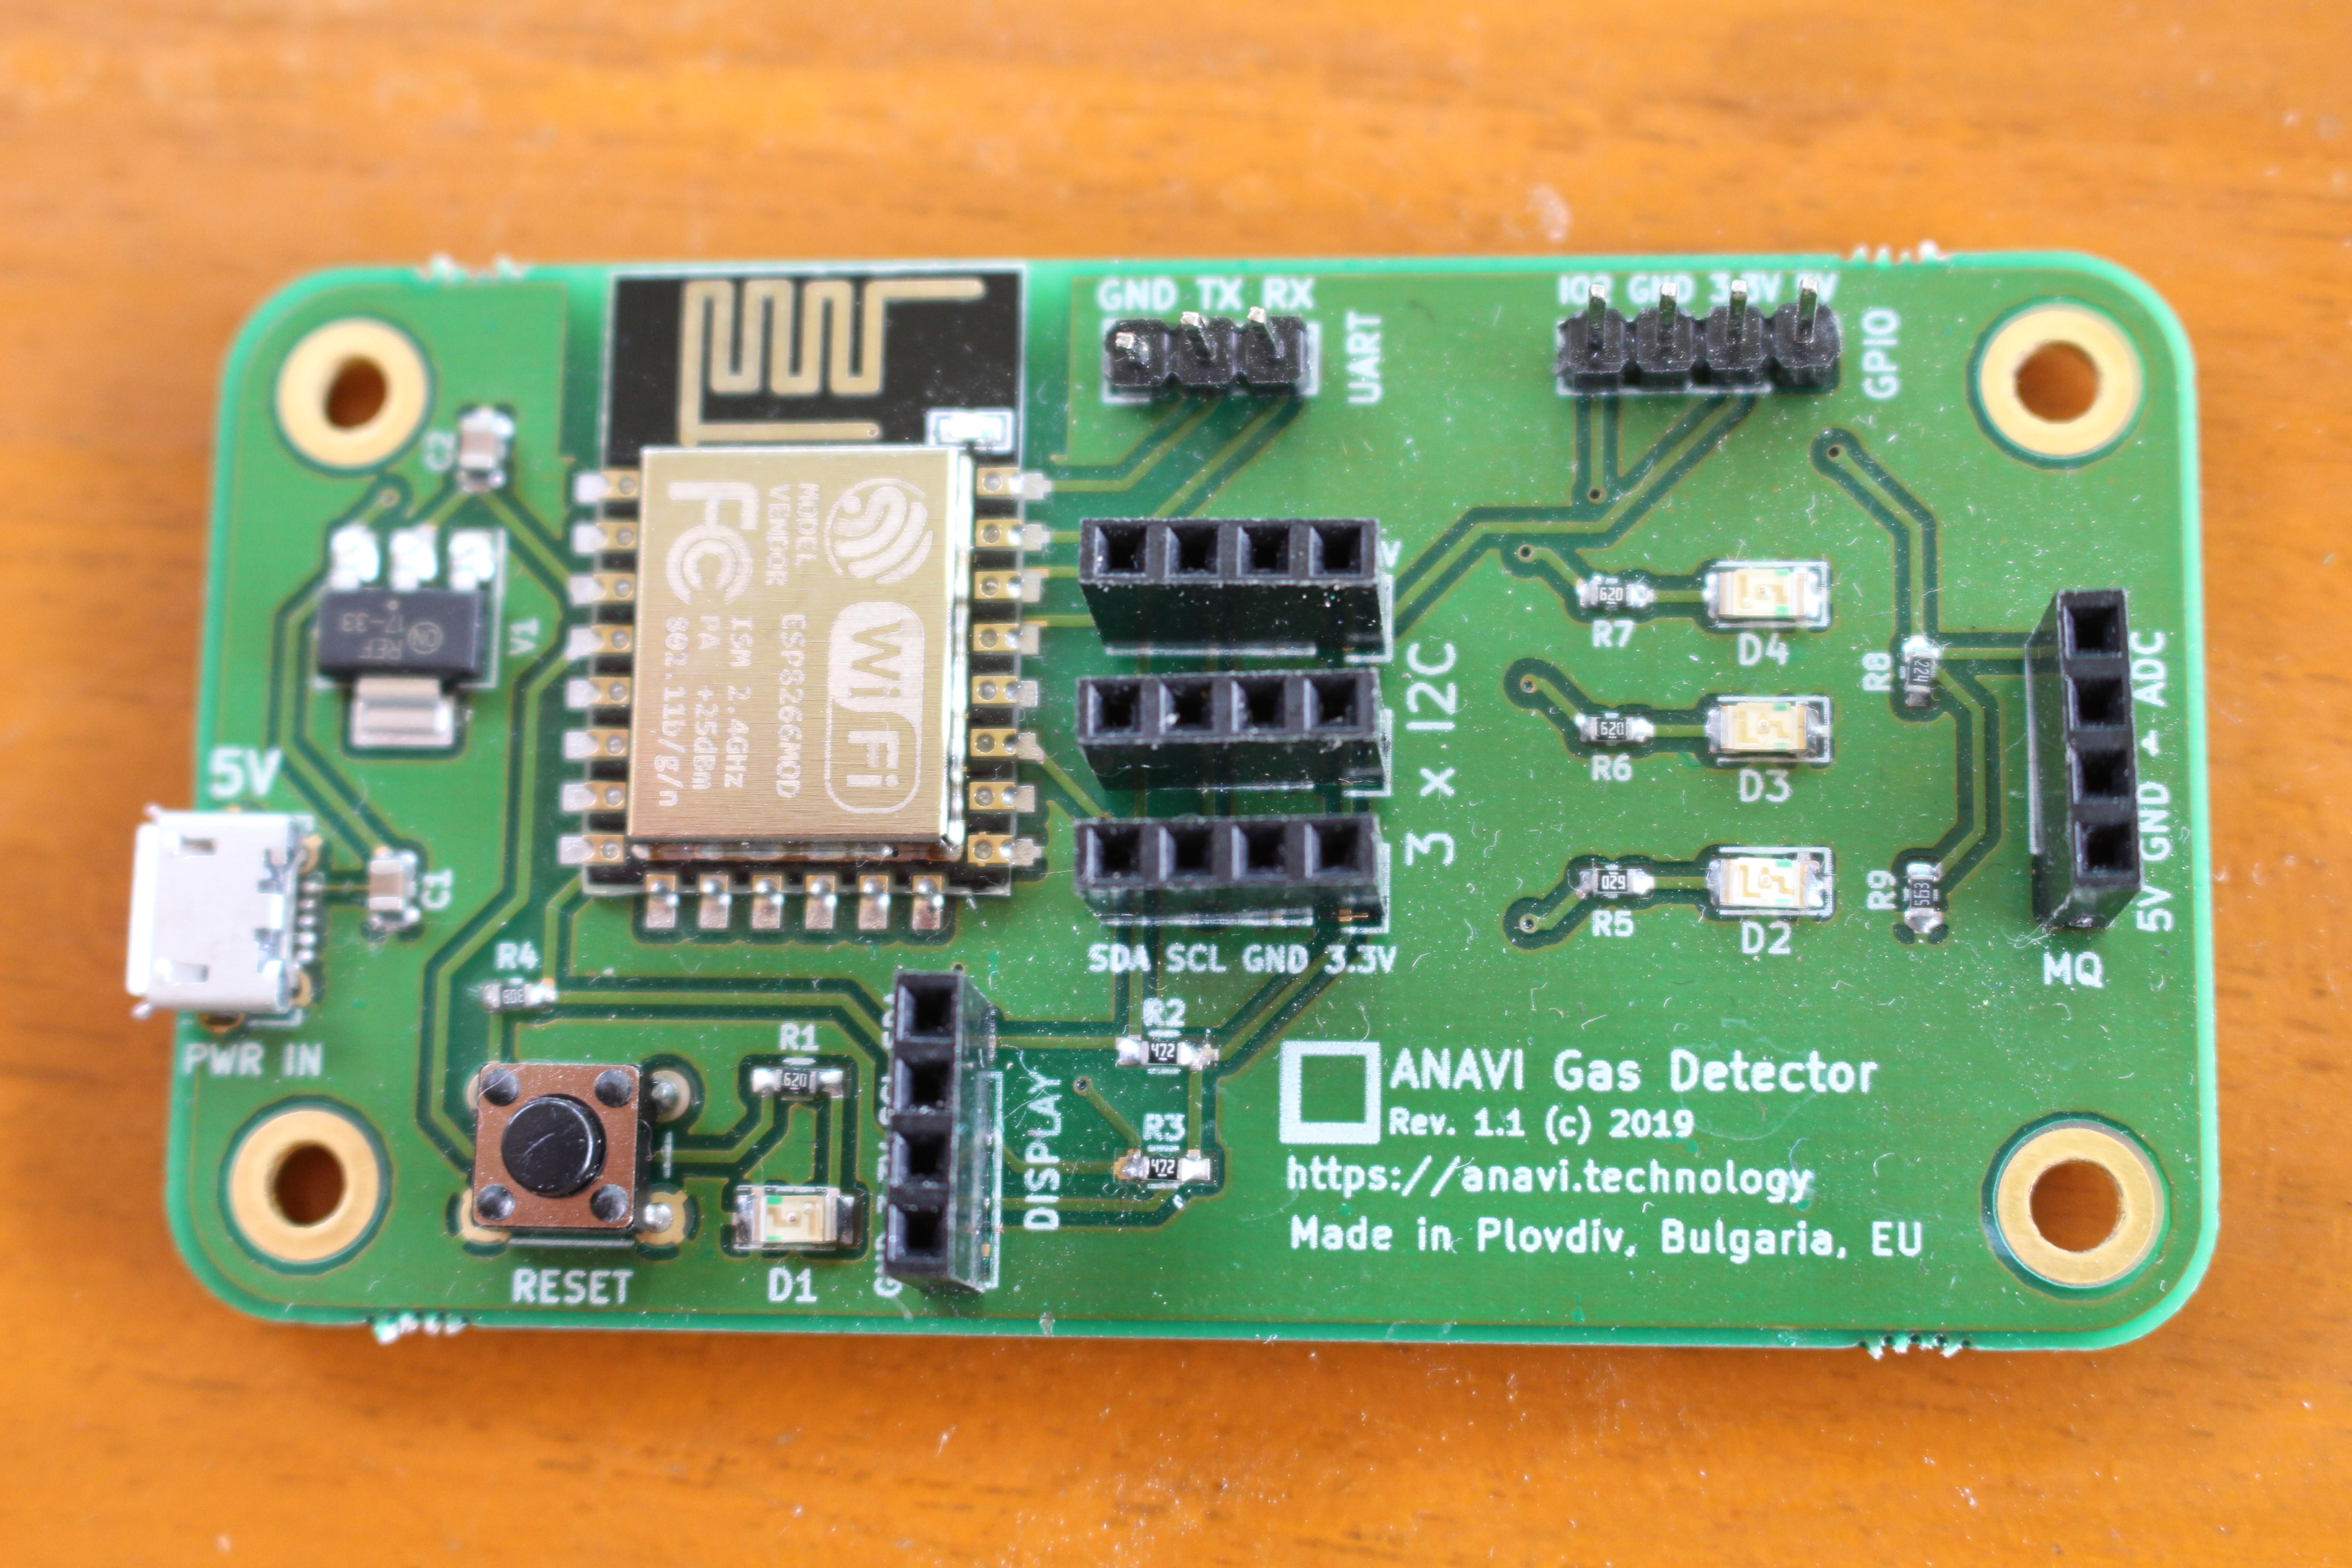
The board itself comes with an ESP8266MOD module, features a micro USB port for power, a reset button, four LEDs, a UART console, a 4-pin GPIO header, three I2C headers for sensors, a 4-pin connector for the OLED display, and finally a 4-pin analog header for MQ gas sensors.
The “Flying-Fish” sensor module includes the sensor itself, a potentiometer to set the threshold value, and a 4-pin header to connect to the host board.
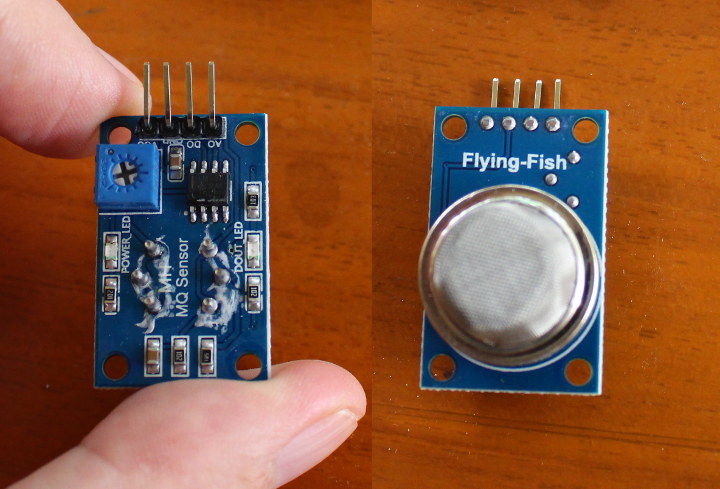
There’s no indication of the sensor model on those views, so we need to look at the sensor from the side, and that’s MQ135 air quality sensor we’ve got here.
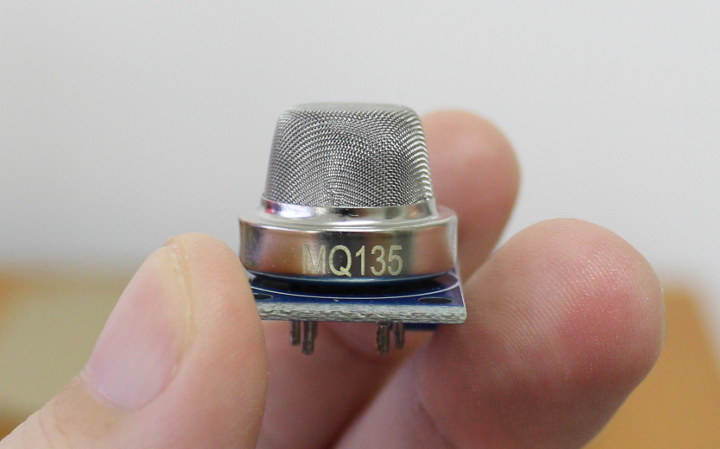
It is sensitive to benzene, alcohol, and smoke. It can also be used to estimate CO2 concentration. ANAVI Gas Detector can support other MQ sensor as well including:
- MQ2 for methane, butane, LPG, smoke
- MQ-3 for alcohol, ethanol, smoke
- MQ-7 for carbon monoxide
- MQ-9 for carbon monoxide and flammable gasses
You’ll find more details about each on Arduino Playground.
ANAVI Gas Detector Assembly
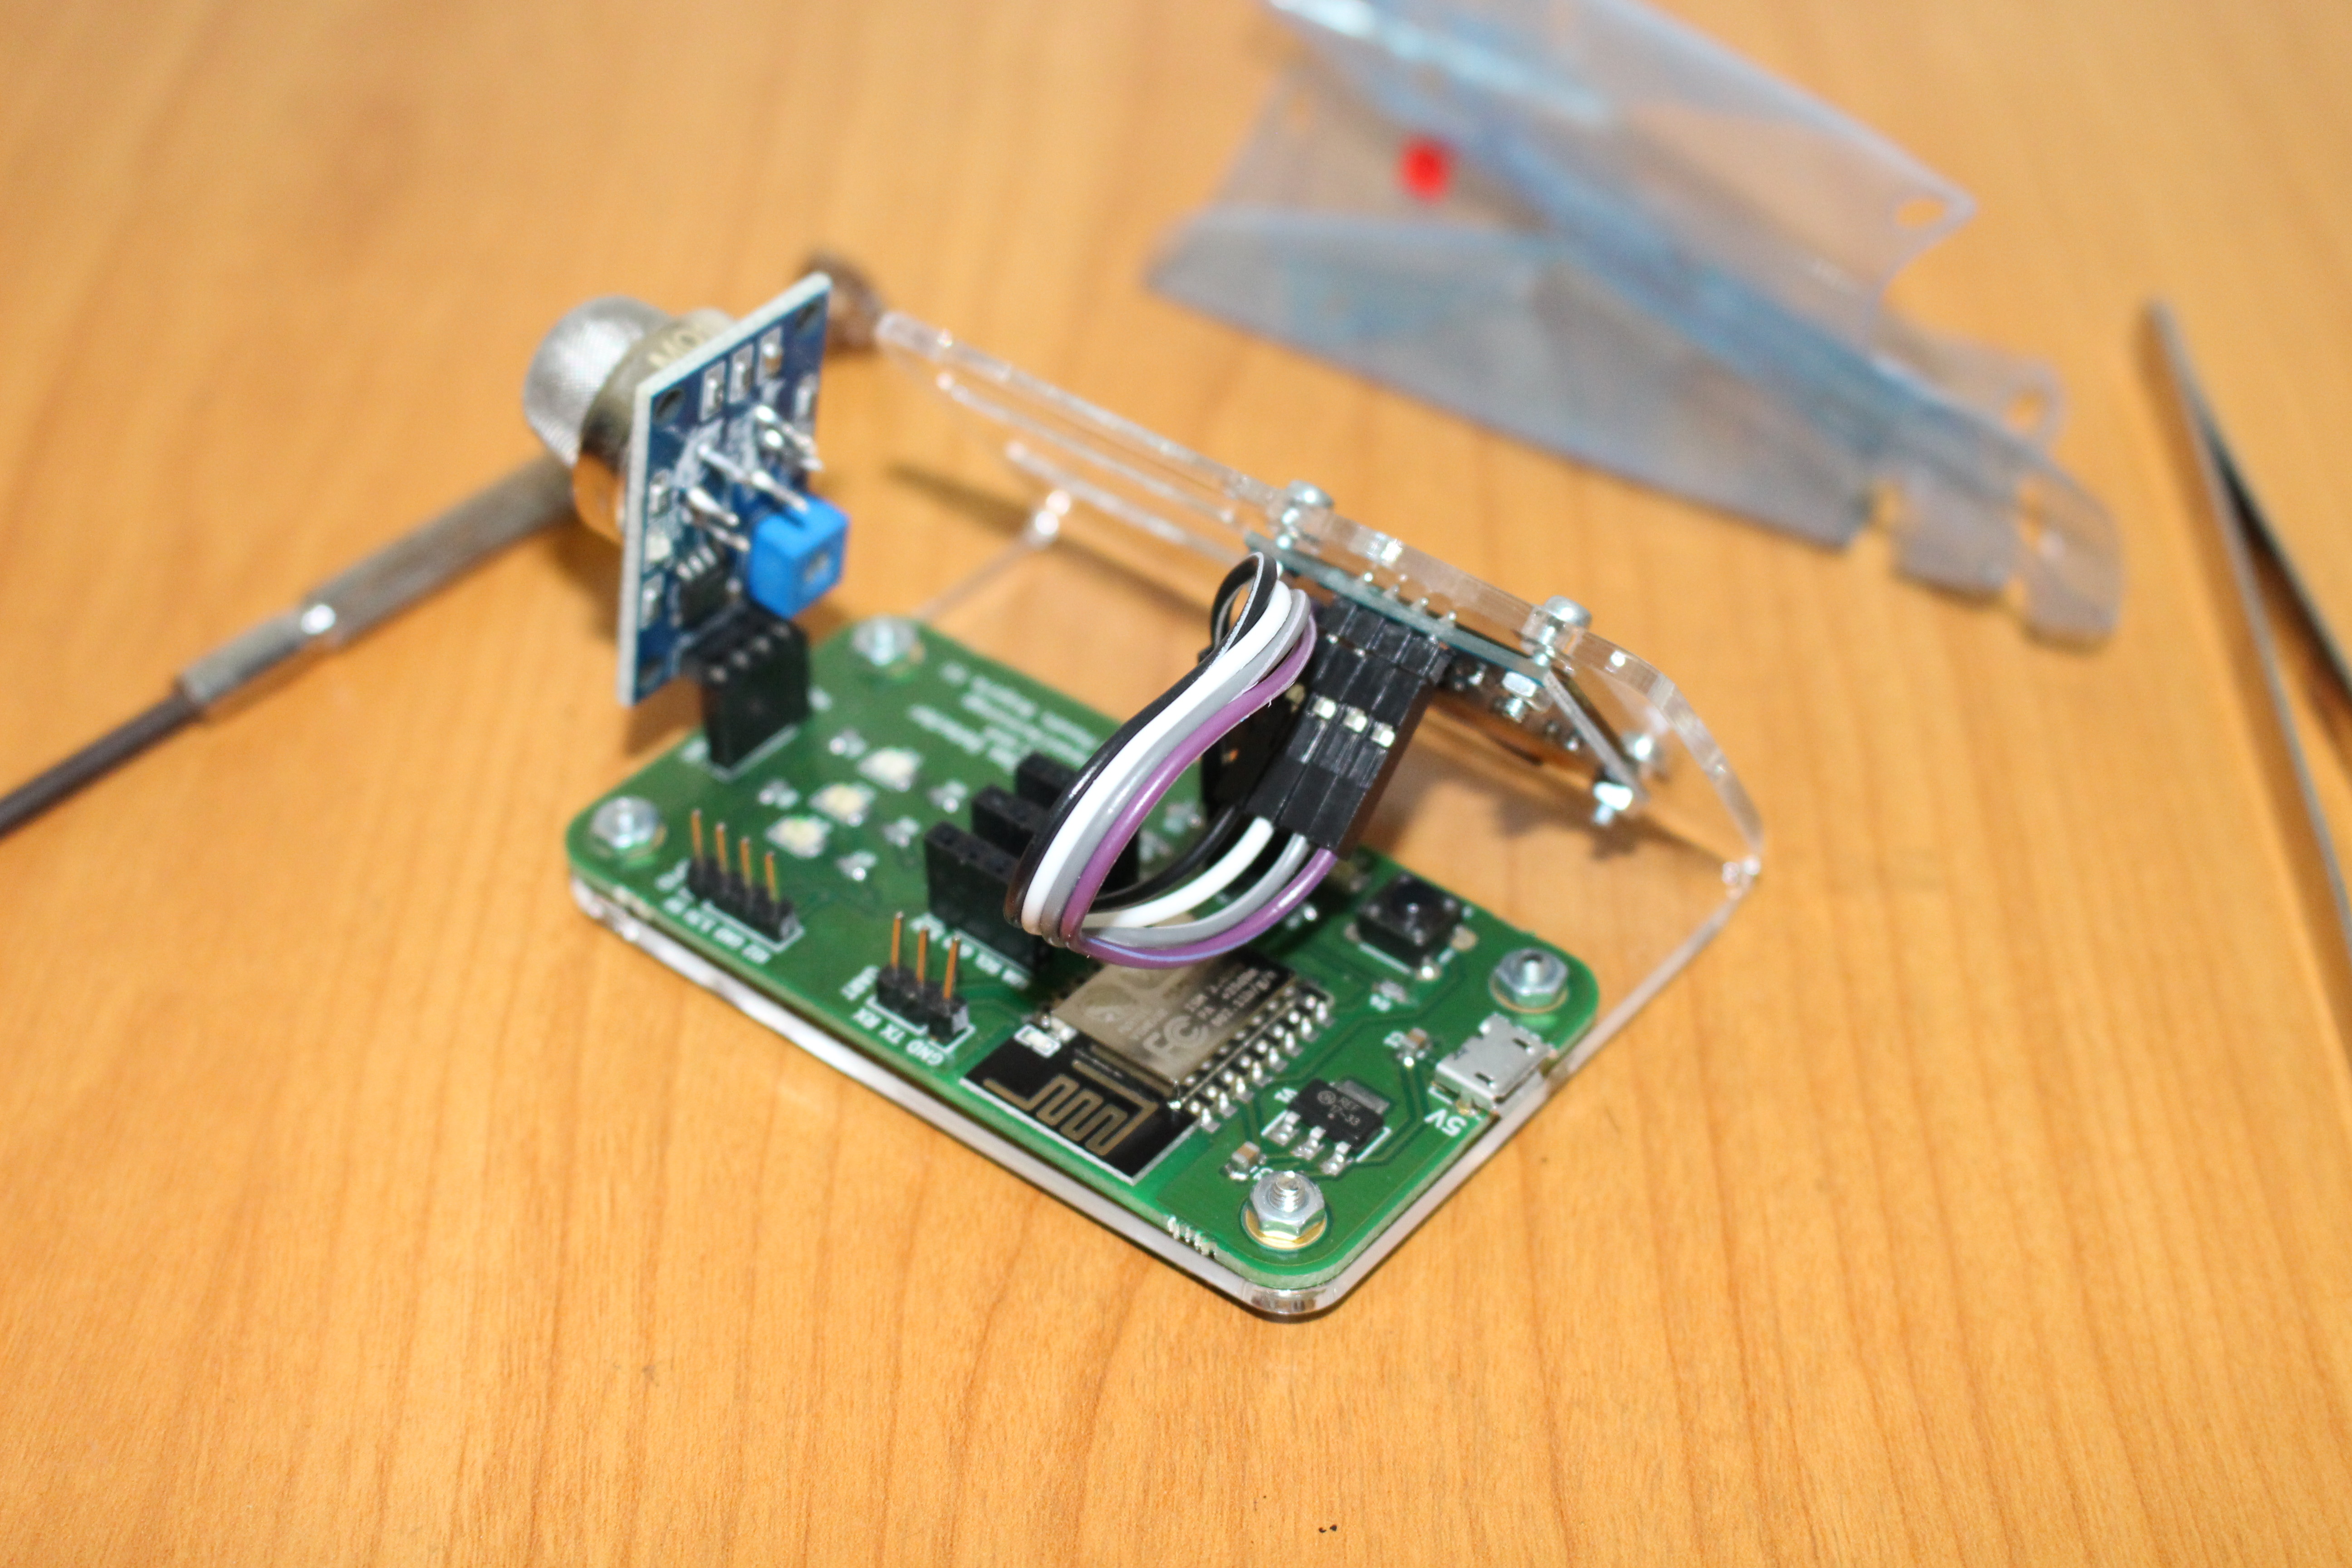
The starter kit assembly instructions are straightforward and very similar to ANAVI Thermometer assembly steps.
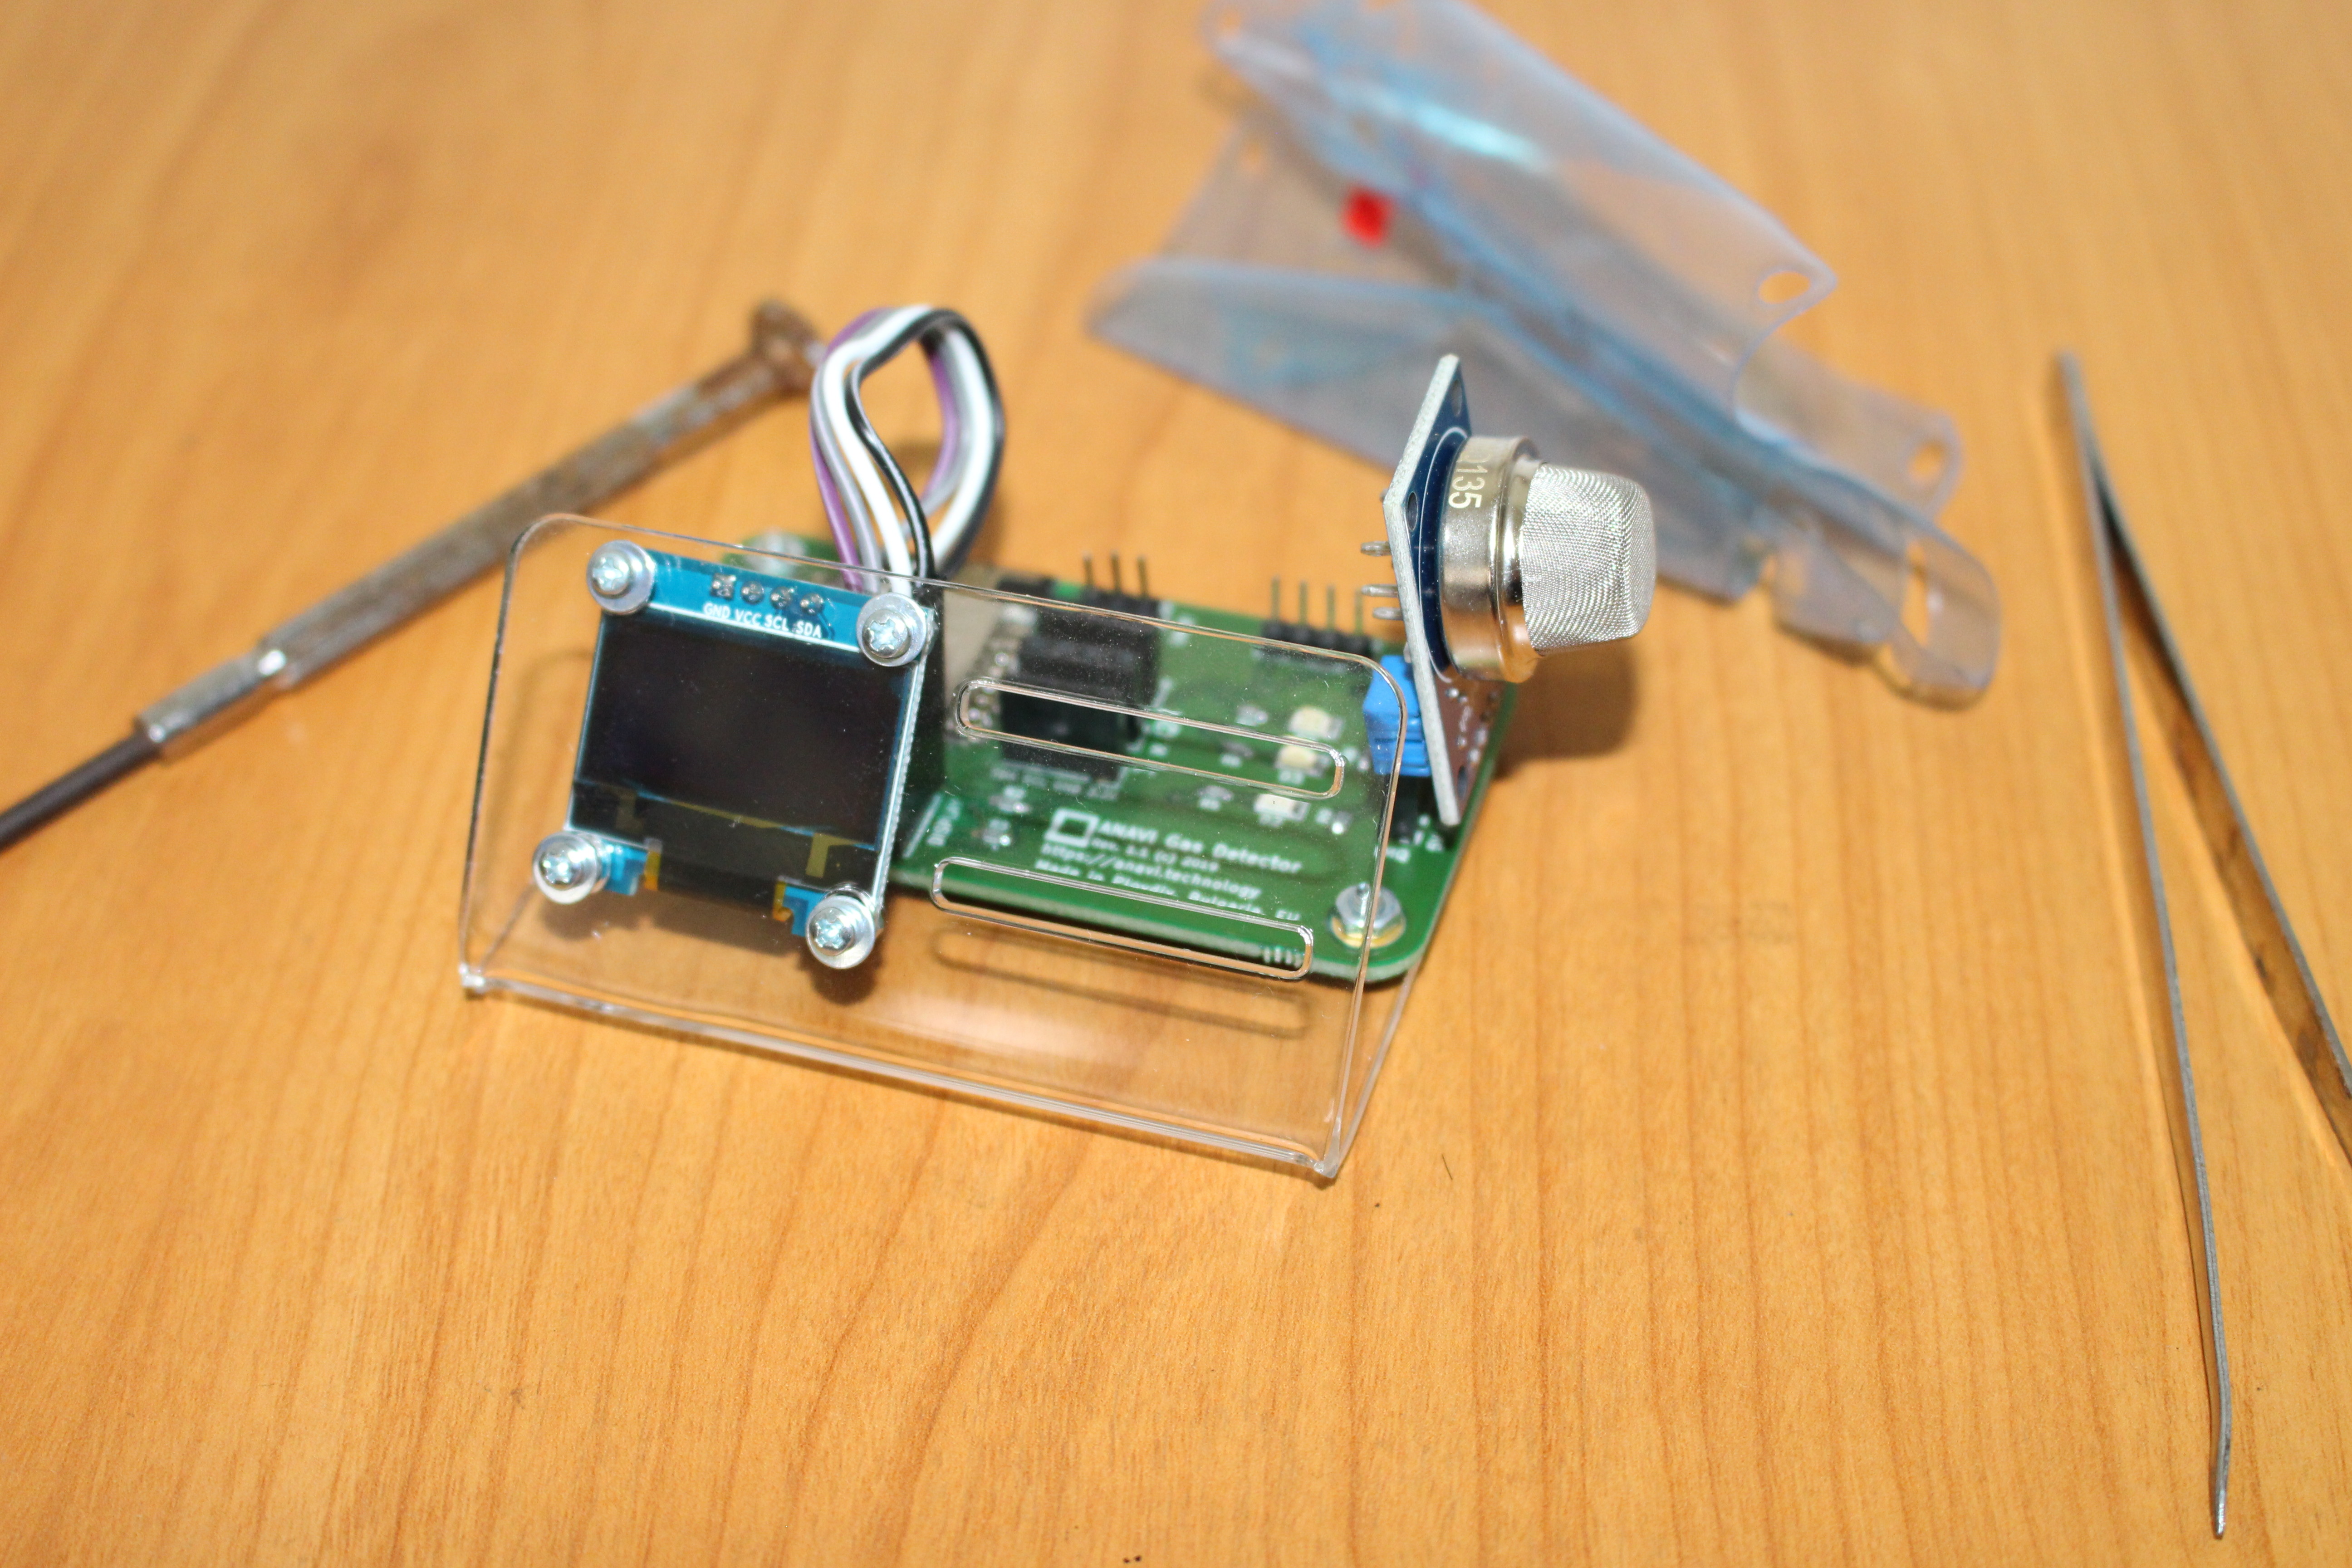
All I need was a precision screwdriver and a pair of tweezers to handle the nuts when installing the display. The first step is to remove the protective films from the plastic stand, install the display, install the mainboard, and wire the display to the display header. Finally, insert the MQ sensor and you’re done.
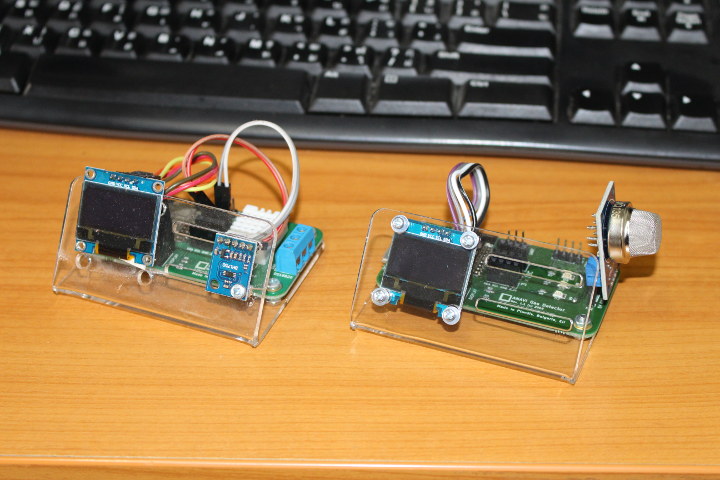
If you have the feeling you’ve seen this before because ANAVI Thermometer and ANAVI Gas Detector starter kits are indeed very similar.
Configuration
The board comes pre-loaded with a default firmware, so we can use it straightaway. You just need to power the board via the micro USB port either via a computer port, or another power source.I started with the former, and the kit starts in access point mode.
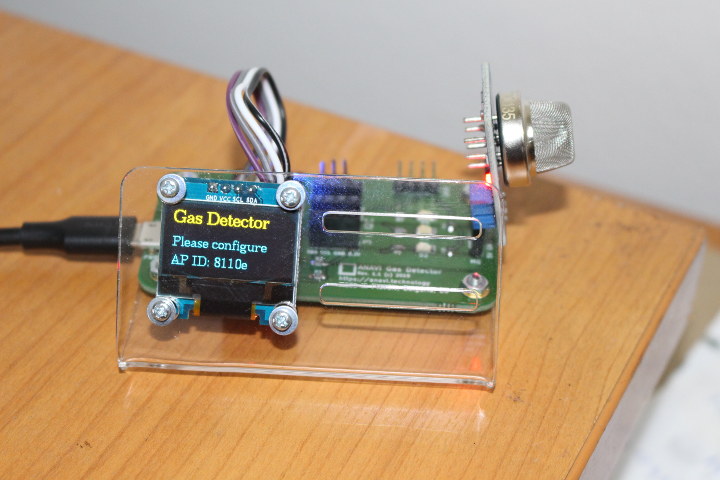
The display shows the AP ID. Take your phone or another device that can connect to WiFi, select “ANAVI Gas Detector <AP ID>, and you should be asked to sign-in. This will bring you to the user interface.
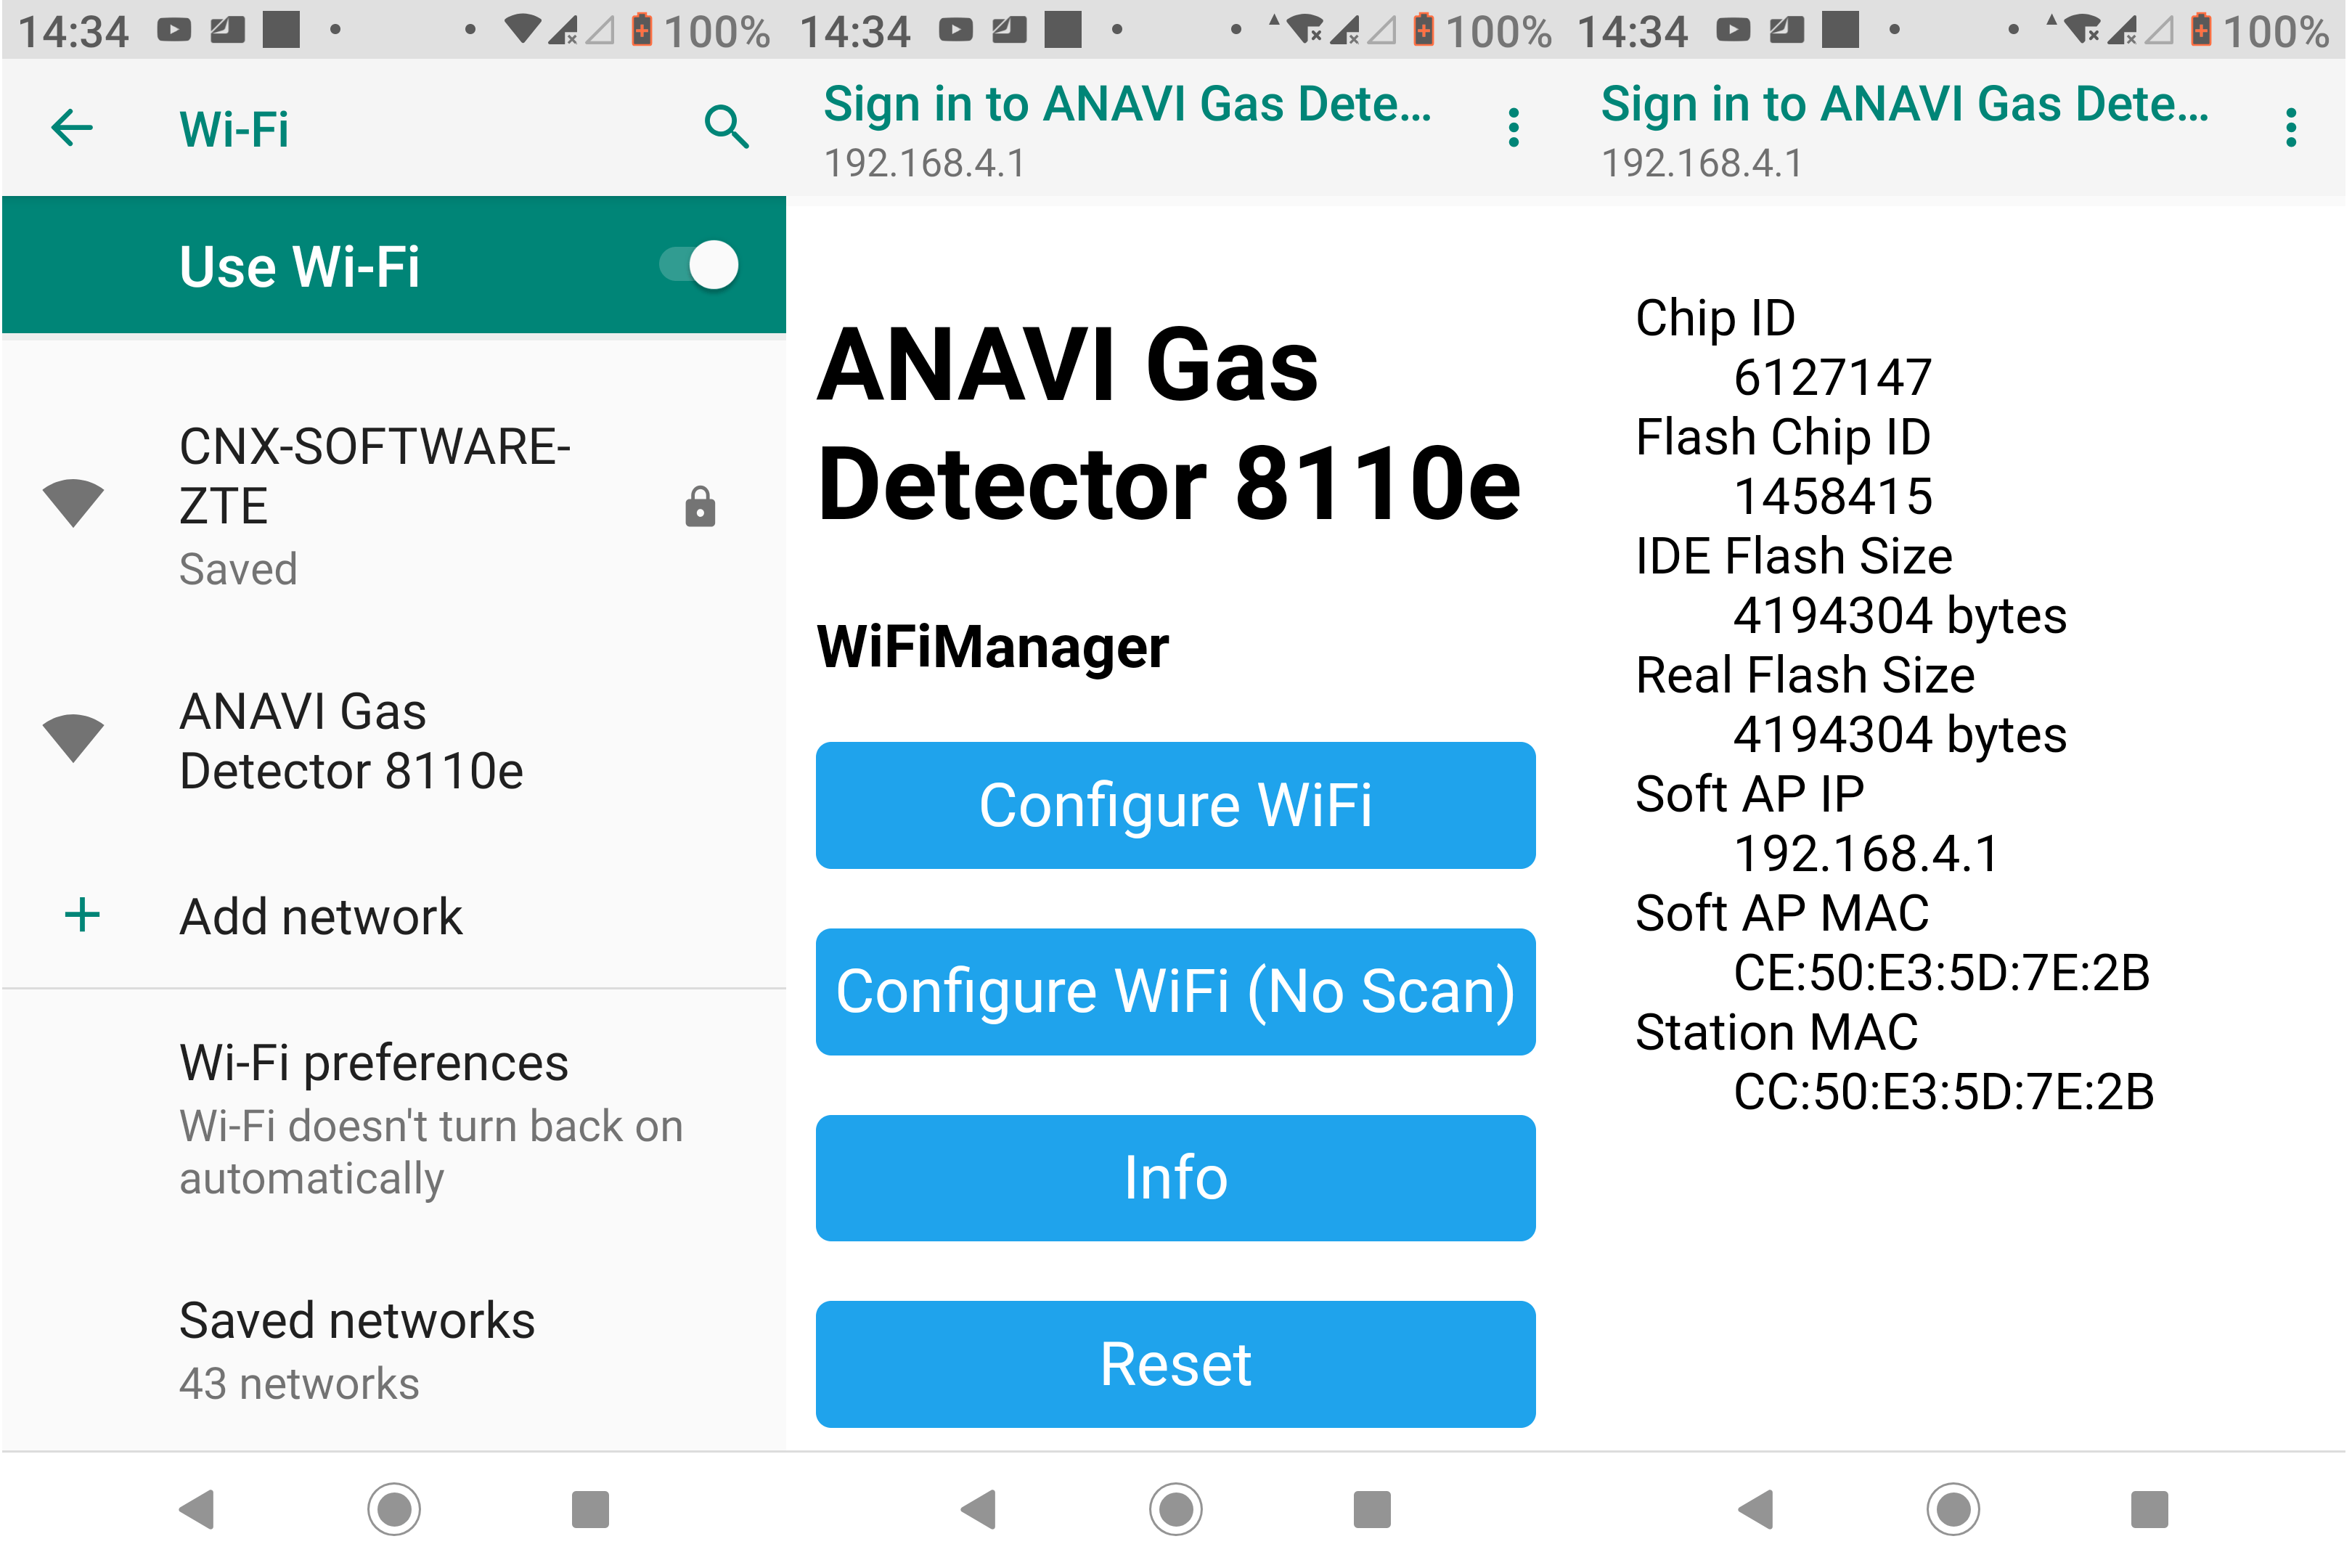
The Info section is shown on the right above for reference. But we do not really need to care about this. Most people will just tap on Configure WiFi to connect it to their WiFi router.
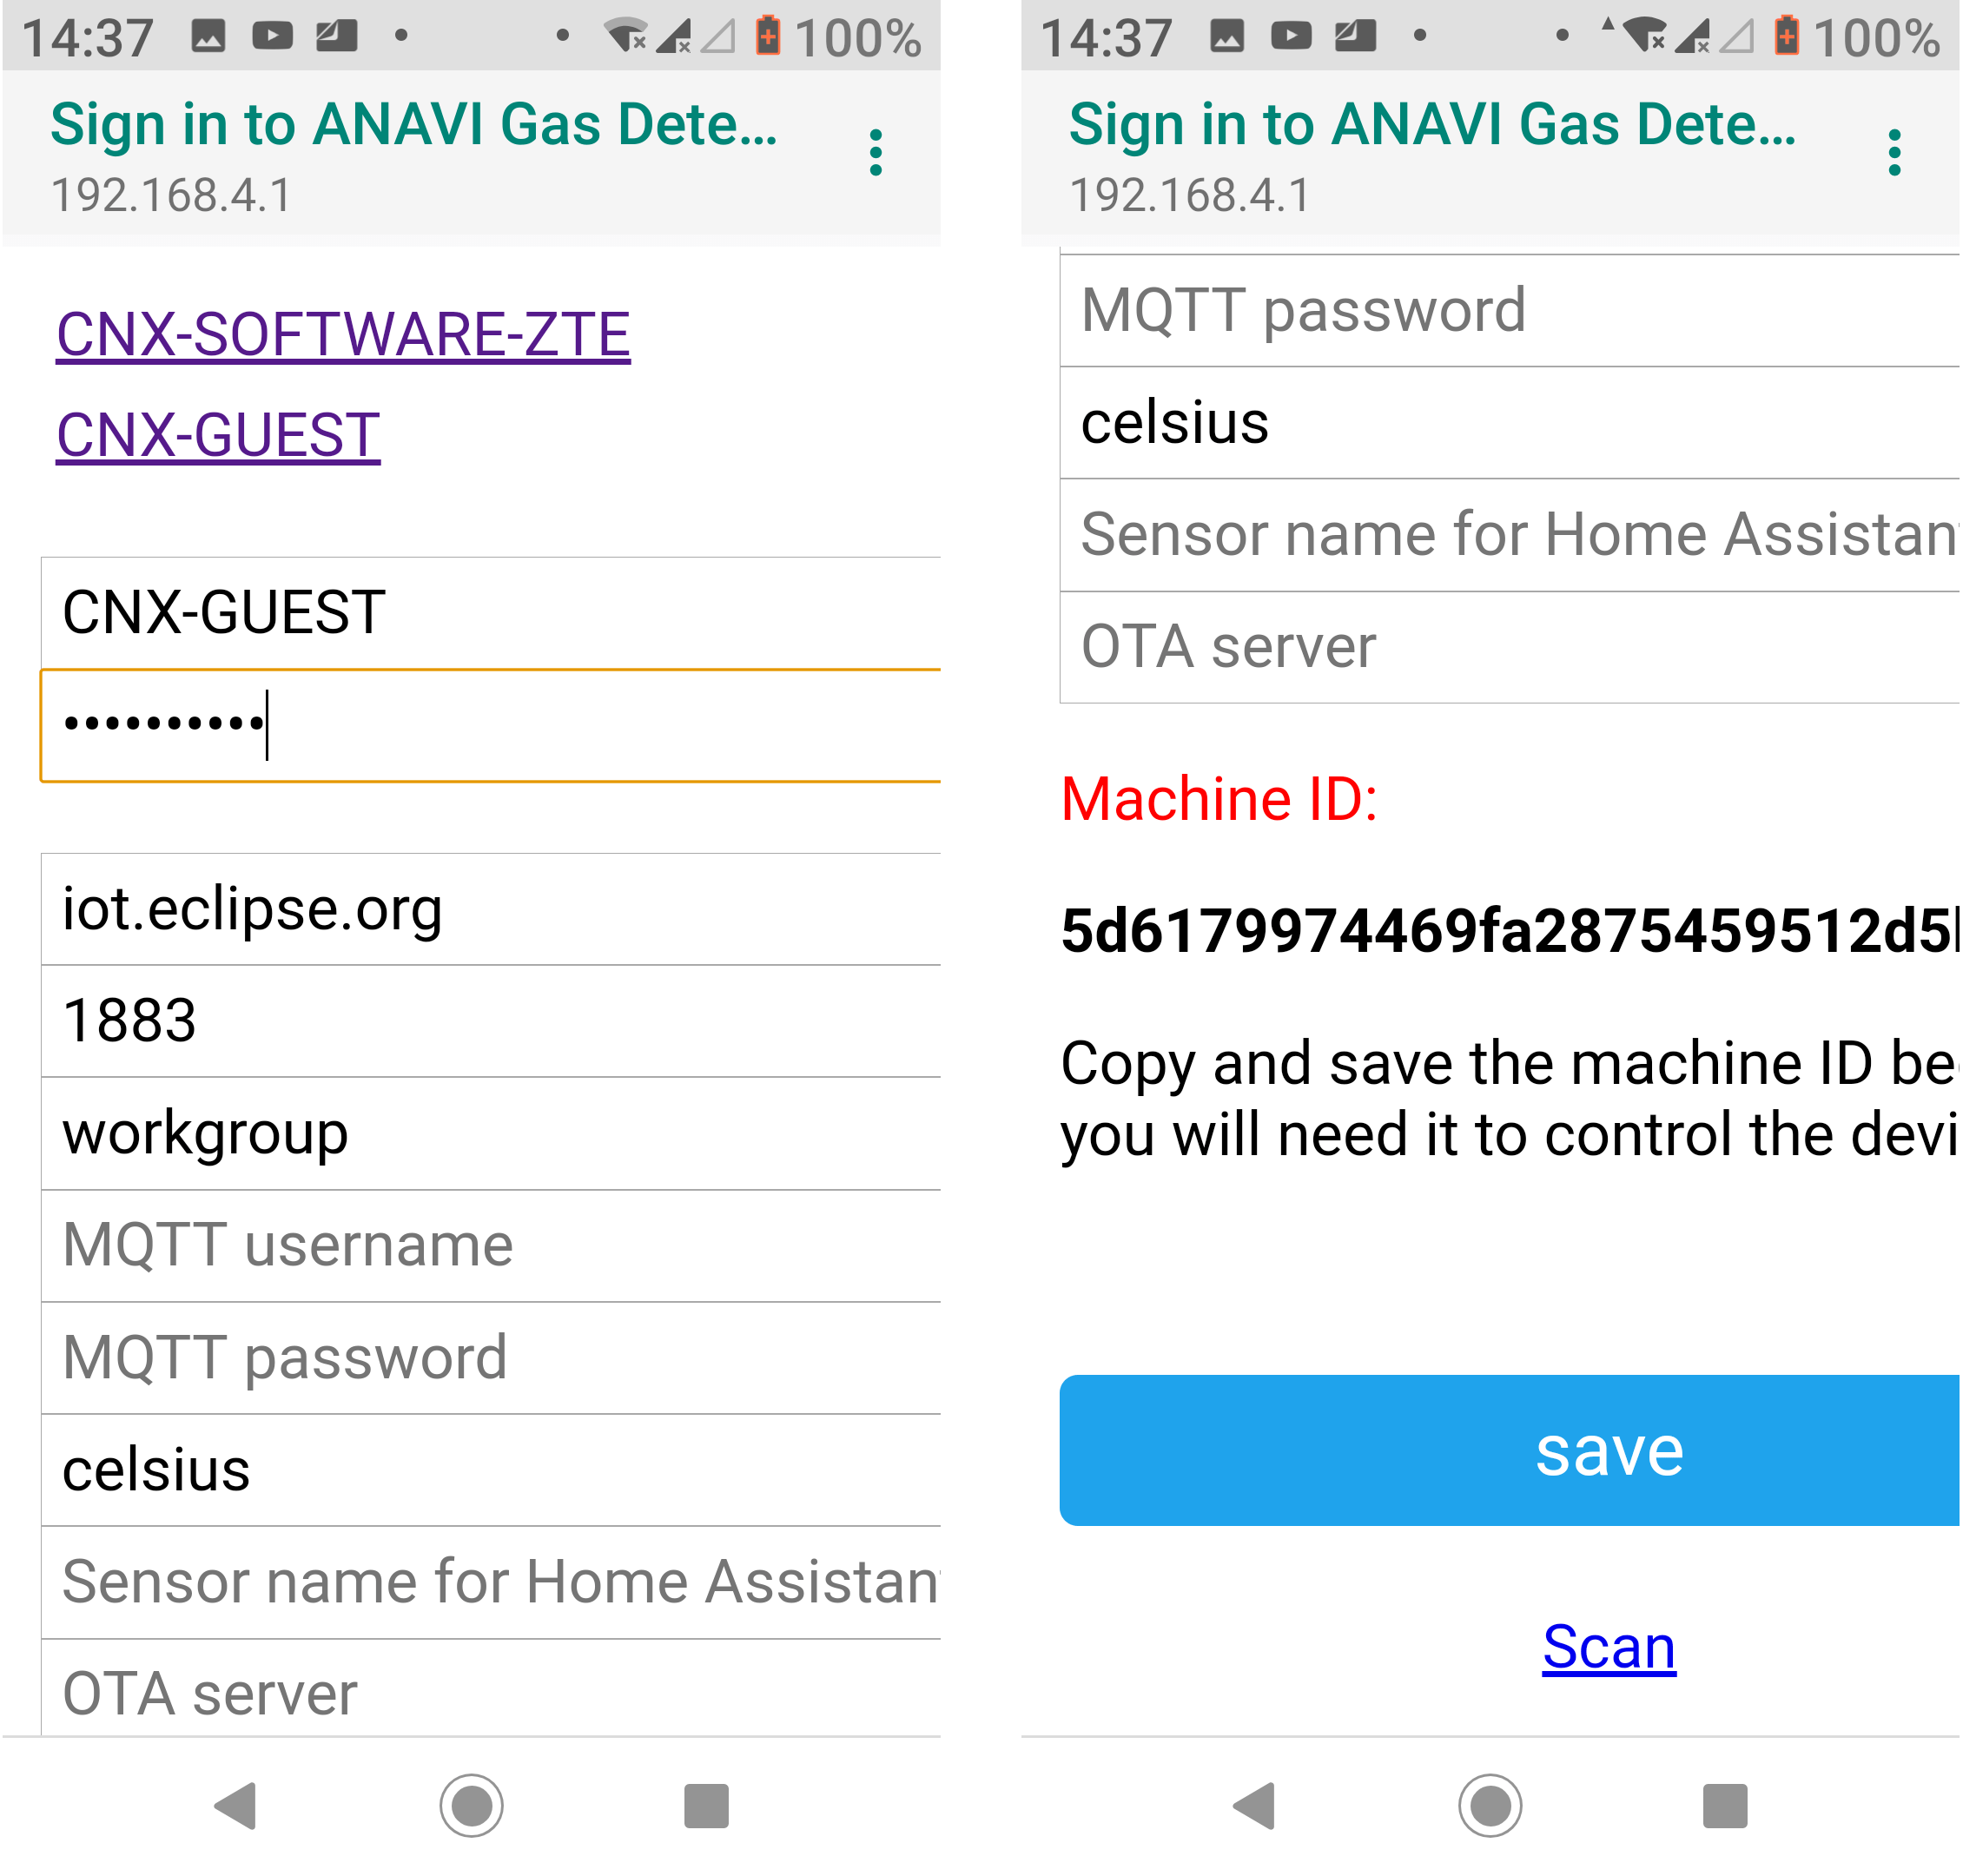
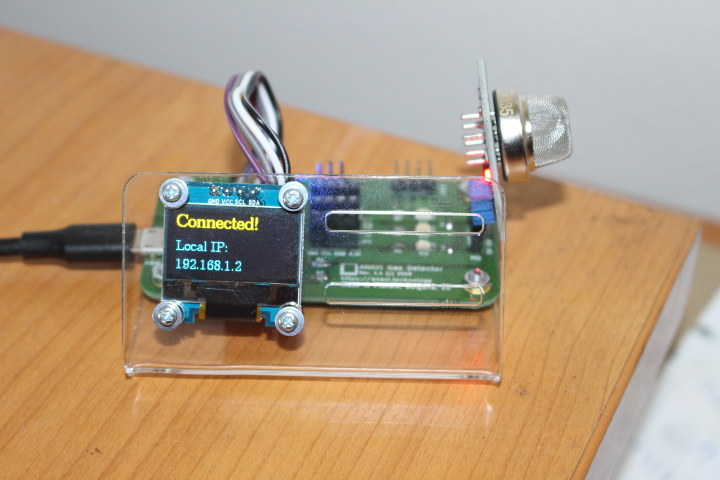
Select your access point, and enter the password. We can ignore MQTT settings for now, but we’ll use those later on. We will not use the Machine ID in this review as it’s not needed. Just tap and save, and the board should reboot with its new IP address freshly acquired from your router over DHCP.
Air Quality Measurements
Just wait a few seconds and the OLED display with start showing the sensor conductivity, and an estimation of the air quality either Poor, Moderate or Good.
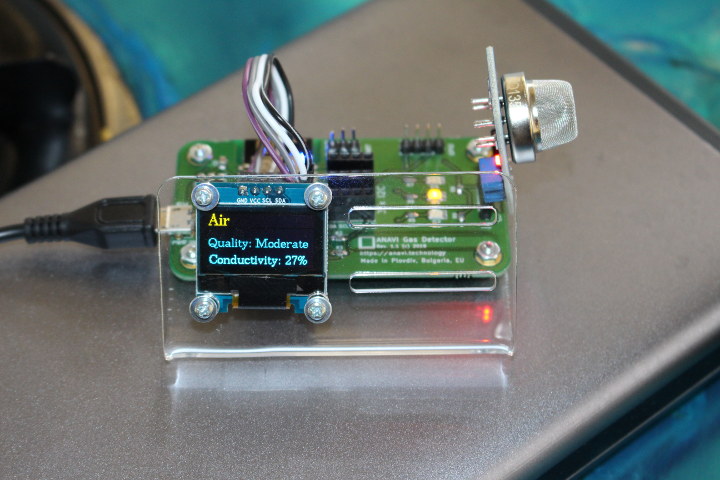
In my office air conductivity was 27% corresponding to moderate air quality. I’m now using an oversized battery bank since I want to move it around in different locations around the house.
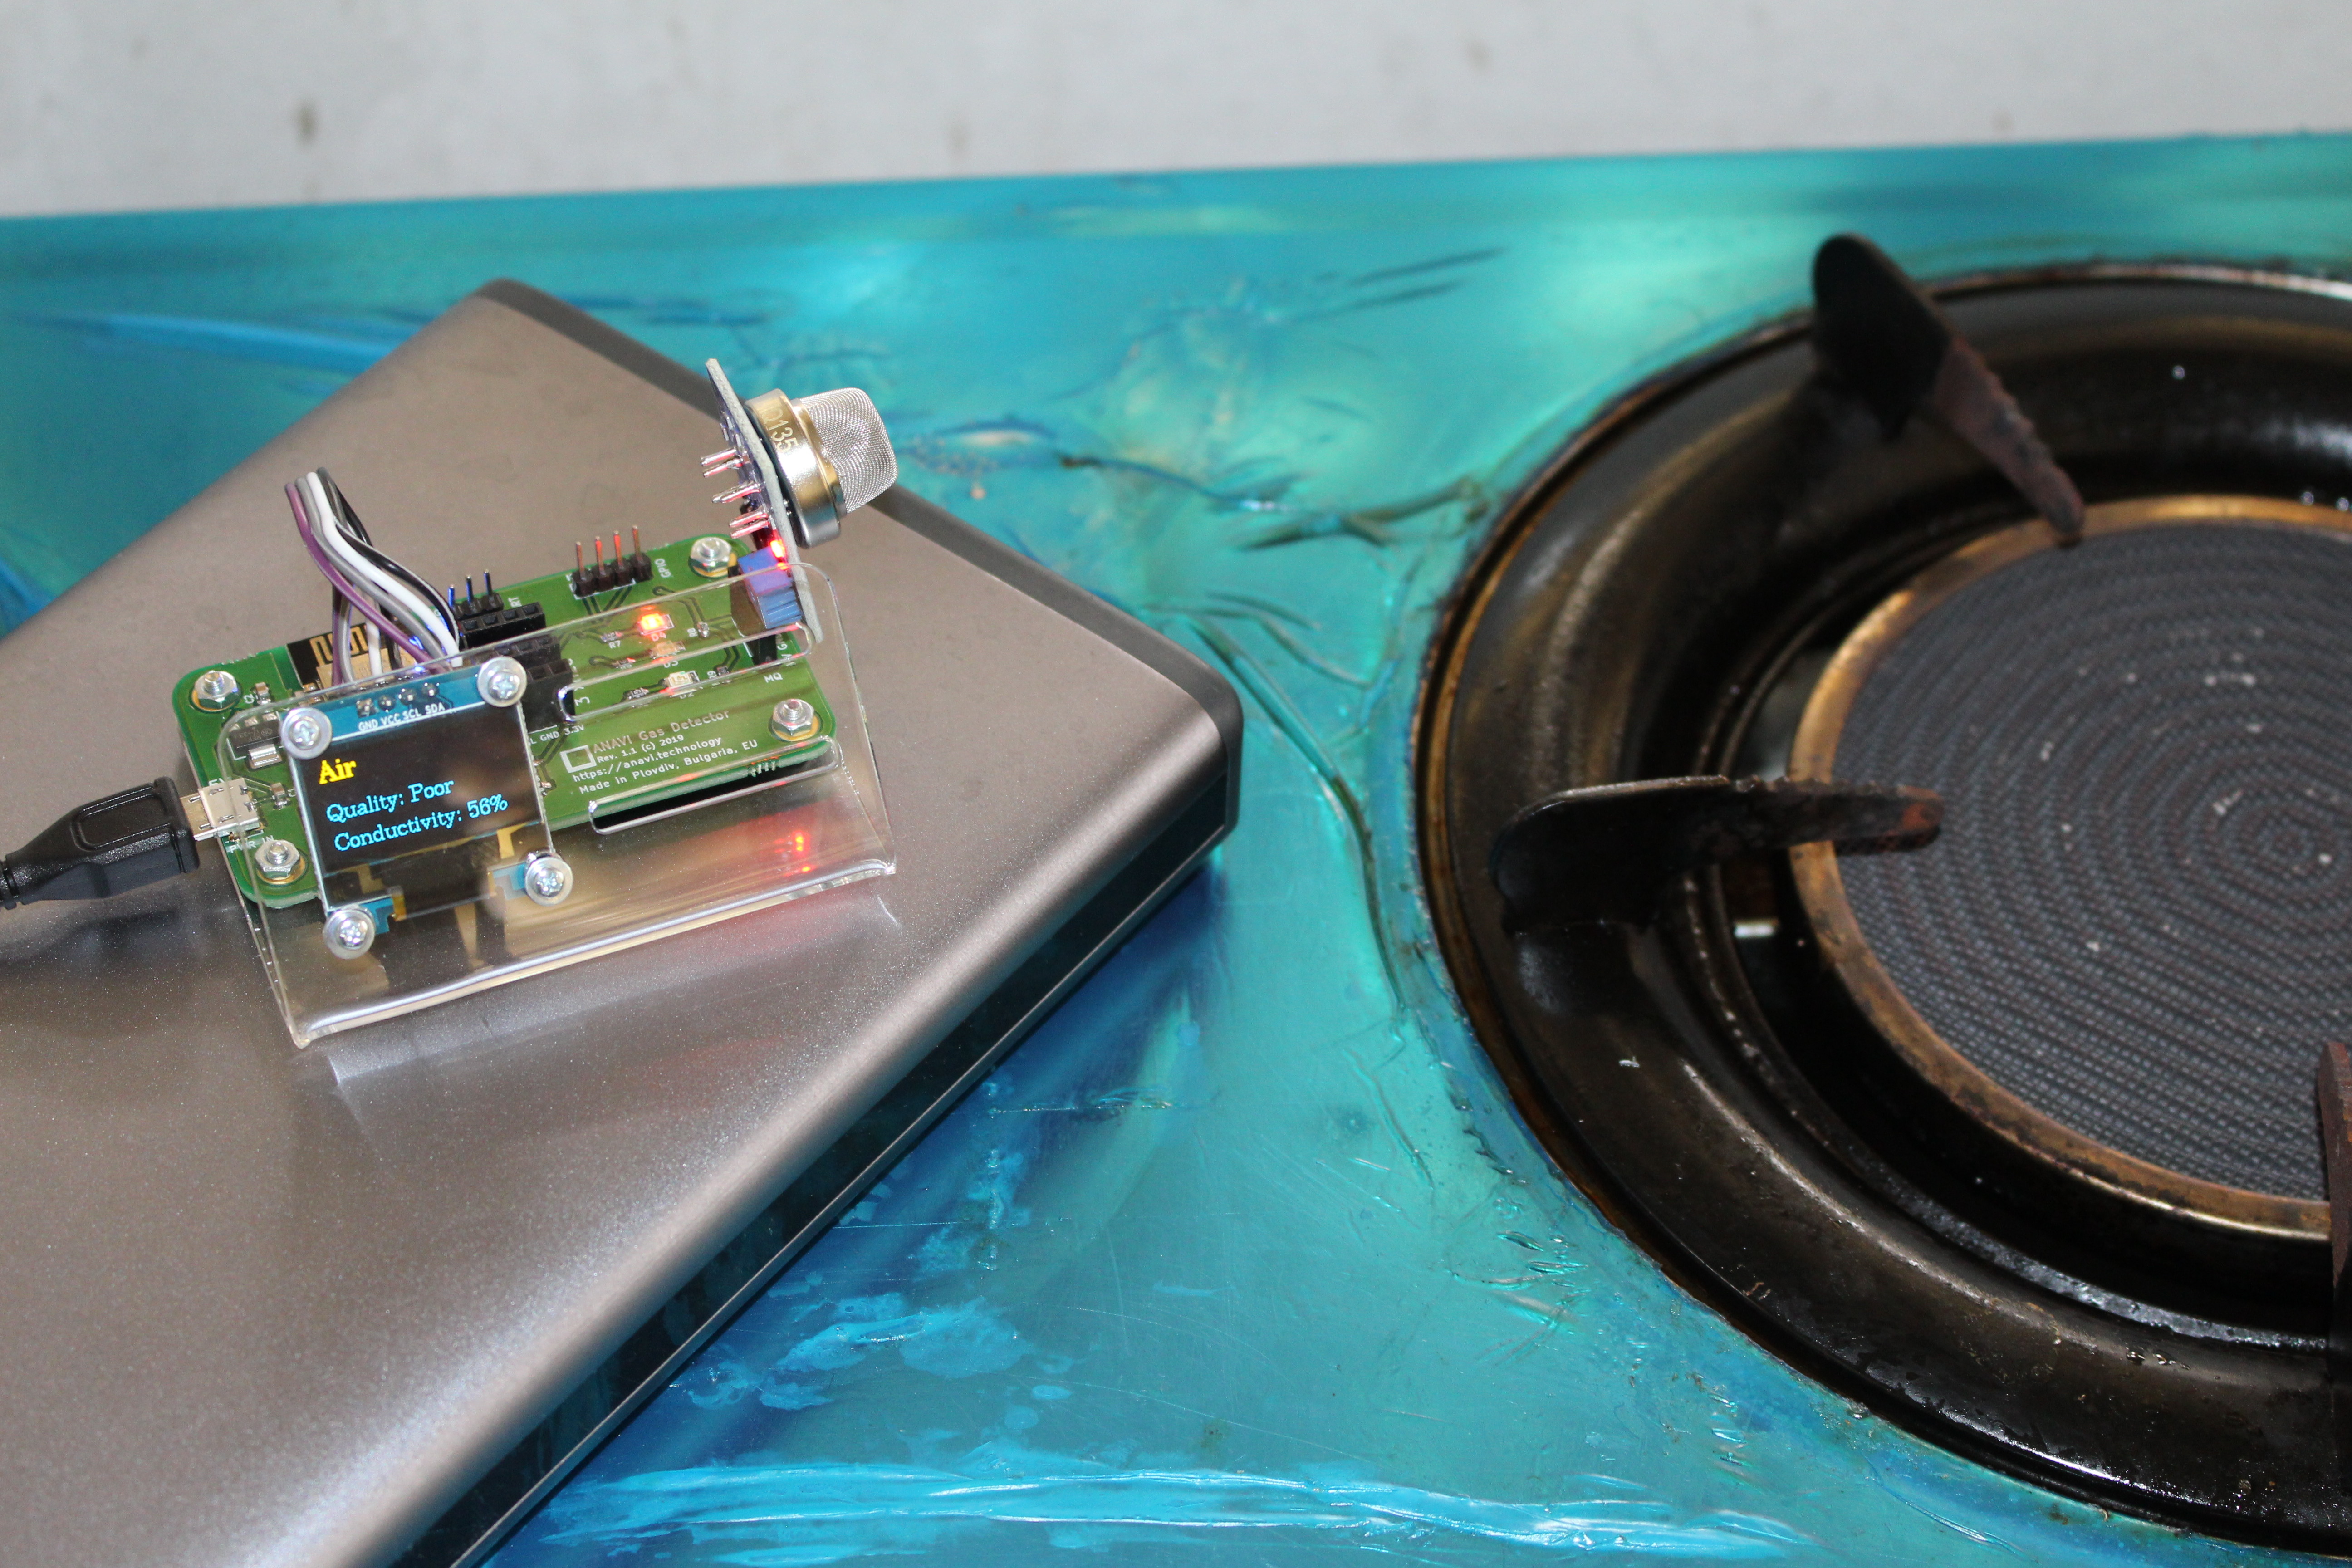
Let’s go to the kitchen. I placed the device on the gas stove, and turn on one of the burners, and as the gas escaped it quickly went to 100% before starting to fall down as ignition occurred, and gas was burned. Note that MQ-135 is not specifically designed to detect this type of gas leaks, but it seems to serve the purpose. We’ll see it in more details below, including in a video.
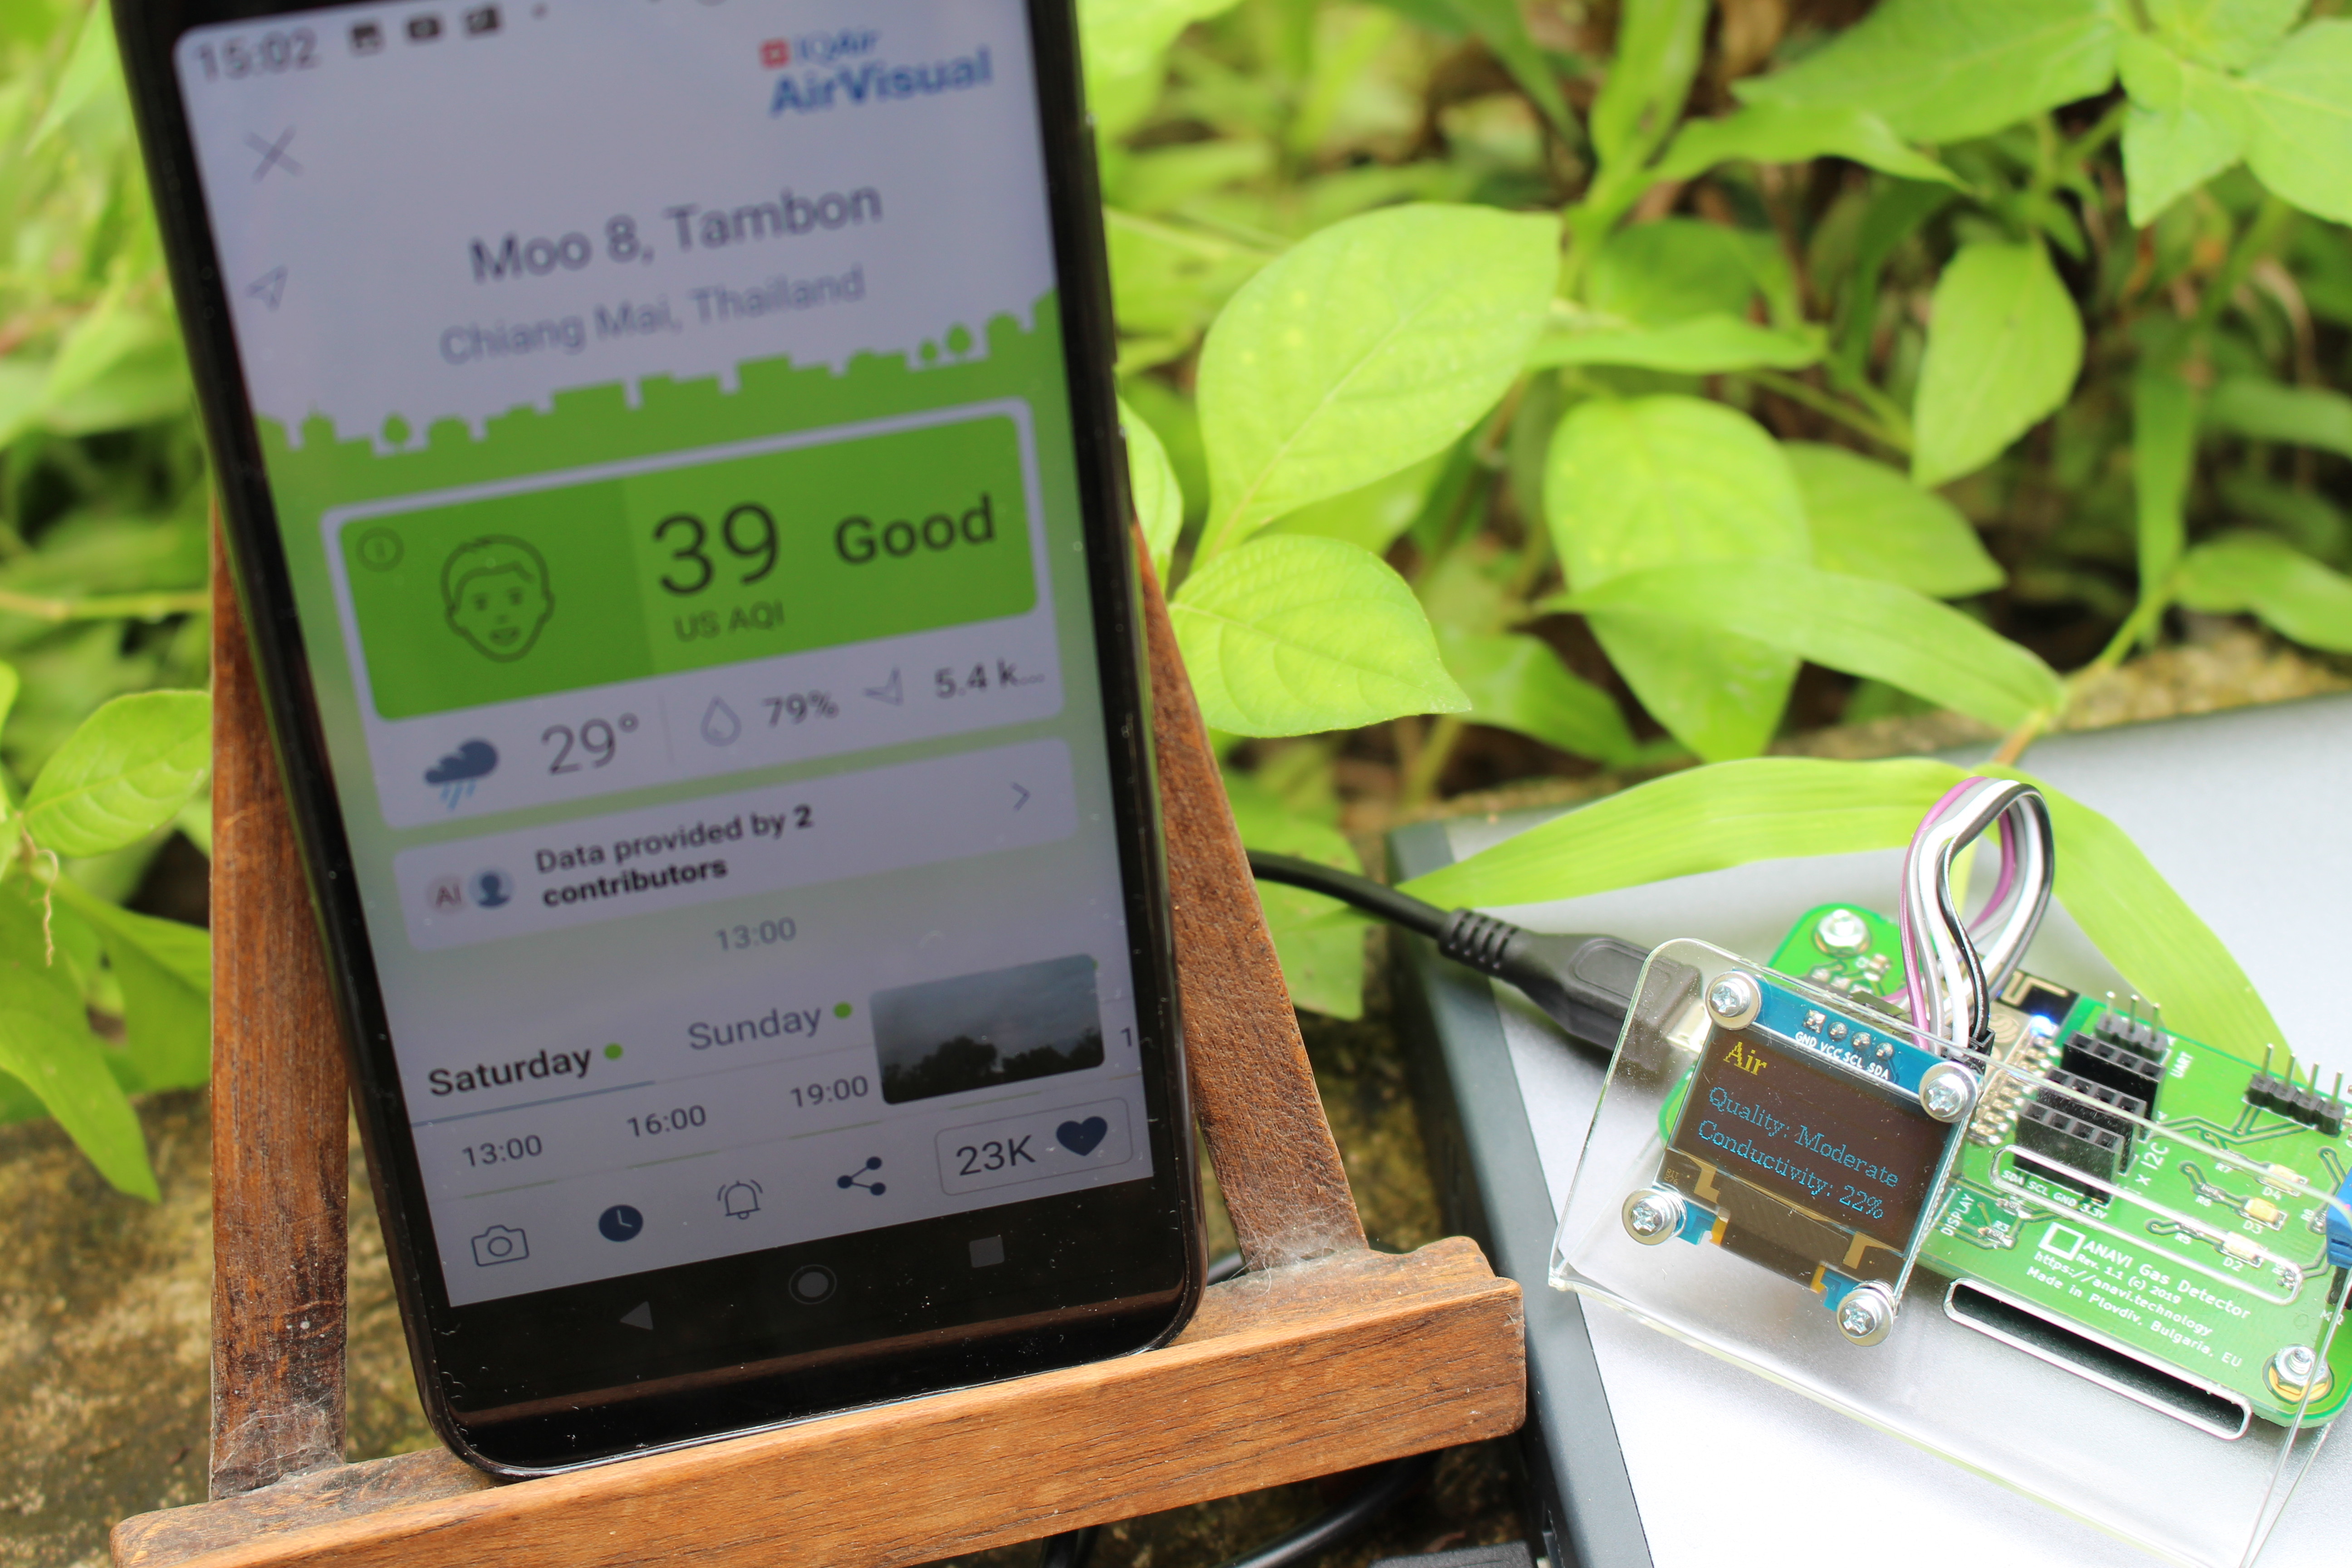
I went outdoors for some fresh air and got 22% conductivity, that’s still classified as moderate air quality. I’m showing AirVisual app’s air quality for reference only. MQ-135 sensor apparently picks a bit of everything, while AFAIK AirVisual monitor targets PM2.5 and PM10 particles only. It would still be interesting to find out if there could be a correlation.
Next morning I went back inside and connected the board over the serial console to check out the output:
|
1 2 3 4 5 6 7 8 9 10 11 12 13 14 15 16 17 18 |
-59 dBm Gas value: 138 Air Quality: Good Conductivity: 13% -49 dBm Gas value: 144 Air Quality: Good Conductivity: 14% -50 dBm Gas value: 138 Air Quality: Good Conductivity: 13% Gas value: 144 Air Quality: Good |
If you want to find out what the code does, you can check out the Arduino sketch. The code specific to conductivity measurement and air quality calculation is in detectGas function:
|
1 2 3 4 5 6 7 8 9 10 11 12 13 14 15 16 17 18 19 20 21 22 23 24 25 26 27 28 |
void detectGas() { int gas = analogRead(pinAdc); // Calculate conductivity in pecents // The gas concetration depends on the coductivity // If the analog MQ sensor detects more gases // the conductivity will be higher int conductivity = round(((float)gas/1023)*100); String quality = "Good"; String gasState = "off"; if (gas <= 190) { setColor(LOW, LOW, HIGH); gasState = "OFF"; } else if (gas <= 300) { quality="Moderate"; setColor(LOW, HIGH, LOW); gasState = "OFF"; } else { quality="Poor"; setColor(HIGH, LOW, LOW); gasState = "ON"; } |
ANAVI Gas Detector and Home Assistant
Reading the values on the OLED display or in the serial console is all well and good, but we’ve got a WiFi-connected node so it would be so much better if we could store the data on our own server and see some nice charts, possibly triggering alerts as well. One way to do so is to use Home Assistant.
I did try to setup Home Assistant with ANAVI Thermometer last March, but gave up due to lack of time fixing all the issues I encountered. I did try again with his Gas Detector, and this time everything was very easy thanks to video posted by Leon Anavi explaining how to do so with ANAVI Thermometer.
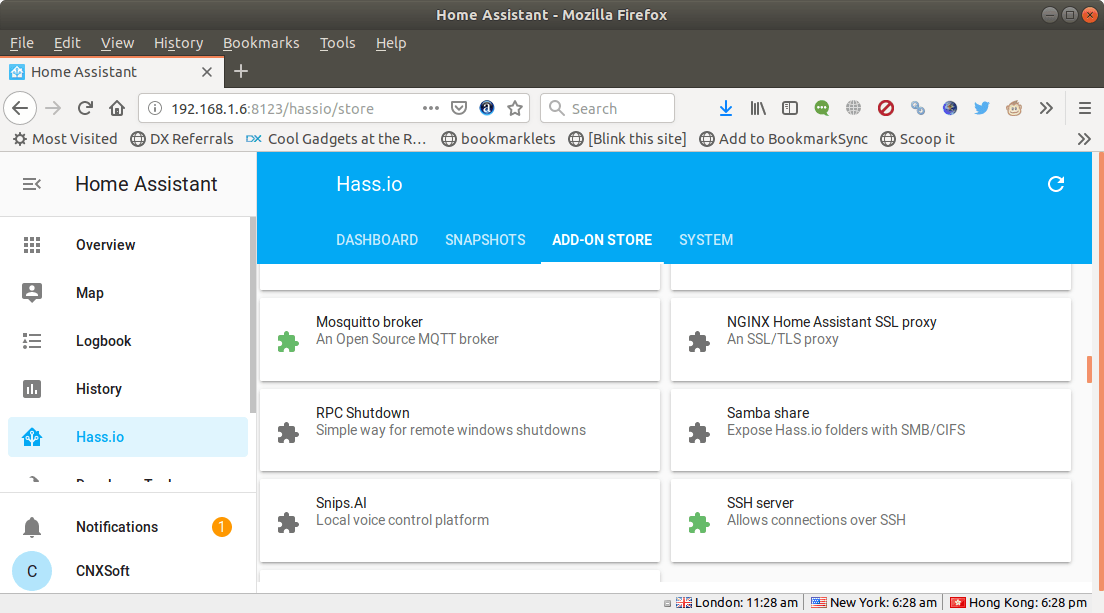
First, instead of just installing Home Assistant, I went with Hass.io that includes Home Assistant as well as common tools that make it easier to use. I could install it in two lines in Ubuntu 18.04 adapting some instructions found on Github:
|
1 2 |
sudo apt install -y apparmor-utils apt-transport-https avahi-daemon ca-certificates curl dbus jq network-manager socat software-properties-common docker.io sudo sh -c 'curl -sL "https://raw.githubusercontent.com/home-assistant/hassio-installer/master/hassio_install.sh" | bash -s' |
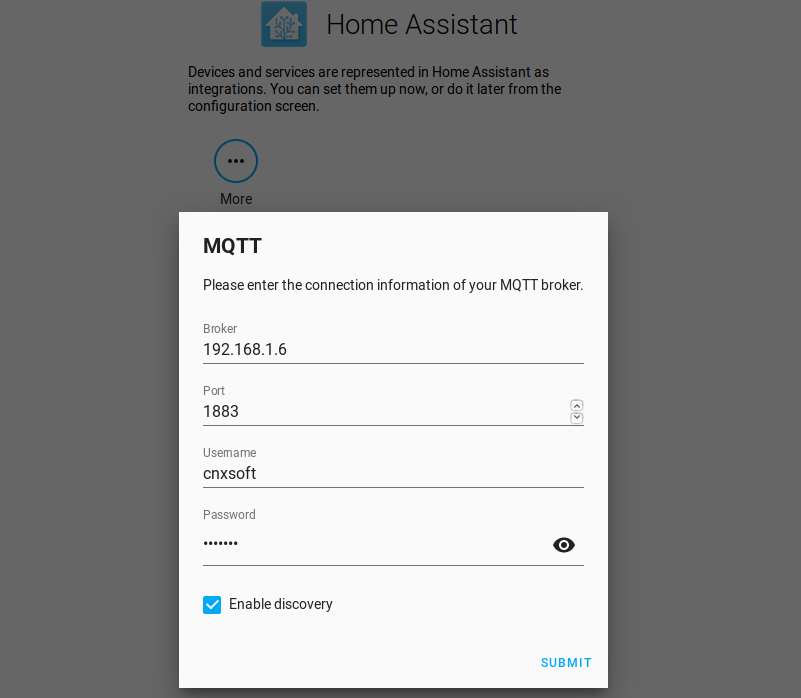
You should now able to access the dashboard by going to http://<computer_ip_address>:8123 in your web browser and go through the first setup wizard that’s pretty much self-explanatory. At some point, you can add MQTT services. You can do this now or later (Integrations part. I did this at this stage, by setting the broker IP address (e.g. my computer IP address), a username and password of my choice, and – very important – ticked Enable discovery.
You’ll need to configure it as shown below.
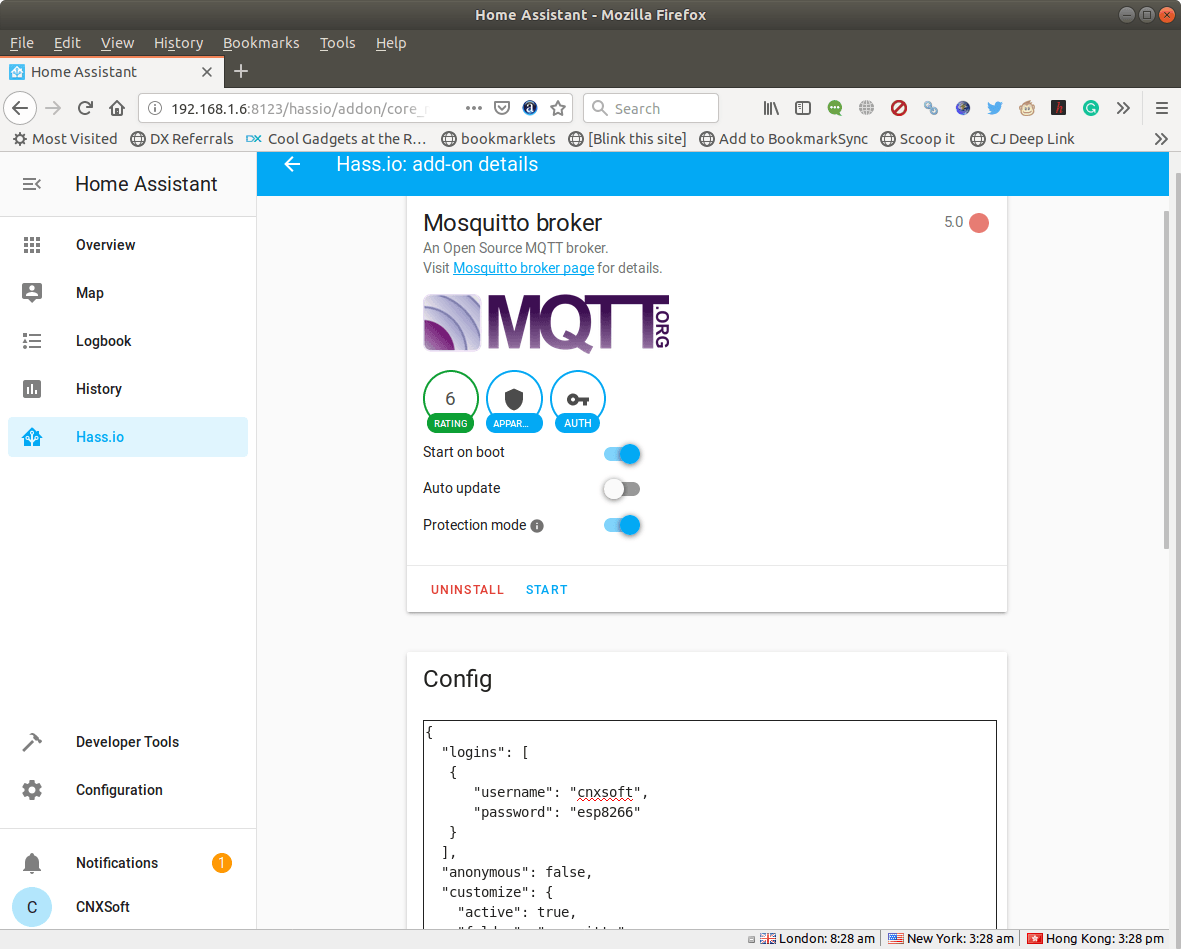
MQTT broker configuration:
|
1 2 3 4 5 6 7 8 9 10 11 12 13 14 15 |
{ "logins": [ { "username": "cnxsoft", "password": "esp8266" } ], "anonymous": false, "customize": { "active": true, "folder": "mosquitto" }, "certfile": "fullchain.pem", "keyfile": "privkey.pem" } |
Click Save and Start. We need to configure our gas detector to connect to our MQTT broker with the provided credentials. Press the reset button on the board for 10 seconds in order to restore factor settings and enter access point mode again.
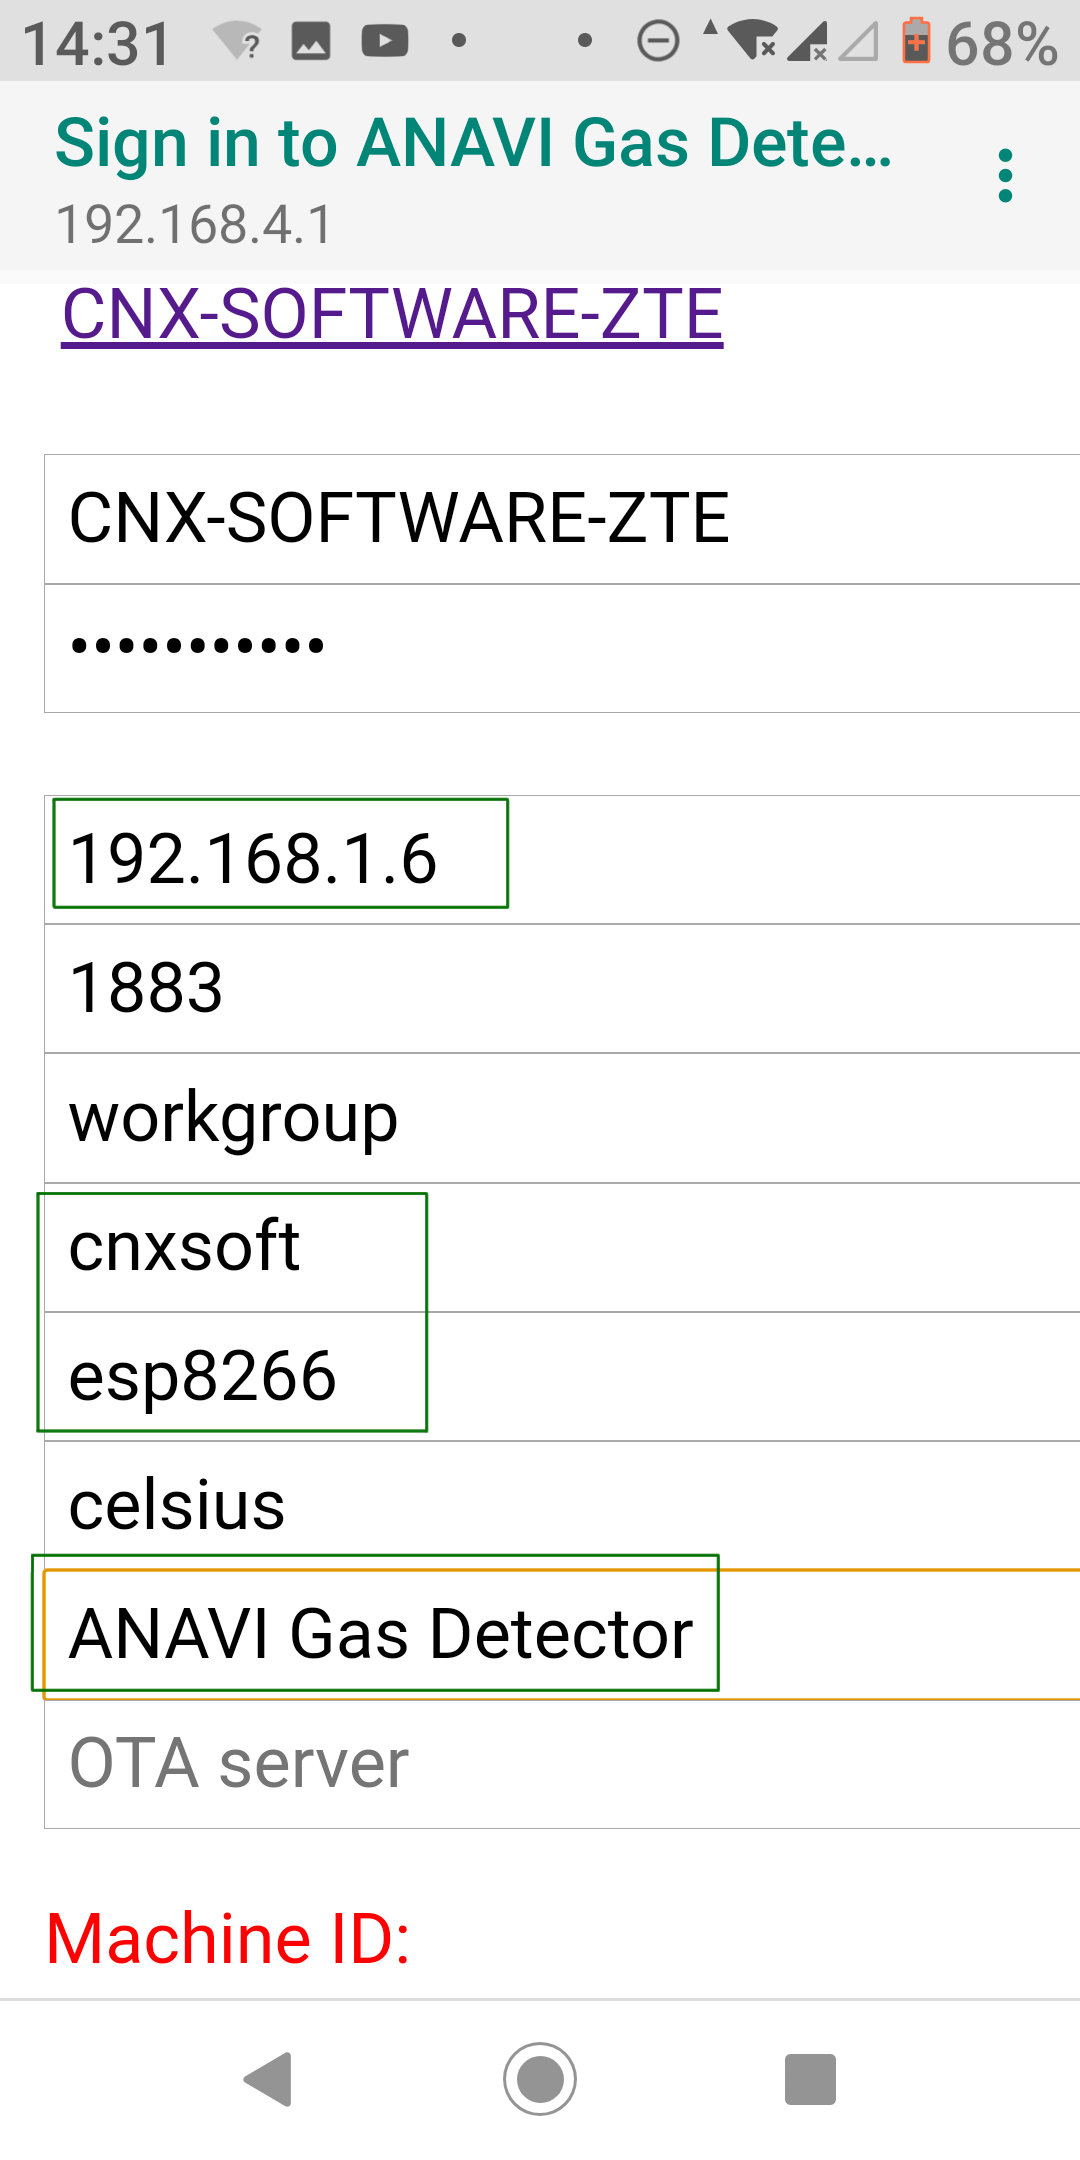
After sign-in, we can input the access point password as previously, as well as fill fields relevant to MQTT namely IP address, username, password, and device’s name for Home Assistant (“ANAVI Gas Detector”). Click Save.
Now we can go to Configuration->Integrations in Home Assistant dashboard. If you have not yet configured your MQTT broker you may be asked to do so here, but in our case, we did this already, so we can see MQTT: 192.168.1.6.
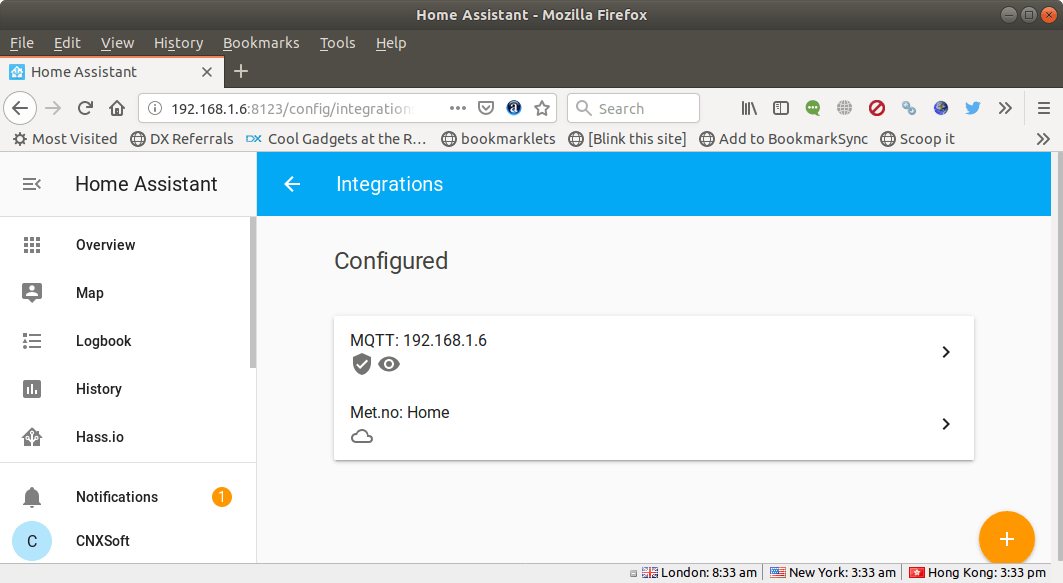
Let’s click on it, and oh surprise! ANAVI Gas Detector is detected, as well as the two values it returns: conductivity in percent and dangerous gas detection (yes or no).
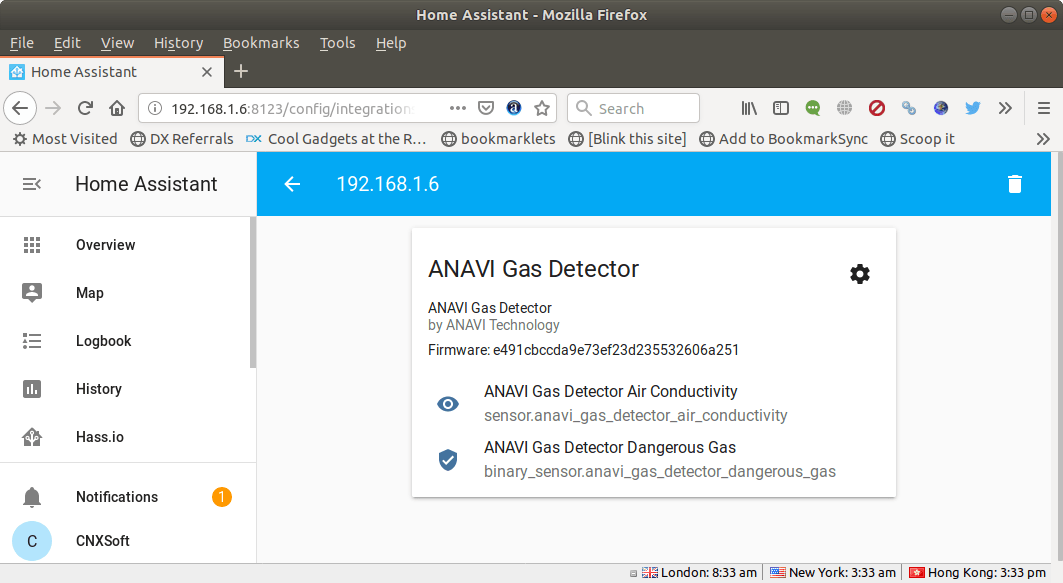
Perfect! No need to mess around with configuration files, except when we set the username password in the MQTT broker above. It’s just that easy.
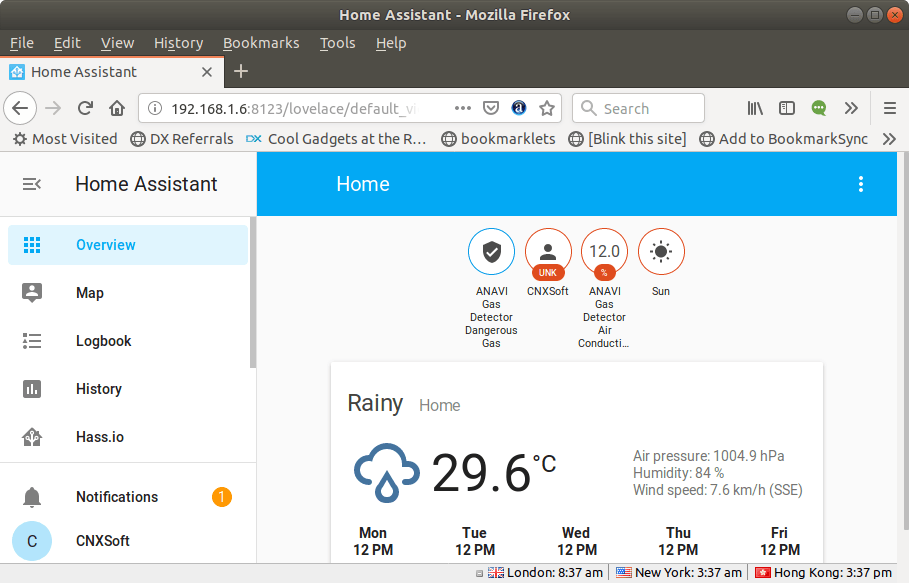
The two values are also shown on Home Assistant dashboard. All good. Before we check the chart, let’s go to play with our stove again.
This video below I show how conductivity quickly jumps to 100% when gas flows through the burner without ignition. I turn it off, and conductivity slowly goes down as the gas disperses.
So how does it look in Home Assistant? Here’s how.
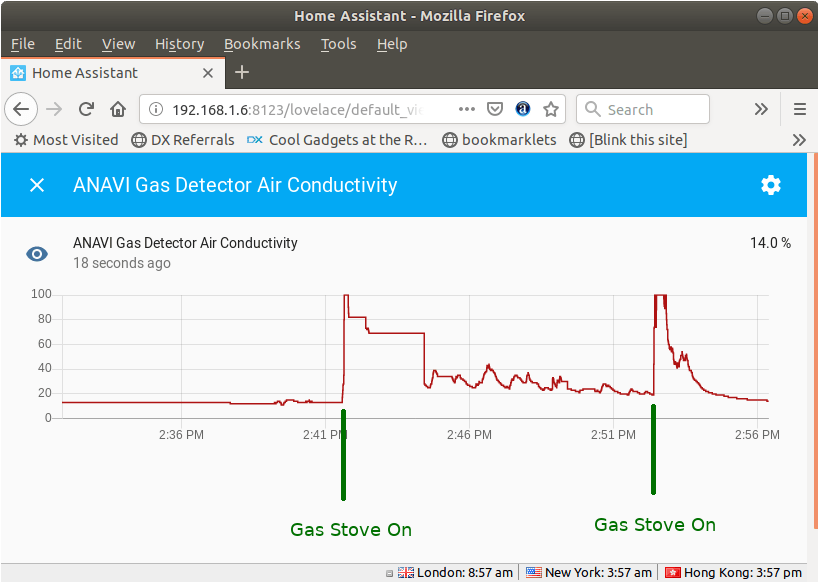
The second time it drops faster as I moved the kit into another room. We can also check a long term view in the History tab.
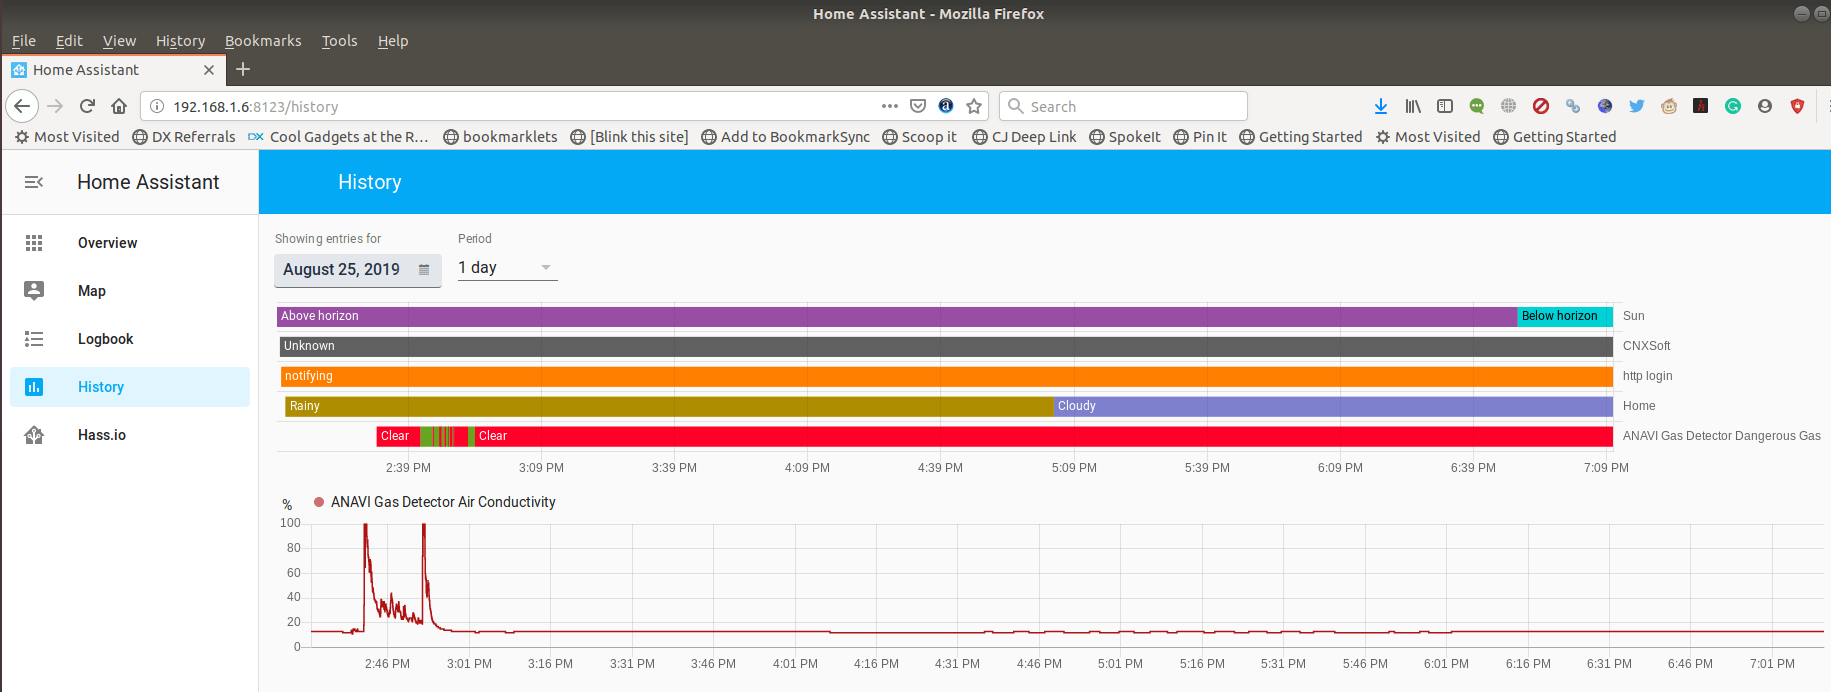
The Dangerous Gas alert is “clear” most of the time, and “Detected” when a dangerous gas is detected. Somehow it does not exactly match the “gasState” status which is set to ON in the code when conductivity is over 30%. It looks like the bar is shifted left for some reasons. If we would shift it right, it would align with the conductivity chart. Apart from this small rendering issue, everything works pretty well!
If you’re interested you can pledge for ANAVI Gas Detector starter kit on Crowd Supply for $39 as the campaign still has about 10 days to go. Shipping is free to the US, $12 to the rest of the world, and backers should expect their rewards sometimes in November / December 2019.

Jean-Luc started CNX Software in 2010 as a part-time endeavor, before quitting his job as a software engineering manager, and starting to write daily news, and reviews full time later in 2011.
Support CNX Software! Donate via cryptocurrencies, become a Patron on Patreon, or purchase goods on Amazon or Aliexpress


I wonder if it drives MQ-7 and MQ-9 properly, those require two different voltages levels for the heater, it should be heated for 60 seconds at 5V, then drop it to 1.4V for 90 seconds then take the measure, so it is a 2.5 minutes cycle. I know they can detect variations in gas concentrations even when constantly driven at 5V, but their sensibility will drop (faster) over the time as they are not supposed to be driven that way. If they don’t drive them in that way, I would not advise to use them if you are planning to… Read more »
There’s no control for the voltage to module from the board and the generic banggood/taobao sourced driver board for the sensors just seems to have an op-amp to boost the output.
Aren’t you supposed to run the sensor for 24+ hours the first time, some burn-in time (should be mentioned in the datasheet)?
Yes, but that is a one time process, the datasheet also mentions that afterwards both the MQ-7 and MQ-9 are supposed to be driven as I mentioned. But anyway, this kit was not intended for accuracy.
Any way to set the frequency of updates? Mine updates (I think) every second, so I’d like it just to take a measurement say, every 5 seconds
I think changing the following const in Arduino sketch should do the job:
Just set it to 5000