CNXSoft: This is a guest post written in collaboration with SurfShark.
When it comes to choosing a platform for STEM education or hobbyist projects, there are a number of low-cost, compact maker boards on the market. The most popular include the kid-friendly Raspberry Pi SBC that was designed with children in mind, Arduino boards for electronics projects, and more recently boards and modules based on EspressifESP8266 and ESP32 wireless SoC’s. In this post, we’ll look at the use cases and strong points for each of the boards whether you are just dabbling in the hobby of coding and DIY electronics, or you have a commercial project.
Raspberry Pi
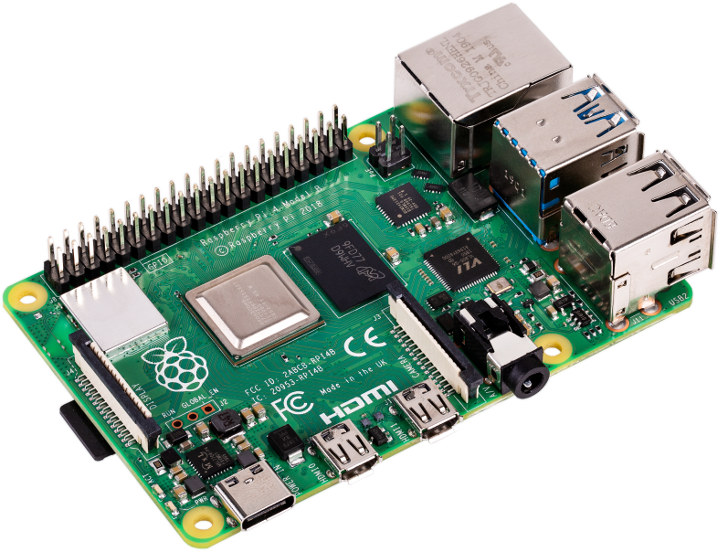
The Raspberry Pi is a lineup of single-board computers (SBCs) that are from the UK and were first introduced in February 2012. These small computers were initially designed to teach students the basics of computer science, but they’ve found their way into various projects including commercial products. To the uninitiated, the Raspberry Pi does not look like a typical computer. However, when connected to a monitor, USB keyboard and mouse, the Raspberry Pi is just like an entry-level Linux computer.
Available at an affordable cost of $35 and up for a Raspberry Pi 4, the system features 2GB or 4GB of RAM, as well as USB-C port for power, and two micro HDMI ports for connecting to up to two displays. There are also USB 2.0 and USB 3.0 ports to connect peripherals, as well as a gigabit Ethernet port and a WiFi & Bluetooth module for respectively wired or wireless networking connectivity.
While the Raspberry Pi is sometimes sold as part as of a turnkey kit, it often comes barebone, meaning you’ll need to add accessories include a 15W+ USB-C power supply and a microSD card. You will have to install an operating system, preferably Raspbian for beginner, on the latter using NOOBS installer. Once it’s done, insert the microSD card into your board, connect it to a display, USB keyboard and mouse, and optionally your Ethernet router. Connect the power, and you are ready to use the board. Pretty easy.
Projects With Raspberry Pi
So what can you do exactly with a Raspberry Pi? Since Raspberry Pi boards run a fully-fledged Linux operating system, they can run advanced applications like office suites, photo editors, as well as server applications such as an Apache or nginx web server, setup OpenVPN or WireGuard with your favorite VPN service, run a BitTorrent downloader in the background, build a NAS for your network storage needs, etc…
The Raspberry Pi is also designed to be simple enough that school children can operate it and learn how to set up various projects with the help of their educator. There is an easy-to-use online guide that helps new users figure out what they can do with their Raspberry Pi. Examples of projects include:
- Take photos and record videos
- Create stop motion animation
- Learn programming skills to code
- Build a robot digitally
- Design websites using HTML
- Invent apps for Android devices
- Construct 3D models
- Make video games
- Digital art projects
- Create musical recordings
The Raspberry Pi is extensible thanks to hardware accessories, and add-on boards called HAT (Hardware Attached on Top), and an extensive ecosystem of software tools and packages that can be leveraged to create more complex projects. Some of the software tools include Scratch or Python to learn to program, while the Pi Camera Module is an example of hardware accessory that can be attached to the Raspberry Pi SBC. The Raspberry Pi Foundation partnered with third parties with the free online community called the Code Club offers a global network of free coding clubs for 9- to 13-year-olds. The online platform features modules that help kids learn to code with the Raspberry Pi board along with the following software and hardware components:
- Scratch visual programming tools
- Web design with HTML/CSS
- Python programming language
- Sense HAT add-on board with LEDs and a joystick
- Sonic Pi program to create music and sounds using code
- BBC Micro:Bit codeable computer
- Blender for 3D models and animations
These allow you to experiment with all of the features of Raspberry Pi single board computer and increases the educational value of the platform, and capabilities of any projects.
Arduino Boards
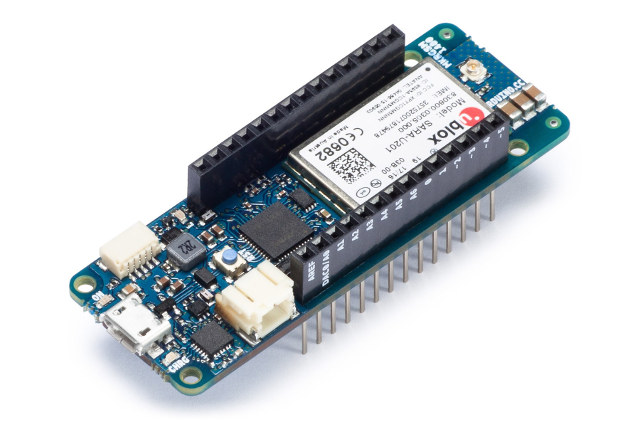
Having been first launched in 2005, Arduino is the older of the platforms we are covering today. The boards are manufactured by an Italian company of the same name, and most of the boards are open-source hardware meaning the hardware can be easily reproduced and altered if need be, something that’s virtually impossible with the Raspberry Pi.
The Arduino is nothing like a computer, as most of Arduino boards are not powerful enough to run an operating system. Indeed, Arduino is designed for electronics projects were you control I/O using C programming with the Arduino IDE installed in a Windows, Linux, or Mac computer. All the hard parts of setting up the hardware are however taken care of or abstracted, so Arduino boards are much easier to use than traditional MCU boards.
You are then able to turn on/off an LED, control sensors, and more recent Arduino board come with built-in connectivity such as WiFi and Bluetooth, or even LoRa or NB-IoT making the boards suitable for IoT applications such as sensor nodes or location trackers. If you don’t find exactly what you are looking for, there are plenty of compatible boards from third-parties that should match your requirements, although support may vary from vendor to vendor.
The large community of makers familiar with Arduino means there are all sorts of documented projects online from musicians using Arduino boards to create new musical instruments via miniature soundboards, to holiday lights and greenhouse control systems. You’ll find plenty of well-documented projects on the official Project hub, as well as independent websites such as Instructables.
Schools can also teach STEAM to students using some Arduino Education Starter Kits that besides hardware platforms also include instructions and materials for 10 lessons. At 90 minutes per lesson, you are getting 15 hours of instructional time, covering everything from the fundamentals of electricity to lightwave radar.
Espressif ESP8266 and ESP32
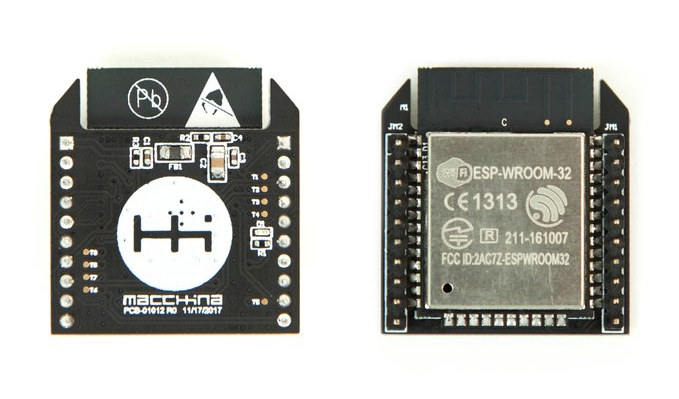 Adding WiFi to a project used to be a fairly expensive proposition as several years ago it easily added at least $30 to any project, so when Espressif Systems introduced ESP8266 in 2014 with module selling as little as $3, they really made a splash despite fairly poor software support at the time. But there was just so much value to the chip, that the open-source community quickly forms around the chip within around two years support was fairly, even leveraging the Arduino IDE. Since then the company also launched ESP32 with a more powerful processor and support for both WiFI and Bluetooth connectivity.
ESP8266 and ESP32 both come with Xtensa cores, and run FreeRTOS real-time operating system with the platforms offering a middle road between the power-efficiency, real-time capabilities of Arduino boards, and the full-feature nature of Raspberry Pi Linux SBC.
These processors are designed to be energy efficient, well-integrated with wireless technology, and can operate in rough conditions with an operating temperature between -40°C to 125°C. There are however some notable differences, so we’ve come up with a comparison of ESP32 versus ESP8266 to help you decide which one would be more applicable to your project’s needs:
- WiFi speeds vary of up to 72.2 Mbps for ESP8266 and up to 150 Mbps for ESP32
- ESP32 is Bluetooth compatible unlike ESP8266
- ESP32 features a 12-bit SAR and two 8-bit DAC channels compared to the 10-bit SAR of the ESP8266
- While the ESP32 has eight channels, the ESP8266 operates using a single channel
- ESP32 has several sensors including a touch sensor with eight channels, as well as a temperature sensor and hall effect sensor, while the ESP8266 does not have any built-in sensors
The pricing for ESP8266 and ESP32 boards & modules is very affordable at just above $2 and up for the ESP32 and less than $2 and up for the ESP8266 at the time of writing. Therefore, choosing one of these SoCs depends on your requirements.
The ESP8266 and ESP32 are made for use in wearable electronics, the IoT industry, and mobile devices, and you’ll find plenty of well-documented projects based on either around the web.
Choosing the Right Board for Your Needs

So which board is best for you? As always it all depends. Raspberry Pi is the most powerful and versatile platform. For education purposes, it has the most resources, and it’s perfect for projects requiring a powerful Linux computer or gateway. It’s also the easiest platform to get started by far.
Arduino is the best choice for real-time I/O control, battery-powered projects, and it also comes with good materials for STEM education. You may not even have to choose between Raspberry Pi and Arduino, as both can be combined with an Arduino board being connected to a Raspberry Pi board over a UART (serial) connection.
Whenever you think about adding WiFI or Bluetooth connectivity to a project, ESP8266 or ESP32 boards are the obvious, cost-effective choice. The downside is that the platform may be better suited for people with a higher knowledge of electronics and programming.

Jean-Luc started CNX Software in 2010 as a part-time endeavor, before quitting his job as a software engineering manager, and starting to write daily news, and reviews full time later in 2011.
Support CNX Software! Donate via cryptocurrencies, become a Patron on Patreon, or purchase goods on Amazon or Aliexpress

Hi Jean-Luc,
I just wanted to thank you again for your great contributions that are always interesting. I start my day on with CNX-Software every single day since early 2018. Keep going…
Malik Cisse
Nice summary! Thank you for your contribution!
Thanks for sharing all these HW into one page.