I’ve received several Reolink IP cameras either connected over WiFi or Ethernet, but the company has just sent me Reolink Go Plus 4G security camera together with a solar panel that would let me access the camera from anywhere with cellular network connectivity.
Reolink Go Plus integrates a 4MP camera and supports person and vehicle detection, just like Reolink RLC-810A model I reviewed earlier this year. I have three Reolink cameras, and I’m somewhat satisfied except that the connection to WiFi cameras is often unreliable, and I have to rely on Cloud backup to play video captures most of the time. The Ethernet-connected Reolink RLC-810A has a much more reliable connection. So I’ll have to see if the Reolink Go Plus camera is more accessible over 4G LTE than WiFi cameras.
I’ll start the review by checking out the packages and going through the initial setup for the Reolink Go Plus smart security camera.
Reolink Go Plus unboxing
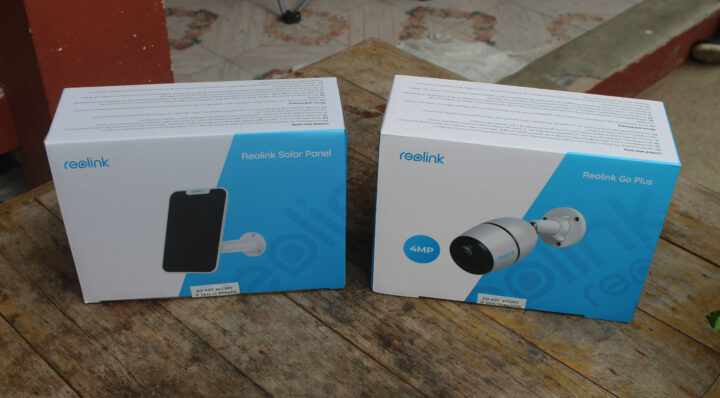
I received two separate packages one for the camera, and the other for the solar panel.
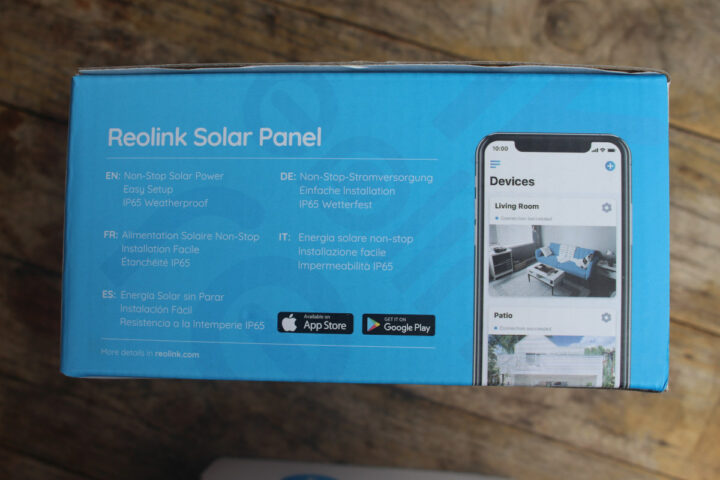
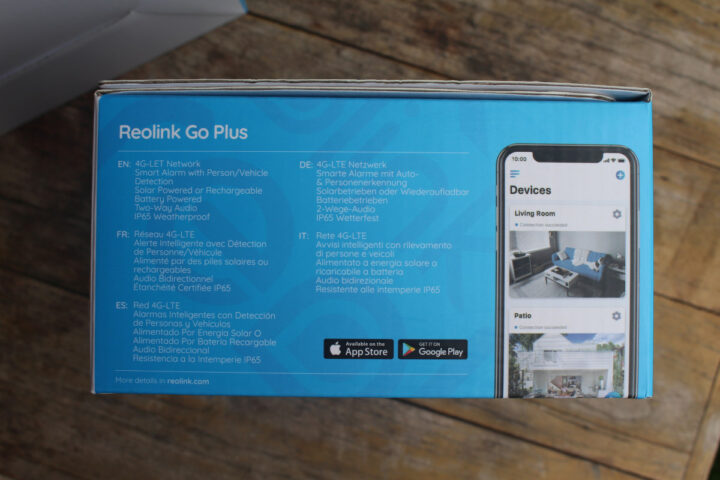
We’ve got the key features for each in English, French, Spanish, German, and Italian. There’s not much for the solar panel except it’s “easy to setup” and weatherproof with an IP65 rating,
but we’ve got a few more details about the camera with 4G LTE network support, person/vehicle detection, two-way audio, and IP65 ingress protection rating for outdoor use. Not this camera only supports 4G LTE, and there’s no WiFi or Ethernet at all.
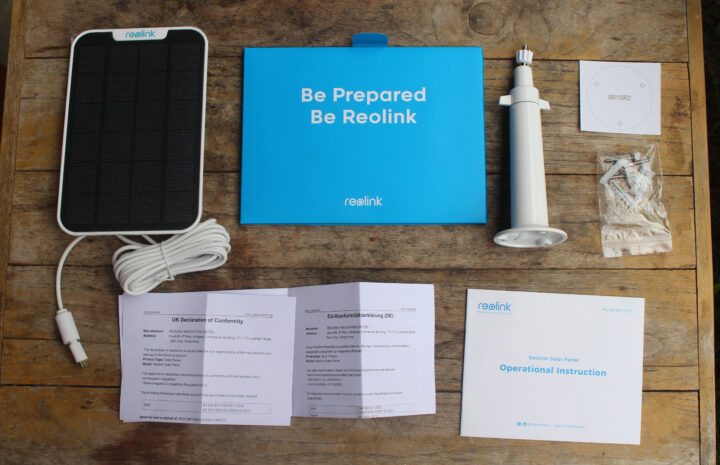
The solar panel includes a long micro USB cable attached to it in a weatherproof fashion, a mount with a screw set, some UK/EU compliance documents, and a multilingual “operational instruction” manual.
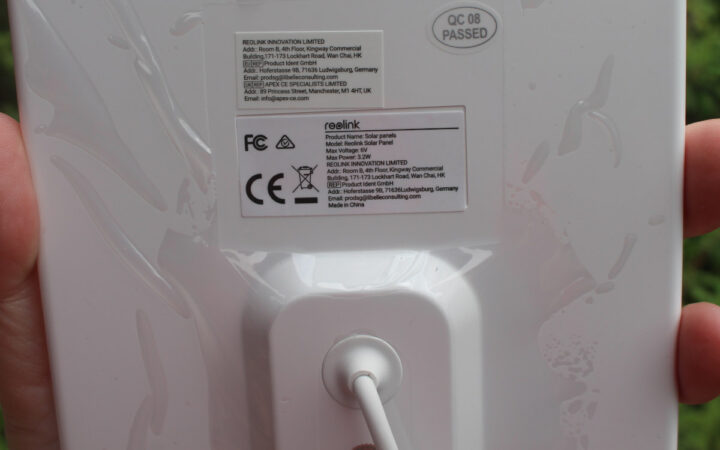
At the back of the panel, we can see the solar panel supports up to 6V, up to 3.2W of output power. Two of my Reolink cameras are using this type of solar panel, and none of the cameras ever went out of power including Reolink Argus Eco which I’ve used since June 2019, or for about 2.5 years. I’m based in Thailand, so it probably helps as well.
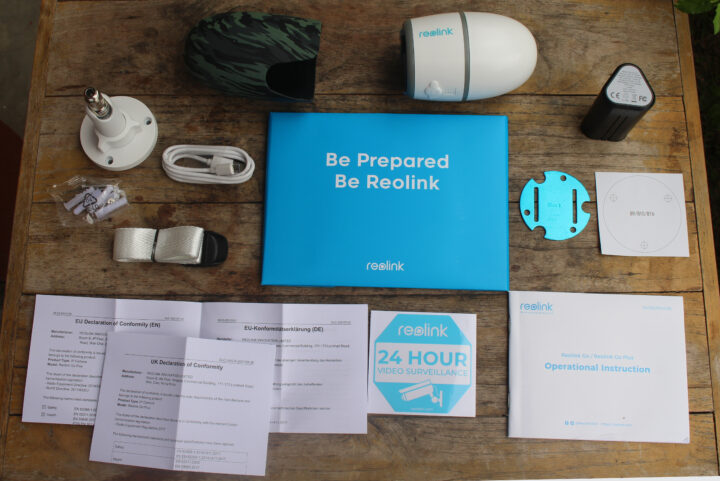
The package for the camera itself includes a wall mount with a pack of screws, a belt and mounting plate for tree mounting, a micro USB cable for charging the battery, a rechargeable battery, a rubber skin cover to further protect and hide the camera, several “24-hour video surveillance” sticker in English, French, Spanish, German, and Italian, as well as a user manual also written in five languages.
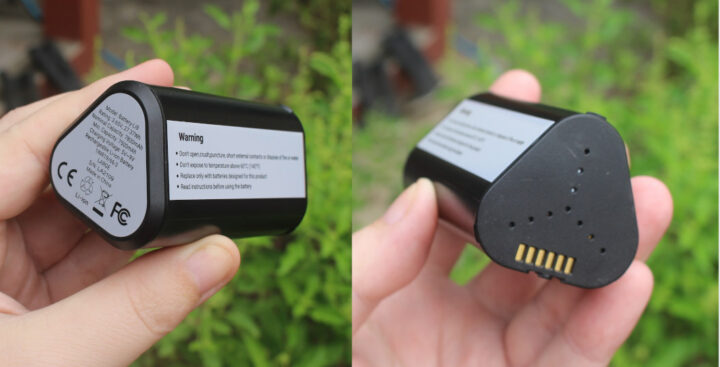
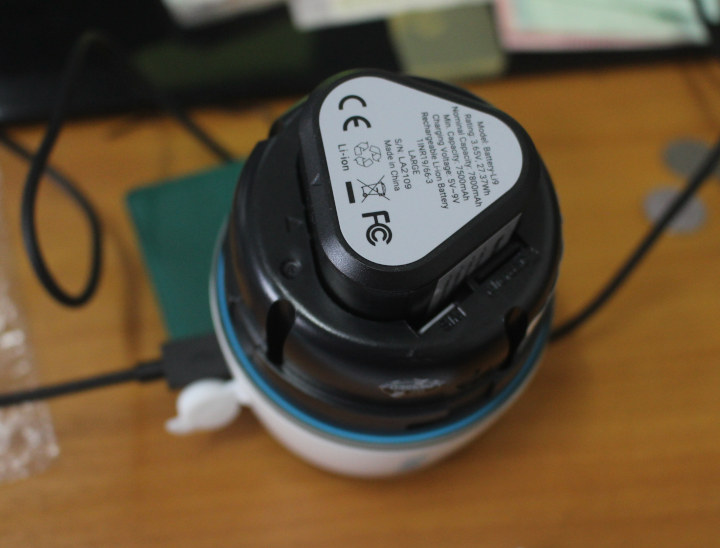
The battery has a custom design with 27.37 Wh capacity (3.65V/7,500 mA), and is charged through pogo pins inside the camera.
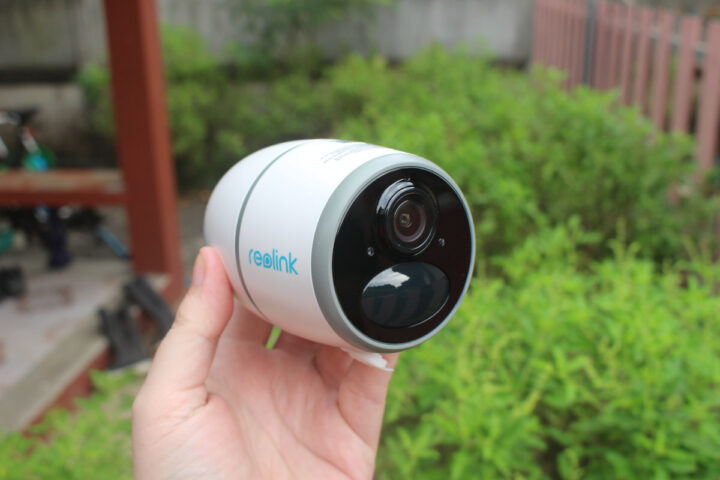
We can clearly see the lens and PIR sensor in the photo above, but the front of the camera also comes with a light sensor, a status LED, six infrared lights, and a small opening for a microphone.
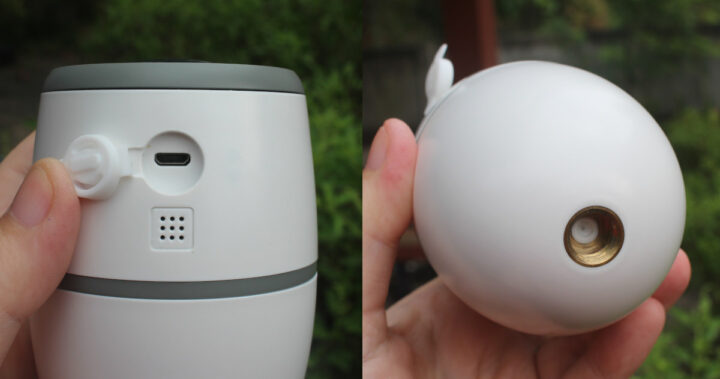
The micro USB port is protected with a plastic cover when not using the solar panel and a grid for the speaker. The back features a thread for the mounting kit.
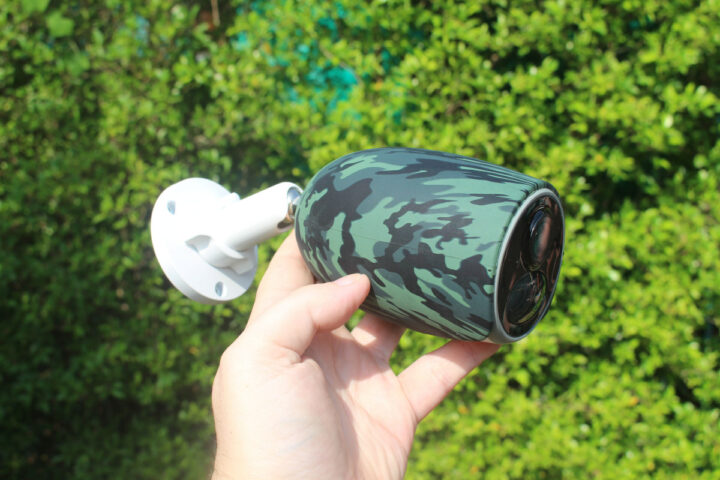
This is what the camera looks like with the mount and the rubber skin cover. It can help somewhat hide the camera when mounted to a tree for instance.
Initial setup
Let’s setup the camera. We’ll first need to remove the back cover by rotating counterclockwise.
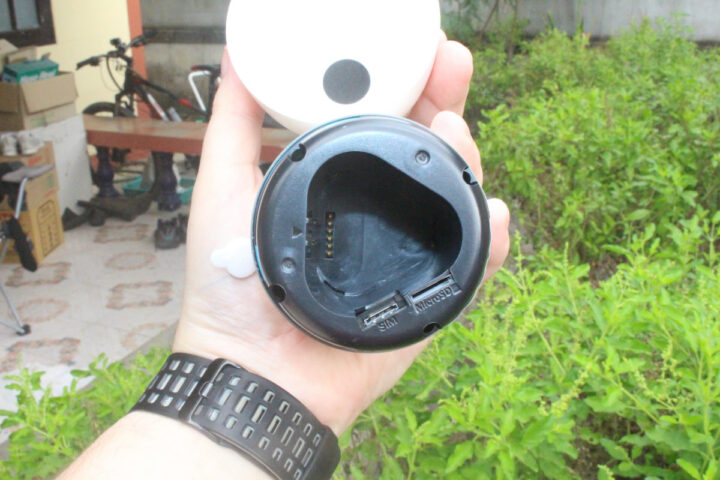
This reveals the compartment for the batteries and the slots for a SIM card and a microSD card. If you’ve just purchased the microSD from the shop you’d probably be able to just install it for it to work. But since most of my microSD cards have spent some time in a Raspberry Pi or another single board computer, the camera will not recognize those due to the non-standard partition. So each time I install a microSD card in a camera, I use Gparted to make sure there’s a single partition formatted with FAT32.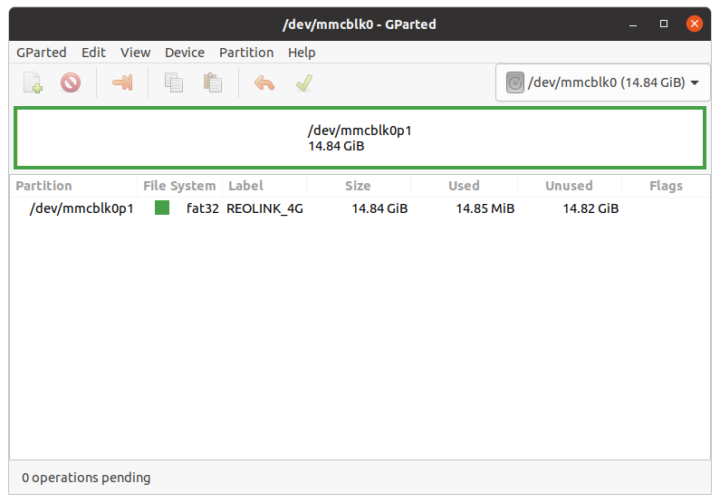
With that done, I took the nano-SIM card from my phone (with a 10 Mbps unlimited, unmetered plan) to insert it into the camera, and did the same for the microSD card I’ve just repartitioned and formatted, followed by the installation of the battery.
Shortly after inserting the battery, I got a voice prompt saying “Network connection succeeded”. That’s a good sign! I also started to charge the battery as recommended in the user manual, but I then noticed the battery already has a good charge it may not be absolutely necessary.
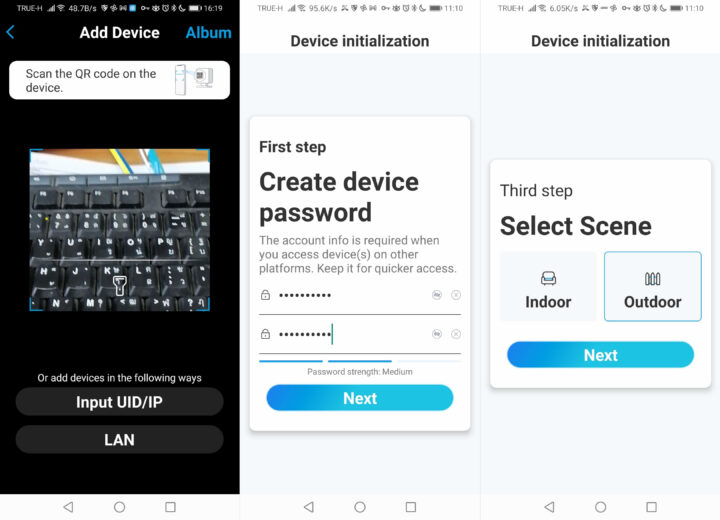
I already have the Reolink Android app installed on my phone, so I just taped on the ‘+’ button to add a new camera, and scanned the QR code on the camera to start the process…
After scanning the QR code, I was asked to create a device password and select whether the camera will be used indoor or outdoor.
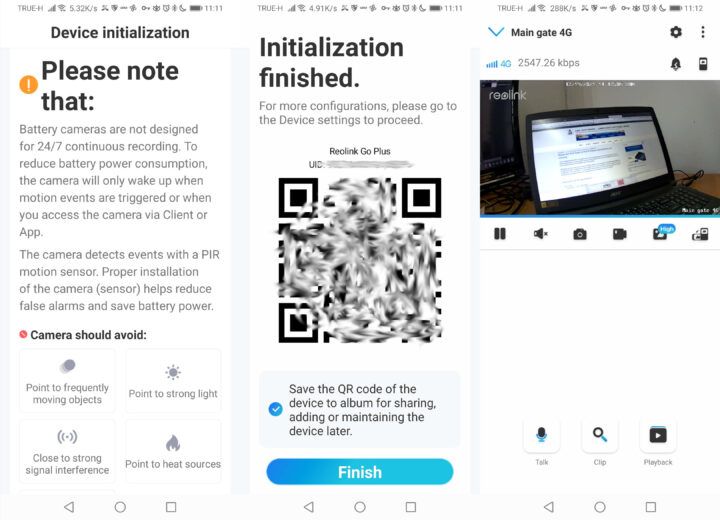
This follows some warning about using battery cameras, since they can record continuously, and what consideration should be taken into account such as frequency of motion, strong heat or light may trigger many false positive, interference may cause connection issues, and so on. The procedure ends with a QR code that can be used to share or add the device again later on. It’s useful as scanning the QR code after the camera has been installed on a tree might be inconvenient. Anyway, I got the stream working immediately after clicking on Finish. No need to configure the Internet parameters in the camera or anything like that. So I suppose if the SIM card works on your phone, and there’s no pin, it’s safe to assume it would go just as smoothly with any SIM card.
By default, the camera operates at low resolution with a bitrate around 400-500 Kbps, but I switched to high resolution with the bitrate varying from 1.5 to 3 Mbps. There’s also a fluent mode that provides a balance between quality and bitrate. Of course, the bitrate will depend on the scene itself as well, but determining the maximum bitrate may save you a few bucks per year on your cellular plan.
The next step will be to install the camera near my house gate that’s outside the Wi-Fi range, and test the various features of the camera. I’d like to thank Reolink for sending the Go Plus and solar panel for review. The bundle reviewed here can be purchased on Amazon for $249.99, but you’ll also find it on Reolink shop.
Continue reading “Reolink Go Plus 4G review – Part 2: A Solar-powered 4G LTE security camera with person & vehicle detection“.

Jean-Luc started CNX Software in 2010 as a part-time endeavor, before quitting his job as a software engineering manager, and starting to write daily news, and reviews full time later in 2011.
Support CNX Software! Donate via cryptocurrencies, become a Patron on Patreon, or purchase goods on Amazon or Aliexpress. We also use affiliate links in articles to earn commissions if you make a purchase after clicking on those links.




Beware that reo camera batteries die in cold climates in winter.
How cold? London cold or Siberia cold?
Can this camera work in Africa
You’d need to check if any of the available bands are supported in your country:
• Europe Version:
LTE FDD: B1/B3/B5/B7/B8/B20
WCDMA: B1/B5/B8
• America Version:
LTE FDD: B2/B4/B12
WCDMA: B2/B4/B5
• Australia Version:
LTE FDD: B1/B2/B3/B4/B5/B7/B8/B28
LTE TDD: B40
WCDMA: B1/B2/B5/B8
If at least one of the LTE bands is supported you should be good to go.
Hi Jean, is it possible to locate the camera like a mobile phone (with a sim card inside)?
I’m not sure how to accurately answer the question without further context.
There’s no such feature within the app, but if your telco or authorities wanted to locate the camera they could certainly do so.
Thank you, I meant the app.
FYR. They’ve launched a new camera with this functionality:
https://www.cnx-software.com/2022/06/28/keen-ranger-pt-4g-ip-camera-animal-human-detection/
Oh thank you but I just bought GO Plus already 🙂