In the first part of iKOOLCORE R2 mini PC & router review, I had a look at the hardware with an unboxing and a teardown of the Intel Core i3-N300 Alder Lake-N computer and also noticed the device booted to a UEFI shell. So for the second part of the review, I will report my experience installing Proxmox VE on the iKOOLCORE R2 and setting up and using Ubuntu 22.04, pfSense 2.7.2, and OpenWrt 23.05 virtual machines, making sure I can still use a physical display, keyboard, and mouse with Ubuntu while pfSense firewall is running.
As a side note, the previous generation iKOOLCORE R1 mini PC that was sent to Ian for review with Proxmox VE and various virtual machines preinstalled OpenWrt, Debian 11, and Windows 10 Enterprise LTSC set to Chinese language by default. As I understand it, iKOOLCORE still does that for the Chinese market, but not for the overseas markets potentially because they don’t want to handle two versions and potential customs issues. This review will be a bit different than other mini PCs, as I’ll mostly report my experience of using the iKOOLCORE R2 with Proxmox VE and the steps I had to follow to make everything work the way I wanted with Ubuntu 22.04 and pfSense OS running simultaneously.
Installing Proxmox VE on iKOOLCORE R2
The first step is to download ProxmoxVE ISO and I selected Proxmox VE 8.1 ISO Installer (updated on November 23, 2023).
The Startup Disk Creator is Ubuntu 22.04 did not seem to like the Proxmox ISO file, so I went with dd instead as per the official instructions to flash the ISO to a USB flash drive:
|
1 |
sudo dd bs=1M conv=fdatasync if=./proxmox-ve_8.1-1.iso of=/dev/sdb |
Since the mini PC only comes with two USB Type-A ports, and I need two RF dongles, one for the mouse, and one for the keyboard, I had to use a USB hub to connect the USB flash drive, but the installation went smoothly.
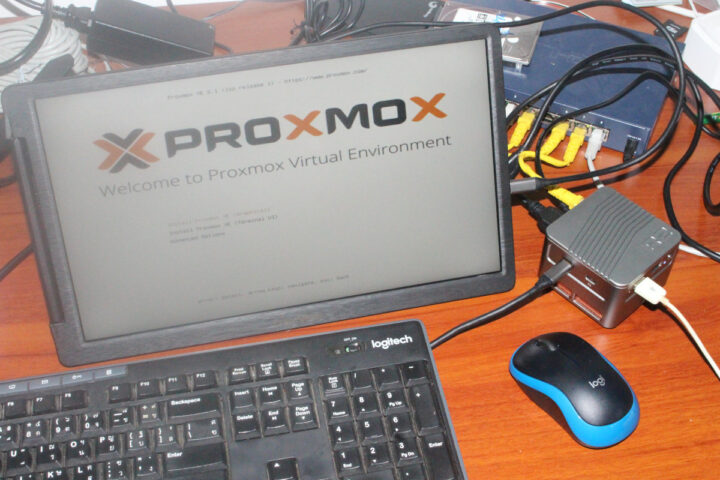
I went to the “Install Proxmox VE (graphical)” option in the installation menu, followed the instructions, and soon enough the installation was complete, and upon reboot, I was presented with a GRUB menu showing Proxmox VE GNU/Linux.
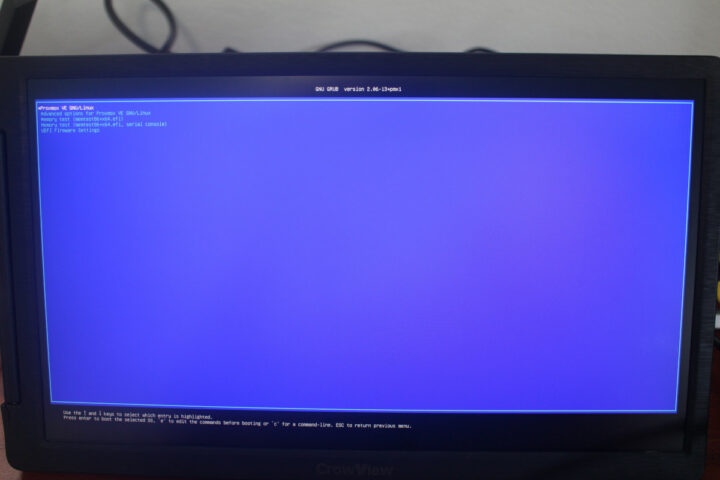
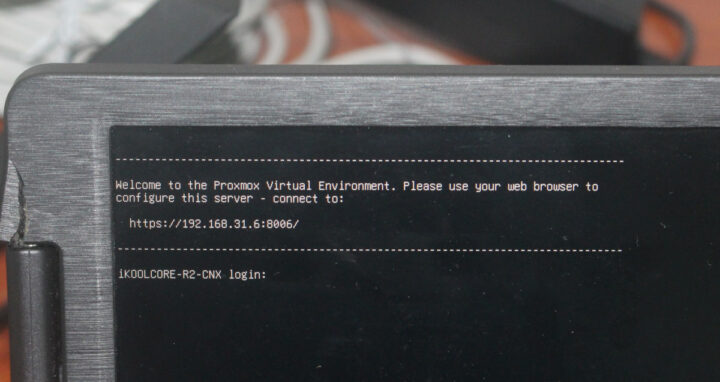
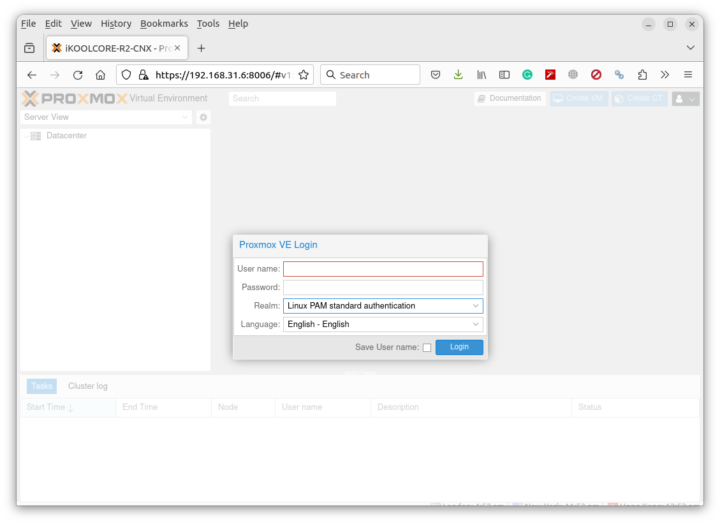
The boot ends with a text login prompt on the HDMI display telling us to configure the server in a web browser at the address https//:<ip_address>:8006.
The login requires root user and the password is the one provided during the Proxmox VE installation.
Note some of the screenshots will use 192.168.31.6 and others 192.168.31.249 as the second time I installed Proxmox VE, I changed the static IP address to something not covered by the DHCP server range from my router…
Proxmox VE dashboard and configuration
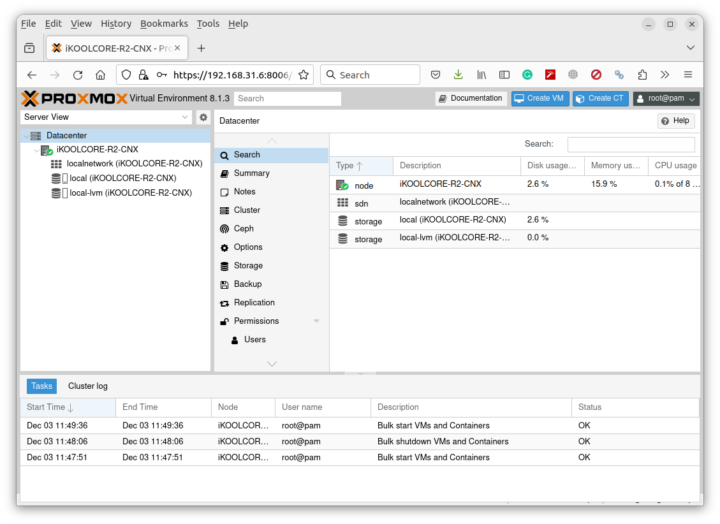
The Proxmox Virtual Environment dashboard shows the iKOOLCORE-R2-CNX node and storage volumes, some buttons to create a VM (Virtual Machine) or CT (Container), and a Tasks section at the bottom showing all main events.
Before going further we might want to have a look at the Wiki that tells us to install a script in order to enable hardware passthrough on the iKOOLCORE R2 and display system information in the Proxmox VE dashboard:
|
1 2 3 4 5 6 |
export LC_ALL=en_US.UTF-8 apt update apt -y install git git clone https://github.com/KoolCore/Proxmox_VE_Status.git cd Proxmox_VE_Status bash ./passthrough.sh |
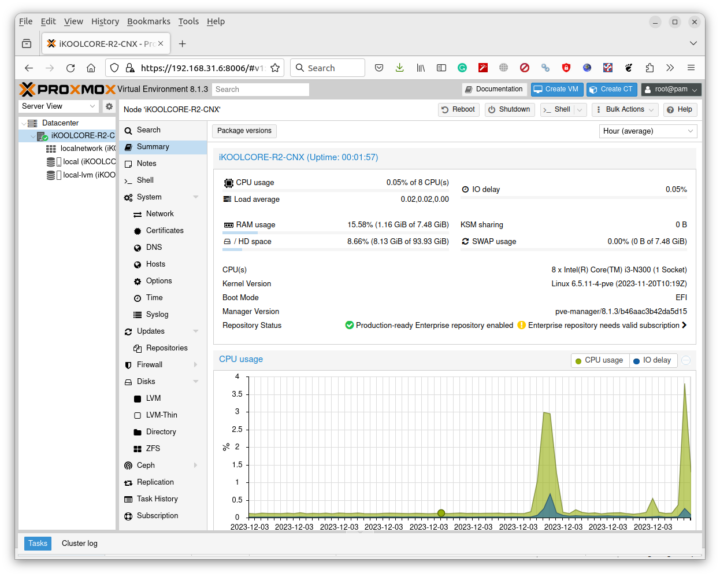
I did the above in an SSH terminal, but you could also do so in the _Shell section directly in the Proxmox VE dashboard. Nevertheless, I could access system information in the Summary tab in the dashboard.
Installing Ubuntu 22.04 desktop, pfSense 2.7.1, and OpenWrt 23.05
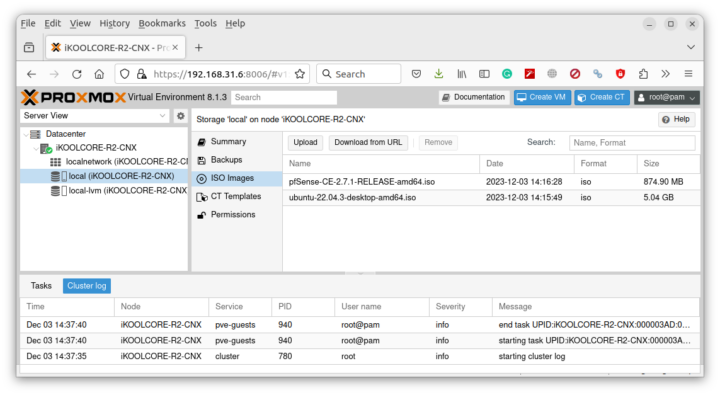
We are now ready to install the operating we need for this review. So I loaded Ubuntu 22.04 (upload from local machine) and pfSense (downloaded from URL) to Promox VE in the local->ISO image section of the dashboard.
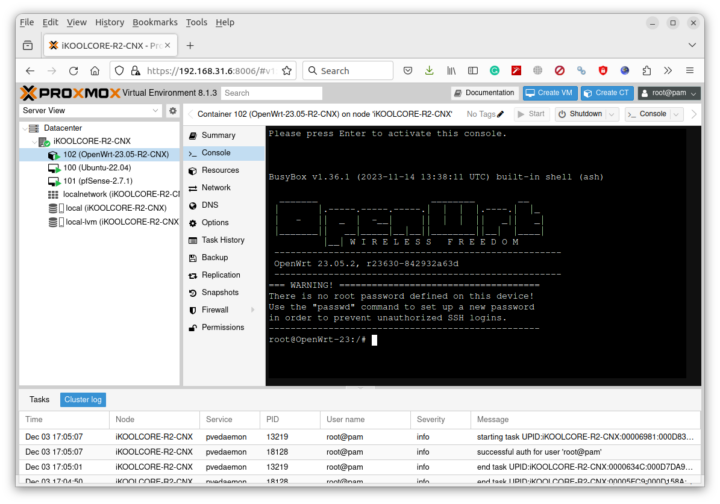
We’ll also install OpenWrt 23.05, but it’s more complicated, and some people will just tell users to simply install pfSense and skip OpenWrt on this type of hardware.
I’ve already documented the method to install Ubuntu 22.04 in Proxmox VE with hardware passthrough on Alder Lake-N hardware in order to have access to the physical interfaces such as HDMI and USB-C (DisplayPort) video output and connect a wireless keyboard and mouse to the device. The Ubuntu 22.04 VM was configured to use eight cores, 128GB storage and 4GB RAM out of the 8GB RAM in my iKOOLCORE R2 mini PC
I then repeated the same procedure for pfSense 2.7.2 (minus the hardware passthrough steps) with two cores, 2GB RAM, and 32GB storage, and also installed OpenWrt 23.05.2 following the instructions linked above, except I used the openwrt.tar.gz file from https://downloads.openwrt.org/releases/23.05.2/targets/x86/64/ insteadL
|
1 2 |
wget https://downloads.openwrt.org/releases/23.05.2/targets/x86/64/openwrt-23.05.2-x86-64-rootfs.tar.gz pct create 102 openwrt-23.05.2-x86-64-rootfs.tar.gz --arch amd64 --hostname openwrt-23.05 --rootfs local-lvm:20 --memory 512 --cores 2 --ostype unmanaged --unprivileged 1 |
At this point, I had three OS running in Proxmox VE:
- Ubuntu 22.04 (ID 100)
- pfSense 2.7.1 (ID 101) – yet to be configured
- OpenWrt 23.05 (ID 102) – which we won’t use in this review…
The first time I installed Ubuntu 22.04 without hardware passthrough and desktop would show on the Proxmox VE dashboard.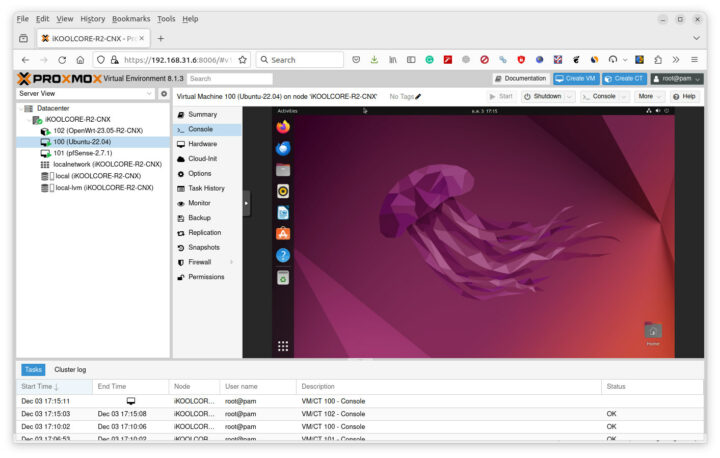
But once I enabled hardware passthrough for specific PCIe and USB ports as explained in our how-to, the Ubuntu desktop shows on the display connected to the iKOOLCORE R2 either via HDMI or USB-C port.
The goal: using iKOOLCORE R2 as a mini PC and a firewall
At this point, we haven’t talked about using the four 2.5GbE RJ45 ports on the iKOOLCORE R2 just yet, and my goal is to use pfSense as a firewall with two Ethernet ports, have the Ubuntu VM behind the firewall while using it as a mini PC with a single 2.5GbE port, and the last RJ45 port will be used to access Proxmox VE interface even if pfSense is shut down.
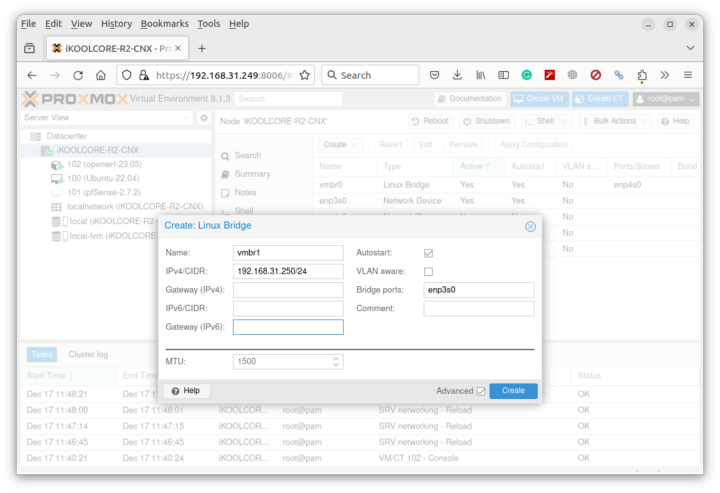
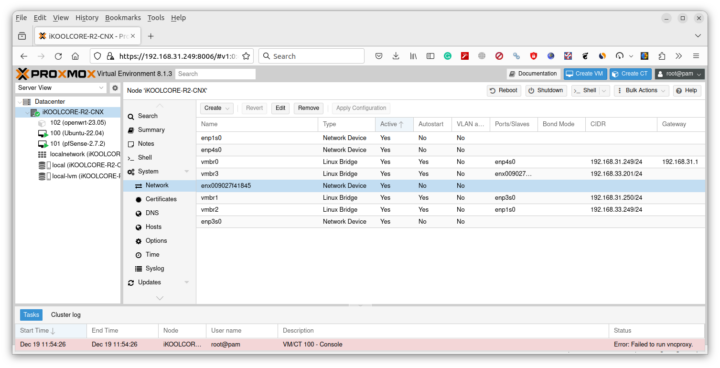
I’ll be mostly following the pfSense setup instructions from Zenarmor in this section and creating Linux bridges for the three Ethernet ports that are not used yet by going to iKOOLCORE-R2-CNX and System->Network, and clicking on Create->Linux bridge.
The name is automatically generated, but we need to enter the IPv4/CIDR and bridge ports. So I ended up with four Linux bridges as follows:
- vmbr0 – enp4s0 (Intel i226) with IP address: 192.168.31.249 for Proxmox VE
- vmbr1 – enp3s0 (Intel i226) with IP address: 192.168.31.250 for pfSense WAN
- vmbr2 – enp1s0 (Intel i226) with IP address: 192.168.33.1 for pfSense LAN
- vmbr3 – enx009027f41845 (RealTek RTL8156BG) with IP address: 192.168.33.201 for Ubuntu LAN
One important note is that the IPv4/CIDR field is only used by the Proxmox VE and not the guest OS. I failed to understand that at the beginning and set 192.168.31.1 for the LAN port of both pfSense and Proxmox VE and it created conflicts making the system not work properly. For the same reason, none of the IP addresses there should be in the DHCP range of any of the DHCP servers used.
I have configured all those ports, but I don’t actually know where they are yet on the iKOOLCORE R2, so I used the command line to properly map each Ethernet port to the correct device/bridge by plugging a cable to each port in turn:
|
1 2 3 4 5 |
root@iKOOLCORE-R2-CNX:~# ip a | grep 'enp\|enx' 2: enp1s0: <NO-CARRIER,BROADCAST,MULTICAST,UP> mtu 1500 qdisc mq master vmbr2 state DOWN group default qlen 1000 3: enp3s0: <NO-CARRIER,BROADCAST,MULTICAST,UP> mtu 1500 qdisc mq master vmbr1 state DOWN group default qlen 1000 4: enp4s0: <BROADCAST,MULTICAST,UP,LOWER_UP> mtu 1500 qdisc mq master vmbr0 state UP group default qlen 1000 5: enx009027f41845: <BROADCAST,MULTICAST,UP,LOWER_UP> mtu 1500 qdisc pfifo_fast state UP group default qlen 1000 |
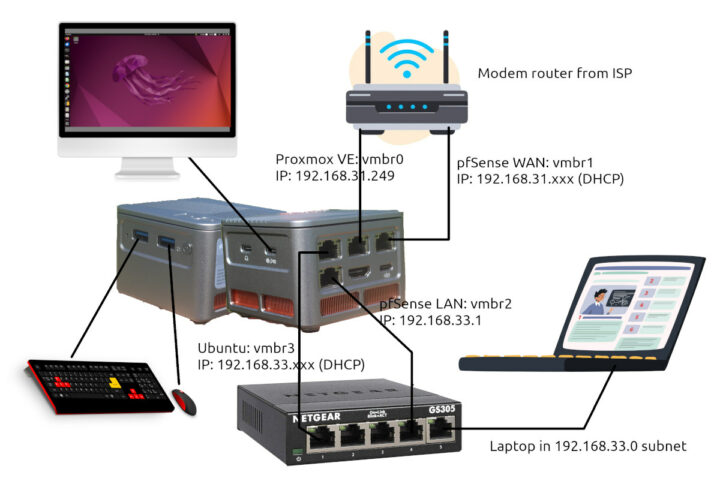
We can check the UP and DOWN state to find out which device/bridge corresponds to a specific RJ45 jack on the mini PC. For example, enp4s0 (vmbr0) is the middle RJ45 jack in the top row. I can now write my network and connect everything with the final result looking like that:
Proxmox VE and the pfSense WAN ports are connected directly to the modem router from the ISP, the pfSense LAN port creates a new 192.168.33.0 subnet to switch I connected the Ubuntu VM RJ45 port and a laptop through a TP-Link network switch. There’s also a CCTV camera not shown there. If you wanted WiFi devices behind the firewall you’d also install an access point/router in the 192.168.33.0 subnet.
pfSense configuration
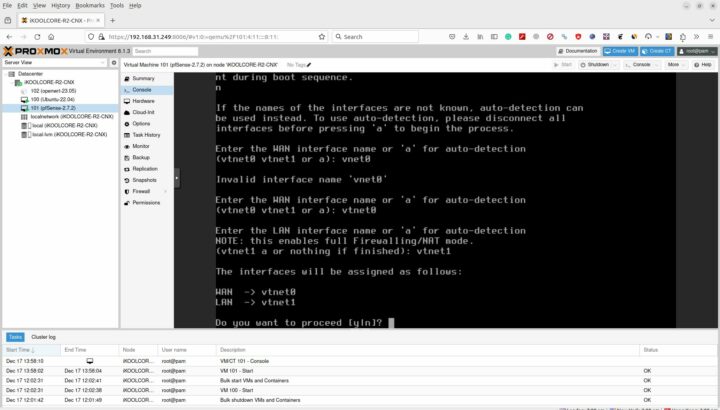
We can now to the console for the pfSense VM to complete the configuration. We’ll skip VLAN configuration, and assign vtnet0 to WAN and vtnet1 to LAN in the configuration wizard.
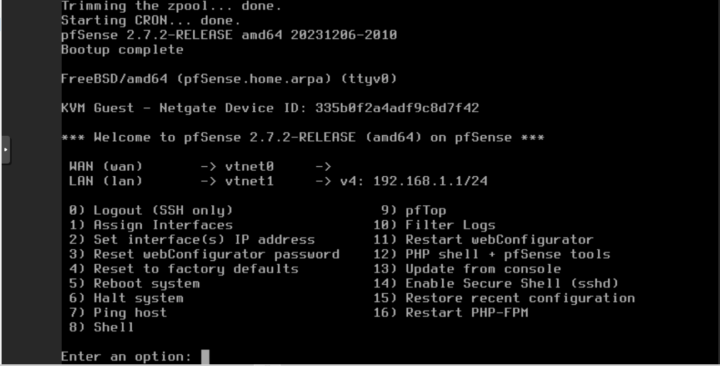
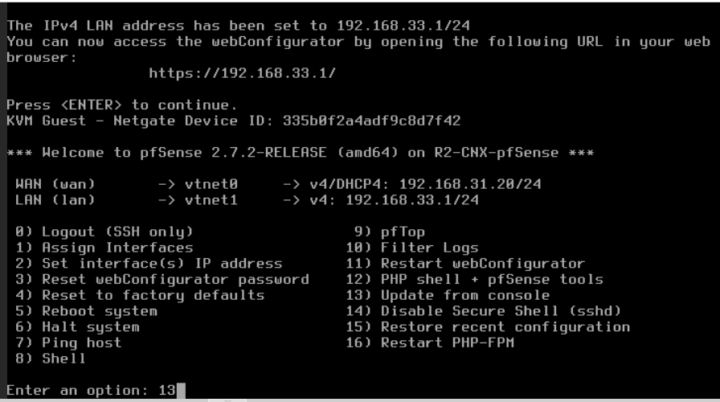
After a little while we’ll reach the pfSense configuration menu as shown below. (I had not connected the WAN port correctly at the time, as otherwise the WAN IP address would show)
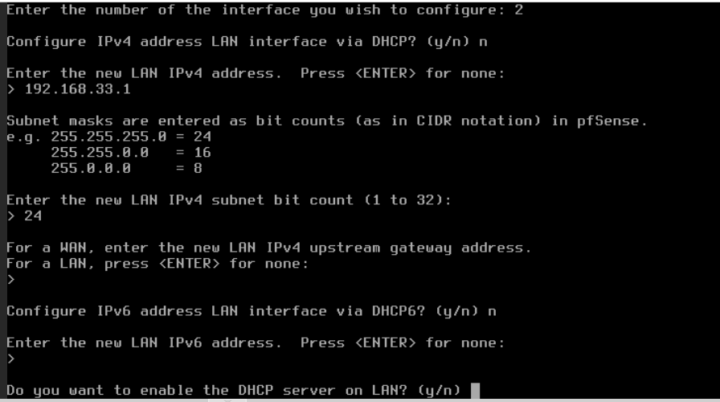
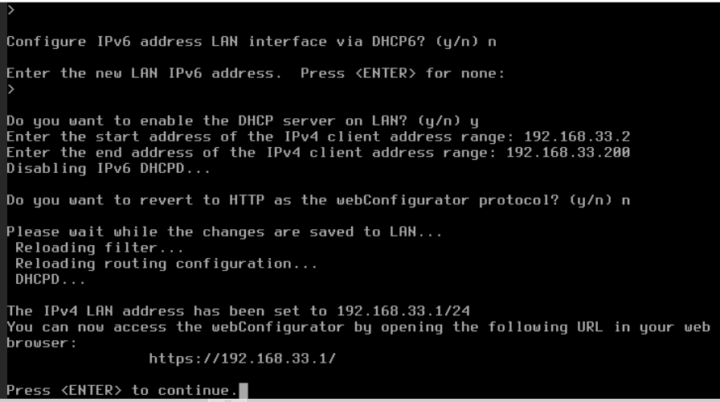
We can now select option 2 to configure the LAN interface using 192.168.33.1 IP address with a 24 CIDR, and no IPv6 address.
We’ll also want to enable the DHCP server and allow DHCP clients in the 192.168.33.2 to 192.168.33.200 range, and keep using HTTPS for the webConfigurator.
Once done we should see both the WAN and LAN IP address configured as below and we can update pfSense from the console by typing 13.
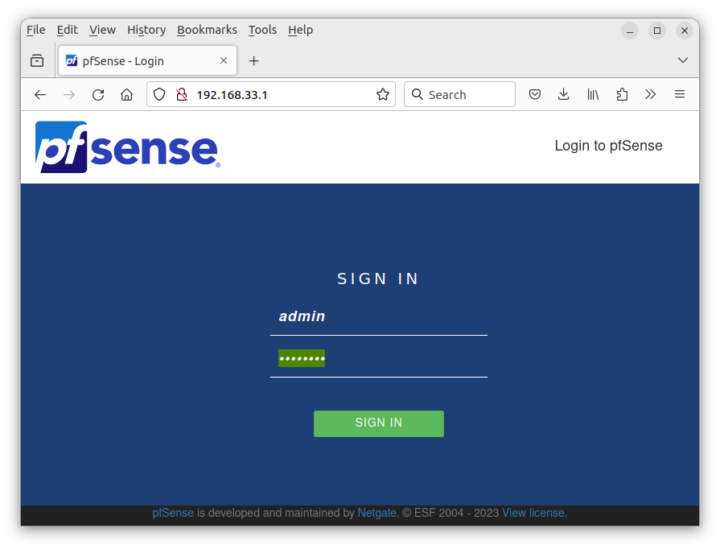
Time to go to the pfSense webConfiguration with the provided address and log in with the default admin username and pfsense password.
We’ll now enter the setup wizard. The dashboard complains about the admin account password, but do not change it right now, as it’s one of the steps of the setup wizard.
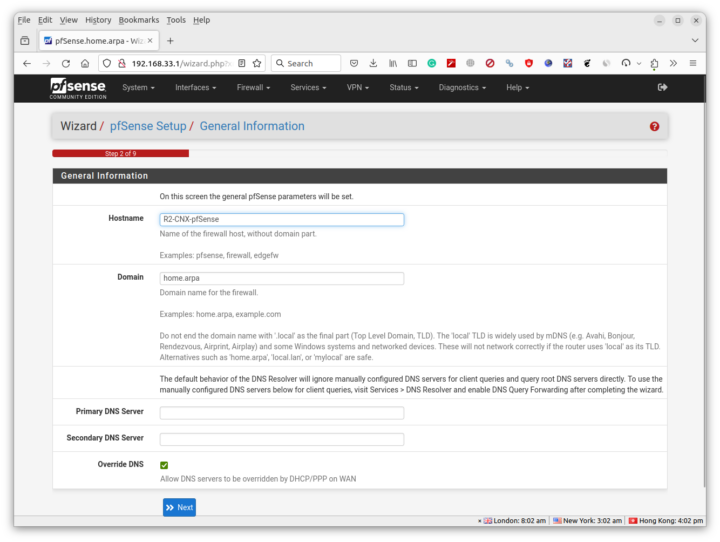
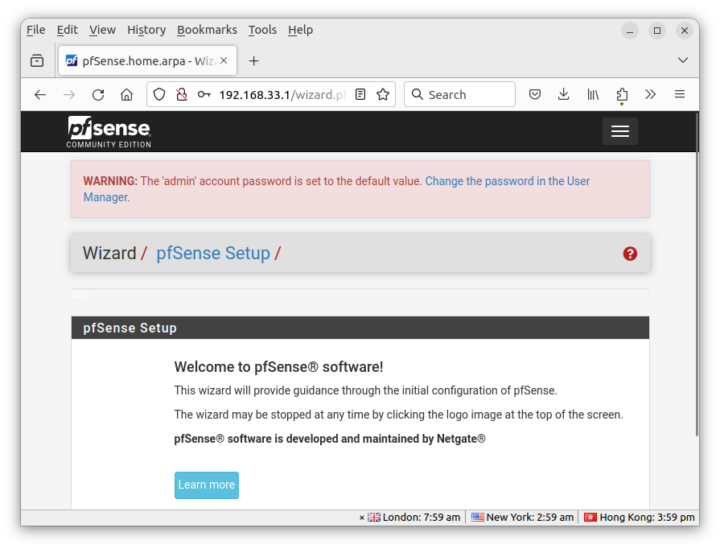 Now click on Next until we get to the general information window where we can set the Hostname (e.g. R2-CNX-pfSense).
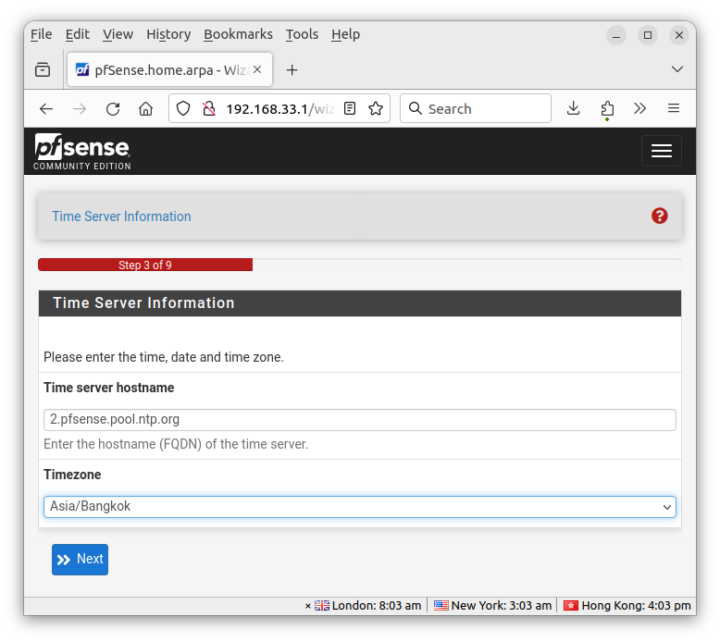
The next step configures the time server and I manually set the timezone to Asia/Bangkok.
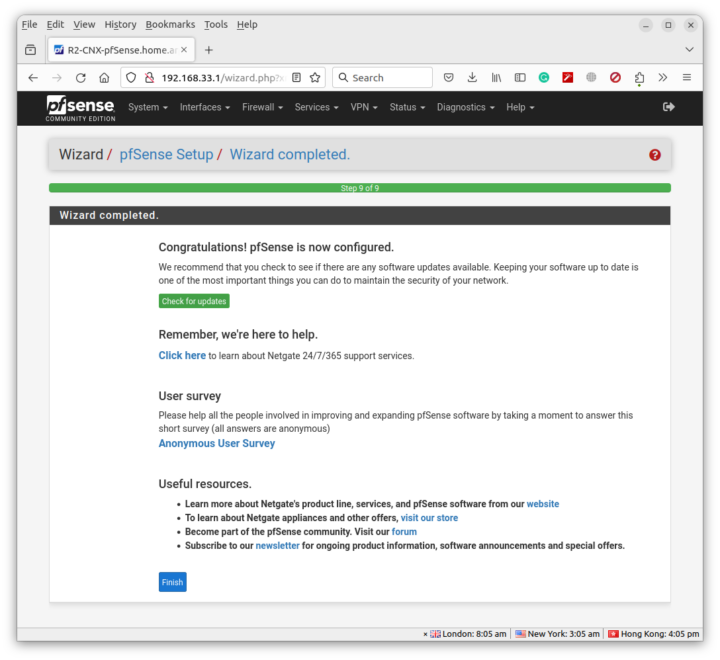
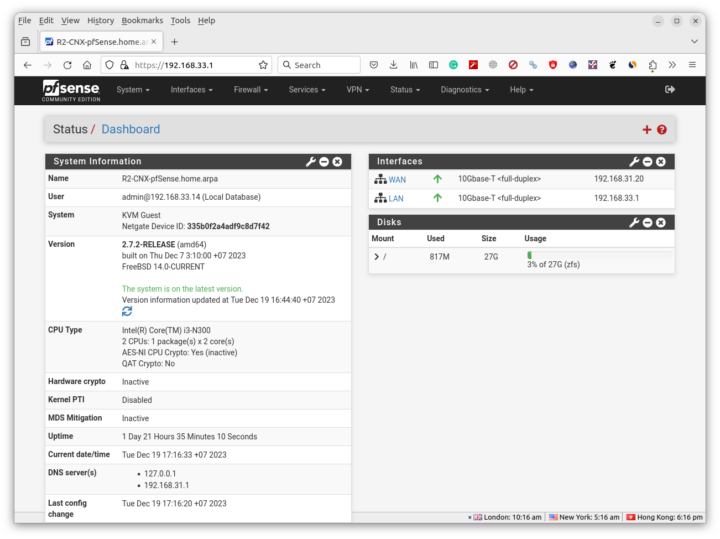
The next screens are for WAN and LAN configuration (I used the default settings), change admin password, reload configuration, and a final screen congratulating you for the completion of the setup wizard.
Both my laptop and Ubuntu VM in Proxmox got an IP address in the 192.168.33.0 subnet, I can browse the web without issue, and both systems should be protected behind the firewall. I also quickly tested the CCTV camera connected through the firewall and I can still access the stream with the Reolink app.
Networking performance testing
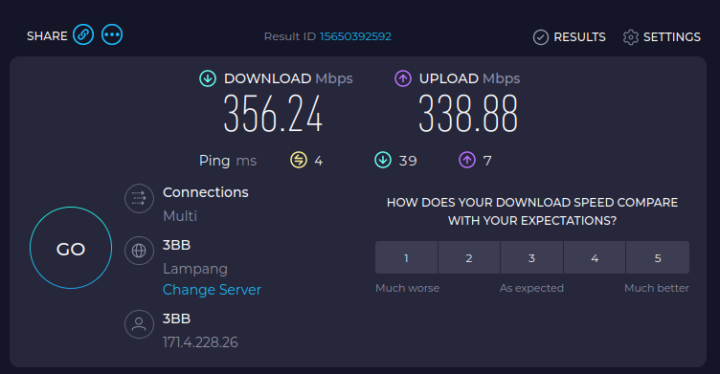
I’m supposed to have 300 Mbps broadband internet, which I tested with Speedtest on my Ubuntu laptop behind the firewall.
All good that means nothing bad happened…
I also added a new host to the 192.168.33.0 subnet, namely UP Xtreme i11 edge mini PC (192.168.33.18) to independently test the Intel and Realtek networking interfaces on the iKOOLCORE R2.
Let’s start with the RealTek 2.5GbE USB chip in the Ubuntu VM:
- Upload
|
1 2 3 4 5 6 7 8 9 10 11 12 13 14 15 16 |
jaufranc@R2-CNX-Ubuntu:~$ iperf3 -t 60 -c 192.168.33.18 -i 10 Connecting to host 192.168.33.18, port 5201 [ 5] local 192.168.33.12 port 51060 connected to 192.168.33.18 port 5201 [ ID] Interval Transfer Bitrate Retr Cwnd [ 5] 0.00-10.00 sec 2.74 GBytes 2.35 Gbits/sec 0 3.13 MBytes [ 5] 10.00-20.00 sec 2.73 GBytes 2.35 Gbits/sec 1 3.13 MBytes [ 5] 20.00-30.00 sec 2.73 GBytes 2.35 Gbits/sec 0 3.13 MBytes [ 5] 30.00-40.00 sec 2.73 GBytes 2.35 Gbits/sec 0 3.13 MBytes [ 5] 40.00-50.00 sec 2.73 GBytes 2.35 Gbits/sec 0 3.13 MBytes [ 5] 50.00-60.00 sec 2.74 GBytes 2.35 Gbits/sec 0 3.13 MBytes - - - - - - - - - - - - - - - - - - - - - - - - - [ ID] Interval Transfer Bitrate Retr [ 5] 0.00-60.00 sec 16.4 GBytes 2.35 Gbits/sec 1 sender [ 5] 0.00-60.05 sec 16.4 GBytes 2.35 Gbits/sec receiver iperf Done. |
- Download
|
1 2 3 4 5 6 7 8 9 10 11 12 13 14 15 16 17 |
jaufranc@R2-CNX-Ubuntu:~$ iperf3 -t 60 -c 192.168.33.18 -i 10 -R Connecting to host 192.168.33.18, port 5201 Reverse mode, remote host 192.168.33.18 is sending [ 5] local 192.168.33.12 port 32880 connected to 192.168.33.18 port 5201 [ ID] Interval Transfer Bitrate [ 5] 0.00-10.00 sec 2.74 GBytes 2.35 Gbits/sec [ 5] 10.00-20.00 sec 2.74 GBytes 2.35 Gbits/sec [ 5] 20.00-30.00 sec 2.74 GBytes 2.35 Gbits/sec [ 5] 30.00-40.00 sec 2.74 GBytes 2.35 Gbits/sec [ 5] 40.00-50.00 sec 2.74 GBytes 2.35 Gbits/sec [ 5] 50.00-60.00 sec 2.74 GBytes 2.35 Gbits/sec - - - - - - - - - - - - - - - - - - - - - - - - - [ ID] Interval Transfer Bitrate Retr [ 5] 0.00-60.04 sec 16.4 GBytes 2.35 Gbits/sec 0 sender [ 5] 0.00-60.00 sec 16.4 GBytes 2.35 Gbits/sec receiver iperf Done. |
- Full-duplex (bidirectional)
|
1 2 3 4 5 6 7 8 9 10 11 12 13 14 15 16 17 18 19 20 21 22 23 24 25 |
jaufranc@R2-CNX-Ubuntu:~$ iperf3 -t 60 -c 192.168.33.18 -i 10 --bidir Connecting to host 192.168.33.18, port 5201 [ 5] local 192.168.33.12 port 58772 connected to 192.168.33.18 port 5201 [ 7] local 192.168.33.12 port 58780 connected to 192.168.33.18 port 5201 [ ID][Role] Interval Transfer Bitrate Retr Cwnd [ 5][TX-C] 0.00-10.00 sec 2.73 GBytes 2.34 Gbits/sec 1 3.14 MBytes [ 7][RX-C] 0.00-10.00 sec 2.54 GBytes 2.18 Gbits/sec [ 5][TX-C] 10.00-20.00 sec 2.72 GBytes 2.34 Gbits/sec 0 3.14 MBytes [ 7][RX-C] 10.00-20.00 sec 2.53 GBytes 2.17 Gbits/sec [ 5][TX-C] 20.00-30.00 sec 2.73 GBytes 2.34 Gbits/sec 0 3.14 MBytes [ 7][RX-C] 20.00-30.00 sec 2.53 GBytes 2.17 Gbits/sec [ 5][TX-C] 30.00-40.00 sec 2.73 GBytes 2.34 Gbits/sec 0 3.14 MBytes [ 7][RX-C] 30.00-40.00 sec 2.53 GBytes 2.17 Gbits/sec [ 5][TX-C] 40.00-50.00 sec 2.73 GBytes 2.34 Gbits/sec 1134 2.79 MBytes [ 7][RX-C] 40.00-50.00 sec 2.59 GBytes 2.23 Gbits/sec [ 5][TX-C] 50.00-60.00 sec 2.72 GBytes 2.34 Gbits/sec 0 3.01 MBytes [ 7][RX-C] 50.00-60.00 sec 2.54 GBytes 2.18 Gbits/sec - - - - - - - - - - - - - - - - - - - - - - - - - [ ID][Role] Interval Transfer Bitrate Retr [ 5][TX-C] 0.00-60.00 sec 16.4 GBytes 2.34 Gbits/sec 1135 sender [ 5][TX-C] 0.00-60.05 sec 16.4 GBytes 2.34 Gbits/sec receiver [ 7][RX-C] 0.00-60.00 sec 15.3 GBytes 2.18 Gbits/sec 0 sender [ 7][RX-C] 0.00-60.05 sec 15.3 GBytes 2.18 Gbits/sec receiver iperf Done. |
Excellent, even though the speed dropped to around 2.18 Gbps in one direction in full-duplex mode.
Let’s now switch to one of the Intel i226V interfaces (Proxmox VE via 192.168.33.249 – vmbr2 – enp1s0):
- Upload
|
1 2 3 4 5 6 7 8 9 10 11 12 13 14 15 16 |
root@iKOOLCORE-R2-CNX:~# iperf3 -t 60 -c 192.168.33.18 -i 10 Connecting to host 192.168.33.18, port 5201 [ 5] local 192.168.33.201 port 47188 connected to 192.168.33.18 port 5201 [ ID] Interval Transfer Bitrate Retr Cwnd [ 5] 0.00-10.00 sec 2.74 GBytes 2.36 Gbits/sec 0 669 KBytes [ 5] 10.00-20.00 sec 2.74 GBytes 2.35 Gbits/sec 0 744 KBytes [ 5] 20.00-30.00 sec 2.74 GBytes 2.35 Gbits/sec 0 1.09 MBytes [ 5] 30.00-40.00 sec 2.74 GBytes 2.35 Gbits/sec 0 1.09 MBytes [ 5] 40.00-50.00 sec 2.74 GBytes 2.35 Gbits/sec 0 1.09 MBytes [ 5] 50.00-60.00 sec 2.74 GBytes 2.35 Gbits/sec 0 1.63 MBytes - - - - - - - - - - - - - - - - - - - - - - - - - [ ID] Interval Transfer Bitrate Retr [ 5] 0.00-60.00 sec 16.4 GBytes 2.35 Gbits/sec 0 sender [ 5] 0.00-60.05 sec 16.4 GBytes 2.35 Gbits/sec receiver iperf Done. |
- Download
|
1 2 3 4 5 6 7 8 9 10 11 12 13 14 15 16 17 |
root@iKOOLCORE-R2-CNX:~# iperf3 -t 60 -c 192.168.33.18 -i 10 -R Connecting to host 192.168.33.18, port 5201 Reverse mode, remote host 192.168.33.18 is sending [ 5] local 192.168.33.201 port 52794 connected to 192.168.33.18 port 5201 [ ID] Interval Transfer Bitrate [ 5] 0.00-10.00 sec 2.74 GBytes 2.35 Gbits/sec [ 5] 10.00-20.00 sec 2.74 GBytes 2.35 Gbits/sec [ 5] 20.00-30.00 sec 2.74 GBytes 2.35 Gbits/sec [ 5] 30.00-40.00 sec 2.74 GBytes 2.35 Gbits/sec [ 5] 40.00-50.00 sec 2.74 GBytes 2.35 Gbits/sec [ 5] 50.00-60.00 sec 2.74 GBytes 2.35 Gbits/sec - - - - - - - - - - - - - - - - - - - - - - - - - [ ID] Interval Transfer Bitrate Retr [ 5] 0.00-60.04 sec 16.4 GBytes 2.35 Gbits/sec 0 sender [ 5] 0.00-60.00 sec 16.4 GBytes 2.35 Gbits/sec receiver iperf Done. |
- Full-duplex
|
1 2 3 4 5 6 7 8 9 10 11 12 13 14 15 16 17 18 19 20 21 22 23 24 25 |
root@iKOOLCORE-R2-CNX:~# iperf3 -t 60 -c 192.168.33.18 -i 10 --bidir Connecting to host 192.168.33.18, port 5201 [ 5] local 192.168.33.201 port 33410 connected to 192.168.33.18 port 5201 [ 7] local 192.168.33.201 port 33412 connected to 192.168.33.18 port 5201 [ ID][Role] Interval Transfer Bitrate Retr Cwnd [ 5][TX-C] 0.00-10.00 sec 2.73 GBytes 2.35 Gbits/sec 0 1.02 MBytes [ 7][RX-C] 0.00-10.00 sec 2.73 GBytes 2.34 Gbits/sec [ 5][TX-C] 10.00-20.00 sec 2.73 GBytes 2.35 Gbits/sec 0 1.02 MBytes [ 7][RX-C] 10.00-20.00 sec 2.73 GBytes 2.34 Gbits/sec [ 5][TX-C] 20.00-30.00 sec 2.73 GBytes 2.35 Gbits/sec 0 1.53 MBytes [ 7][RX-C] 20.00-30.00 sec 2.73 GBytes 2.34 Gbits/sec [ 5][TX-C] 30.00-40.00 sec 2.73 GBytes 2.35 Gbits/sec 1 1.07 MBytes [ 7][RX-C] 30.00-40.00 sec 2.73 GBytes 2.34 Gbits/sec [ 5][TX-C] 40.00-50.00 sec 2.73 GBytes 2.35 Gbits/sec 43 1.13 MBytes [ 7][RX-C] 40.00-50.00 sec 2.73 GBytes 2.34 Gbits/sec [ 5][TX-C] 50.00-60.00 sec 2.73 GBytes 2.35 Gbits/sec 0 1.70 MBytes [ 7][RX-C] 50.00-60.00 sec 2.73 GBytes 2.34 Gbits/sec - - - - - - - - - - - - - - - - - - - - - - - - - [ ID][Role] Interval Transfer Bitrate Retr [ 5][TX-C] 0.00-60.00 sec 16.4 GBytes 2.35 Gbits/sec 44 sender [ 5][TX-C] 0.00-60.04 sec 16.4 GBytes 2.35 Gbits/sec receiver [ 7][RX-C] 0.00-60.00 sec 16.4 GBytes 2.34 Gbits/sec 0 sender [ 7][RX-C] 0.00-60.04 sec 16.4 GBytes 2.34 Gbits/sec receiver iperf Done. |
Perfect. Both the RealTek and Intel interfaces are working well, but the Intel i226V controller works slightly better in full-duplex mode.
Ubuntu 22.04 benchmarks and features testing in Proxmox VE
The networking part is done with pfSense firewall and up running, and the 2.5GbE interfaces of the iKOOLCORE R2 are shown to perform up to our expectations. I will now check whether Ubuntu 22.04 works as well in Promox VE as natively by both running benchmarks and testing some features.
Let’s start by running SBC Bench script from Thomas Kaiser:
|
1 2 3 4 5 6 7 8 9 10 11 12 13 14 15 16 17 18 19 20 21 22 23 24 25 26 27 28 29 30 31 32 33 34 35 36 37 38 39 40 41 42 43 44 45 46 47 48 49 50 51 52 53 54 55 56 57 58 59 60 61 62 63 64 65 66 67 68 69 70 71 72 73 74 75 76 77 78 79 80 81 82 83 84 85 86 87 88 89 90 |
jaufranc@R2-CNX-Ubuntu:~$ sudo ./sbc-bench.sh -r Starting to examine hardware/software for review purposes... sbc-bench v0.9.59 Installing needed tools, cpuminer. Done. Checking cpufreq OPP. Done. Executing tinymembench. Done. Executing RAM latency tester. Done. Executing OpenSSL benchmark. Done. Executing 7-zip benchmark. Done. Throttling test: heating up the device, 5 more minutes to wait. Done. Checking cpufreq OPP again. Done (13 minutes elapsed). Results validation: * No swapping Full results uploaded to http://sprunge.us/wOWOLV # Standard PC (i440FX + PIIX, 1996) kvm/QEMU VM Tested with sbc-bench v0.9.59 on Tue, 19 Dec 2023 12:03:55 +0700. Full info: [http://sprunge.us/wOWOLV](http://sprunge.us/wOWOLV) ### General information: i3-N300, Kernel: x86_64 / kvm, Userland: amd64 CPU sysfs topology (clusters, cpufreq members, clockspeeds) cpufreq min max CPU cluster policy speed speed core type 0 0 0 - - i3-N300 1 0 0 - - i3-N300 2 0 0 - - i3-N300 3 0 0 - - i3-N300 4 0 0 - - i3-N300 5 0 0 - - i3-N300 6 0 0 - - i3-N300 7 0 0 - - i3-N300 3891 KB available RAM ### Clockspeeds (idle vs. heated up): Before: cpu0: Measured: 3781 After: cpu0: Measured: 3779 ### Performance baseline * memcpy: 11315.1 MB/s, memchr: 17750.4 MB/s, memset: 10613.9 MB/s * 16M latency: 131.4 124.8 130.9 125.7 130.7 108.9 103.7 109.4 * 128M latency: 141.5 141.3 141.8 140.9 141.2 130.3 122.2 123.5 * 7-zip MIPS (3 consecutive runs): 22363, 22419, 22564 (22450 avg), single-threaded: 4080 * `aes-256-cbc 901939.58k 1312635.61k 1357618.77k 1365799.59k 1371286.19k 1372389.38k` * `aes-256-cbc 903119.93k 1310872.34k 1355180.54k 1365037.06k 1370802.86k 1371755.86k` ### Storage devices: * 128GB Virtual disk: /dev/sda, Driver=virtio-pci ### Swap configuration: * /swapfile on /dev/sda2: 3.8G (1.3M used) ### Software versions: * Ubuntu 22.04.3 LTS * Compiler: /usr/bin/gcc (Ubuntu 11.4.0-1ubuntu1~22.04) 11.4.0 / x86_64-linux-gnu * OpenSSL 3.0.2, built on 15 Mar 2022 (Library: OpenSSL 3.0.2 15 Mar 2022) ### Kernel info: * `/proc/cmdline: BOOT_IMAGE=/boot/vmlinuz-6.2.0-39-generic root=UUID=18abae82-acb6-446b-bb19-da0a88ae5671 ro quiet splash vt.handoff=7` * Vulnerability Spec store bypass: Mitigation; Speculative Store Bypass disabled via prctl * Vulnerability Spectre v1: Mitigation; usercopy/swapgs barriers and __user pointer sanitization * Kernel 6.2.0-39-generic / CONFIG_HZ=250 All known settings adjusted for performance. Device now ready for benchmarking. Once finished stop with [ctrl]-[c] to get info about throttling, frequency cap and too high background activity all potentially invalidating benchmark scores. All changes with storage and PCIe devices as well as suspicious dmesg contents will be reported too. Time CPU n/a load %cpu %sys %usr %nice %io %irq Temp 12:03:55: n/a MHz 6.92 0% 0% 0% 0% 0% 0% °C |
Since we are in a virtual machine, the temperature and CPU frequency testing does not seem to work with sbc-bench.sh. Due to time constraints, I won’t try to reproduce the results in a native Ubuntu installation, we can use the results from the Weibu N10 (Core i3-N305) mini PC review for reference.
[Update: Since Proxmox VE is Debian-based we can run sbc-bench.sh natively as well. I did it while the Ubuntu 22.04 and pfSense VM were running (and mostly idling) for a direct comparison with the results above
|
1 2 3 4 5 6 7 8 9 10 11 12 13 14 15 16 17 18 19 20 21 22 23 24 25 26 27 28 29 30 31 32 33 34 35 36 37 38 39 40 41 42 43 44 45 46 |
root@iKOOLCORE-R2-CNX:~# ./sbc-bench.sh Average load and/or CPU utilization too high (too much background activity). Waiting... Too busy for benchmarking: 16:20:55 up 2:31, 1 user, load average: 0.32, 0.20, 0.13, cpu: 1% Too busy for benchmarking: 16:21:00 up 2:31, 1 user, load average: 0.29, 0.20, 0.13, cpu: 1% Too busy for benchmarking: 16:21:05 up 2:31, 1 user, load average: 0.27, 0.19, 0.13, cpu: 1% Too busy for benchmarking: 16:21:10 up 2:31, 1 user, load average: 0.25, 0.19, 0.13, cpu: 1% Too busy for benchmarking: 16:21:15 up 2:31, 1 user, load average: 0.31, 0.20, 0.13, cpu: 1% Too busy for benchmarking: 16:21:20 up 2:31, 1 user, load average: 0.28, 0.20, 0.13, cpu: 2% sbc-bench v0.9.59 Installing needed tools: apt -f -qq -y install gcc make build-essential lm-sensors sysstat lshw powercap-utils p7zip, tinymembench, ramlat, mhz, cpufetch. Done. Checking cpufreq OPP. Done (results will be available in 7-10 minutes). Executing tinymembench. Done. Executing RAM latency tester. Done. Executing OpenSSL benchmark. Done. Executing 7-zip benchmark. Done. Checking cpufreq OPP again. Done (7 minutes elapsed). Results validation: * Measured clockspeed not lower than advertised max CPU clockspeed * Swapping occured -> https://tinyurl.com/3h222wnh * Background activity (%system) OK * Too much other background activity: 1% avg, 3% max -> https://tinyurl.com/mr2wy5uv * Powercap detected. Details: "sudo powercap-info -p intel-rapl" -> https://tinyurl.com/4jh9nevj Memory performance memcpy: 11026.0 MB/s memset: 10958.8 MB/s 7-zip total scores (3 consecutive runs): 23101,23268,23246, single-threaded: 4238 OpenSSL results: type 16 bytes 64 bytes 256 bytes 1024 bytes 8192 bytes 16384 bytes aes-128-cbc 1102858.52k 1669343.42k 1826090.41k 1871562.07k 1887881.90k 1891341.65k aes-128-cbc 1109703.91k 1668637.65k 1825153.11k 1874709.85k 1888168.62k 1889391.96k aes-192-cbc 1075252.71k 1430323.09k 1544505.69k 1582064.30k 1590981.97k 1591208.62k aes-192-cbc 1077114.43k 1432635.11k 1544703.15k 1580479.15k 1592300.89k 1590476.80k aes-256-cbc 960164.45k 1255560.21k 1339470.51k 1365235.37k 1374281.73k 1374366.38k aes-256-cbc 960240.39k 1254501.72k 1339013.97k 1364885.50k 1374461.95k 1376299.69k Unable to upload full test results. Please copy&paste the below stuff to pastebin.com and provide the URL. Check the output for throttling and swapping please. |
The full test results can be found on pastebin.com. The native results are only very slightly higher than in the Ubuntu VM as expected]
iKOOLCORE R2 got 22,450 points in 7-zip on average, while the Weibu N10 reached up to 20,000 points, and the AES-256 results are 1371755.86k vs 1377211.73k. The results are in the same ballpark, so if there’s any impact on performance due to running Ubuntu 22.04 in Proxmox VE it does not show in sbc-bench.sh…
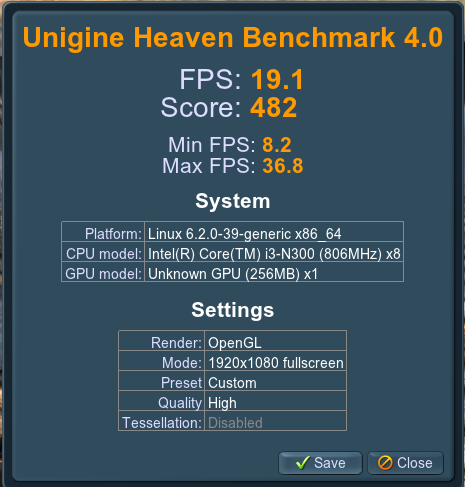
But that’s still a headless test, so let’s run Unigine Heaven Benchmark 4.0 to test the GPU at 1920×1080 resolution.
It worked fine, and the performance looks OK considering the Weibu N10 achieved 17.9 fps and a score of 451 points in the same test.
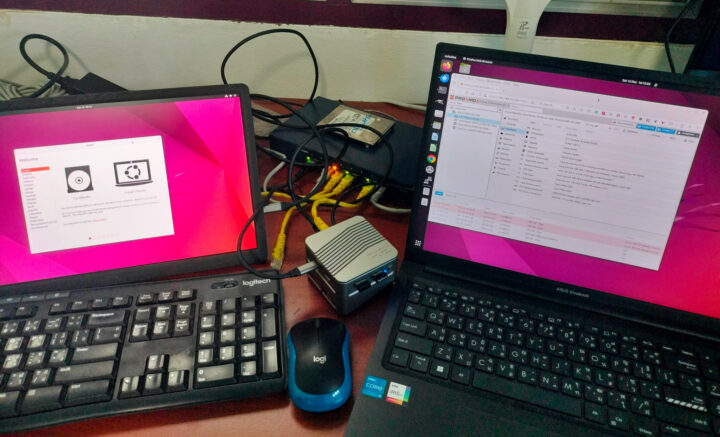
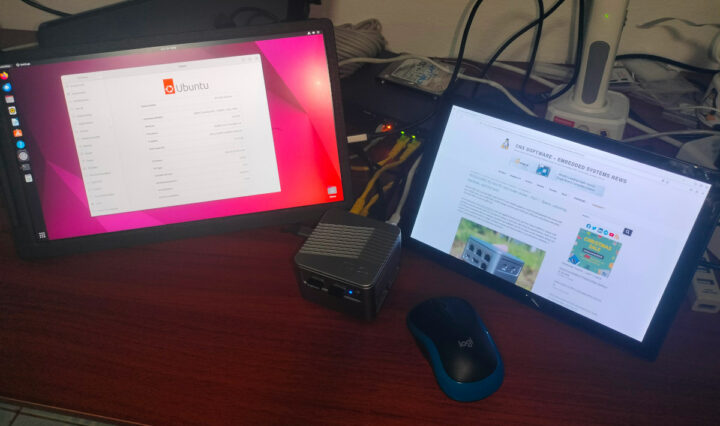
I’ve already tested USB ports with the RF dongles, and HDMI and USB-C video output by connecting the CrowView laptop monitor to either. But I haven’t tried to connect two displays just yet. Let’s do that by adding the 10-inch RPI “All-in-One” display.
It works! Here’s the screenshot of the two displays for reference.
I then played a YouTube 4Kp60 video in Firefox that looked smooth, but there were a few frames dropped (770 out of 11,618).
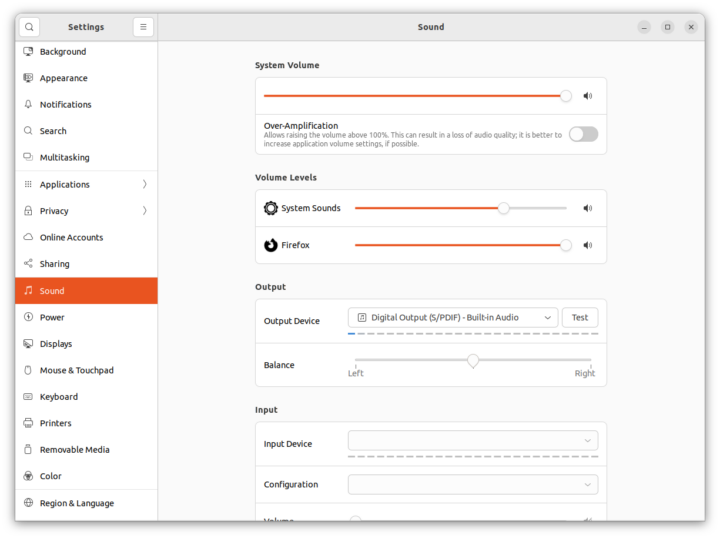
There was no audio through HDMI though, and when I looked at the audio settings I could only see a digital output (S/PDIF) audio device with the volume varying while playing the video. It’s probably outputting to the USB-C audio port, but I have no idea how to use it as there’s no information about it in the Wiki.
It’s probably possible to enable HDMI audio by adding one or more raw PCIe devices to the Proxmox VE configuration, but again it’s not clear which one to select…
Here’s a final storage benchmark to evaluate the SSD performance:
|
1 2 3 4 5 6 7 8 9 10 11 12 13 14 15 |
jaufranc@R2-CNX-Ubuntu:~$ sudo iozone -e -I -a -s 100M -r 4k -r 16k -r 512k -r 1024k -r 16384k -i 0 -i 1 -i 2 Iozone: Performance Test of File I/O Version $Revision: 3.489 $ Compiled for 64 bit mode. Build: linux-AMD64 random random bkwd record stride kB reclen write rewrite read reread read write read rewrite read fwrite frewrite fread freread 102400 4 71747 81129 72689 71015 31129 76241 102400 16 235112 245085 198403 191845 115866 265999 102400 512 1038676 1094485 977397 1006340 914327 973856 102400 1024 1193902 1097994 1126587 1146786 1129907 1127664 102400 16384 1383684 1265712 1588750 1633476 1635562 1440625 iozone test complete. |
That would be a 1.58 GB/s sequential read speed and 1.38GB/s sequential write speed in the Ubuntu VM.
Power consumption
The iKOOLCORE R2 will consume more power than your usual Alder Lake-N mini PC since you may have four 2.5GbE connections. I measured the power consumption with a wall power meter with the mini PC having all four 2.5GbE active, two RF dongles for the keyboard and mouse, and a display connected via HDMI with its own power supply:
- Power Off – 2.2W (after issuing shutdown in Proxmox VE)
- Idle – 13.4 to 14.1 Watts
- YouTube Video (4Kp60 in Firefox) – 31.2 to 35.2 Watts
- Stress test (stress -c 8) – 30.0 to 31.3 Watts
Conclusion
Reviewing the iKOOLCORE R2 was an interesting and challenging experience, as I did not have any experience with Proxmox VE and pfSense, and the learning curve was such that I estimate having spent over 25 hours on this three-part review.
The Intel Core i3-N300 device can be used simultaneously as a mini PC running Ubuntu 22.04 (or Windows 11, or other desktop OSes) and a firewall or network appliance with an OS such as pfSense. Once configured correctly the little dual-use device works great, and I found 2.5GbE networking to work great, and most Ubuntu 22.04 Desktop features work great through Proxmox VE, with no obvious impact on performance, except for audio where I was unable to make HDMI audio work, and it’s unclear how we are supposed to use the USB-C audio port.
I’d like to thank iKOOLCORE for sending the R2 mini PC / router for review in a configuration with an Intel Core i3-N300 octa-core processor, 8GB RAM, and a 512GB NVMe SSD. The iKOOLCORE R2 model reviewed here can be purchased for $389 on the iKOOLCORE store, and you should be able to use the CNXSOFT coupon to lower the price by 5%. Pricing currently starts at $239 for the N95 model with 8GB RAM and no storage.

Jean-Luc started CNX Software in 2010 as a part-time endeavor, before quitting his job as a software engineering manager, and starting to write daily news, and reviews full time later in 2011.
Support CNX Software! Donate via cryptocurrencies, become a Patron on Patreon, or purchase goods on Amazon or Aliexpress






> the temperature and CPU frequency testing does not seem to work with sbc-bench.sh
Neither cpufreq scaling nor thermal sensors are available in a VM. But you could run sbc-bench also directly in the hypervisor installation since Proxmox is plain Debian under the hood (and results won’t differ between a recent Ubuntu und Debian install due to chosen benchmark tools)
I did not realize I could run the script in Proxmox VE directly. I’ve done so, and added the results to the review.
Hi thanks for the amazing guide. I have a few questions about connecting to Proxmox. Currently I have my iKoolCore unit running Proxmox connected to my TpLink router so I can access it through the browser. But once I move the iKoolCore to be directly connected to my modem (which is on bridge mode). How do I connect to Proxmox through the web again since I won’t be on that subnet anymore?
Since you are in bridge mode shouldn’t all your devices be in the same subnet?