
MINIX NEO Z83-4U is a Cherry Trail mini PC pre-loaded with Ubuntu 18.04. I received a sample a little while ago, and in the first part of NEO Z83-4U review I checked out the specifications and hardware that appears to be exactly the same a MINIX NEO Z83-4 Pro mini PC, except for the eMMC flash capacity that has increased from 32GB to 64GB.
Since the mini PC comes with an older Atom X5-Z8350 processor, and is designed for commercial applications, I’ve decided to make a slightly different review. We already now how the system is supposed to perform thanks to benchmarks with NEO Z83-4 mini PC running Windows 10 Pro, so I’ll just check the main features are working as expected in Ubuntu 18.04, test audio & video support in Kodi 18.1, and try out Xibo Linux open source digital signage CMS and player on the mini PC.
MINIX NEO Z83-4U Initial Setup
I connected various USB peripherals, an Ethernet cable, an HDMI cable, and power before pressing the power button to get started. You’ll be greeted by the usual Ubuntu login screen, and you can enter using username: minix and password: 123456.
The first thin you want to do is probably to open a terminal to change the password:
|
1 2 3 4 5 6 |
minix@minix-Z83-4:~$ passwd Changing password for minix. (current) UNIX password: Enter new UNIX password: Retype new UNIX password: passwd: password updated successfully |
or alternatively create a new user, and delete minix user.
SSH server is not installed by default in Ubuntu 18.04, and since it’s more convenient to access the mini PC for review, I had to install it first in using a terminal using the TV connected via HDMI:
|
1 |
sudo apt install openssh-server |
I could then login from my laptop using the mini PC’s default username, hostname, and password:
|
1 |
ssh minix@minix-z83-4.local |
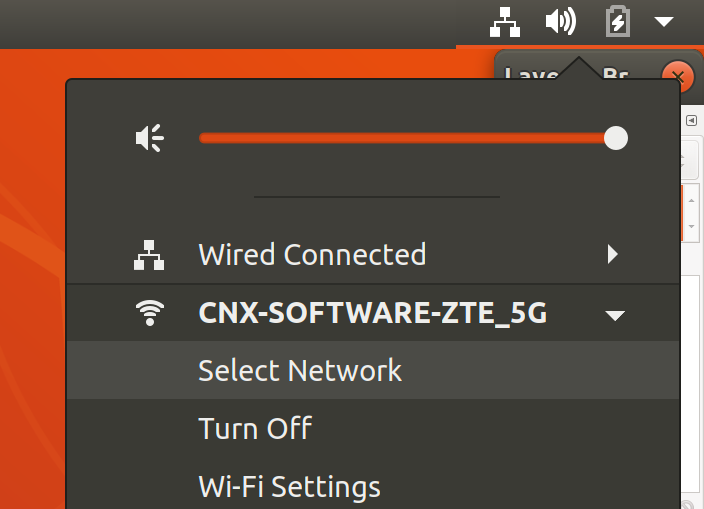
If you don’t use Ethernet, you’ll have to setup WiFi by clicking on the top right icons in the menu bar, then Select Network.
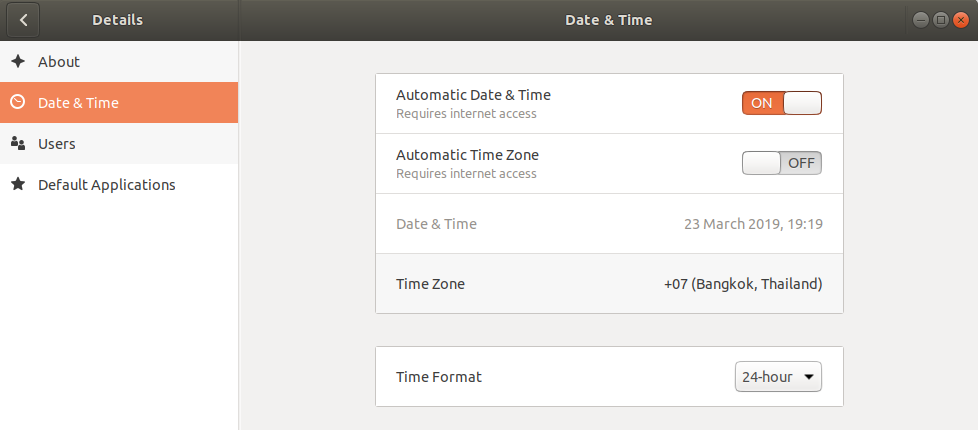
Time will be wrong until you select the Time Zone in Date & Time.
My USB drive comes with four partitions using NTFS, EXT-4, BTRFS and exFAT, and I noticed the exFAT would not mount because the exFAT packages are not installed by default:
|
1 |
sudo apt install exfat-fuse exfat-utils |
I’m not using the Amazon thing in Ubuntu 18.04, so I just remove the icon, but you can also just remove it if you want to make sure there’s no tracking:
|
1 |
sudo apt purge ubuntu-web-launchers |
If you plan on getting several mini PC running in your network, you may also consider changing the hostname, e.g. to call it xibo-ds:
|
1 |
sudo hostnamectl set-hostname xibo-ds |
That’s basically all I had to do to get the system working to my needs.
MINIX NEO Z83-4U System Information and Hardware Features Testing
My system shipped with Ubuntu 18.04.1 LTS, but the operating system will automatically upgrade and soon enough I was running Ubuntu 18.04.2 LTS. Here are some of the main system information after the upgrade and a reboot:
|
1 2 3 4 5 6 7 8 9 10 11 12 13 14 15 16 17 18 19 20 21 22 23 24 25 26 27 28 29 30 31 32 33 34 35 36 37 38 39 40 41 42 43 44 45 46 47 48 49 50 51 52 53 54 55 56 57 58 59 60 61 62 63 64 65 66 67 68 69 70 71 72 73 74 75 76 77 78 79 80 81 82 83 84 85 86 87 88 89 90 91 92 93 94 95 96 97 98 99 100 101 102 103 104 105 106 107 108 109 110 111 112 113 114 115 116 117 118 119 120 121 122 123 124 125 126 127 128 129 130 131 132 133 134 135 136 137 138 139 140 141 142 143 144 145 146 147 148 149 150 151 152 153 154 155 156 157 158 159 160 161 162 163 164 165 166 167 168 169 170 171 172 173 174 175 176 177 |
minix@minix-Z83-4:~$ lsb_release -a No LSB modules are available. Distributor ID: Ubuntu Description: Ubuntu 18.04.2 LTS Release: 18.04 Codename: bionic minix@minix-Z83-4:~$ uname -a Linux minix-Z83-4 4.15.0-46-generic #49-Ubuntu SMP Wed Feb 6 09:33:07 UTC 2019 x86_64 x86_64 x86_64 GNU/Linux minix@minix-Z83-4:~$ inxi -Fc0 System: Host: minix-Z83-4 Kernel: 4.15.0-46-generic x86_64 bits: 64 Console: tty 0 Distro: Ubuntu 18.04.2 LTS Machine: Device: desktop System: MINIX product: Z83-4 v: V1.1 serial: N/A Mobo: MINIX model: NEO Z83-4 v: V1.1 serial: N/A UEFI: American Megatrends v: CHT0A190 date: 12/06/2018 CPU: Quad core Intel Atom x5-Z8350 (-MCP-) cache: 1024 KB clock speeds: max: 1920 MHz 1: 480 MHz 2: 480 MHz 3: 642 MHz 4: 826 MHz Graphics: Card: Intel Atom/Celeron/Pentium Processor x5-E8000/J3xxx/N3xxx Series PCI Configuration Registers Display Server: N/A driver: i915 tty size: 80x24 Advanced Data: N/A out of X Audio: Card-1 chtrt5645 driver: chtrt5645 Card-2 Intel HDMI/DP LPE Audio driver: HdmiLpeAudio Sound: Advanced Linux Sound Architecture v: k4.15.0-46-generic Network: Card: Realtek RTL8111/8168/8411 PCIE Gigabit Ethernet Controller driver: r8169 IF: enp1s0 state: up speed: 1000 Mbps duplex: full mac: a0:1e:0b:0d:30:ab Drives: HDD Total Size: 1000.2GB (0.8% used) ID-1: /dev/mmcblk0 model: N/A size: 62.5GB ID-2: USB /dev/sda model: Expansion size: 1000.2GB Partition: ID-1: / size: 57G used: 7.4G (14%) fs: ext4 dev: /dev/mmcblk0p2 RAID: No RAID devices: /proc/mdstat, md_mod kernel module present Sensors: System Temperatures: cpu: 42.0C mobo: N/A Fan Speeds (in rpm): cpu: N/A Info: Processes: 204 Uptime: 1:01 Memory: 395.9/3745.9MB Init: systemd runlevel: 5 Client: Shell (bash) inxi: 2.3.56 minix@minix-Z83-4:~$ df -h Filesystem Size Used Avail Use% Mounted on udev 1.9G 0 1.9G 0% /dev tmpfs 375M 1.7M 373M 1% /run /dev/mmcblk0p2 57G 7.4G 47G 14% / tmpfs 1.9G 0 1.9G 0% /dev/shm tmpfs 5.0M 4.0K 5.0M 1% /run/lock tmpfs 1.9G 0 1.9G 0% /sys/fs/cgroup /dev/loop0 141M 141M 0 100% /snap/gnome-3-26-1604/70 /dev/loop1 15M 15M 0 100% /snap/gnome-characters/206 /dev/loop2 54M 54M 0 100% /snap/core18/782 /dev/loop3 141M 141M 0 100% /snap/gnome-3-26-1604/82 /dev/loop4 36M 36M 0 100% /snap/gtk-common-themes/1198 /dev/loop6 3.8M 3.8M 0 100% /snap/gnome-system-monitor/51 /dev/loop5 144M 144M 0 100% /snap/gnome-3-28-1804/23 /dev/loop7 35M 35M 0 100% /snap/gtk-common-themes/319 /dev/loop8 1.0M 1.0M 0 100% /snap/gnome-logs/57 /dev/loop9 3.8M 3.8M 0 100% /snap/gnome-system-monitor/70 /dev/loop10 2.4M 2.4M 0 100% /snap/gnome-calculator/180 /dev/loop11 92M 92M 0 100% /snap/core/6531 /dev/loop12 15M 15M 0 100% /snap/gnome-logs/37 /dev/loop13 13M 13M 0 100% /snap/gnome-characters/103 /dev/loop14 4.2M 4.2M 0 100% /snap/gnome-calculator/352 /dev/loop15 87M 87M 0 100% /snap/core/4917 /dev/mmcblk0p1 511M 6.1M 505M 2% /boot/efi tmpfs 375M 20K 375M 1% /run/user/121 tmpfs 375M 0 375M 0% /run/user/1000 minix@minix-Z83-4:~$ lsblk -a NAME MAJ:MIN RM SIZE RO TYPE MOUNTPOINT loop0 7:0 0 140.9M 1 loop /snap/gnome-3-26-1604/70 loop1 7:1 0 14.8M 1 loop /snap/gnome-characters/206 loop2 7:2 0 53.7M 1 loop /snap/core18/782 loop3 7:3 0 140.7M 1 loop /snap/gnome-3-26-1604/82 loop4 7:4 0 35.3M 1 loop /snap/gtk-common-themes/1198 loop5 7:5 0 143.5M 1 loop /snap/gnome-3-28-1804/23 loop6 7:6 0 3.7M 1 loop /snap/gnome-system-monitor/51 loop7 7:7 0 34.7M 1 loop /snap/gtk-common-themes/319 loop8 7:8 0 1008K 1 loop /snap/gnome-logs/57 loop9 7:9 0 3.7M 1 loop /snap/gnome-system-monitor/70 loop10 7:10 0 2.3M 1 loop /snap/gnome-calculator/180 loop11 7:11 0 91.1M 1 loop /snap/core/6531 loop12 7:12 0 14.5M 1 loop /snap/gnome-logs/37 loop13 7:13 0 13M 1 loop /snap/gnome-characters/103 loop14 7:14 0 4M 1 loop /snap/gnome-calculator/352 loop15 7:15 0 86.9M 1 loop /snap/core/4917 loop16 7:16 0 0 loop sda 8:0 0 931.5G 0 disk ├─sda1 8:1 0 244.1G 0 part ├─sda2 8:2 0 244.1G 0 part ├─sda3 8:3 0 244.1G 0 part └─sda4 8:4 0 199.1G 0 part mmcblk0 179:0 0 58.2G 0 disk ├─mmcblk0p1 179:1 0 512M 0 part /boot/efi └─mmcblk0p2 179:2 0 57.8G 0 part / mmcblk0boot0 179:8 0 4M 1 disk mmcblk0boot1 179:16 0 4M 1 disk minix@minix-Z83-4:~$ sudo lshw -C cpu *-cpu description: CPU product: Intel(R) Atom(TM) x5-Z8350 CPU @ 1.44GHz vendor: Intel Corp. physical id: 34 bus info: cpu@0 version: Intel(R) Atom(TM) x5-Z8350 CPU @ 1.44GHz slot: SOCKET 0 size: 515MHz capacity: 2400MHz width: 64 bits clock: 80MHz capabilities: x86-64 fpu fpu_exception wp vme de pse tsc msr pae mce cx8 apic sep mtrr pge mca cmov pat pse36 clflush dts acpi mmx fxsr sse sse2 ss ht tm pbe syscall nx rdtscp constant_tsc arch_perfmon pebs bts rep_good nopl xtopology tsc_reliable nonstop_tsc cpuid aperfmperf tsc_known_freq pni pclmulqdq dtes64 monitor ds_cpl vmx est tm2 ssse3 cx16 xtpr pdcm sse4_1 sse4_2 movbe popcnt tsc_deadline_timer aes rdrand lahf_lm 3dnowprefetch epb pti tpr_shadow vnmi flexpriority ept vpid tsc_adjust smep erms dtherm ida arat cpufreq configuration: cores=4 enabledcores=4 threads=4 minix@minix-Z83-4:~$ sudo lshw -C memory *-firmware description: BIOS vendor: American Megatrends Inc. physical id: 0 version: CHT0A190 date: 12/06/2018 size: 64KiB capacity: 4032KiB capabilities: pci upgrade shadowing cdboot bootselect socketedrom edd int13floppy1200 int13floppy720 int13floppy2880 int5printscreen int14serial int17printer acpi usb biosbootspecification uefi *-memory description: System Memory physical id: 28 slot: System board or motherboard size: 4GiB capabilities: ecc configuration: errordetection=multi-bit-ecc *-bank:0 description: DIMM DDR3 1600 MHz (0.6 ns) product: 00000000 vendor: Hynix Semiconductor physical id: 0 serial: 00000000 slot: A1_DIMM0 size: 4GiB width: 8 bits clock: 1600MHz (0.6ns) *-bank:1 description: DIMM [empty] product: 00000000 vendor: Hynix Semiconductor physical id: 1 serial: 00000000 slot: A1_DIMM1 *-cache:0 description: L1 cache physical id: 32 slot: CPU Internal L1 size: 224KiB capacity: 224KiB capabilities: internal write-back configuration: level=1 *-cache:1 description: L2 cache physical id: 33 slot: CPU Internal L2 size: 2MiB capacity: 2MiB capabilities: internal write-back unified configuration: level=2 minix@minix-Z83-4:~$ free -mh total used free shared buff/cache available Mem: 3.7G 344M 2.7G 103M 638M 3.0G Swap: 2.0G 0B 2.0G minix@minix-Z83-4:~$ lsusb Bus 002 Device 002: ID 0bc2:2312 Seagate RSS LLC Bus 002 Device 001: ID 1d6b:0003 Linux Foundation 3.0 root hub Bus 001 Device 004: ID 1a2c:0002 China Resource Semico Co., Ltd Bus 001 Device 003: ID 11c0:5500 Bus 001 Device 002: ID 0461:4d15 Primax Electronics, Ltd Dell Optical Mouse Bus 001 Device 001: ID 1d6b:0002 Linux Foundation 2.0 root hub minix@minix-Z83-4:~$ lspci 00:00.0 Host bridge: Intel Corporation Atom/Celeron/Pentium Processor x5-E8000/J3xxx/N3xxx Series SoC Transaction Register (rev 36) 00:02.0 VGA compatible controller: Intel Corporation Atom/Celeron/Pentium Processor x5-E8000/J3xxx/N3xxx Series PCI Configuration Registers (rev 36) 00:14.0 USB controller: Intel Corporation Atom/Celeron/Pentium Processor x5-E8000/J3xxx/N3xxx Series USB xHCI Controller (rev 36) 00:1a.0 Encryption controller: Intel Corporation Atom/Celeron/Pentium Processor x5-E8000/J3xxx/N3xxx Series Trusted Execution Engine (rev 36) 00:1c.0 PCI bridge: Intel Corporation Atom/Celeron/Pentium Processor x5-E8000/J3xxx/N3xxx Series PCI Express Port #1 (rev 36) 00:1f.0 ISA bridge: Intel Corporation Atom/Celeron/Pentium Processor x5-E8000/J3xxx/N3xxx Series PCU (rev 36) 01:00.0 Ethernet controller: Realtek Semiconductor Co., Ltd. RTL8111/8168/8411 PCI Express Gigabit Ethernet Controller (rev 0c) minix@minix-Z83-4:~$ |
The /dev/sda* partitions from my USB drive are not mounted because they only get mounted after I login through the user interface, and I got the details above from an SSH terminal.
I tested most of the main hardware features to make sure drivers are working as expected (or not):
- HDMI output – OK (4K @ 30 Hz and 1080p60 tested)
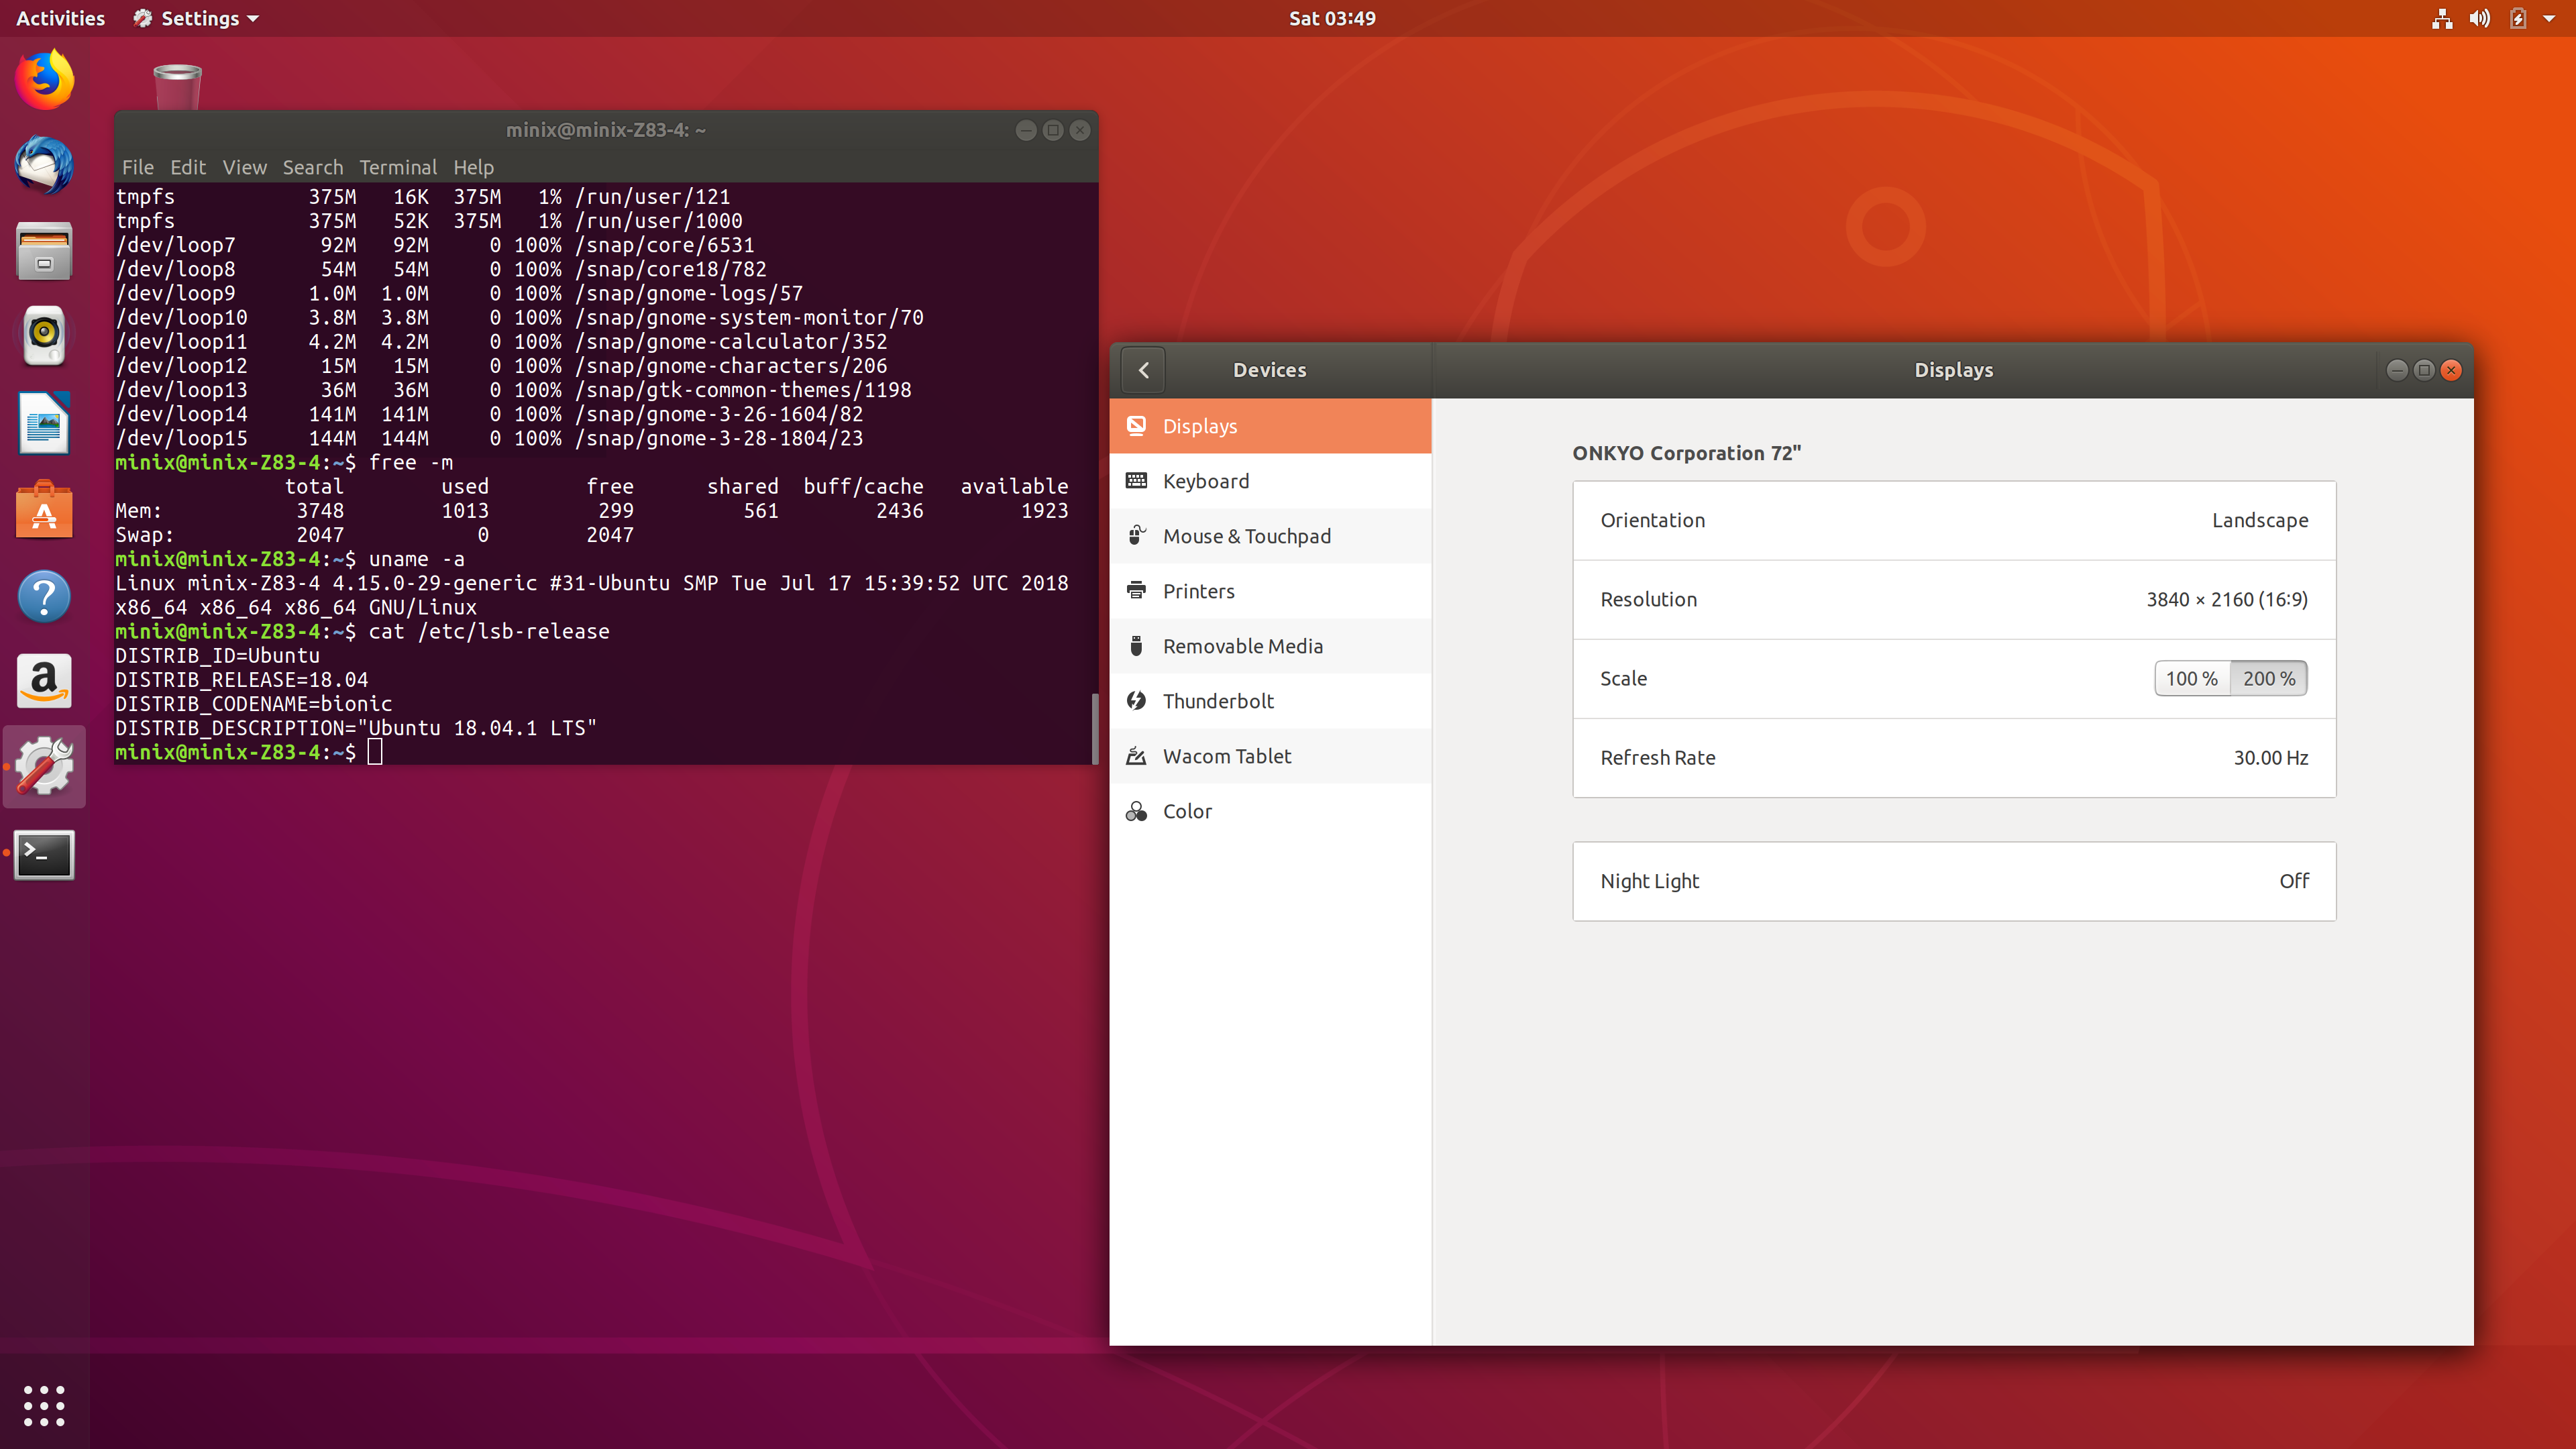
- mini DisplayPort – Untested (no adapter)
- Audio output – HDMI: OK, 3.5mm audio jack: OK; Bluetooth: massive audio cuts
- 3x USB 2.0 ports – OK with keyboard, mouse, and Tronsmart Mars G01 RF dongle
- 1x USB 3.0 port – OK (Tested with USB 3.0 HDD at 95MB/s read, 91 MB/s write)
- Gigabit Ethernet – OK (iperf download: 941 Mbps, upload: 937 Mbps)
- 802.11ac Wi-Fi – OK but performance on the low side (iperf download: 111 Mbps, upload: 106 Mbps)
- Bluetooth – Somewhat OK tested with Bluetooth headphones (see Audio) and Android smartphone (file transfer works but is really slow)
- micro SD Card – OK
So no problem detected here, except there may be issues with Bluetooth throughput that may also affect audio.
Audio & Video Testing with Kodi 18.1
Let’s go through audio & video testing since the platform could be used as an HTPC and video playback is one important feature for digital signage.
To do so, I installed the latest Kodi 18 media center:
|
1 2 3 4 |
sudo apt install software-properties-common sudo add-apt-repository ppa:team-xbmc/ppa sudo apt update sudo apt install kodi |
I tested a few H.264, H.265, VP8 and VP9 video files at various resolution and frame rates:
- H.264
- Big Buck Bunny with H.264 codec / MP4 container (1080p60) – OK
- [1080p][16_REF_L5.1][mp3_2.0]Suzumiya Haruhi no Shoushitsu BD OP.mkv (1080p24, 10-bit H.264) – OK with software decode
- big_buck_bunny_4k_H264_30fps.mp4 – OK
- big_buck_bunny_4k_H264_60fps.mp4 – OK
- sintel-2010-4k.mkv (H.264, 24 fps, 4096×1744) – OK
- HD.Club-4K-Chimei-inn-60mbps.mp4 (4K, H.264, 29.97 fps) – OK
- -4K.mp4 (10-bit H.264; 120 Mbps; 24 fps) – Not smooth (ff-h264 software decode)
- H.265 / HEVC
- Beauty_3840x2160_120fps_420_8bit_HEVC_MP4.mp4 (4K, H.265, 30 fps) – OK
- MHD_2013_2160p_ShowReel_R_9000f_24fps_RMN_QP23_10b.mkv (4K, 10-bit HEVC, 24fps) – Not smooth (ff-hevc software decode)
- BT.2020.20140602.ts (4K, 10-bit Rec.2020 compliant video; 36 Mbps; 59.97 Hz) – Not smooth (ff-hevc software decode)
- Fifa_WorldCup2014_Uruguay-Colombia_4K-x265.mp4 (4K, H.265, 60 fps) – OK
- Samsung_UHD_Dubai_10-bit_HEVC_51.4Mbps.ts (4K, 10-bit HEVC / MPEG-4 AAC, 24 fps) – Not smooth (ff-hevc software decode)
- VP8/VP9
- big_buck_bunny_1080p_VP8_VORBIS_25fps_7800K.WebM (1080p25, VP8) – OK
- phfx_4KHD_VP9TestFootage.webm (4K, VP9, 25 fps, no audio) – Not smooth (ff-vp9 software decode)
- tara-no9-vp9.webm (4K VP9 YouTube video @ 60 fps, Vorbis audio) – Not smooth (ff-vp9 software decode)
- The.Curvature.of.Earth.4K.60FPS-YT-UceRgEyfSsc.VP9.3840×2160.OPUS.160K.webm (4K VP9 @ 60 fps + opus audio) – Not smooth (ff-vp9 software decode)
So 4K 8-bit H.264 and H.265 videos can be played, but make sure you don’t play 4K 10-bit H.264/H.265 videos, nor 4K VP9 videos on this system. All 1080p videos I tried could be play with either software or hardware video decoding, and automatic frame rate switching is working fine. I double-checked with Totem and VLC video players, and they do not work as well as Kodi when it comes to 4K video playback.
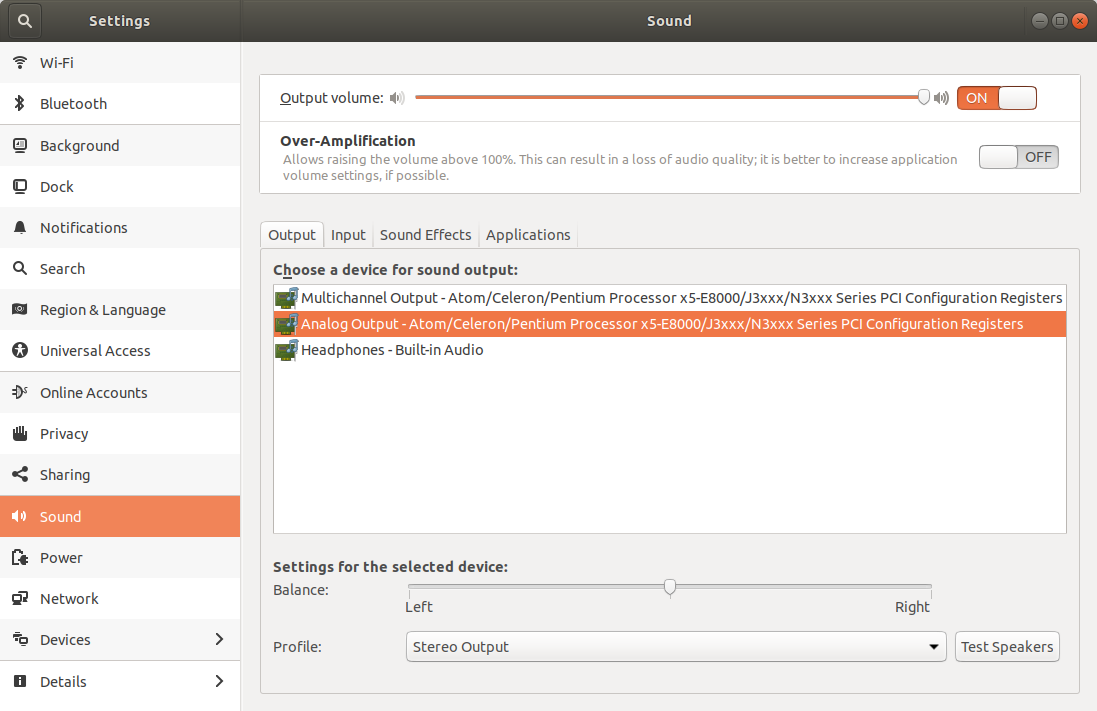
I wanted to try audio pass-through, but there’s no option for Audio passthrough. I followed the instructions for PulseAudio in Kodi wiki, but it looks like an HDMI digital audio pass-through device is missing from the output options: I can only see digital multichannel output or analog output.
Xibo Digital Signage on MINIX NEO Z83-4U Mini PC
Xibo open source digital signage is comprised of a CMS (Content Management System) and a client. The CMS part has been running on Windows, Linux and Mac OS for many years, but the Python client available 9 years ago is gone, and the company only restarted Linux client development last year or so, and what I’ve tried below is Xibo Player client for Linux that’s only at the alpha stage of development.
I already explained how to install Xibo CMS on Ubuntu 16.04 a few years ago, but docker is now recommended for installation, so I followed the updated instructions instead.
I had to install docker and docker compose first:
|
1 |
sudo apt install docker.io docker-compose |
We can now install the latest Xibo CMS release (Xibo 2.0.0):
|
1 2 3 4 |
sudo mkdir -p /opt/xibo cd /opt/xibo sudo wget https://xibo.org.uk/api/downloads/cms -O xibo-docker.tar.gz sudo tar --strip 1 -xvf xibo-docker.tar.gz |
Copy the template config file to config.env:
|
1 |
sudo cp config.env.template config.env |
Open the file, and set MYSQL_PASSWORD value to whatever password you’d like to use with Xibo database.
Now we bring the CMS up inside the installation directory (/opt/xibo):
|
1 |
sudo docker-compose up -d |
Output of a successful installation:
|
1 2 3 4 5 6 7 8 9 10 11 12 13 14 15 16 17 18 19 20 21 22 23 24 25 26 27 28 29 30 31 32 33 34 35 36 37 38 39 40 41 42 43 44 45 46 47 |
Creating network "xibo_default" with the default driver Pulling cms-db (mysql:5.6)... 5.6: Pulling from library/mysql f7e2b70d04ae: Pull complete df7f6307ff0a: Pull complete e29ed02b1013: Pull complete 9cb929db392c: Pull complete 42cc77b24286: Pull complete b7493809599f: Pull complete 9e72fa203c2b: Pull complete e4a5e4487a94: Pull complete 165ca9a539aa: Pull complete 81140eaaa67e: Pull complete 19021337b46f: Pull complete Digest: sha256:36cad5daaae69fbcc15dd33b9f25f35c41bbe7e06cb7df5e14d8b966fb26c1b4 Status: Downloaded newer image for mysql:5.6 Pulling cms-xmr (xibosignage/xibo-xmr:release-0.7)... release-0.7: Pulling from xibosignage/xibo-xmr 5a3ea8efae5d: Pull complete f3adf1a9e2cb: Pull complete 04b940ee7e11: Pull complete 2c334f59ed31: Pull complete 8ce96da20348: Pull complete 1549c5688935: Pull complete Digest: sha256:cb119c68324511e1c355361b3267e6289c8bdd10817ea4032547b88cc7243f3a Status: Downloaded newer image for xibosignage/xibo-xmr:release-0.7 Pulling cms-web (xibosignage/xibo-cms:release-2.0.0)... release-2.0.0: Pulling from xibosignage/xibo-cms c87736221ed0: Pull complete d0b47c519980: Pull complete c3715553d49b: Pull complete da2ef9f046f4: Pull complete 330941ec80e3: Pull complete 9af4688d32d7: Pull complete 99b0f987778a: Pull complete 92315b1760d8: Pull complete 223419ed34d0: Pull complete 43a17b7016c0: Pull complete a450eb8ee066: Pull complete Digest: sha256:93f7285d0150976bed45eaf391e13d57a494b696a5f0f7efd6857948fe57f131 Status: Downloaded newer image for xibosignage/xibo-cms:release-2.0.0 Creating xibo_cms-db_1 ... Creating xibo_cms-xmr_1 ... Creating xibo_cms-xmr_1 Creating xibo_cms-db_1 ... done Creating xibo_cms-web_1 ... Creating xibo_cms-web_1 ... done |
I had to restart the mini PC, and run the command again to be able to access the Xibo CMS dashboard from my laptop: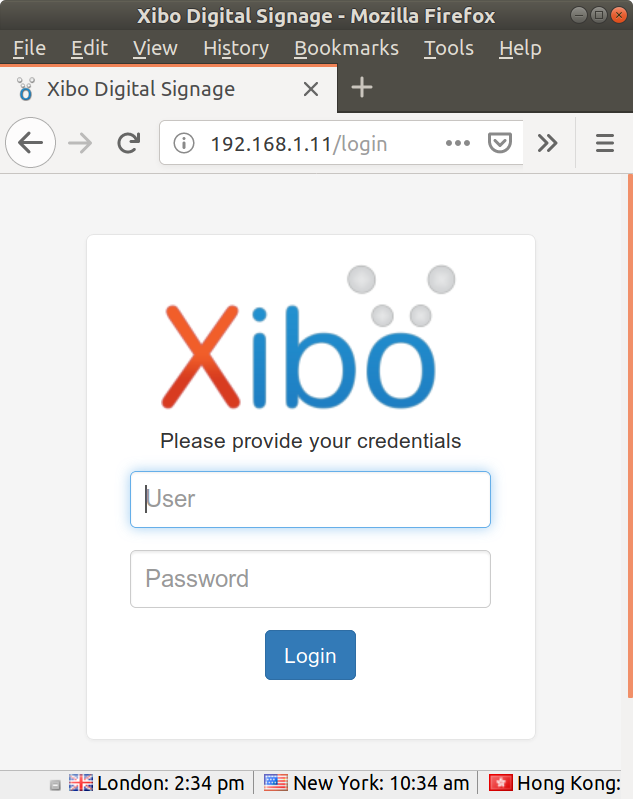 You’ll need to use the default credentials for the very first time: xibo_admin and password.
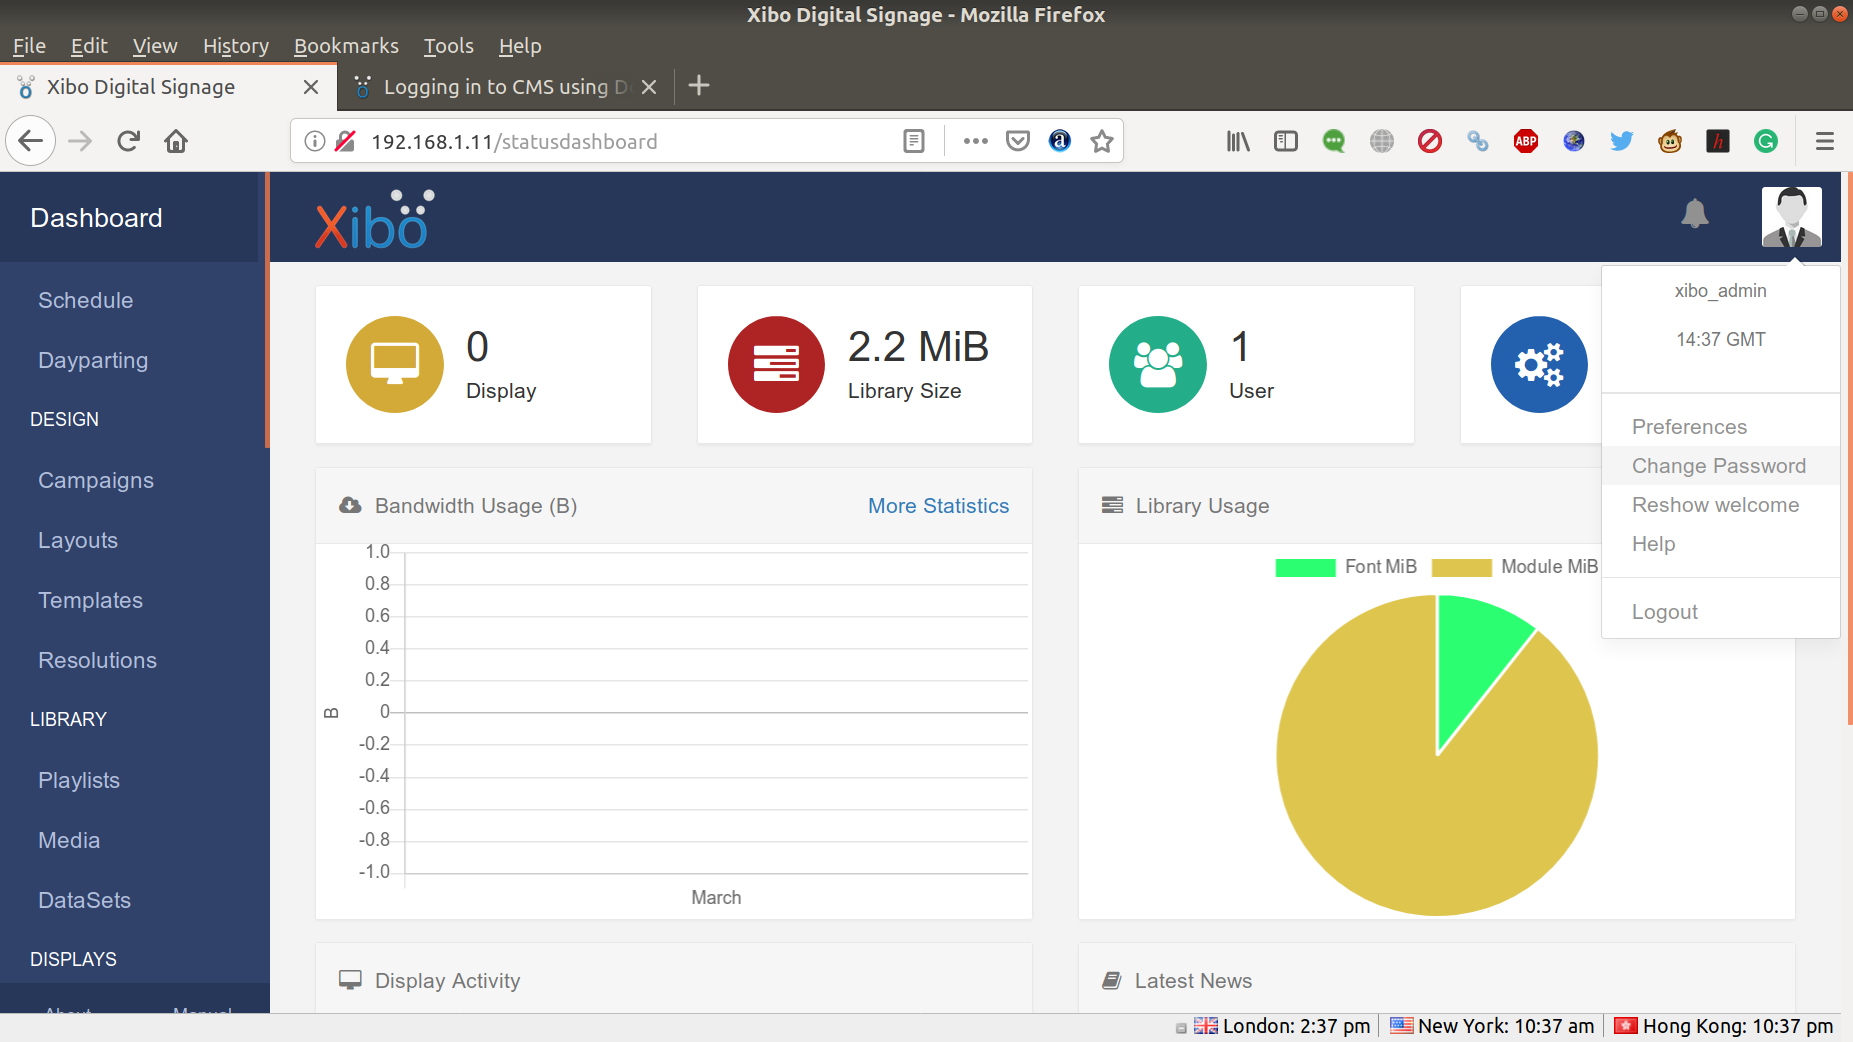
You’ll want to change the password before going further by clicking on the person icon on the top right of the interface, and selecting “Change Password”.
Now we can install the client. I went with Xibo Linux Player 0.5 Alpha since that was the latest release at the time of the review. Note that alpha software can be considered fairly unstable, even worse than beta. Installation is really easy now since a snap is provided:
|
1 |
sudo snap install xibo-player-test --channel=beta |
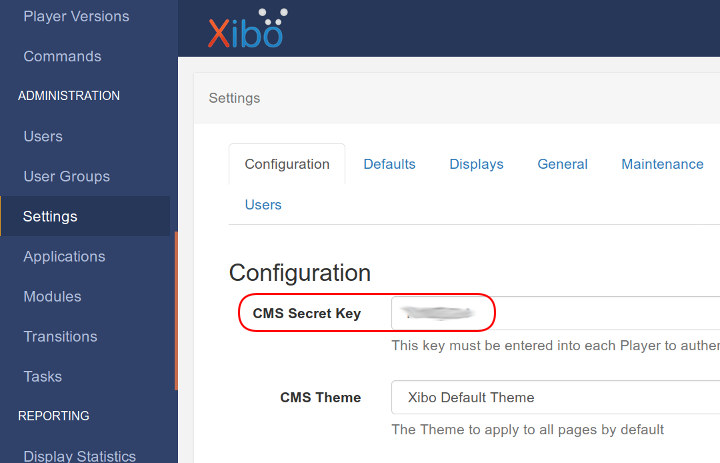
Before we launch the client in the terminal, we’ll need to copy the CMS Secret Key in Xibo CMS in Settings->Configuration:
Now let’s create a working directory where the client will download resources (~/xibo-data), and register the player:
|
1 2 3 |
mkdir ~/xibo-data cd ~/xibo-data xibo-player-test --host http://localhost --server-key <CMS_Secret_Key> --hardware-key neoz834ureview |
Replace <CMS_Secret_Key> with the key we’ve just copied from the CMS, and the hardware key can be any random string for now. The output should look as follows:
|
1 2 |
[15:02:04.986] [debug]: Collection started [15:02:05.334] [debug]: Display added and is awaiting licensing approval from an Administrator. |
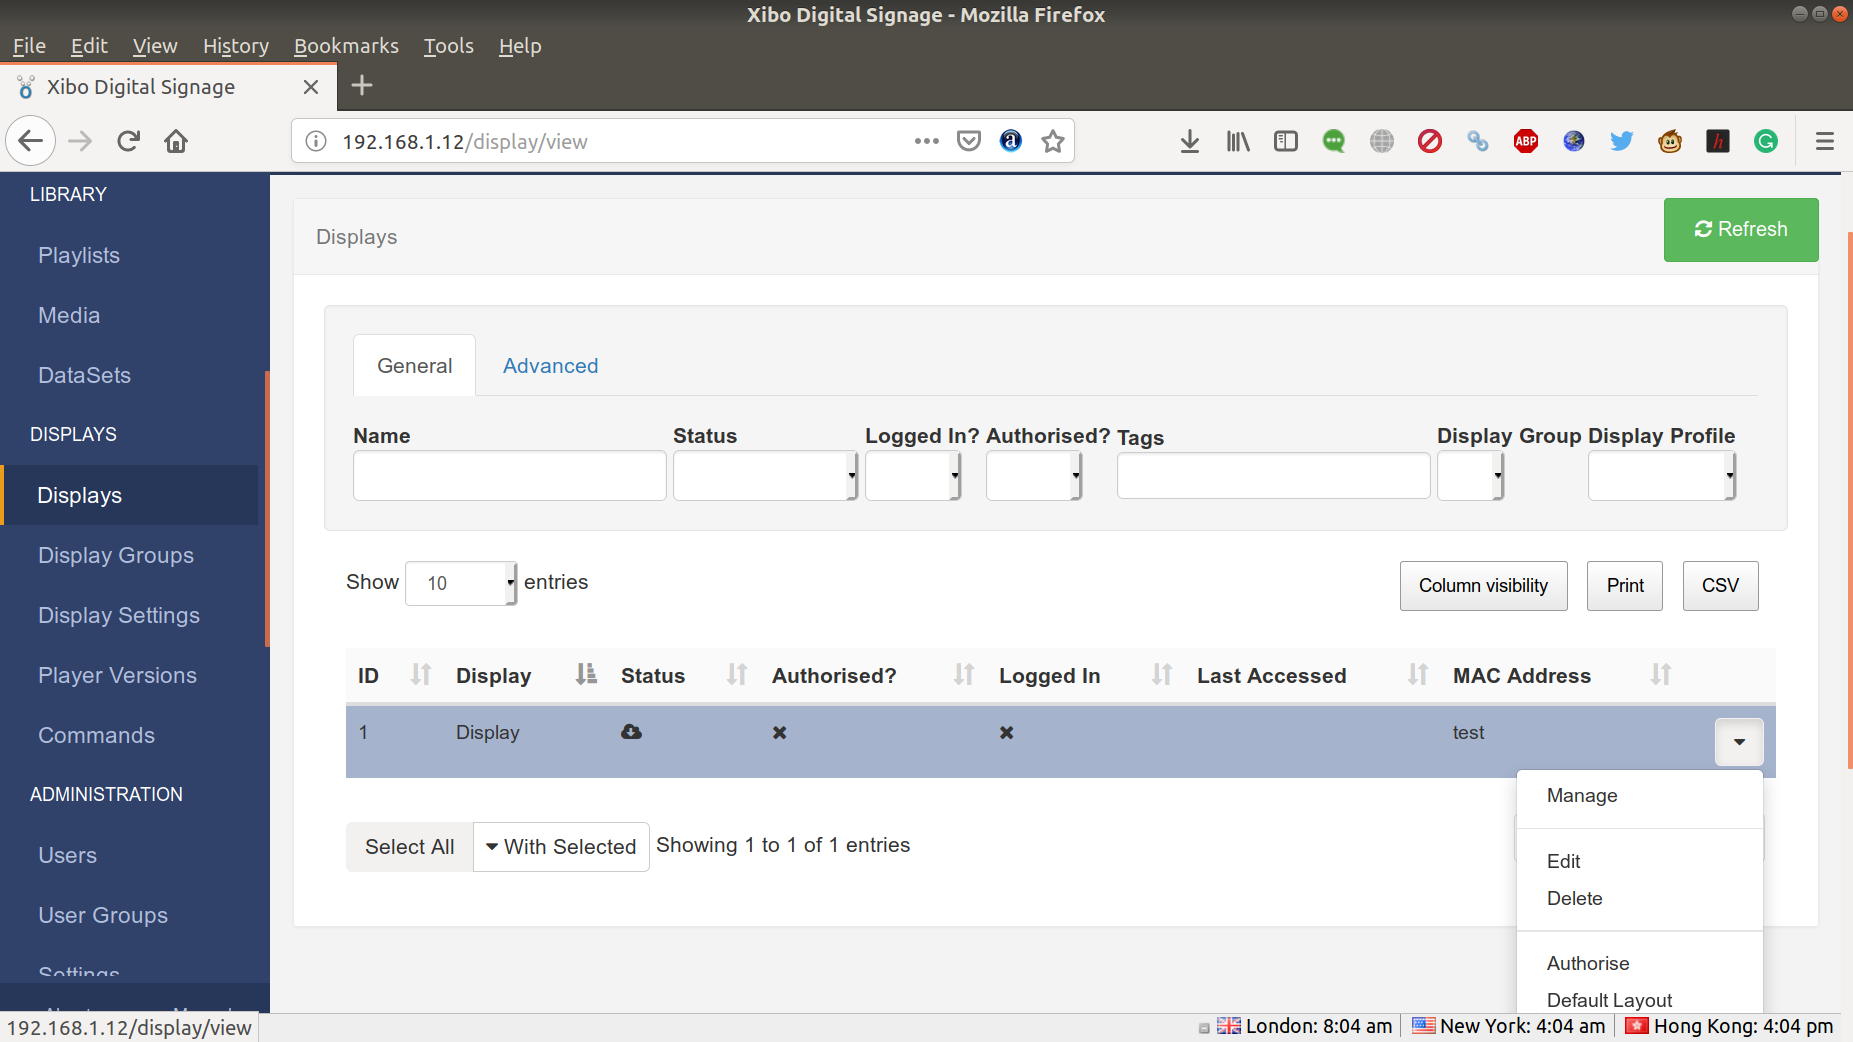
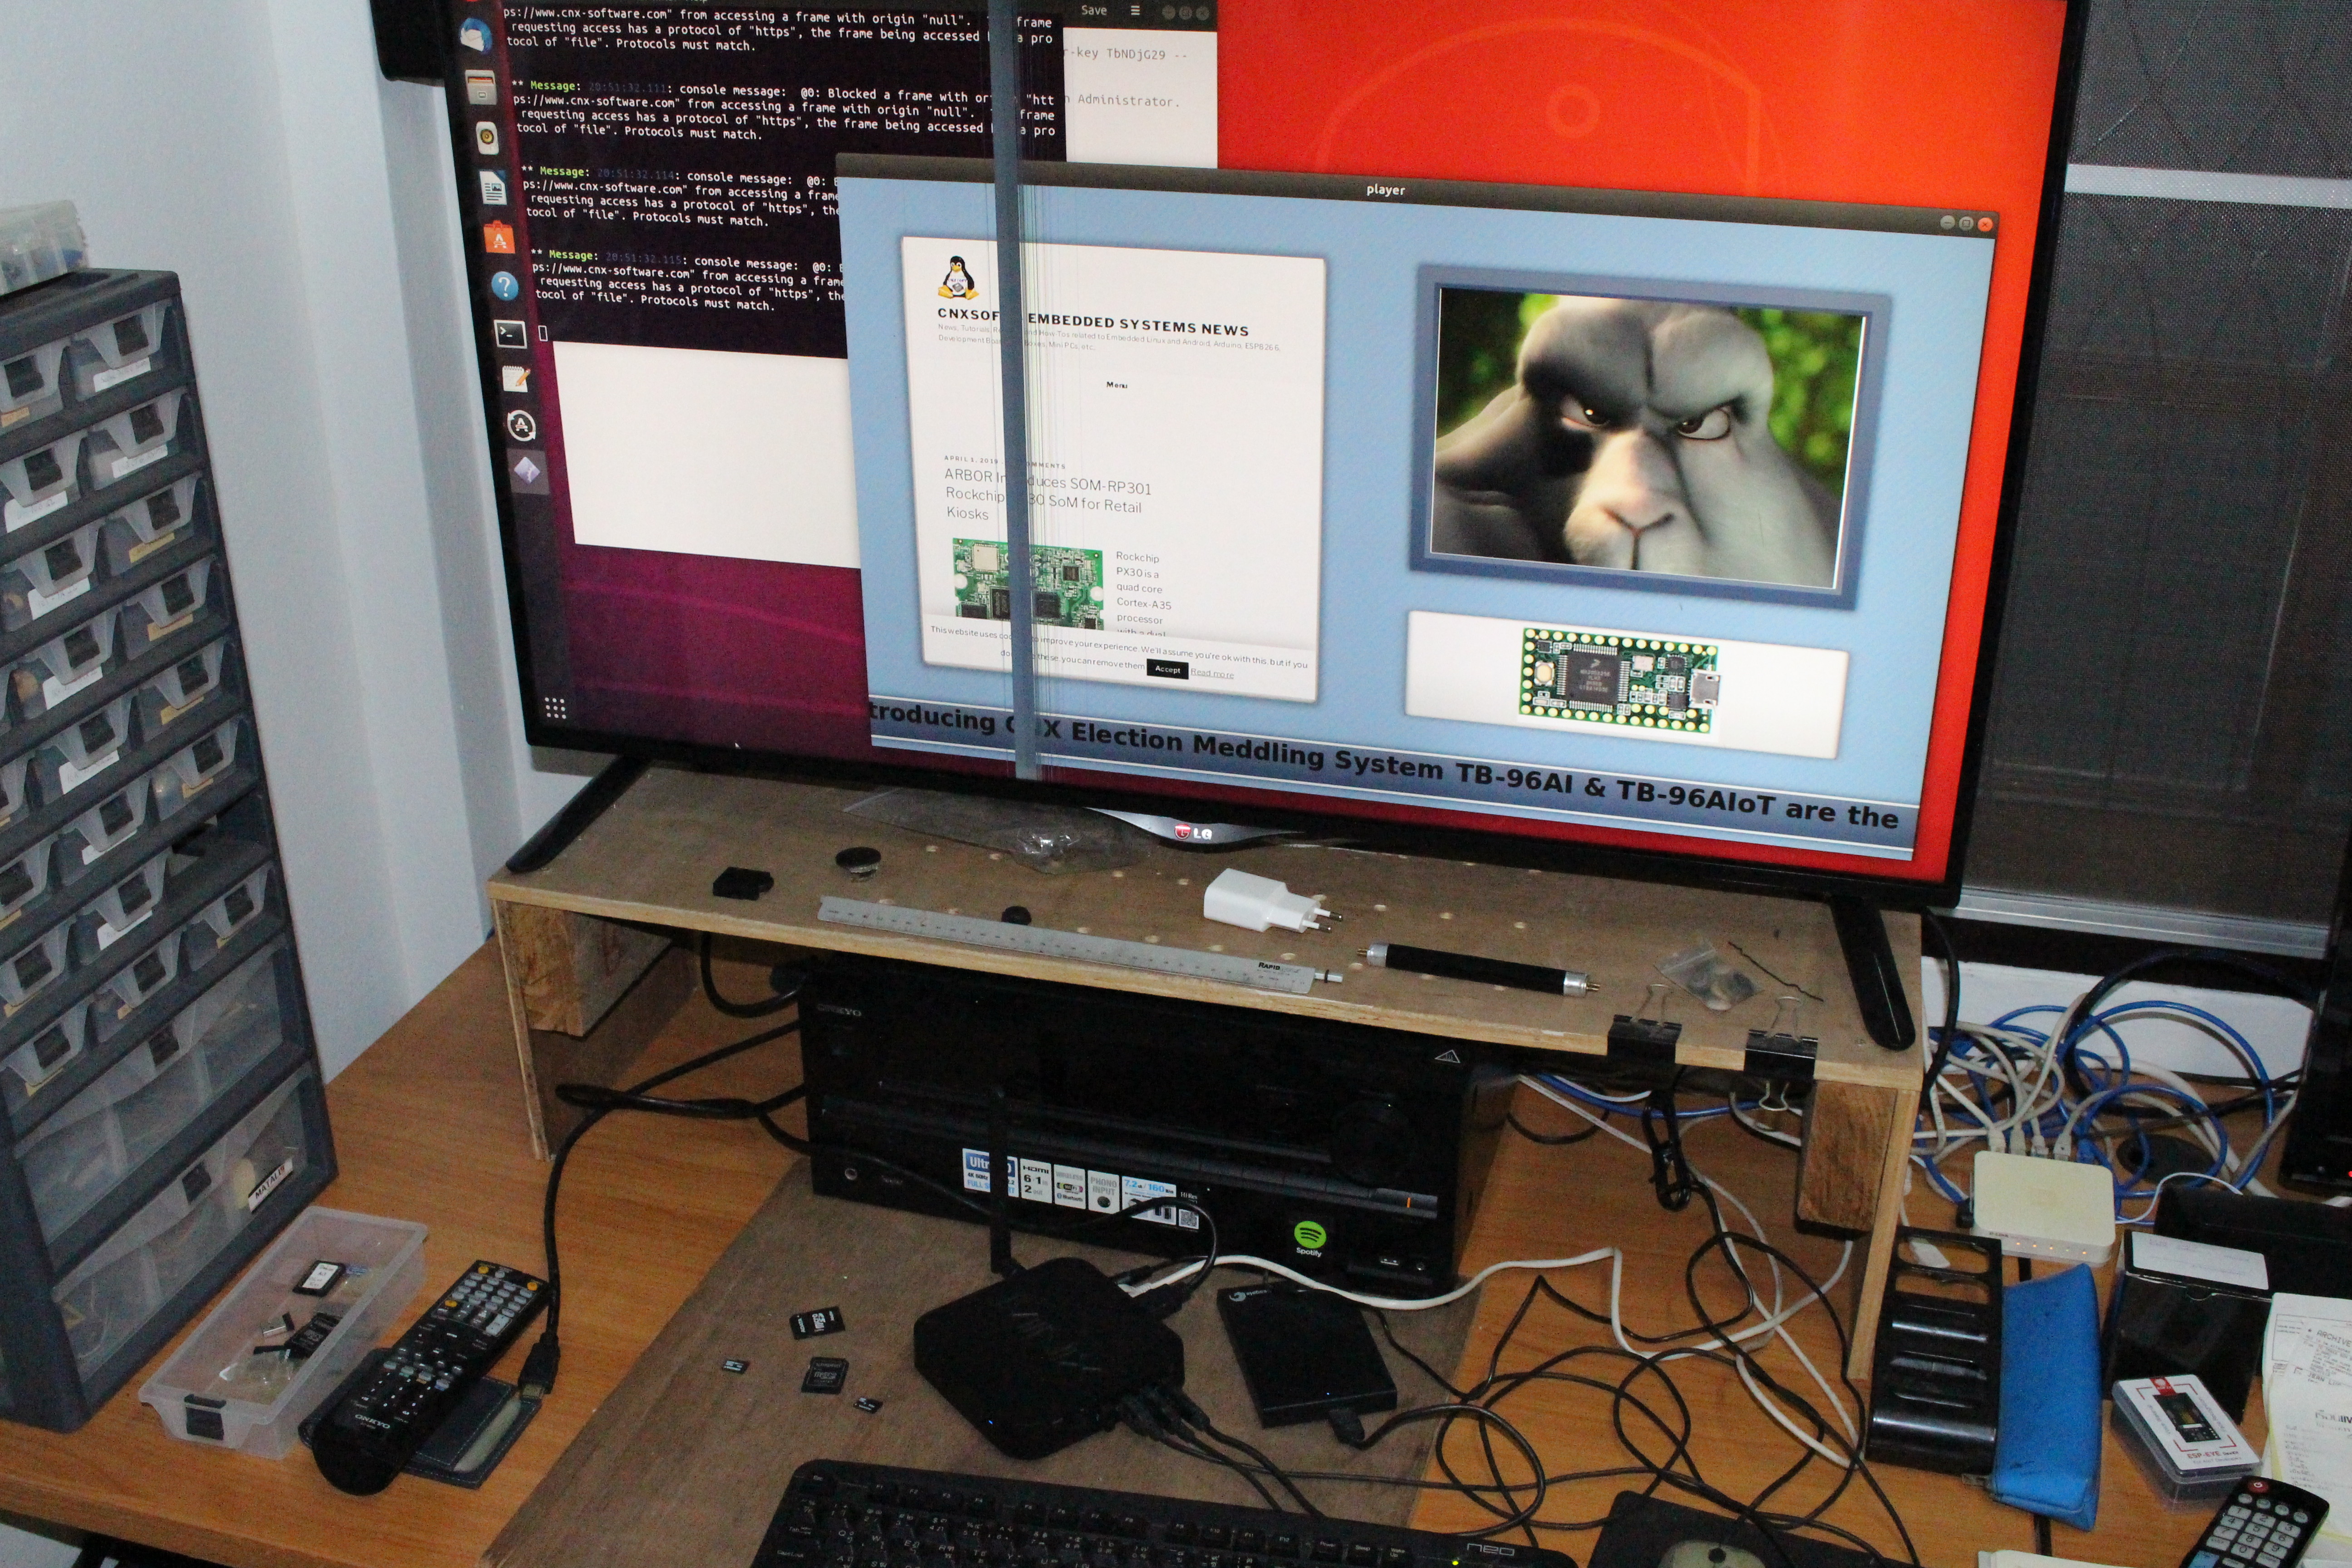
Back to the CMS, we can go to Displays and approve our “test” device as shown in the screenshot above. I also exited the xibo-player app in the terminal at this point, but it’s probably not needed.
The next step is to create a layout in Xibo CMS, and schedule it. I published a Xibo tutorial many years ago, and while the interface has been completely revamped, the workflow is basically the same now, so I could still follow those old instructions to create a layout with embedded HTML (CNX Software Blog), an H.264 1080p60 video, a picture zone, and a scrolling text zone with CNX Software RSS feeds. I restarted the player with the same command as above, and scheduled the layout to run now. Shortly after the Xibo Player would start to download content, and display it as expected.
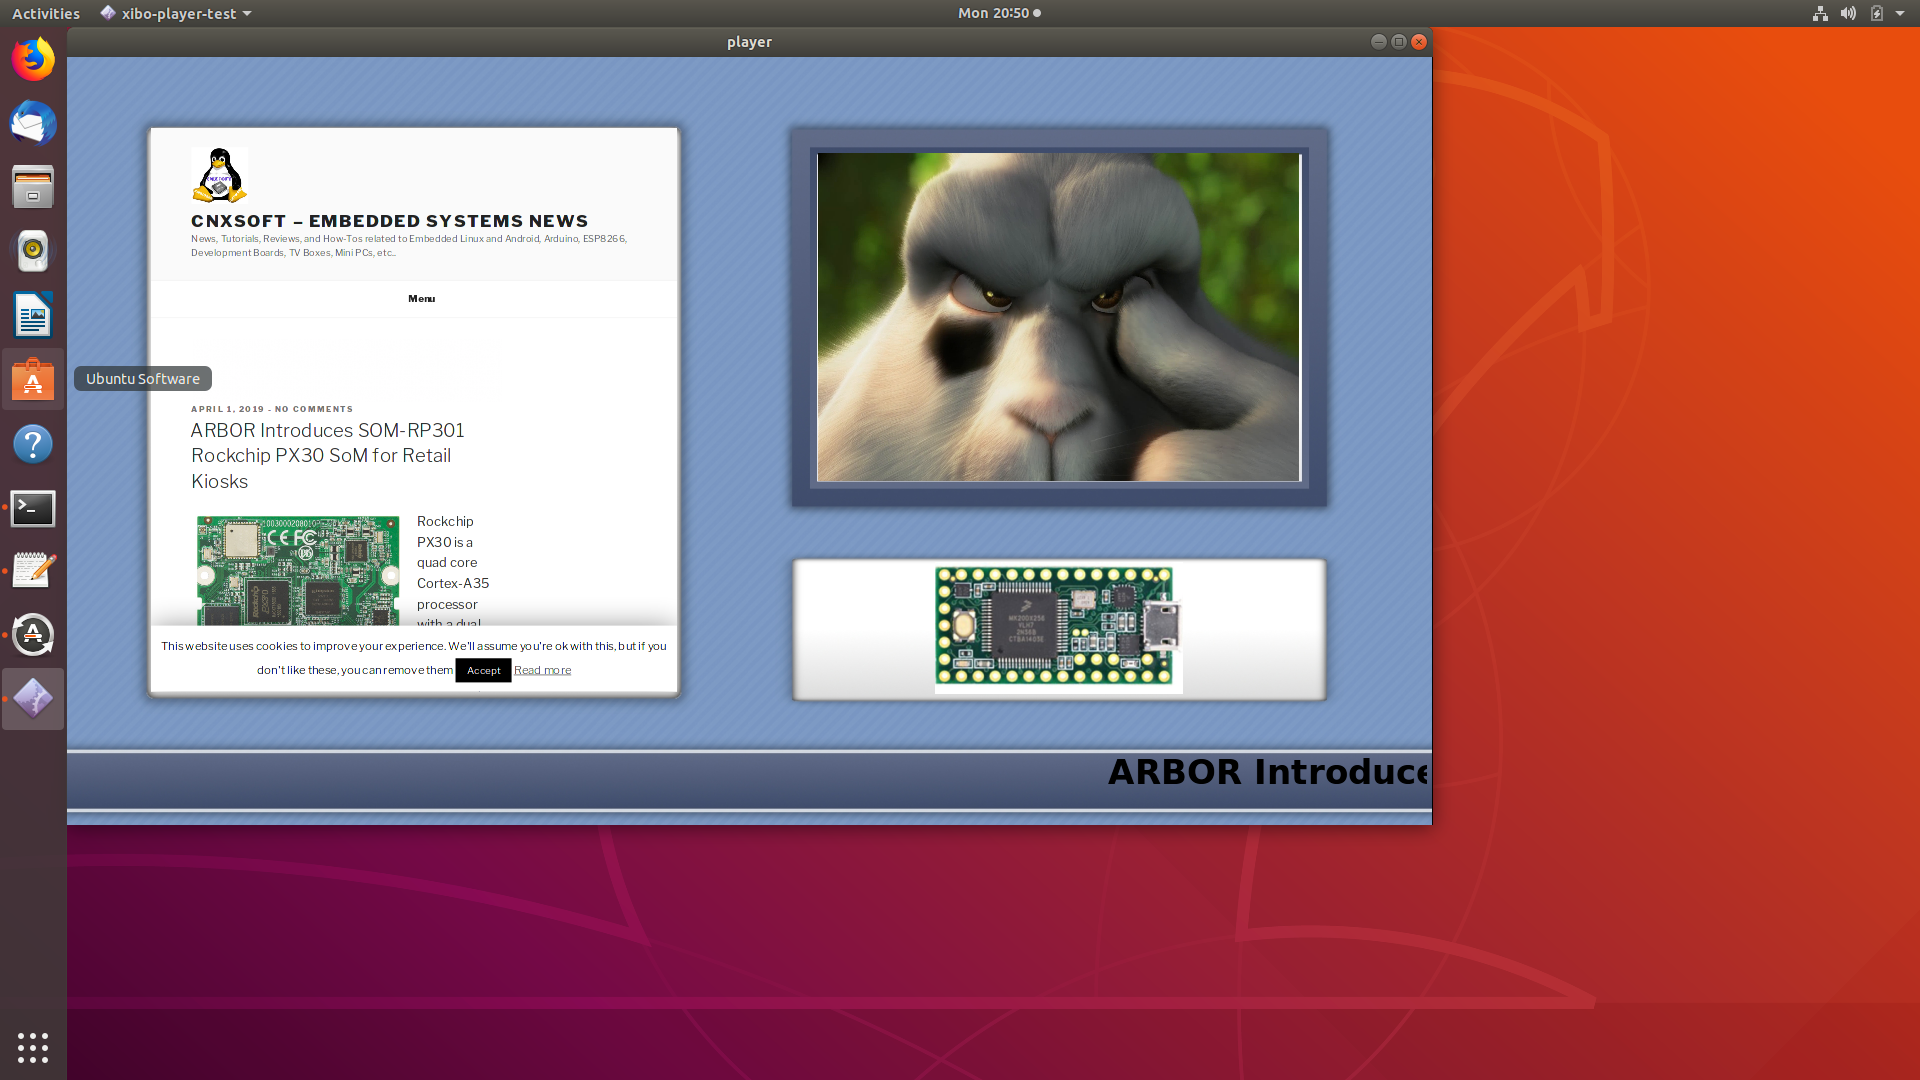
It looks OK, but why is it in windowed mode? That’s because the software is still alpha and full screen has not been enabled, since it’s not supposed to be deployed in the field just yet. That’s understandable.
I shot a video to show how it runs on MINIX NEO Z83-4U.
The scrolling text is now super smooth because text is displayed, and in the past I found out the only way to have smooth scrolling text was to implement it through offscreen pixmaps. But that’s not an option with Xibo right now.
I had plans to let the layout run a few days to evaluate the stability, but the program will usually crash after around one or two minutes with a segmentation fault:
|
1 2 3 4 5 6 7 8 9 10 11 12 13 14 15 16 17 18 19 20 21 22 23 24 25 26 27 28 29 30 31 32 33 34 35 36 37 38 39 40 41 42 |
minix@minix-Z83-4:~/xibo-data$ xibo-player-test --host http://localhost --server-key xxxyyyzzz --hardware-key neoz834ureview [11:43:35.717] [debug]: Collection started [11:43:36.017] [debug]: Display is active and ready to start. [11:43:36.017] [debug]: Collection interval updated. Old: 5, New: 300 [11:43:36.822] [debug]: 23 files and 4 resources to download [11:43:37.275] [debug]: [2.html] Downloaded [11:43:37.315] [debug]: [1.html] Downloaded [11:43:37.333] [debug]: [17.html] Downloaded [11:43:41.886] [debug]: [20.html] Downloaded [11:43:41.888] [debug]: Received collection result [11:43:41.888] [debug]: Max show priority: 1 [11:43:41.888] [debug]: Layout ID: 7 SatartDT: 2019-Mar-30 16:52:00 EndDT: 2020-May-03 16:52:00 Priority: 1 [11:43:41.889] [debug]: Log level updated ** Message: 11:43:42.772: console message: file:///home/minix/xibo-data/resources/17.html @6: Viewport argument value "[[viewportwidth]]" for key "width" is invalid, and has been ignored. ** Message: 11:43:42.791: console message: file:///home/minix/xibo-data/resources/20.html @6: Viewport argument value "[[viewportwidth]]" for key "width" is invalid, and has been ignored. ** Message: 11:43:42.826: console message: file:///home/minix/xibo-data/resources/jquery.marquee.min.js @5: ReferenceError: Can't find variable: jQuery ** Message: 11:43:42.830: console message: file:///home/minix/xibo-data/resources/jquery-cycle-2.1.6.min.js @6: ReferenceError: Can't find variable: jQuery ** Message: 11:43:42.831: console message: file:///home/minix/xibo-data/resources/xibo-layout-scaler.js @20: ReferenceError: Can't find variable: jQuery ** Message: 11:43:42.832: console message: file:///home/minix/xibo-data/resources/xibo-text-render.js @20: ReferenceError: Can't find variable: jQuery ** Message: 11:43:42.833: console message: file:///home/minix/xibo-data/resources/xibo-image-render.js @20: ReferenceError: Can't find variable: jQuery ** Message: 11:43:42.834: console message: file:///home/minix/xibo-data/resources/20.html @35: ReferenceError: Can't find variable: $ ** Message: 11:43:42.842: console message: file:///home/minix/xibo-data/resources/17.html @6: Viewport argument value "[[viewportwidth]]" for key "width" is invalid, and has been ignored. .... ** Message: 11:45:08.314: console message: @0: Blocked a frame with origin "https://www.cnx-software.com" from accessing a frame with origin "null". The frame requesting access has a protocol of "https", the frame being accessed has a protocol of "file". Protocols must match. ** Message: 11:45:08.314: console message: @0: Blocked a frame with origin "https://www.cnx-software.com" from accessing a frame with origin "null". The frame requesting access has a protocol of "https", the frame being accessed has a protocol of "file". Protocols must match. ** Message: 11:45:43.775: console message: file:///home/minix/xibo-data/resources/17.html @6: Viewport argument value "[[viewportwidth]]" for key "width" is invalid, and has been ignored. Segmentation fault (core dumped) minix@minix-Z83-4:~/xibo-data$ |
Full log available here.
That may be specific for my layout, and those things are supposed to happen with alpha software. So I was unable to test the “long run” part.
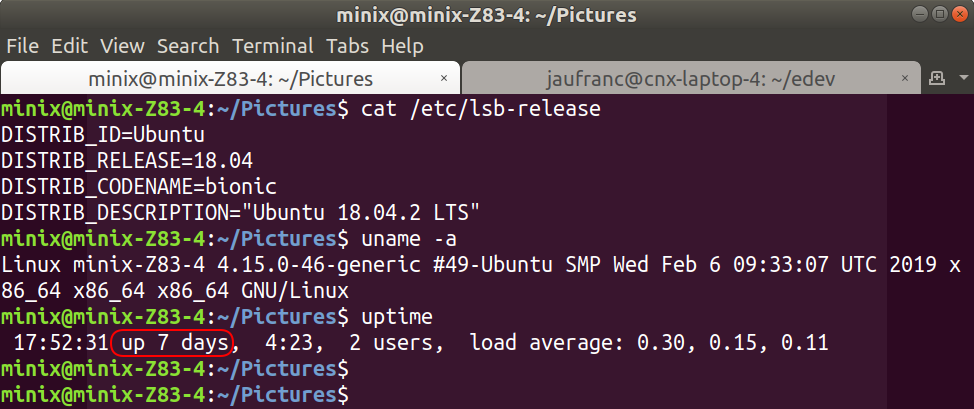
However, I never had to turn off MINIX NEO Z83-4U mini PC during my review, and it has an uptime of over 7 days.
So the operating system, Linux kernel, and drivers all appear to be very stable. I have not looked into the thermal design and stress tested the plaform, as I already did this with NEO Z83-4 PRO which never exceeded 69°C under load in a room with an ambient temperature of about 30°C.
MINIX NEO Z83-4U Ubuntu mini PC can be purchased for $169.90 and up on GeekBuying, or Aliexpress, but for some reasons the company has not listed it on their Amazon store just yet.
Disclosure: Ian Morrison (Linuxium) who regularly publishes mini PC reviews on CNX Software was involved in the development of the Ubuntu 18.04 image for MINIX NEO Z83-4U mini PC

Jean-Luc started CNX Software in 2010 as a part-time endeavor, before quitting his job as a software engineering manager, and starting to write daily news, and reviews full time later in 2011.
Support CNX Software! Donate via cryptocurrencies, become a Patron on Patreon, or purchase goods on Amazon or Aliexpress


